Anaconda for Ubuntu
Introduction to Anaconda
Anaconda is a distribution of the R and Python programming languages for scientific computing (predictive analytics, large-scale data processing, machine learning applications, data science, etc.) that aims for simplifying package deployment and management. The distribution contains several packages of data science compatible with macOS, Linux, and Windows.
It is maintained and developed by Anaconda Inc., which was detected by Travis Oliphant and Peter Wang in 2012. Also, it is called Anaconda Individual Edition or Anaconda Distribution as a product of Anaconda Inc., while other products through the company are Anaconda Enterprise Edition and Anaconda Team Edition.
In Anaconda, package versions are handled by the conda which is the package management system. The package manager was meshed out as an isolated open-source package because it ended up being helpful on its own. Also, there is a small bootstrap release of Anaconda which is called Miniconda which contains only the packages, python, conda, and some other packages they rely on.
Overview of Anaconda
Anaconda distribution provides 250+ packages installed automatically, 7500+ extra open-source packages could be installed from PyPI, virtual environment, and conda package manager. Also, it contains GUI-based Anaconda Navigator as an alternative to the CLI. The huge difference between the pip package manager and conda is how the dependencies of the package are handled which is an important challenge for Python data science and the cause conda exists.
When pip downloaded a package before the 20.3 version, it automatically installed a dependent Python package without inspecting if these clashed with installed packages. It will install a package and its dependencies regardless of the existing installation state. In a few cases, the package will occur to work but generate different outcomes. While pip has implemented steady dependency resolution, this distinction accounts for a historical contrast of the conda package manager.
- Conda analyses the latest environment containing everything installed currently, and together with a version restriction described (e.g., the user might want to have the 2.0 TensorFlow version or higher) implement how to install a suitable dependency set and displays a warning when it can’t be done.
- Open-source packages could be installed individually using the Anaconda Cloud, Anaconda Repository, or the private repository of the user with the help of the command, i.e., conda install.
- Anaconda Inc. builds and compiles the packages present inside the Anaconda Repository itself and gives binaries for macOS 64-bit, Linux 64-bit, and Windows 32/64-bit.
- Anything present on PyPI might be installed within the conda environment with pip and conda will record what it has itself installed.
- Custom packages could be created with the help of the command, i.e., conda build, and could be distributed with others by uploading them to PyPI, Anaconda Cloud, and other repositories.
- Anaconda2 default installation contains Python 2.7 and Anaconda3 contains Python 3.7.
- Although, it is possible for creating new environments that contain any Python version packaged with conda.
Anaconda Navigator
It is a desktop GUI contained in Anaconda Distribution that permits users for launching applications and handles conda packages, channels, and environments without using the commands of the command line. Navigator can find packages in a local Anaconda Repository or on Anaconda Cloud, install them inside an environment, update the packages and run them. It’s available for Linux, macOS, and Windows.
By default, the below applications are available in Navigator:
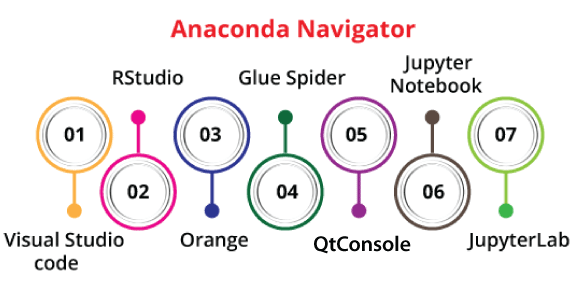
- Visual Studio Code
- RStudio
- Orange
- Glue spider
- QtConsole
- Jupyter Notebook
- JupyterLab
JupyterLab: It is a flexible working environment for reproducible and interactive computing based on the Jupyter Architecture and Notebook.
Jupyter Notebook: It is an interactive and web-based computing notebook environment. Also, we can edit and execute human-readable documents while specifying the data analysis.
Spyder: It is a scientific Desktop Environment of Python. Spyder is a robust Python IDE along with advanced editing, introspection, debugging features, and interactive testing.
QtConsole: QtConsole is the PyQt graphical user interface that supports proper multiline and inline figure editing with graphical call tips, syntax highlighting, and more.
Visual Studio Code: VSCode can be described as a streamlined code editor. It supports development operations such as version control, task running and debugging.
Orange: Orange is a framework for component-based data mining. It can be applied for data analysis and data visualization. In Orange, the workflows are very collective and offer a large toolbox.
Glueviz: It is applied for multidimensional data visualization around files. It represents relationships among and within related data sets.
RStudio: RStudio is a group of integrated tools created to help us be more beneficial with R. It contains R notebooks and essentials.
Conda
It is an environment management system and language-agnostic, cross-platform, open-source package manager that updates, installs, and runs packages and their dependencies. It was made for Python programs but it can distribute and package software for the languages such as multi-language projects. The conda environment manager and package are contained in every version of Anaconda Repository, Miniconda, and Anaconda.
Conda Commands
Conda offers a basic collection of commands and these are necessary for behaving as an interface between the software and the user. The commands can be used to create and modify environments, install and delete packages, manage queries, define dependencies, etc. The following are some of the most basic and used conda commands:
- If you want to install any package, we can use the conda install $PACKAGE_NAME
- If we want to update any package, we can use the conda update –name $ENVIRONMENT_NAME $PACKAGE_NAME
- If you want to update the package manager, we can use the conda update conda
- If we want to remove any package, we can use the conda remove –name $ENVIRONMENT_NAME $PACKAGE_NAME
- If we want to establish an environment, we can use the conda create –name $ENVIRONMENT_NAME python
- If you want to activate any environment, we can use the conda activate –name $ENVIRONMENT_NAME
- If you want to deactivate any environment, we can use the conda deactivate
- If you want to find available packages, we can use the conda search $SEARCH_TERM
- If you want to install any package from a particular source, we can use the conda install –channel $URL $PACKAGE_NAME
- If we want to list all installed packages, we can use the conda list –name $ENVIRONMENT_NAME
- If we want to establish a requirements file, we can use the conda list –export
- If we want to list every environment, we can use the conda info –envs
- If we want to install any other package manager, we can use the conda install pip
- If we want to install Python, we can use the conda install python=x.x
- If we want to update Python, we can use the conda update python
Conda Performance
Some methods can be used in improving the conda system performance likely:
- Establishing a new environment because the previous they develop the harder it becomes for resolving them. Hence, creating dedicated and small environments can help in decreasing compilation time.
- Setting controls of the strict priority. These will help in reducing the compilation time by deleting a mixed collection of possible solutions.
Using a package rather than broad-spectrum packages.
- Another possible way of decreasing the compilation time is by deactivating the security checks because conda spends a good amount of the entire compilation time fixing conflicts. But it is not suggested because it may crash our environment.
Anaconda Cloud
It is a package management service in which users can share, store, access, and find private and public PyPI, conda, environments, and notebook packages. Cloud hosts helpful Python packages, environments, and notebooks for a huge range of applications.
Users don’t require to log in or to have any Cloud account to find public packages and download them. Users can establish new packages with the help of the command-line interface of the Anaconda Client, then automatically or manually upload the packages onto the Cloud.
Features of Anaconda
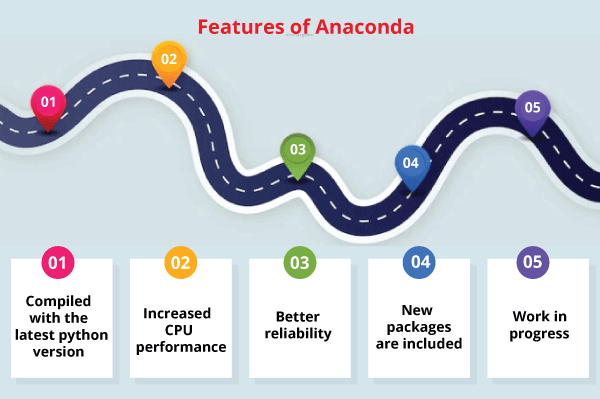
- Compiled with the Latest Python Version: Anaconda is compiled with the 3.7 version of Python, taking advantage of the feature and speed improvements of Python.
- Increased CPU Performance: In the 5.3 distribution of Anaconda, the Intel Math Kernel Library 2019 has been introduced for Deep Neutral Networks.
- Better Reliability: Anaconda reliability has been developed in the latest version by storing and capturing the metadata of the package for installed packages.
- New packages are included: There are 230+ packages that have been added and updated in the new version.
- Work in Progress: In Numpy, a casting bug is present in Python 3.7 version, but the team is working on patching it currently until Numpy is upgraded.
Installing Anaconda on Ubuntu
In Ubuntu, the installation activities need updating packages before continuing. Anaconda is the best in its several functional abilities which contain performing programming, influencing predictive analytics, processing and computing large-scale data, and managing system packages in the Python language.
Anaconda is an enthusiastic podium for achieving machine learning from a broader perspective. Anaconda serves the aim of a command-line tool, as the navigator is based on GUI. Also, Anaconda is compatible with Linux, Windows, and macOS, operating systems. Two outstanding depository tools included in Anaconda contain the navigator. It’s always recommended for installing the latest release of the open-source server that we want to install in Linux.
In this article, we will explain how we can install Anaconda on our Ubuntu system.
Requirements
Some requirements to install Anaconda in the Ubuntu system need that the user login as a root user. Access to the command line or terminal window, as well as the information on the latest Anaconda version, are the common requirements before the installation process.
Installation
The whole process for installing Anaconda consists of five fundamental steps which are mentioned below:
- Update the APT package
- Download the latest Anaconda version
- Data integrity verification
- Package installation
- Installed Anaconda package verification
Update the APT package
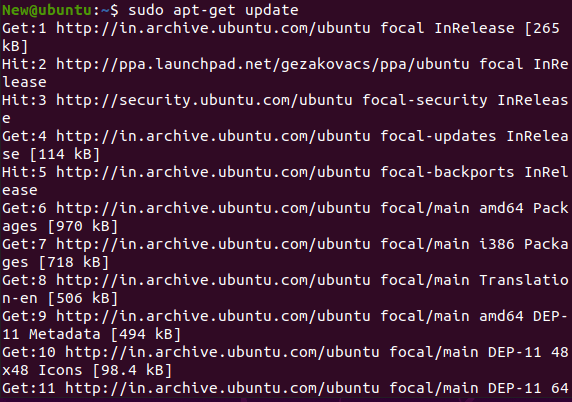
The foremost and first rule of installing a program in Linux is updating our system packages. We need to update our existing system packages with the help of the below command:
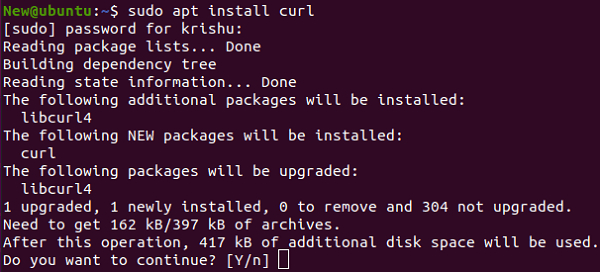
We need to download curl if it doesn’t already present on our Ubuntu system. It will assist in operating the commands for Anaconda installation. We can use the following command for getting curl on our system:
Download the latest Anaconda version
We can use the curl tool in the terminal window for downloading the Anaconda installer:

Important: Remember that the 2020.02 version is only compatible with the 3.7 version of Python which is mentioned above.
Data integrity verification
The below command will assist us in authenticating the data integrity of our downloaded Anaconda version:

Now, we need to compare the code shown on our output screen along with the Hash code with the Anaconda version on the page. Both of these codes should the same or else we are not using the compatible version of Anaconda that is similar to the version of Python and the utility will not properly function in this case.
Package installation
We will be needed to execute the bash script for proceeding with the installation process:

We can change the number of the version if we are using a few other Anaconda versions. A license agreement will occur on our output screen after successfully running the command. We need to click on the Enter button and enter “Yes” for granting permission and proceed with the process.
It’s preferable for keeping the default location. Our output screen will display us the finished installation description once we enter the window. After agreeing to every agreement by clicking on the Enter button, we can now start our installer.
Installed Anaconda package verification
We need to enter the conda command to show the verification information for verifying the installation of our package:
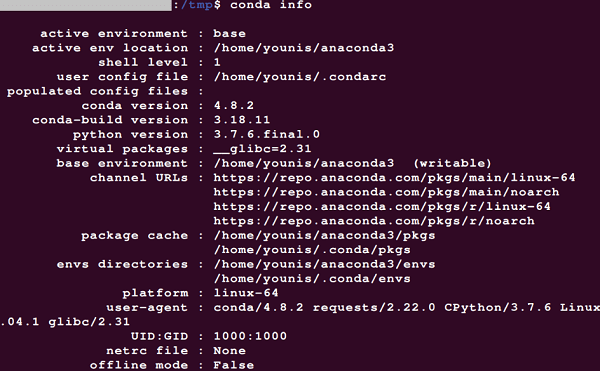
The output screen will give us every information related to our installed package of Anaconda.
Updating Anaconda in Ubuntu
For updating Anaconda in Ubuntu, begin by updating the utility of Anaconda:
Next, we need to execute the update command of the Anaconda package:
Establish and Run Anaconda Environments
Suppose we need to establish an environment of Python 3 named make_environment by typing the following:
Run the environment by using the following:
The command prompt will modify. It indicates that we are now within a shell environment with Python 3. Now, we can work in this specific environment.
How to Remove Anaconda from Ubuntu?
If you wish to remove Anaconda from our Ubuntu system, we need to follow the following steps:
Step 1: Remove the install directory of Anaconda
To remove the entire installation directory type of Anaconda, we need to enter the following command in the terminal window:
Step 2: Editing the PATH environment variable
We need to edit the file, i.e., ~/.bashrc, and delete the Anaconda directory using the path environment variable.
Step 3: Delete the hidden files
The below command will delete the hidden folders and files that have been made in our user home directory: