Creating IAM Roles
Creating IAM Roles for a service
Creating a Role for a service using the AWS Management Console.
- In the navigation pane of the console, click Roles and then click on “Create Role”. The screen appears shown below on clicking Create Role button.
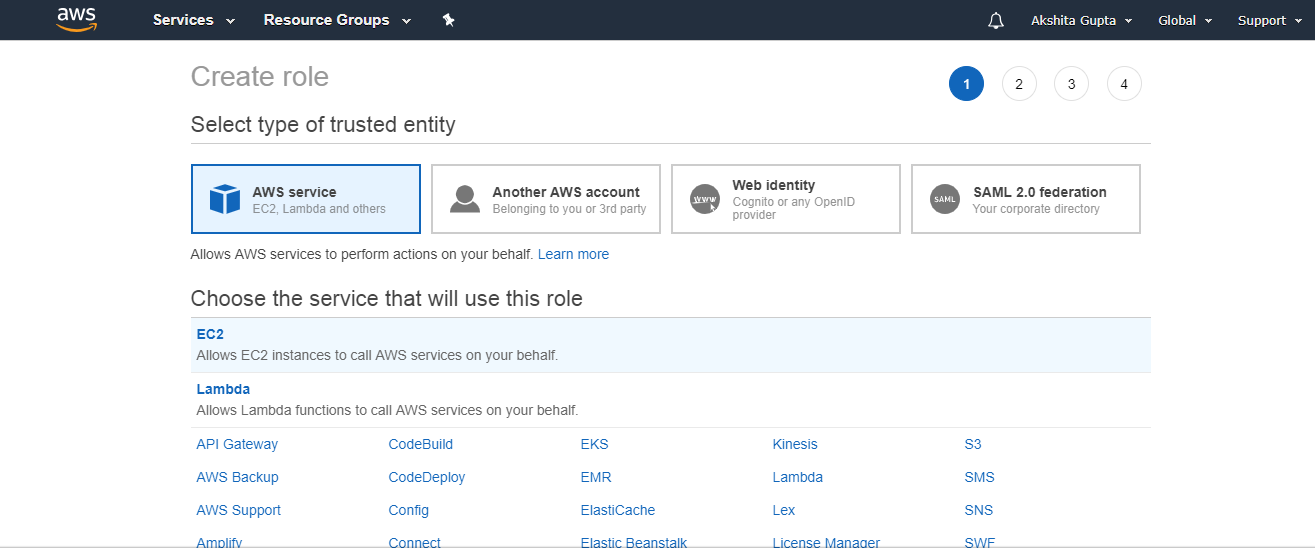
- Choose the service that you want to use with the role.
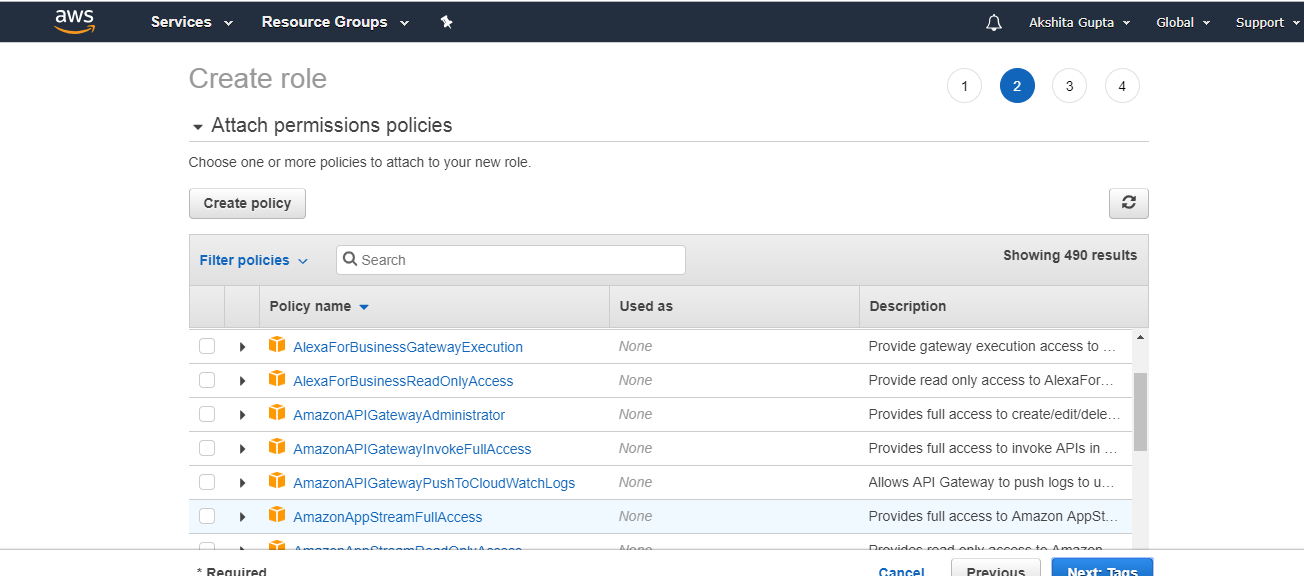
- Select the managed policy that attaches the permissions to the service.
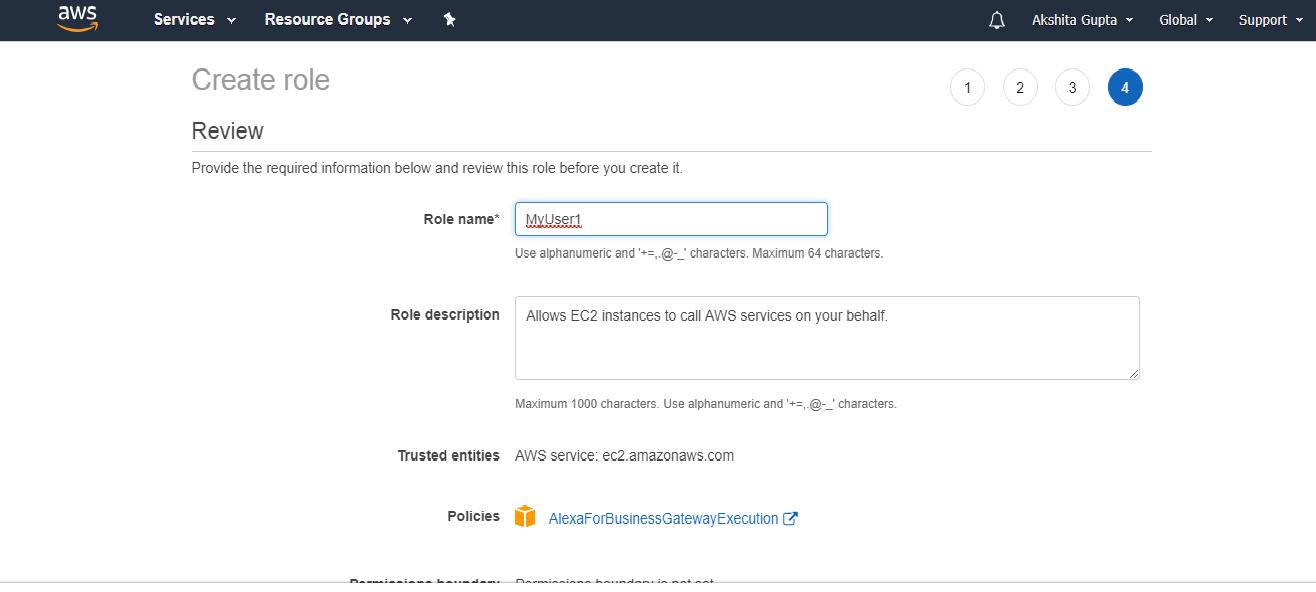
- In a role name box, enter the role name that describes the role of the service, and then click on “Create role”.
Creating a Role for a service using the CLI (Command Line Interface)
- Creating a role using the console, many of the steps are already done for you, but with the CLI you explicitly perform each step yourself. You must create a policy, and assign a permission policy to the role.
To create a role for an AWS service using the AWS CLI, use the following commands:- Create a role: aws iam create-role
- Attach a permission policy to the role: aws iam put-role-policy
- If you are using a role with instance such as Amazon EC2 instance, then you need to create an instance profile to store a role. An instance profile is a container of role, but instance profile can contain only one role. If you create the role by using AWS Management Console, then instance profile is already created for you. If you create the profile using CLI, you must explicitly specify each step yourself.
To create an instance profile using CLI, use the following commands:- Create an instance profile: aws iam create-instance-profile
- Add a role to instance profile: aws iam add-role-to-instance-profile
Creating IAM Roles for an IAM User
Creating a Role for an IAM User using AWS Management Console
- In the navigation pane of the console, click Roles and then click on “Create Role”. The screen appears shown below on clicking Create Role button.
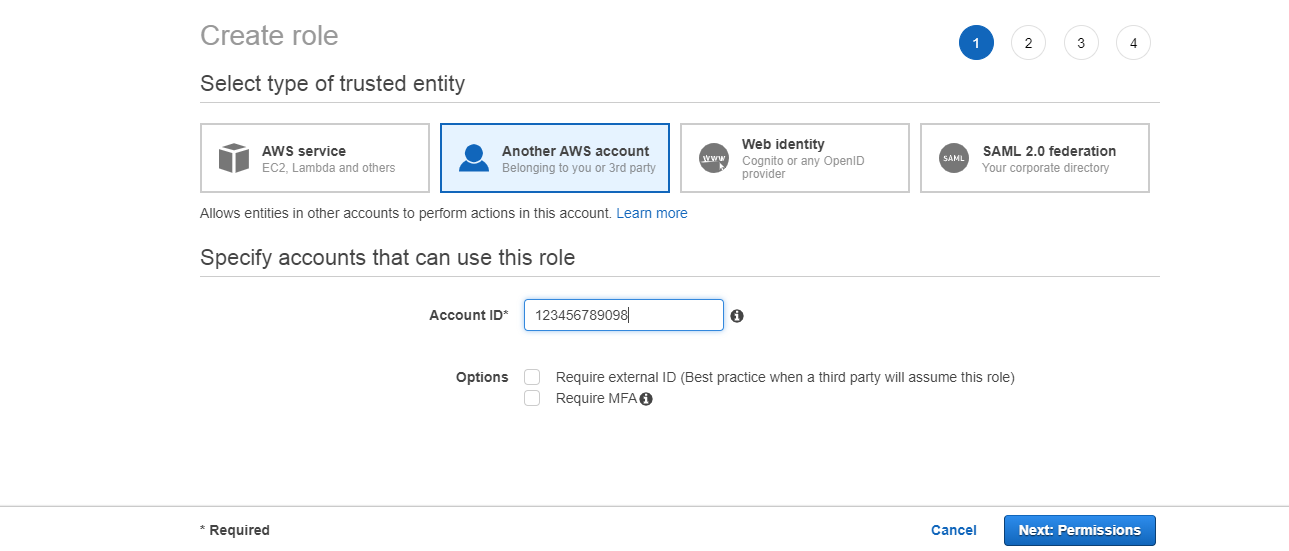
- Specify the account ID that you want to grant the access to the resources, and then click on Next Permissions button.
- If you selected the option “Require external ID” means that it allows the users from the third party to access the resources. You need to enter the external ID provided by the administrator of the third party. This condition is automatically added to the trust policy that allows the user to assume the role.
- If you selected the option “Require MFA” is used to restrict the role to the users who provide Multi-factor authentication.
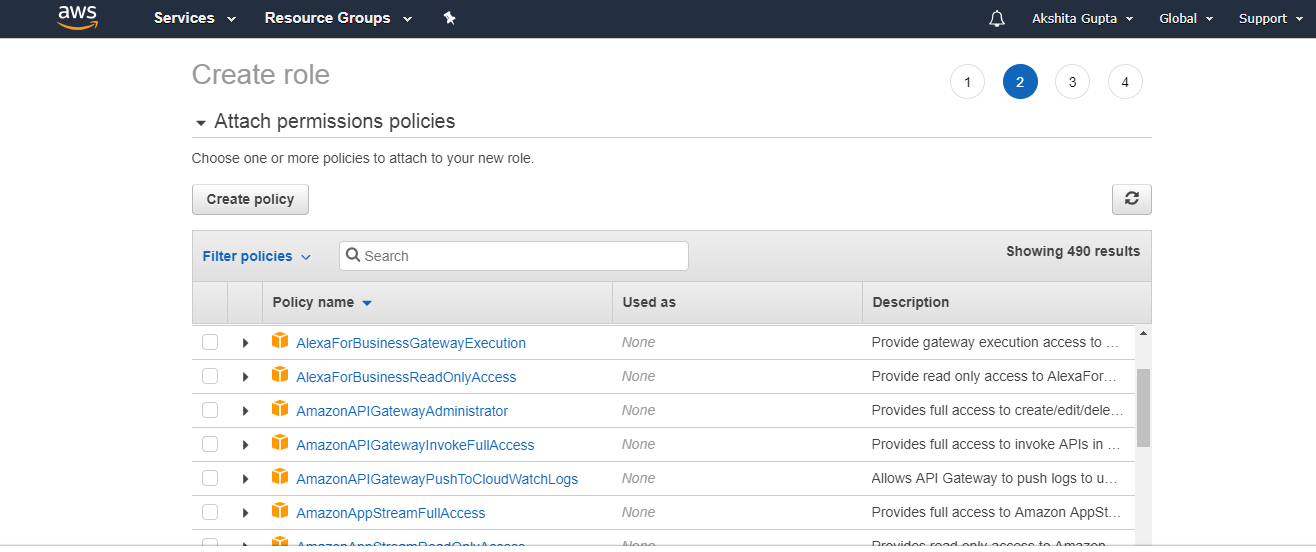
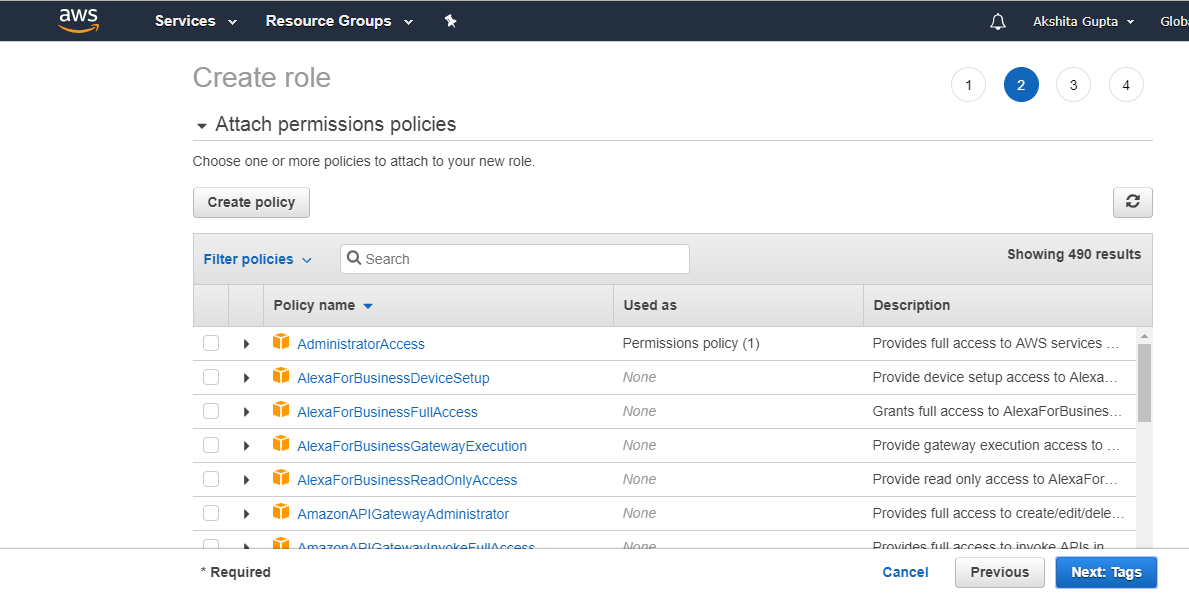
- Select a policy that you want to attach with the role. A policy contains the permissions that specify the actions that they can take and resources that they can access.
- In a role name box, enter the role name and the role description.
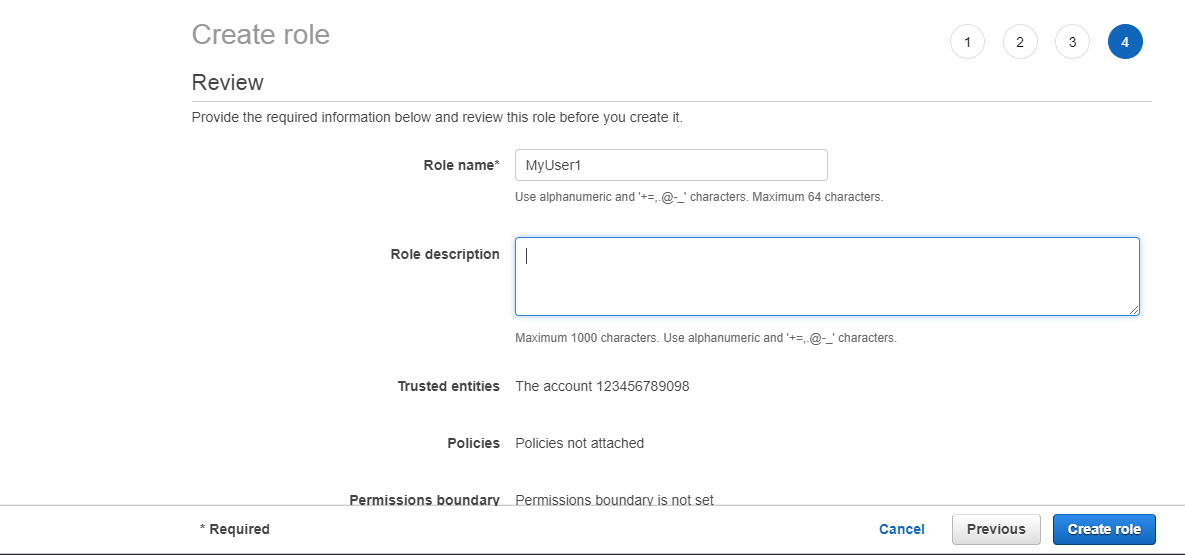
- Click on Create role to complete the creation of the role.
Creating a Role for an IAM User using CLI (Command Line Interface)
When you use the console to create a role, many of the steps are already done for you. In the case of CLI, you must specify each step explicitly.
To create a role for cross-account access using CLI, use the following commands:
- Create a role: aws iam create-role
- Attach a permission policy to the role: aws iam put-role-policy
Creating IAM Roles for a Third Party Identity Provider (Federation)
Identity Federation allows you to access AWS resources for users who can sign in using third-party identity provider. To configure Identity Federation, you must configure the identity provider and then create an IAM Role that determines the permissions which federated users can have.
- Web Identity Federation: Web Identity Federation provides access to the AWS resources which have signed in with the login with facebook, Google, Amazon or another Open ID standard. To configure with the Web Identity Federation, you must first create and configure the identity provider and then create the IAM Role that determines the permissions that federated users will have.
- Security Assertion Markup Language (SAML) 2.0 Federation: SAML-Based Federation provides access to the AWS resources in an organization that uses SAML. To configure SAML 2.0 Based Federation, you must first create and configure the identity provider and then create the IAM Role that determines the permissions the federated users from the organization will have.
Creating a Role for a web identity using AWS Management Console
- Open the IAM Console at https://console.aws.amazon.com/iam/
- In the navigation pane, click Roles and then click on Create role.
- After clicking on the create role, select the type of trusted entity, i.e., web identity
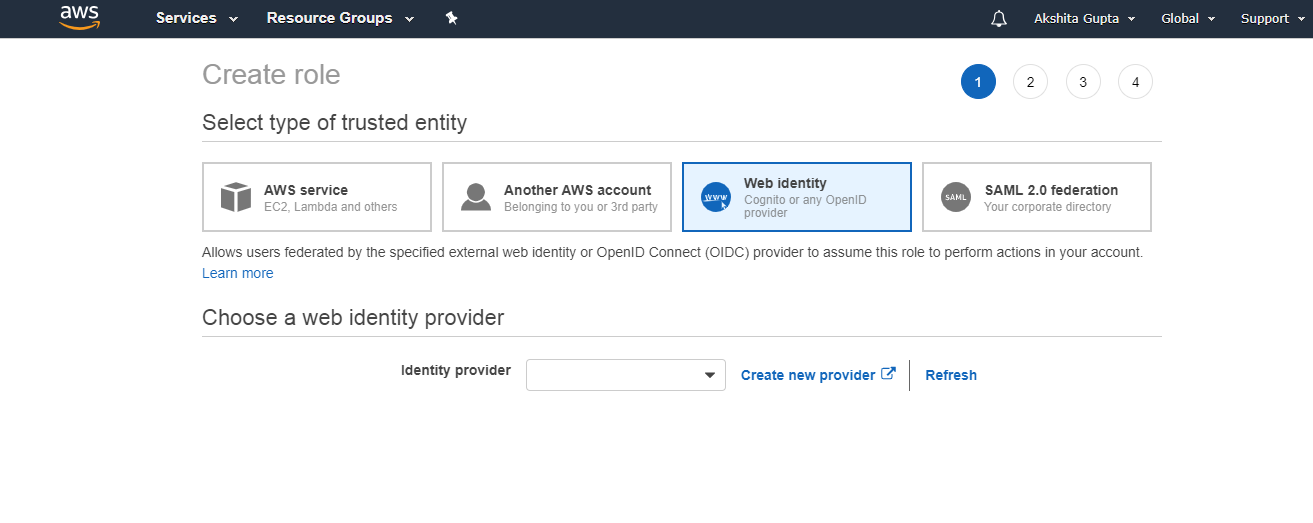
- Specify the client ID that identifies your application.
- If you are creating a role for Amazon Cognity, specify the ID of the identity pool when you have created your Amazon Cognito applications into the identity Pool ID box.
- If you are creating a role for a single web identity provider, specify the ID that the provider provides when you have registered your application with the identity provider.
- (Optional) Click Add Conditions to add the additional conditions that must be met before users of your application can use the permissions granted by the role.
- Now, attach the permission policies to the role and then click Next: Tags.
- In a role name box, specify the role name and role description
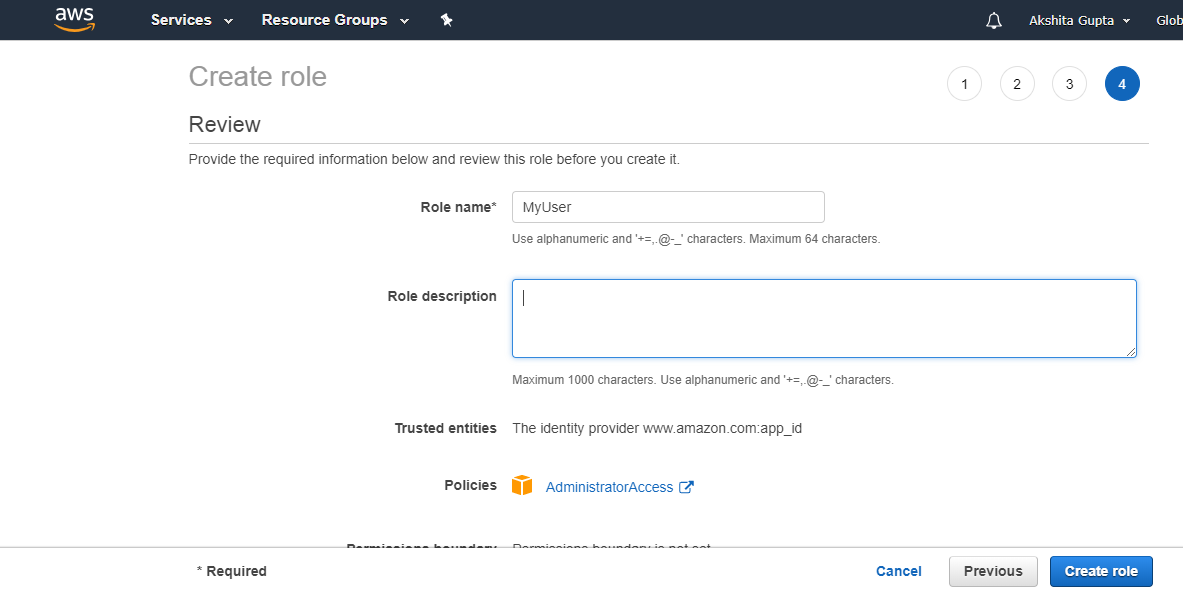
- Click Create role to complete the process of creation of role.
Creating a Role for SAML Based 2.0 Federation using AWS Management Console
- Open the IAM Console at https://console.aws.amazon.com/iam/
- In the navigation pane of the console, Click Roles and then click on Create role
- Click on Role for Identity Provider Access.
- Select the type of the role that you want to create for Grant Web Single Sign-On (SSO) or Grant API access.
- Select the SAML Provider for which you want to create the role.
- If you are creating a role for API access, select the attribute from the attribute list. Then in the value box, enter the value that you want to include in the role. It restricts the access to the role to the users from the identity providers whose SAML authentication response includes the attributes you select.
- If you want to add more attribute related conditions, click on Add Conditions.
- Attach the permission policies to the role.
- Click Create role to complete the process of creation of role.
Creating a role for Federated Users using AWS CLI
To create a role for federated users using AWS CLI, use the following commands:
Create a role: aws iam create-role
To attach permission to the policy: aws iam attach-role-policy or aws iam put-role-policy