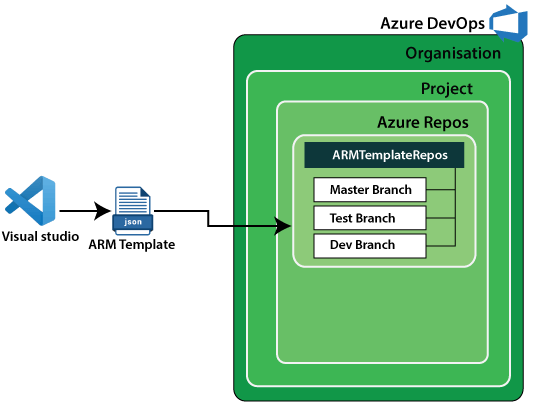
Azure DevOps Repository
Azure Repository is a set of version control tools that we can use to manage our code. In case if we are entirely new to version control, then version control enables us to track changes we make in our code over time. There are so many software that is available in the market to enable version control on our code. We can use the version control system to keep track of each change done by each developer, safely merge them, test the changes, and publish the change into production.
There are two types of version control in Azure Repos.
- Git: It is a distributed version control.
- Team Foundation Version Control: It is a centralized version control.
Azure Repos Concepts
- Repository: A repository is a location for our code, which is managed by version control. It supports Git and TFVC so we can create multiple repositories in a single project and various branches for each repository.
- Branch: A branch is a lightweight reference that keeps a history of commits and provides a way to isolate changes for a feature or a bug fix from our master branch and other work.
- Branch policies: It is an essential part of the Git workflow. We use them to help protect the critical branches is our development, as the master.
- Pull and Clone: Create a complete local copy of an existing Git repo by cloning it. A pull command updates the code in our local repository with the code that is in the remote repository.
- Push and Commit: A commit is a group of change saved to our local repository. We can share these changes to the remote repository by pushing.
- Fork: A fork is a complete copy of a repository, including all file commits, and (optionally) branches.
- Git: Git is a distributed version control system. Our local copy of code is a complete version control repository that makes it easy to work offline or remotely.
- Notification: Using notification, we will receive an email whenever any changes occur to work items, code reviews, pull requests, source control files and builds.
- Projects: A project provides a place where a group of people can plan, track progress, and collaborate on building software solutions.
- Teams: A team corresponds to a selected set of project members. With teams, organizations can subcategorize work to better focus on all of the work they track within a project.
Publish ARM Deployment project into DevOps
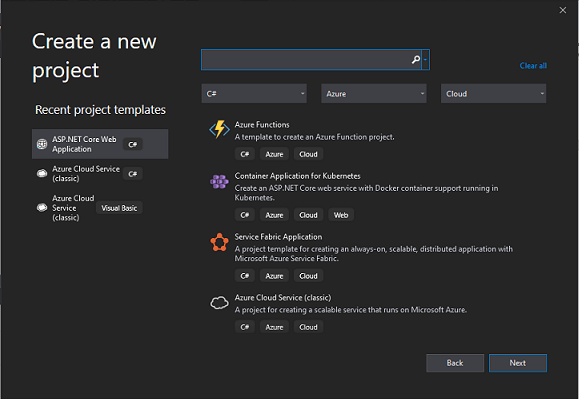
Step 1: Open Visual Studio and click on create a new project.
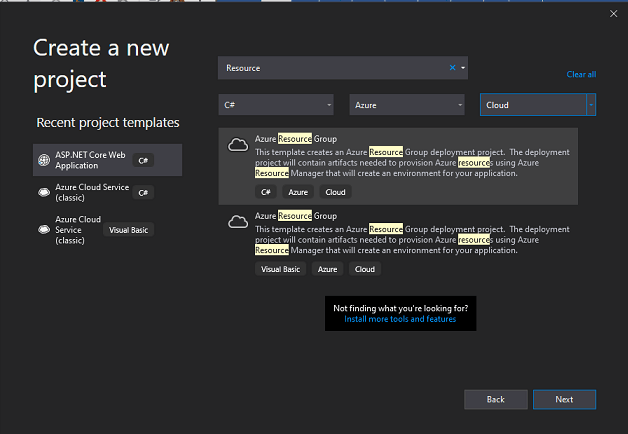
Step 2: Now, search for the Azure Resource Group. Then select it and click on Next.
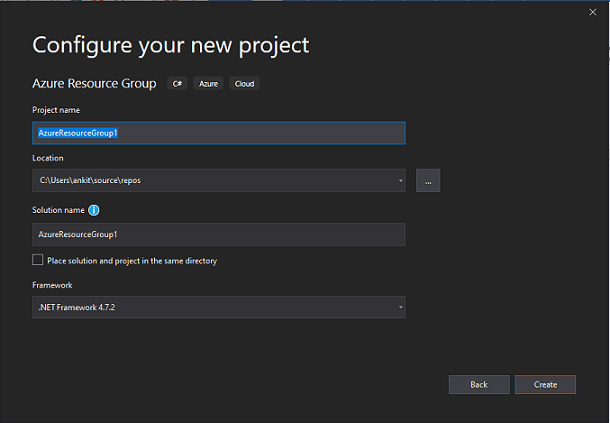
Step 3: Configure your new project and click on create.
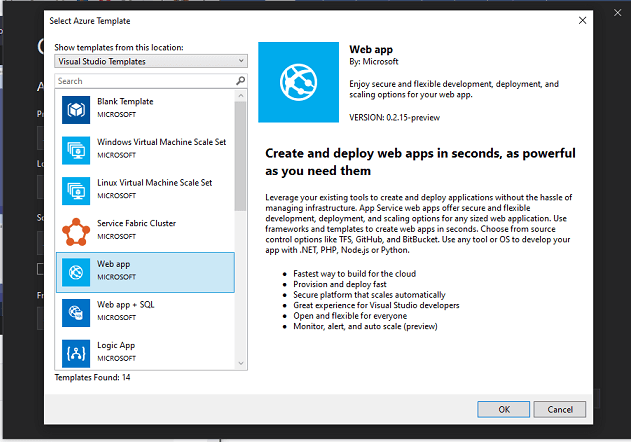
Step 4: Select the Web app from the available Azure Template in Visual Studio.
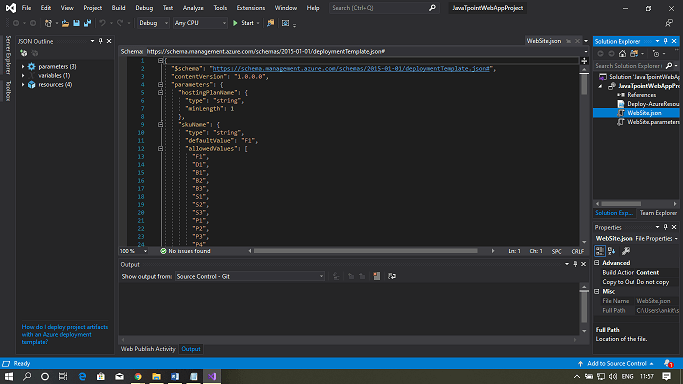
Step 5: Click on the website.json file, then you will find the available resources on the left-hand side file explorer.
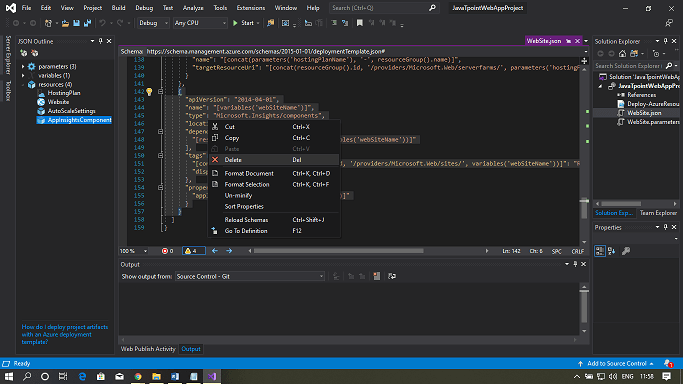
Step 6: Now, delete the ‘appinsightcomponent’ resource from the file. Because we don’t need this service right now.
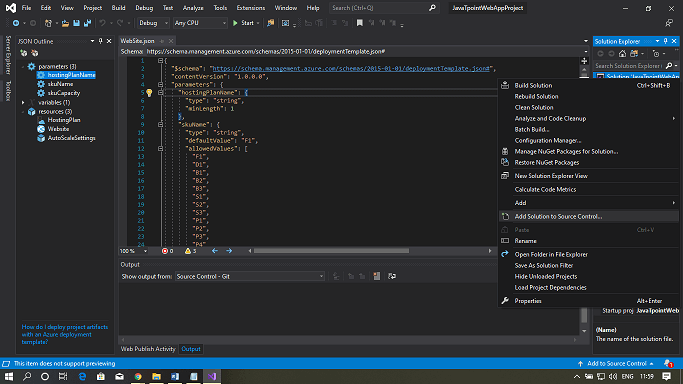
Step 7: To publish this code to the Azure DevOps portal, add this solution to source control. Then Right-click on the solution and then click on add solution to source control.
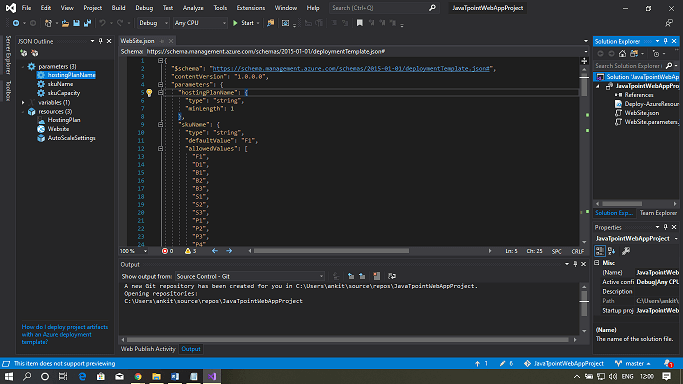
Step 8: A new git repository has been created. You can see the message in the output window.
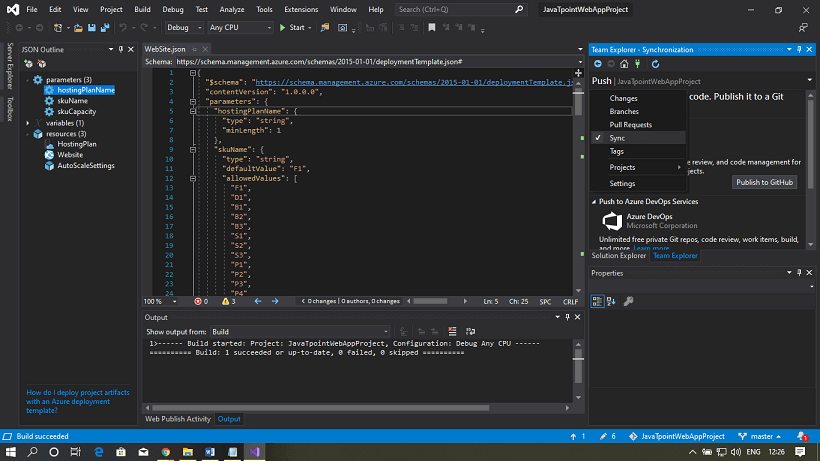
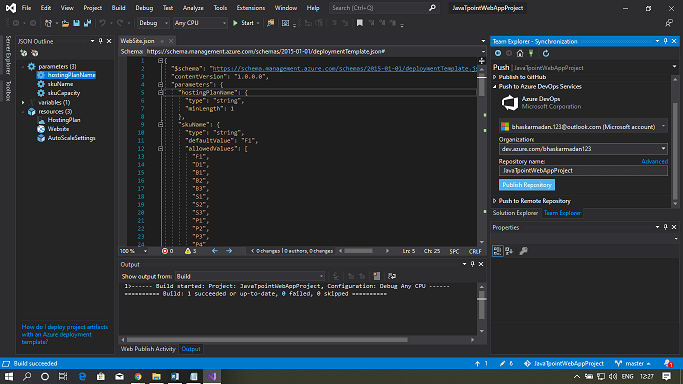
Step 9: Click on Team Explorer as shown in the figure below, then right-click on the dropdown menu and select sync.
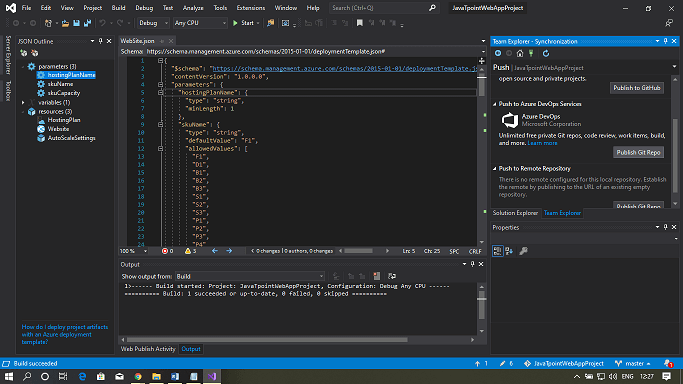
Step 10: Now, Click on the Publish Git Repo button to publish this project in the Azure DevOps organization.
Step 11: Select the project and repository where you want to push this git repository in the Azure DevOps portal. Finally, Click on publish repository.
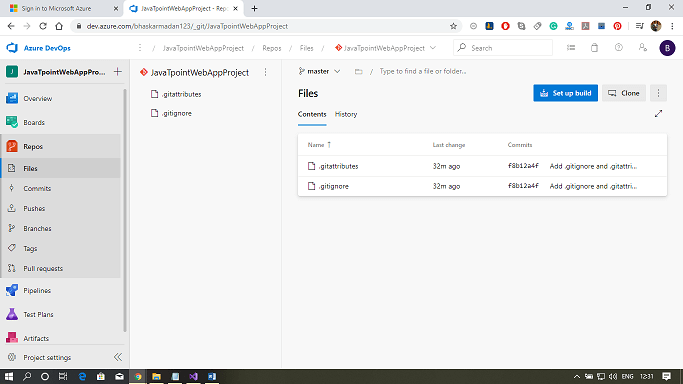
Step 12: To see your repository, open the Azure DevOps portal. And go through the organization that you have selected during the publishing. Click on the Repos to view the files.
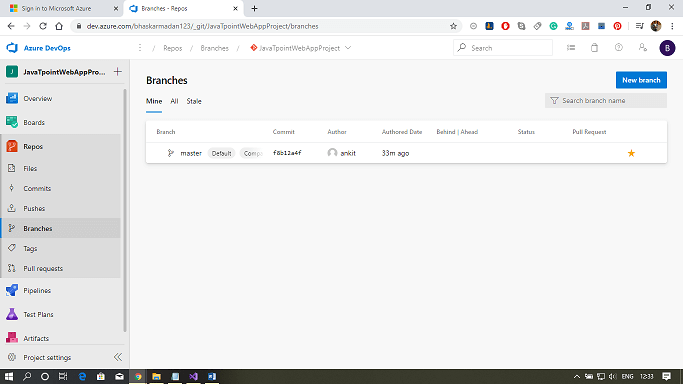
Step 13: To see the branches associated with your repository, click on Branches. Here we have only one branch right now, which is the default master branch.