Azure SQL Database Configuration
We’ll see here the key configuration features of the Azure SQL Server and SQL database. In terms of Azure SQL database configuration, the first key thing is Firewall rules at a server level.
Firewall Rules
At a logical server within Azure, we can define some firewall rules. It can be IP rules. IP rules will grant access to the database based on the originating IP address of each request. And the second type of rule is the virtual network rule. It is based on virtual network service endpoints.
Rules for Azure SQL databases can be defined at two levels:
- Server level firewall rules: These firewall rules enable clients to access our entire Azure SQL server, i.e., each database within a similar logical server. These firewall rules will be stored in the master database. Server-level firewall rules can be configured by using the portal or by using Transact-SQL statements.
- Database-level firewall rules: These rules enable clients to access certain (secure) databases within the same logical server. We can create these rules for each database (including the master database), and they are stored in the individual databases.
Configuring Firewall rules in Azure portal
Step 1: Go to the firewall setting in your database server that you have already created. After that, click on Add Client.
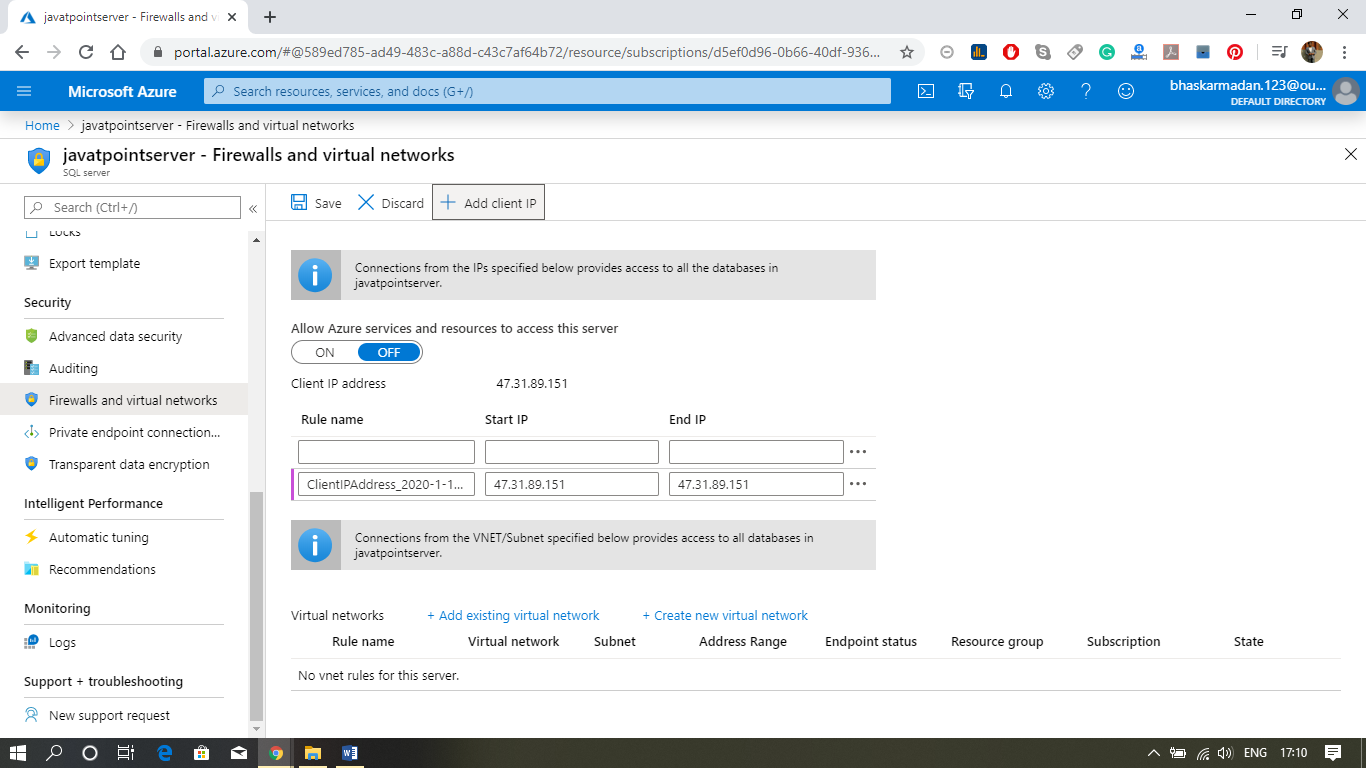
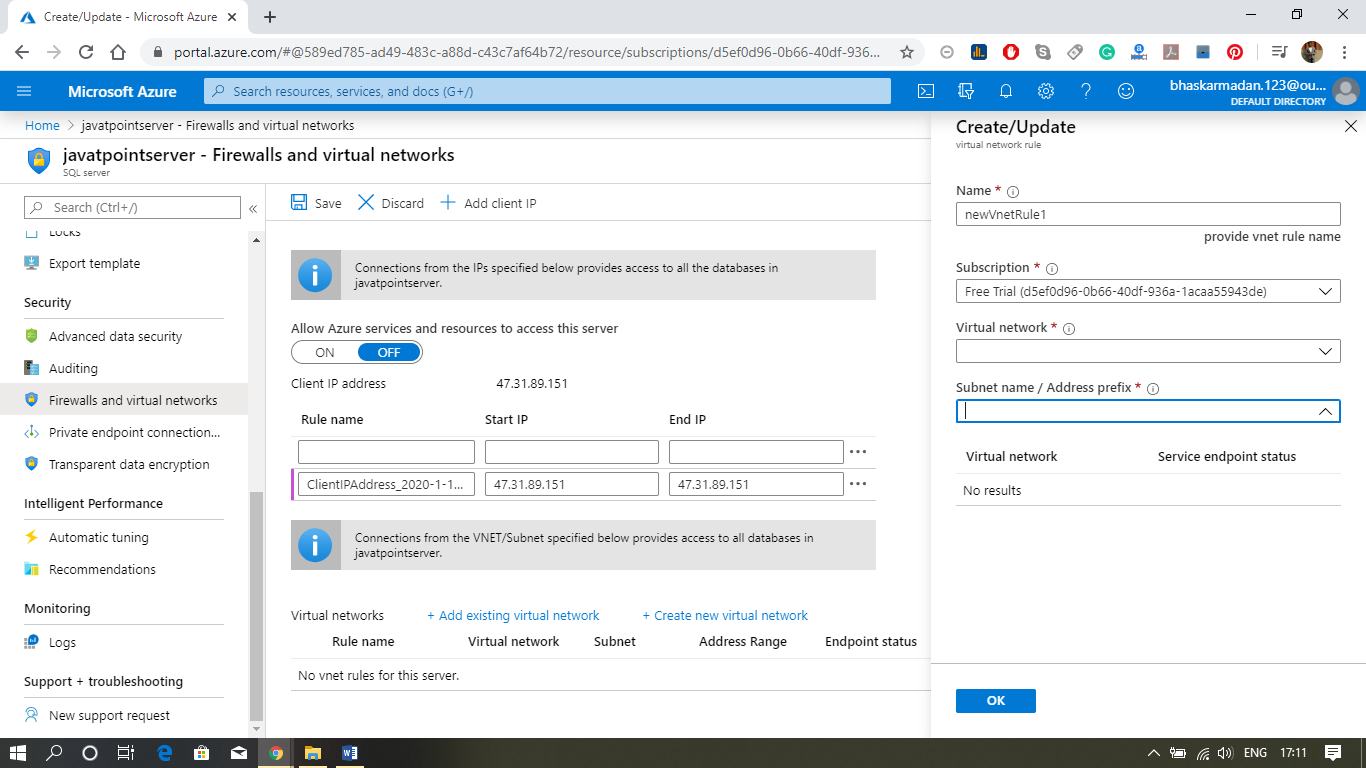
Step 2: Now, click on Add existing virtual network and fill the required details, as shown in the figure below.
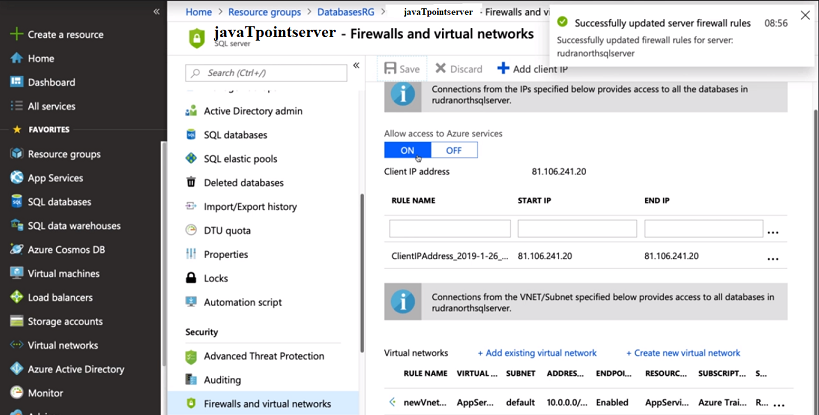
Step 3: Finally click on save, you will get the notification that your firewall rules got updated.
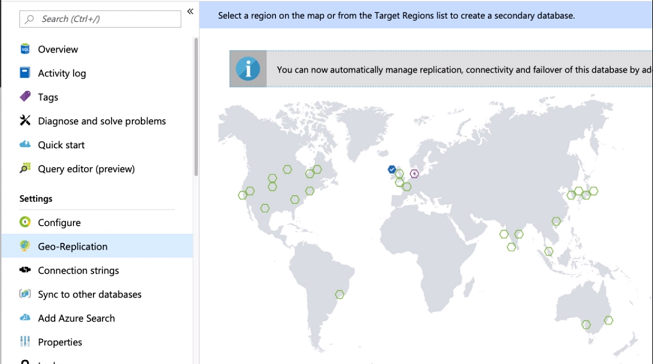
Geo-Replication
It is defined at a database level, not server level, and it is designed as a business continuity solution that allows the application to perform quick disaster recovery of individual databases in case of a regional disaster or large scale outage.
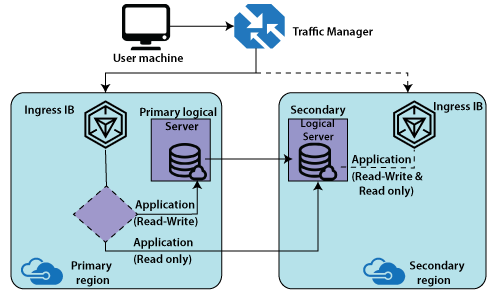
When we are configuring geo-replication, we specify a secondary database at a location far away from the primary location. We can have a traffic manager that routes the traffic by default to our primary load balancer and that the primary load balancer is based on the application request. If it is read and write, then it can route to a primary logical server. If it is ‘read-only’, it can route to a secondary server. Thereby the advantage of geo-replication is that we can offload some of the read-only traffic from primary and route to secondary.
The primary performance will be good because read-only queries will consume a certain amount of CPU or DTU units installed that we have a secondary database where the data continuously get replicated.
Configuring Geo-Replication using Azure portal
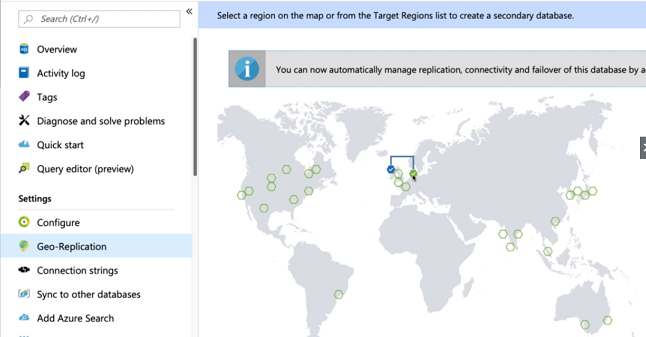
Step 1: Click on the Geo-Replication option; you will see the following window.
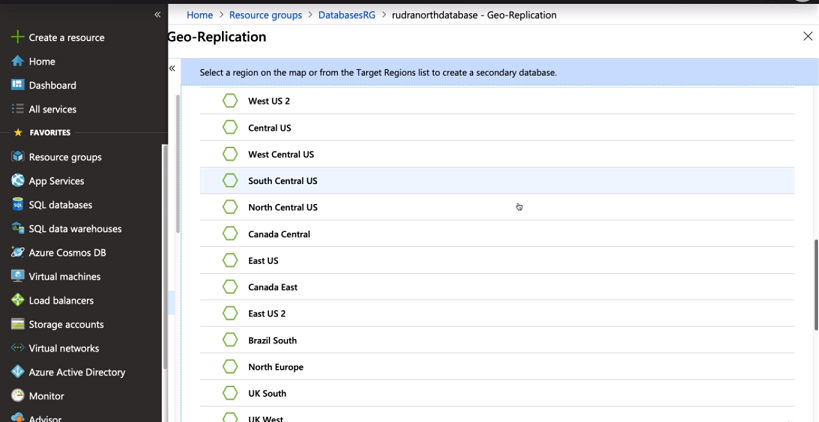
Step 2: Now, select the location where you want to replicate your database. You can choose multiple locations.
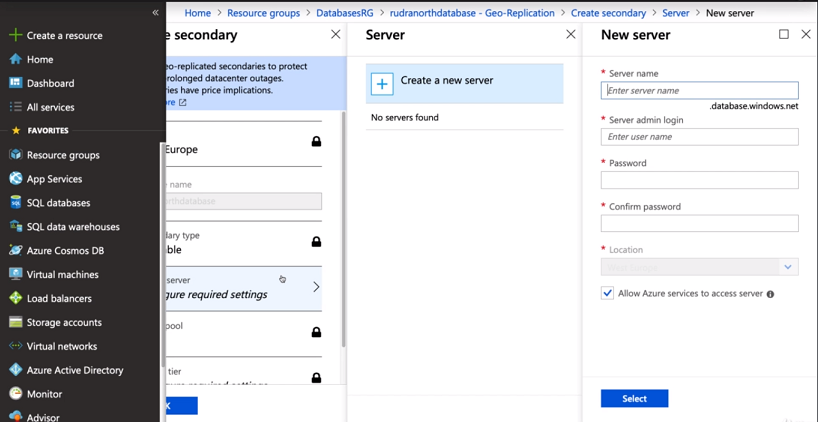
Step 3: Now, create a SQL server for the place where you want to replicate your data.
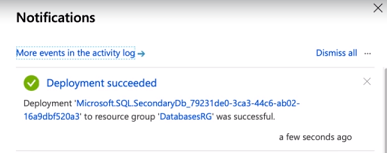
Step 4: Your server has been created and replicated successfully.
Step 5: You can see in the following figure, where the servers are replicated.
Failover Groups
Auto-failover group is a feature of the SQL database that allows us to manage replication and failover of a group of databases on a logical server or all databases in a Managed Instance to another region.
We can initiate failover manually, or we can delegate it to SQL Database service based on a user-defined policy. When we are using auto-failover groups with automatic failover policy, any outage that impacts one or many of the databases in the group results in automatic failover. It allows the read-write SQL application to transparently reconnect to the primary database when the database change after failover.
Database backups
The SQL database uses SQL server technology to create full, differential, and transaction log backups for Point-in-time Restore (PITR). The transaction log backups generally occur every 5-10 minutes, and differential backups occur typically every 12 hours, with the frequency based on the compute size and amount of database activity. Each SQL database has a default backup retention period between 7 and 35 days that depends on the purchasing model and service tier.
Long-term backup retention (LTR) leverages the full database backups that are automatically created to enable point-time restore. These backups are copied to different storage blobs if the LTR policy is configured. We can set an LTR policy for each SQL database and specify how frequently we need to copy the backups to the long-term storage blobs.