Basic Commands of Apache Solr
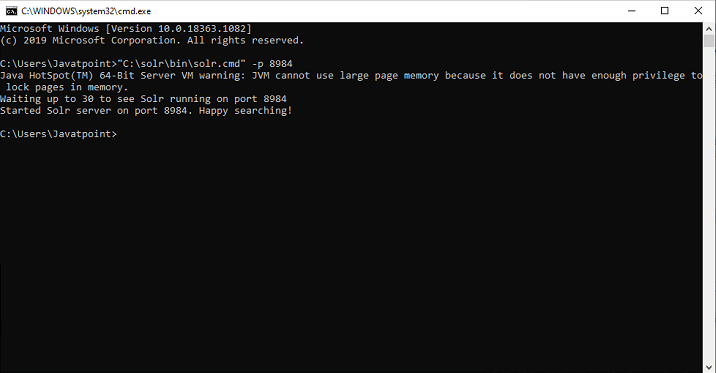
After the complete installation of Solr, open the file explorer and go to the /bin folder in the home directory of Solr and using the following command, start the Solr.
The above command starts Solr in the background, which is acknowledging on Port 8983 and displays the given message below.
Start Solr in Foreground
The Solr would start in the background if the Solr started using the start command. But using the –f option, you can start Solr in the foreground.
If you want to start solr on another port
Use –p option of the start command, we can start Solr in another port, as shown in the following code block.
Command to Stop Apache Solr
Using the stop command, we can stop using Solr
The above command stops Solr, displaying the below message.
Command to Restart Apache Solr
We can use the restart command of Solr that stops Solr for 5 seconds and start it again. We can restart Solr using the following command:
It will display the following message while restarting Solr
Apache Solr Help command
The help command inside the solr can be used to check the uses of the Apache Solr prompt and its associated options.
Apache Solr Status Command
The status command in Solr can be used for the search operation and find out the running Solr instances on our PC. It informs you about a Solr instance such as its version, memory usage, etc.
To check the status of a Solr instance, you have to use the status command as given below:
After executing the above command, it displays the status of Solr as follows:
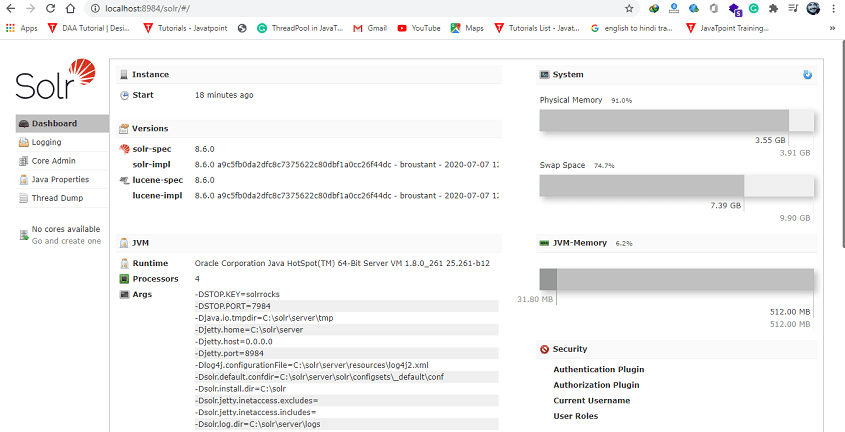
Solr Admin
When we run Apache Solr, we will be redirected to the homepage of the Solr web interface with the following URL.
Below is the image of the Solr Admin Panel:
Solr’s Schema File
All the details about the field types and fields have been stored in the Apache Solr. The file name and file location may vary depending on how we configured our Solr initially or modified it later.
The managed-schema is the schema files Solr uses by default to support making changes in the schema at runtime with the help of Schema API or using the feature of Schemaless Mode. Either we explicitly configure the managed schema features to use an alternative filename, or we choose the contents of the files that are still updated by Solr automatically.
The schema.xml is a schema file that is traditionally named and can be edited manually by users of the ClassicIndexSchemaFactory.
When we use SolrCloud, we may not find any file with these names on the filesystems of the localhost. We can only see the schema with the help of Schema API or using the Solr Admin UI’s Cloud Screens.
Whatever the name of the file we use in our installation, the structure of the file remains the same. However, the way we interact with the file will be changed. If we are using the managed schema, it will be expected that we only interact with the file using the Schema API and unable to make manual edits. If we do not use the managed schema, we can only make manual edits to the file, and the Schema API will not support any modifications.