Build a Dice-Rolling Application with Python
To make small-scale projects, such as the Text-based User Interface (TUI) dice-rolling application, can help us build the level of our Python programming capabilities. We will learn to collect and verify the input of the user, import code from packages and modules, use write-functions, utilize to create loops as well as conditionals, and then display output with strings as well as print() function.
In this tutorial, we will write an application to simulate dice-rolling events. To do so, we will use Python’s random module.
In this tutorial, we will be learn how to:
- Utilize random.randint() to simulate dice-rolling situations
- We can request input from the user by using an integrated input() function
- parse and verify the input of the user
- Modify strings with methods, like .center() as well as .join()
Demo
In this step-by-step project, we will create an app that runs simulations of a dice roll. The application can play up to 6 dice with six faces. The app will create the ASCII diagram of the dice’s faces and show that on display following each roll.
If we open our dice-rolling simulation application, we will get an invitation to enter the number of dice we wish to roll. If we enter an acceptable integer range of one to six, the application then simulates the rolling event and displays a drawing of the dice’s face on the screen.
Project Overview
Our dice-rolling simulator application will feature a basic but user-friendly user interface using text (TUI), which allows us to choose the number of dice with six sides that we would prefer to roll. It will allow us to use this TUI to roll dice from online.
Here’s an explanation of how the app functions internally:
| Tasks to Run | Tools to Use | Code to Write |
|---|---|---|
| Ask the user to select the number of dice that they will roll, then, after that, read the input from the user. | The built-in Python function for input() function | Call on provide input() with appropriate arguments |
| Validate and parse the input of the user | String methods, operators for comparison, as well as conditional assertions | A function that is defined by the user known as parse_input() |
| Play the simulation of rolling dice | The Python random module, particularly the function randint() function | A function that is defined by the user known as roll_dice() |
| Create an ASCII diagram using the dice faces | Loops, list.append(), and str.join() | A user-defined function called generate_dice_faces_diagram() |
| Draw the picture of dice face on-screen | Built-in print() function in Python. printing() function | An instruction to to print() with appropriate arguments |
With these internal workings in our mind, we will write three custom functions to implement the application’s primary features and functions. These functions define the application’s publicly accessible API that we will then call to bring our app to existence.
To arrange the code for our simulator for rolling dice, we will make an individual file called dice1.py in a location of our choice within our system of files. Creating the file now to begin!
Prerequisites
The user must be familiar with these concepts as well as techniques before constructing this simulation game of dice rolling:
- Strategies to execute programs in Python
- The Python import mechanism
- The fundamentals of Python Data types, mostly the strings along with the integer number
- Fundamental information structures, particularly lists
- Python Variables and constants
- Python comparators
- Boolean value and logic expressions
- Conditional statements
- Python is used to create loops
- The fundamentals to entering, output, and formatting strings in Python
If a user is not sure they have all the necessary skills before starting this adventure, It’s possible to learn more by pursuing the project and start! It is always possible to stop and go through the resources listed on this page if they are stuck.
Step 1: Code the TUI of Our Python Dice-Rolling App
In this phase, we will write the code that asks for the input of the user regarding the number of dice we wish to roll in the game. Additionally, we will code a Python function that receives the input of the user, confirms it, and then returns it as an integer in the event that the validation was successful. In the event of a failure, the function will then ask for input from the user.
Take the User’s Input at the Command Line
We can begin writing code that interacts with users for those who want to play with code. This code will create the application’s user interface in text and will depend heavily on user input(). The built-in function will read the user’s inputs directly through the command line. The callback argument lets us specify the type of input we want to receive.
The input() call on line 5 will prompt us to choose which number of dice the user wishes to roll. The dice must be in 1 – 6, inclusive, as the prompt indicates.
Line 6 invokes the function parse_input1() and stores the return value in the number of dice. In the next section, we will be implementing this function.
Parse and Validate the User’s Input
The purpose that the parse_input1() is to accept the input from the user as in the form of a string, verify if it’s an integer number that is valid, and then return it in a Python int object. We can add the following lines to the dice1.py file prior to the app’s main code:
Here’s how the code works line-by-line:
- Line 3 describes “parse_input1()“, which accepts the string input as an argument.
- Lines 4-9 contain the function’s Docstring. Incorporating a clear and well-formatted document in our functions is the best practice for Python programming since docstrings let us record what we code.
- Line 10 examines whether the user’s input is valid that is sufficient for the number of dice to be rolled. The function .strip() removes any spaces that are not needed surrounding an input line. The operator determines if our input is within the allowed number of dice that can be rolled. In this scenario, we are using an appropriate set due to the fact that the membership tests within the Python schema are extremely effective.
- Line 11 transforms the input into an integer number and returns it to the caller.
- Line 13 sends a message to the screen, informing the user to input that is not correct if applicable.
- Line 14 leaves the application with a SystemExit exception and an error code of 1 to indicate something has gone wrong.
Through the parse_input(), we verify and process the input of the user on the command prompt. Validating input from the user or any non-trusted sources is crucial for our application to function safely and reliably.
We must ensure that these features are working correctly with an intuitive TUI and a reliable input validation system. This is what we will be doing in the next section.
Try Out the Dice-Rolling App’s TUI
To test the code, 1we have written thus far, we can open a command-line terminal and roll the dice1.py script:
Output:
How many dice do the user want to roll? [1-6] 3
Input:
Output:
How many dice do the user want to roll? [1-6] 7 Error: Please enter a number between 1 to 6.
If we input an integer number ranging from 1 to 6, the program doesn’t show an error message. However, in the event that the input isn’t an integer number or is outside of the specified interval and we receive an alert telling users that an integer between 1 and 6 is necessary.
So far, we have written code that can request and process input from a command line. This code is the application’s TUI built upon the input() function. It also has a function to validate input from the user and return the input as an integer. It’s time to gamble!
Step 2: Simulate the Rolling of Six-Sided Dice in Python
The dice-rolling application now offers a TUI that can take the input from the user and take it and process it. In order to continue developing the core functionality of the application, We will need to create our roll_dice1() function that allows the user to create a rolling dice event. This function will calculate the quantity of dice the user would like to roll as input.
The Python random module of the standard library includes a randint() function that creates pseudorandom integers within the specified interval. It is possible to use this function to create a simulation of rolling dice.
Here’s the code to implement roll_dice1():
This code snippet line 2 introduces random into the namespace we are currently in. This import lets us use this randint() function later on. Here’s a breakdown of the remainder of the code:
- Line 6 defines the roll_dice() that accepts an argument indicating how many dice will roll during a particular call.
- Lines 7-11 provide the function’s Docstring.
- Line 12 creates a blank list called roll_results to record the outcomes of the simulation using dice.
- Line 13 specifies a for loop that repeats the loop for each die the user wishes to roll.
- Line 14 uses the randint() to create a pseudorandom integer that ranges between 1 to 6 inclusive. The number is the result of rolling a die with six sides. The call produces only one number per repetition.
- Line 15 adds the current die-rolling result to roll_results.
- Line 16 provides the list of simulation results for dice rolling.
To test out our newly developed function, add these lines of code at the end in our dice1.py file:
In this example, Line 9, the code invokes roll_dice1() using num_dice1 as an argument. Line 11 uses the print() to display the results as an array of numbers that appear on the screen. Each number is the result of one die. Line 11 can be removed after we have tested our code.
Start running application using the command line.
Input:
Output:
How many dice do the user want to roll? [1-6] 5 [6, 1, 3, 6, 6]
Input:
Output:
How many dice do the user want to roll? [1-6] 2 [2, 6]
The list of results displayed on the screen will differ because we are creating the numbers, we want to generate our pseudorandom. In this case, we are simulating the rolling of two and five dice each. It is worth noting that the value for each dice ranges from 1 to 6. This is because we are using dice with six sides.
Once we have created and tested the code to simulate the roll of dice, now is the time to go on and give our application an appealing method to display the results. This is what we will be doing during the subsequent section.
Step 3: Generate and Display the ASCII Diagram of Dice Faces
At this moment, our application already simulates the rolling of various dice and records the results in an array of numbers. However, the list of numbers won’t appear attractive from a user’s viewpoint. It’s better to have a more polished output so that our application is professional.
In this section, we will write the code needed to generate a diagram displaying all the dice’s faces. In order to accomplish this, we will design an element of ASCII art.
Set Up the Diagram of Dice Faces
The dice-rolling simulator application will require a way to show what happens when we roll the dice. To do this, it will use the ASCII representation of dice face to reveal the results when we roll the number of dice with six sides. For instance, when we roll 4 dice, the drawing would appear like this:
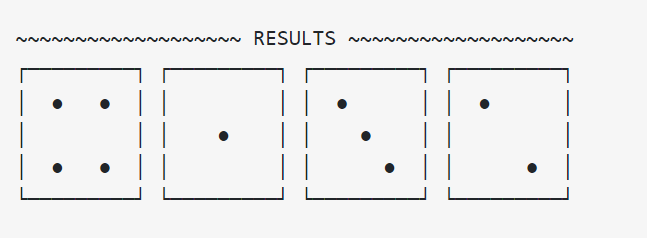
Every die face on this diagram represents the results of one run of the simulation. In order to begin programming the functionality to construct this diagram, we must put together the ASCII art. Return to our editor for code and add the following:
In lines 4 to 47, we make six faces of dice with ASCII characters. We save the dice faces inside DICE_ART, A dictionary that converts each face into its integer equivalent.
Line 48 is the definition of the DIE_HEIGHT, which is what number of rows a particular face is expected to occupy. In this case, each face occupies five rows. In the same way, line 49 specifies the DIE_WIDTH to store the number of columns needed for drawing a die face. In this instance, it is 11.
Then, line 50 is the definition of DIE_FACE_SEPARATOR that holds the whitespace character. These constants will be used to create and display an ASCII drawing of faces of dice to our application.
Generate the Diagram of Dice Faces
In this stage, we have constructed the ASCII artwork for each face. To combine these pieces to form a diagram that shows the entire outcomes of the simulation, then we will write a second custom function.
This function accomplishes these things:
- Line 5 defines generate_dice_faces_diagram() with a single argument called dice_values. This argument is the list of integer dice-rolling values that result from using roll_dice().
- Lines 6-18 contain the function’s docstring.
- Line 20 creates a list known as dice_faces1 to keep the dice faces that correspond to dice numbers in the list input. These dice faces will appear when the ASCII diagram is created.
- Line 21 defines the loop that is a loop that iterates over the dice’s values.
- Line 22 is used to retrieve the face of the dice that corresponds to the current value of the dice of the DICE_ART1 and then adds the die face to dice_faces1.
- Line 25 creates an empty list that holds the rows of the final dice face diagram.
- Line 26 defines a loop that repeats the indices starting that range from to through DIE_HEIGHT – 1. Each index represents the number of a particular row in the dice face diagram.
- Line 27 defines row_components as a list of empty elements that hold the portions of dice faces that make up the row.
- Line 28 creates a for loop that is a nested for loop that loops over the dice’s faces.
- Line 29 records each row’s component.
- Line 30 connects the row components to form a row string and separates the parts of the row by spaces.
- Line 31 adds rows to the lists of the rows that will form our final drawing.
- Line 34 creates a variable that holds the dimensions of the current dice face diagram.
- Line 35 creates a header displaying the word “RESULTS“. In order to do this, it makes use of str.center() along with the diagram’s wide and the symbol for tilde ( ~) as arguments.
- Line 37 creates a string that contains the final dice faces diagram. Line feed character (n) is the line feed character ( n) that acts as an element of row separation. The argument for .join() is a string that combines the diagram’s header and string (rows) that form the dice’s faces.
- Line 38 gives a ready-to-print dice face diagram to the person calling.
Wow! It was quite a bit! We will revisit the code we wrote and modify it to make it easier to manage in a short time. Before we do that, we will need to test the application out, and we will need to write the primary code block.
Finish Up the App’s Main Code and Roll the Dice
With generate_dice_faces_diagram() in place, we can now finish writing the application’s main code, which will allow us to generate and display the diagram of dice faces on our screen. We can add the next lines of code in the final line of dice1.py:
Line 12 calls generate_dice_faces_diagram() with roll_results as an argument. This method creates and displays an illustration of dice faces that match the current dice rolling results. Line 14 invokes print() to display the diagram on the screen.
With this update we will be able to restart the application. Return to the command line and run this command.
Input:
Output:
How many dice do the user want to roll? [1-6] 5 ~~~~~~~~~~~~~~~~~~~~~~~~~ RESULTS ~~~~~~~~~~~~~~~~~~~~~~~~~ ┌─────────? ┌─────────? ┌─────────? ┌─────────? ┌─────────? │ ● ● │ │ ● ● │ │ ● ● │ │ ● │ │ ● ● │ │ ● │ │ ● ● │ │ ● ● │ │ │ │ │ │ ● ● │ │ ● ● │ │ ● ● │ │ ● │ │ ● ● │ └─────────? └─────────? └─────────? └─────────? └─────────?
Cool! The dice-rolling simulator now presents a beautifully formatted ASCII diagram that shows the outcome of the simulation. That’s neat.
If we go back to the implementation of generate_dice_faces_diagram(), then we will note that it includes a few comments that point out what the corresponding portion of code is doing:
This type of comment usually indicates that our code could be better off with some redesigning. In the next section, we will apply a popular refactoring technique that can help us tidy up the code, making it easier to maintain.
Step 4: Refactor the Code That Generates the Diagram of Dice Faces
Our generate_dice_faces_diagram() function requires explanatory comments because it performs several operations simultaneously, violating the single-responsibility principle.
This rule states that each function or class should only do one thing in simple terms. So, changes to one particular function won’t impact the remainder of the program. In the end, we will get an improved and more durable code.
There’s a method of refactoring known as the extraction method, which can aid in improving our code by removing functionality that is able to work independently. For example, we can extract the code from line 20 to 22 in the previous implementation of generate_dice_faces_diagram() and place it in a non-public helper function called _get_dice_faces1():
We can dial _get_dice_faces1() from generate_dice_faces_diagram() to achieve to obtain the implied to get the implied. With this method it is possible to completely refactor generate_dice_faces_diagram() to satisfy the single-responsibility principle. Here’s a refactored version of generate_dice_faces_diagram() that takes advantage of _get_dice_faces() and implements another helper function called _generate_dice_faces_rows() to extract the functionality from line 25 to 31:
Helper functions allow us to choose readable or descriptive titles, which eliminates the need for lengthy explanations. The helper functions that have been added take functionality from the initial function. Every helper function is now assigned its duty.
Refactoring our code to bring it to be more efficient is a valuable talent to have as a Python developer. For more in-depth information on Refactoring code, look at how to refactor Python Applications to ensure Simplicity.
A key idea of code refactoring is that the altered code must function the same way that the code was originally written. To test this, try running our application once more!
We have finished our work! We have developed an entirely functional TUI application that allows us to simulate a dice-rolling experience. Each time we launch the application, we will be able to play the role of six dice that have six faces per. We can even see the dice results in a beautiful ASCII diagram.
Conclusion
We have written an extremely functional program consisting of a user interface based on a text application that simulates a six-sided dice roll with Python. Through this project, we have learned and practised basic skills like collecting and validating the input of the user, importing the code creating functions that use loops and conditionals, as well as a displaying well-written output on the screen.
In this tutorial, we have learned how to:
- Utilize randint() to simulate the rolling of dice
- Use the input of the user via the command line by using input(), the inbuilt function
- Read and verify the input of the user employing a variety of tools and methods
- Modify strings with methods like .center() or .join()
In addition, we have learned how to organize, structure documents, and execute Python scripts and programs. By gaining this knowledge, we are more prepared to continue our journey of coding using Python.