CorelDRAW Basics
This division includes the following essential key points:
- Understanding bitmaps and vector Graphics
- Opening and starting drawings
- Scanning images
- Implementation with multiple drawings
- Repeating, redoing, and undoing actions
- Scrolling, panning, and zooming
- Previewing drawings
- Saving drawings
- Recovering and backing up files
- Accessing and adding drawing information
- Disclosing basic tasks
- Closing drawings
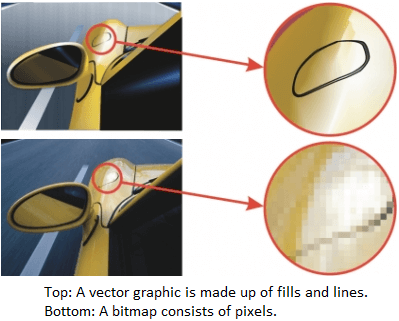
Understanding bitmaps and vector Graphics
The bitmaps and vector graphics are two primary computer graphics type. These vector graphics have been made of curves and lines, and are produced from a mathematical description. It examines the direction, length, and position where lines have been drawn. The bitmap is also called raster images. The bitmap is composed of tiny squares known as pixels. All the pixels are mapped to any location inside an image. It contains values as numerical color.
The vector graphic is ideal for illustration and logos because it is resolution-independent. It can be shown without losing quality. It can be detailed at a resolution and scaled at a printed, or size. In addition, we can generate a crisp and sharp outline along with the vector graphics.
We can make vector graphics within CorelDRAW. Also, we can import bitmap (like TIFF and JPEG) in CorelDRAW, insert them into our drawings.
Opening and starting drawings
CorelDRAW enables us to begin a drawing from an existing drawing, template, and blank page. Any black page provides us the freedom for specifying all the drawing aspects. The template gives us along with a beginning point.
To start any drawing
1. The following can be done:
Go to Welcome Screen and click on Get started > New Document
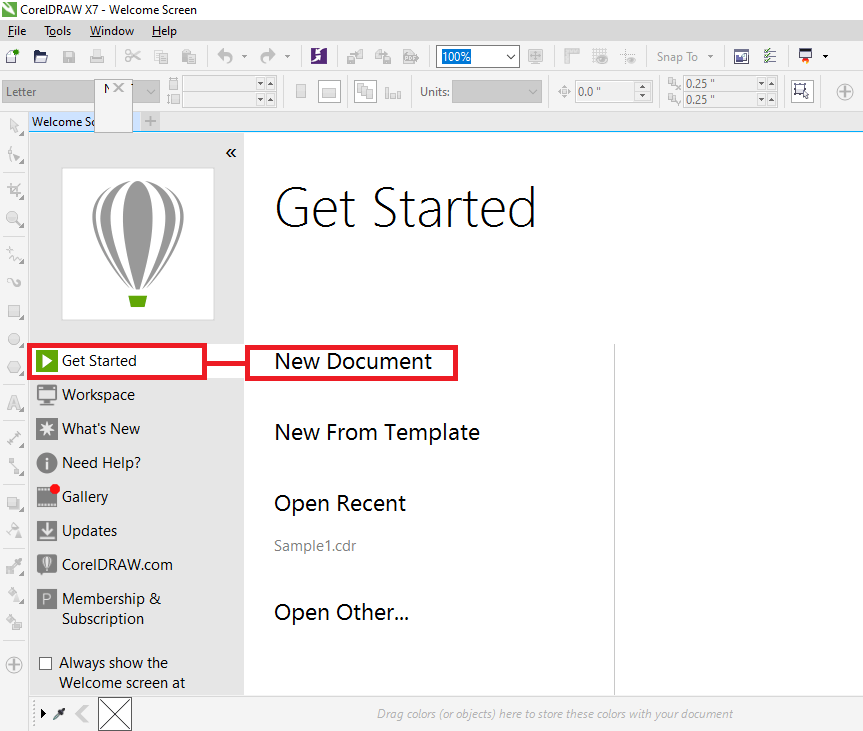
Inside the application window, press on File > New.
2. Fill the filename within the text box Name.
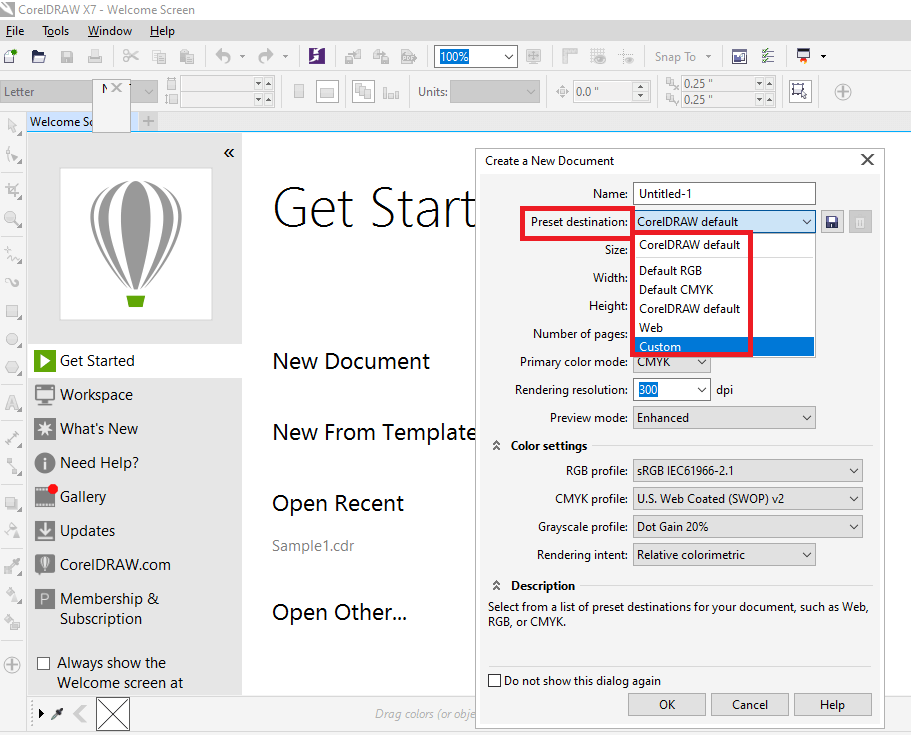
3. From the list box Preset destination, select an output destination to implement drawings:
- CorelDRAW default: It can be used to apply default settings of CorelDRAW to create graphics that can be destined to print.
- Default CMYK: It can be used to apply various settings to create graphics that can be destined for any commercial printing.
- Default RGB: It can be used to apply the settings to create graphics. It can also be destined to print for any high-fidelity type printer.
- Web: It can be used to apply the settings to create graphics that can be destined for the internet.
- Custom: It can be used to let us customize the destination settings to a document.
Scanning images
We can scan the images within CorelDRAW. It helps scanners that apply WIA (Microsoft windows image Acquisition), which facilitates a specific interface for image scanning.
If our scanner doesn’t provide its support for WIA but contains the TWAIN driver, we can use the drive to scan the images inside CorelDRAW. TWAIN drivers are supported by 64-bit and 32-bit versions of CorelDRAW.
Note: There are very few TWAIN drivers of 64-bit available.
For image scanning
1. Go to File > Acquire image, click on any following command:
- Choose WIA source: It can be used for any scanner that applies WIA driver.
- Choose TWAIN source: It can be used for any scanner that applies TWAIN driver.
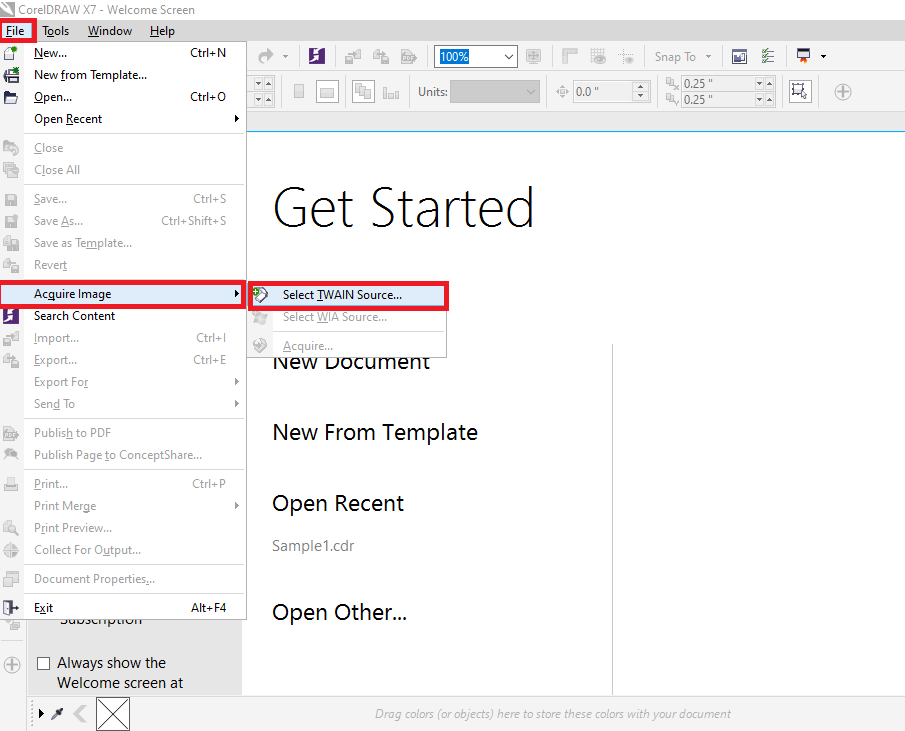
In case a compatible TWAIN and WIA drivers are not installed, then a command pops up disabled.
2. Select the scanner from a dialog box.
3. Click on
4. Click on File > Acquire image > Acquire.
5. Preview an image, and choose an area that we wish to scan.
6. Click on Scan.

Implementation with multiple drawings
Inside one drawing window, multiple drawings could be opened, which makes it efficient to manage several drawings simultaneously. We can access all the open designs from its drawing window top’s tab, and we can begin any new drawing.
We can also undock the drawing we drag and want it outside and inside any application window, but the open drawings illustrate as docked.
Repeating, redoing, and undoing actions
We can undo any action that we perform in the drawing, beginning with some most recent operations. If we do not like the undoing any operations result, we may redo it. Some essential operations are used to objects, like rotating, moving, filling, and stretching, which may be repeated for creating powerful visual effects.
Undo settings customization enables us to decrease and increase the operations number that we can redo and undo.
To undo
- Click on Edit > Undo manager.

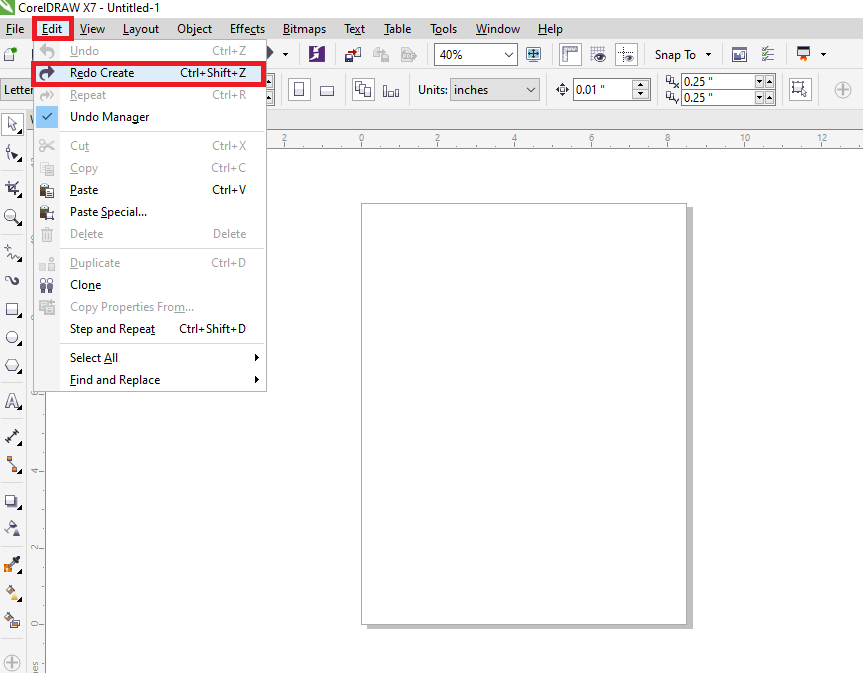
To redo
- Click on Edit > Redo.
To repeat
- Click on Edit > Repeat.

Scrolling, panning, and zooming
We can modify the drawing view by zooming-in for a closer appearance or by zooming-out for more drawing appearance. We can experiment along with the zoom option’s variety to examine the detail amount we want.
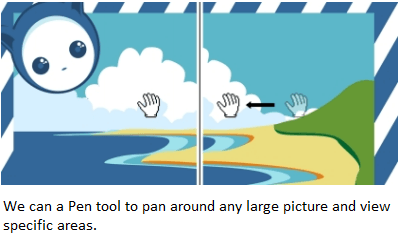
Scrolling and panning are additional ways for viewing drawing particular areas. When we work on levels of magnification or with other drawings, we may not see an entire drawing. Scrolling and panning let us move a page around inside a drawing window for viewing hidden previous areas.
We can zoom out and in while we are panning, and we can pan at the time we are zooming. We can ignore having to substitute between any two tools.
Also, we can apply the mode of Quick pan for switching from an active tool towards a Pan tool. It lets us pan without changing the tools.
In case, we apply the mouse wheel, it zooms-out, and zoom-in by default. We can also apply the wheel of the mouse for scrolling.
We can describe default panning and zooming settings.
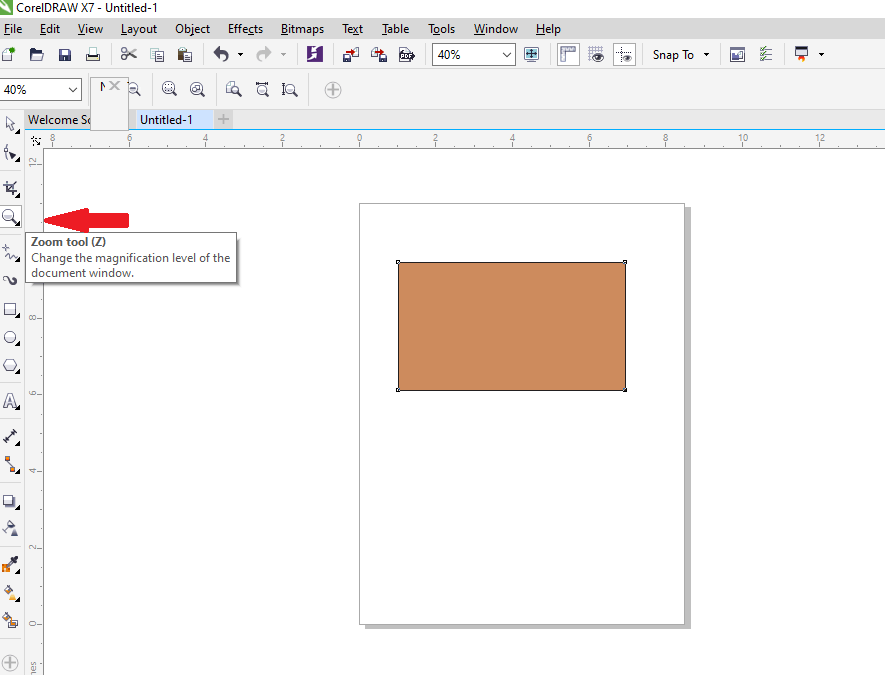
To zoom
1. Within the toolbox, press on the Zoom tool.
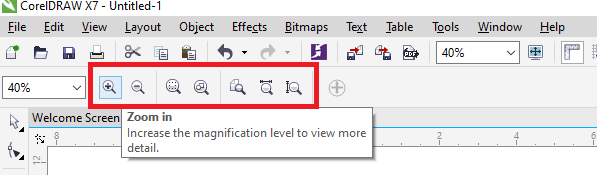
2. Over the property bar, press anyone from the following:
- Zoom out
- Zoom in
- Zoom to selected
- Zoom to all objects
- Zoom to page
- Zoom to page width
- Zoom to page height
Previewing drawings
We can preview the drawing to look at how it would appear if exported and printed. If we preview any drawing, the objects over the page of drawing and in an immediate place of a drawing window will be displayed and we can see every layer that can be set for printing inside an Object manager. In case, we wish a closer appearance at particular objects within the drawing, we can preview and select them. If we preview some selected objects, the other drawings will be hidden.
Before we preview any drawing, we can specify the mode of the preview. A preview mode impacts the speed by which our preview represents and also the detail amount shown in a drawing window.
The page borders are shown inside a drawing window, although we can hide these borders at any time. In case, any drawing is planned for print, we can represent an area that can actually print and bleed as well, the drawing part that boosts beyond a border of the page. Bleeds can be helpful if a drawing includes the objects and background of a color page that is placed on a page border. It ensures that there are not display any white space between the drawing edges and the paper edges after a printer trims, binds, and cuts the document.
To preview the drawing
- Press View > Full-screen preview.
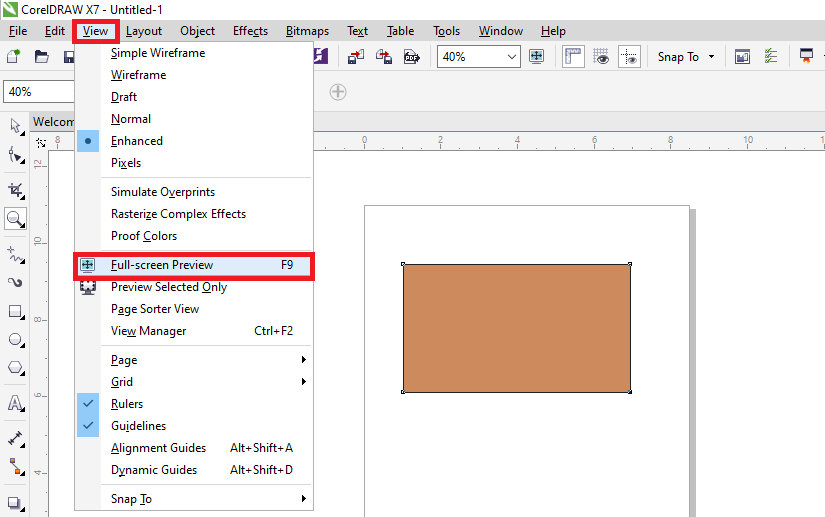
Press any key, or anywhere over the screen, to return on the application window. We can click Page down and Page up to preview the pages within the multipage drawing.
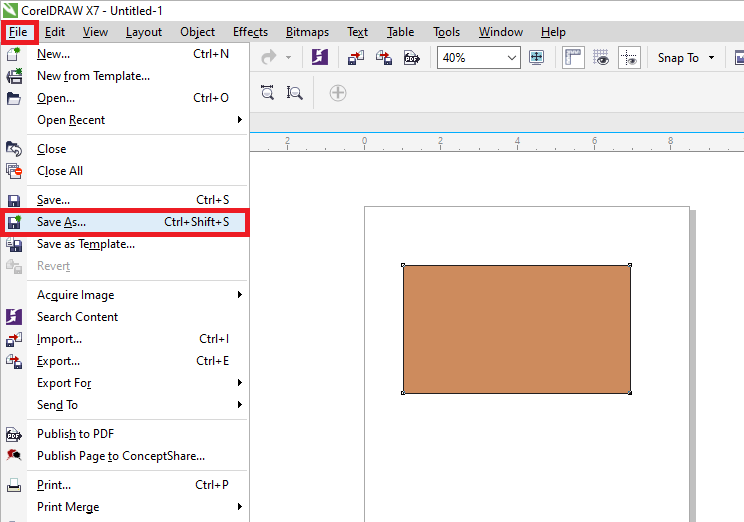
Saving drawings
The file format of CorelDRAW (CDR) can be used to save the drawings. It is compatible with an application’s latest version. Also, we can save the drawing, and it is compatible with the CorelDRAW Graphics Suite earlier version and specify the save options. These options are helpful if any file includes new transparency, outline, fill, and text that can’t be supported in the earlier versions.
If we wish to apply the drawing in other applications, we should save it for the file format, supported by the application. If we save any drawing, we can enclose the applied fonts to provide file sharing.
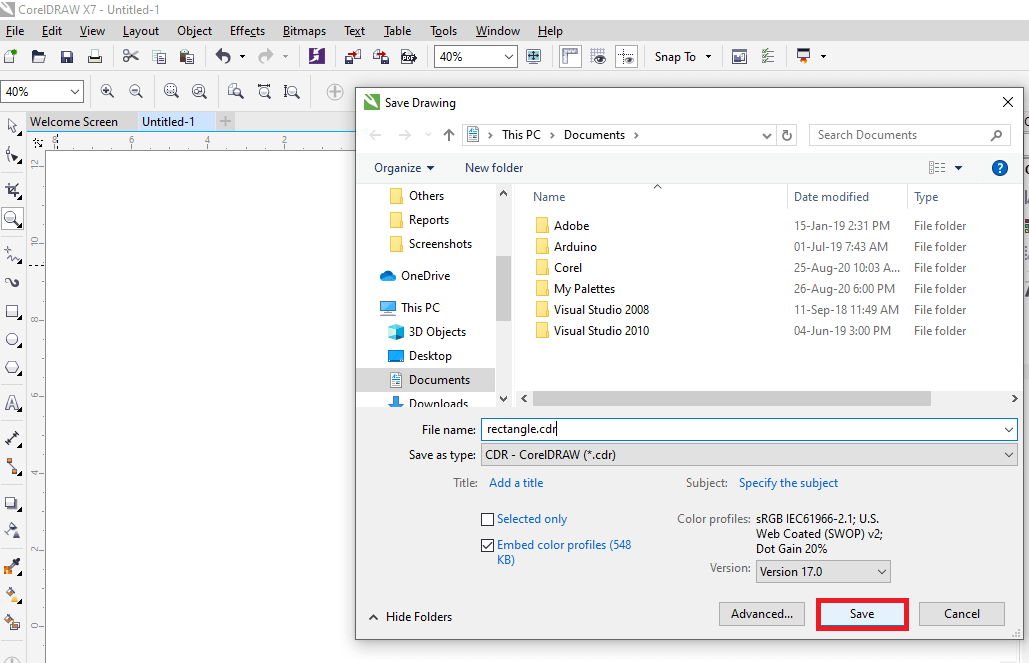
To save the drawing
1. Press File > Save as.
2. Fill the filename within the box of File name.
3. Locate this folder where we wish to save our file.
When we wish to save any drawing to the vector file format, select the file format through the list box of Save as type.
Recovering and backing up files
CorelDRAW may save the backup copies of drawings automatically. It can prompt us to recover in the system error’s event.
A feature auto-backup saves drawings, we have modified and opened. We can set an interval of time for file’s backup automatically and specify if we wish any file to save in our specified folder or temporary folder (default location), with CorelDRAW during the working session.
We can recover various files of backup from the specified or temporary folder if we reopen the CorelDRAW after the system error. In case, we select not backup file recovery, it is erased automatically if we quite this application.
To recover any backup file
1. Reopen CorelDRAW.
2. Press Ok within the dialog box of file recovery that represents.
The dialog box of file recovery represents under startup after the system error.
3. Save and rename that file within the described folder.
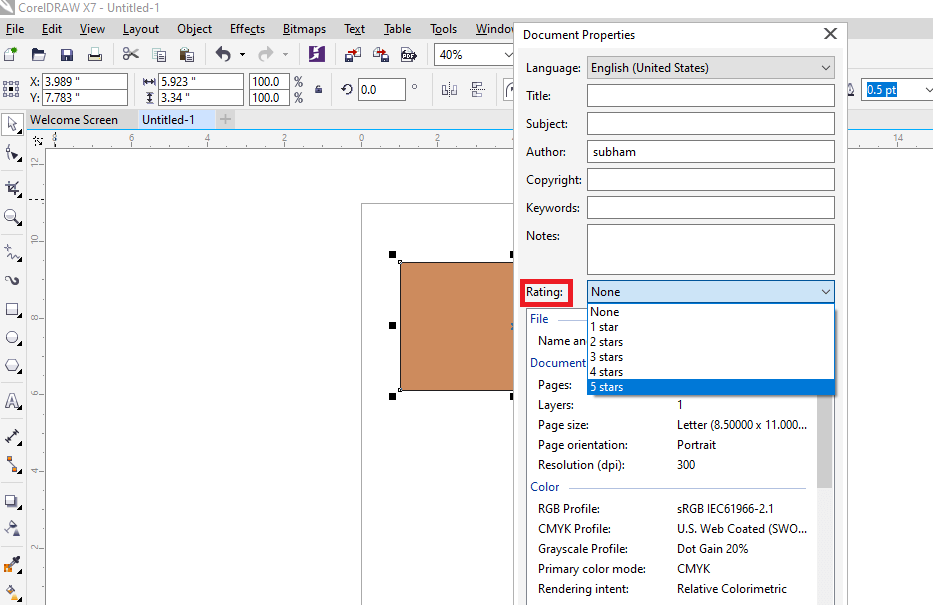
Accessing and adding drawing information
The CorelDRAW Graphics Suit lets us include the reference information, like rating, keywords, subject, author, title, language, and some other notes for the drawing. But including the information of the document is optional, thus makes it efficient to locate and organize later on.
This application lets us access the other essential document information, like the number of text statistics and object, fonts, layers and pages, and the objects types any drawing includes.
We can also see the color information like color profile, applied to depict the colors of the document, mode of primary color, and rendering intent as well.
To insert drawing information
1. Press File > Document properties.

2. Within the dialog box of Document properties, fill text inside anyone from the following:
- Title
- Language
- Author
- Subject
- Copyright
- Notes
- Keywords
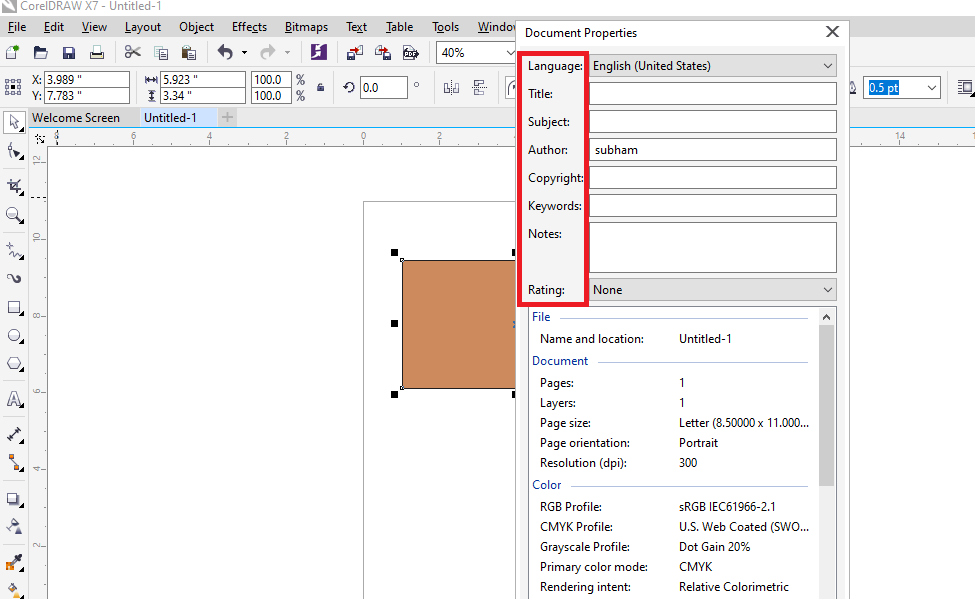
3. To describe the rating, select the rating through the list box of Rating.
4. Press Ok.
To access the drawing information
- Press File > Document properties.
