CorelDRAW: Making objects for web
CorelDRAW enables us to export several objects that can be optimized to view in the web browser. We can also make interactive rollovers through objects in CorelDRAW. Besides, we can insert bookmarks and hyperlinks to any drawing.
This chapter includes the following essential topics:
- Exporting bitmaps to the web
- Applying and saving web presets
- Creating rollovers
- Exporting objects along with backgrounds and transparent colors
- Inserting hyperlinks and bookmarks to documents
Exporting bitmaps to the web
CorelDRAW allows us to export some file formats that are web compatible:
- JPEG
- PNG
- GIF
While describing some exporting options, we can preview a picture along with four distinct types of setting configurations. We can also prepare many preset settings, file formats, color range, image quality, file size, compression, and download speed. We can examine previews by panning and zooming in the preview window.
To adjust an object-export preview
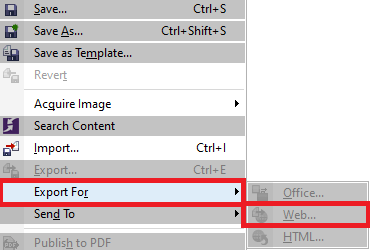
- Press File > Export for > Web.
- Implement any tasks from the below tasks:
- Press on the button, i.e., Full preview over the view toolbar to view a bitmap in an individual preview frame.
- Press on the button, i.e., Two vertical previews to view a bitmap’s two versions in any side-by side frame.
- Press on the button, i.e., Zoom to fit, to fit the button inside the preview window.
- Press on the button, i.e., Zoom to actual size to show the bitmap at the actual size.
Applying and saving web presets
Many web presets permit us to save various settings to export file formats that are web compatible.
To save the preset to export web-compatible picture
- Select the file format in the list box of Format from the dialog box of Export for web.
- Select any settings that we wish to save as the presets.
- Press an arrow near to the list box of Preset, and press Save preset.
- Fill the preset name inside the box of the File name.
- Press Save.
Creating rollovers
The rollovers are some interactive and efficient objects that modify in appearance if we point or click them. We can make rollovers using various objects. We should save a rollover for the SWF format (Macromedia Flash) for adding the rollover objects for any web design.
To make the rollovers, we insert the rollover states which are as follows:
Normal: It is a button’s default state if no activity of a mouse is related to this button.
Over: It is a button’s state if a pointer passes on it.
Down: It a clicked button’s state.
To make the rollover object
- Choose the object.
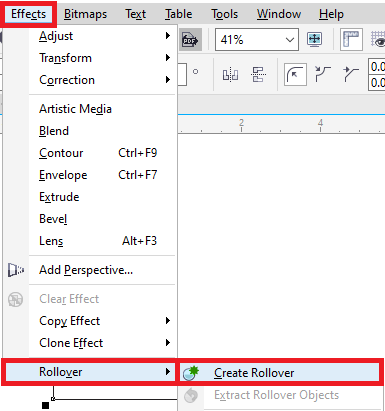
- Press Effects > Rollover > Create rollover.
To make the rollover object
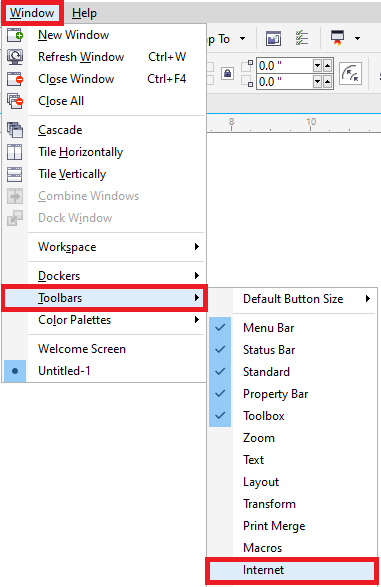
1. Press Window > Toolbars > Internet.
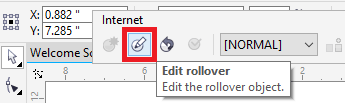
2. Press any rollover object for choosing it.
3. Select the button, i.e., Edit rollover over the Internet toolbar.
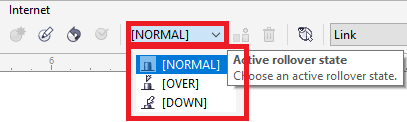
4. Select any state from the list box of Active rollover state:
- Normal
- Over
- Down
5. Change the properties of the object, like color.
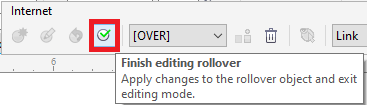
6. Press the button, i.e., Finish editing rollover.
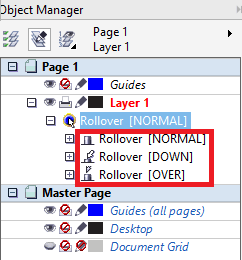
To view properties of the rollover
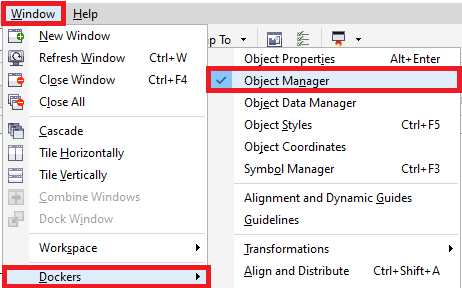
1. Press Window > Dockers > Object manager.
2. Press the layer and page where rollover resides.
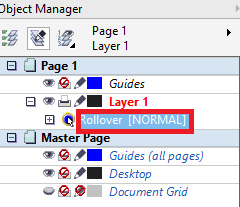
3. Press the name of the rollover, and expand some states like Normal, Down, and Over.
Exporting the objects with backgrounds and transparent colors
CorelDRAW enables us to export various paletted-based bitmaps, like 8-bit PNG or paletted GIF, along with backgrounds and transparent colors. These bitmaps may include the objects, like logo and buttons, which are mostly used over many webpages with paletted or colored backgrounds.
To save any bitmap with the transparent background
- Select the paletted file format, like 8-bit PNG or GIF in the list box of Format from the dialog box of Export for web.
- Implement any tasks from the below tasks:
- Select the checkbox of Transparency inside the Settings area to create the object transparent background.
- Choose the Eyedropper tool from the toolbar, and press an image to select any color. Select the button, i.e., Make the selected color transparent inside the Settings area to create the chosen color transparency.