Creating MySQL Database with XAMPP
XAMPP stack of software is an open-source localhost server providing a number of functionalities through the package of software it contains. The software, which is part of XAMPP is started/stopped using the XAMPP Control Panel. It is used for testing the projects and modifications offline before launching it on the global web. One such very important functionality provided by XAMPP is the creation of the MySQL database. This is done by using phpMyAdmin. The detailed explanation of what is phpMyAdmin and how to use it to create MySQL database with XAMPP will be discussed in this article.
phpMyAdmin
phpMyAdmin is a costless and open source software that provides the functionality of operating and managing MySQL over the internet. It provides an ease to the user to control and supervise the database with the help of a graphic user interface known as phpMyAdmin.This GUI is written in PHP programming language. Over time it has gained a lot of trust and demand for the purpose of finding a web-based MySQL administration solution. The user can operate upon MySQL via phpMyAdmin user interface while still directly executing SQL queries. The GUI allows the host to carry a number of manipulation operations on the database, such as editing, creating, dropping, amending, alteration of fields, tables, indexes, etc. It can also be used to manage access control over the data by giving privileges and permissions. phpMyAdmin has thus a vital role to play in handling and creating a database.
Steps To Create MySQL Database Using XAMPP
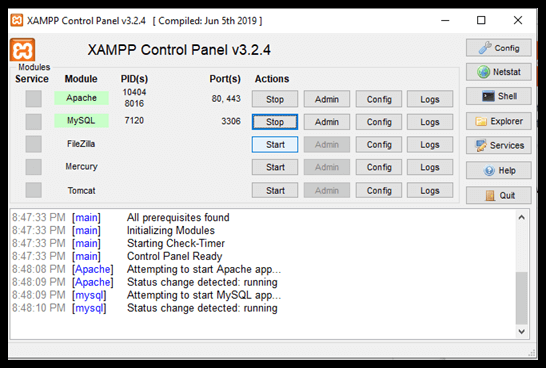
STEP 1- Navigate to XAMPP in your system or simply launch it by clicking the XAMPP  Icon. The Control Panel is now visible and can be used to initiate or halt the working of any module.
STEP 2- Click on the “Start” button corresponding to Apache and MySQL modules. Once it starts working, the user can see the following screen:
STEP 3- Now click on the “Admin” button corresponding to the MySQL module. This automatically redirects the user to a web browser to the following address-
http://localhost/phpmyadmin
STEP 4- One can see a number of tabs such as Database, SQL, User Accounts, Export, Import, Settings, etc. Click on the “Database” tab. Here you can see the Create option. Choose an appropriate name for the input field titled Database name. Things to keep in mind while selecting the name for the database are-
- The number of characters used should be equal to or less than 64.
- The name should comprise of letters, numbers and underscore.
- The DB name should not start with a number.
- It should be relevant to the topic for which it is being created.
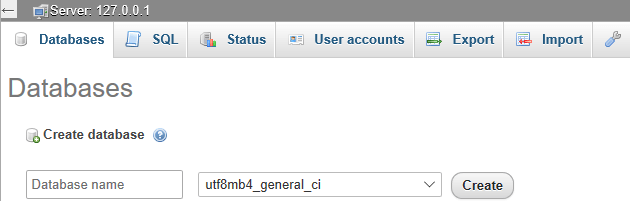
Make sure the database is successfully created.
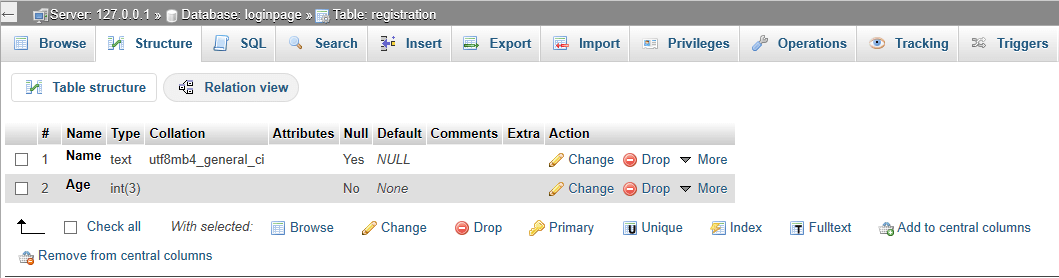
STEP 5- It is very important to create tables in order to store the information in a systematic manner. In this step, we will build tables for the created database. In the created Database (Login page in this case), click on the ‘Structure’ tab. Towards the end of the tables list, the user will see a ‘Create Table’ option. Fill the input fields titled “Name” and “Number of Columns” and hit the ‘Go’ button.
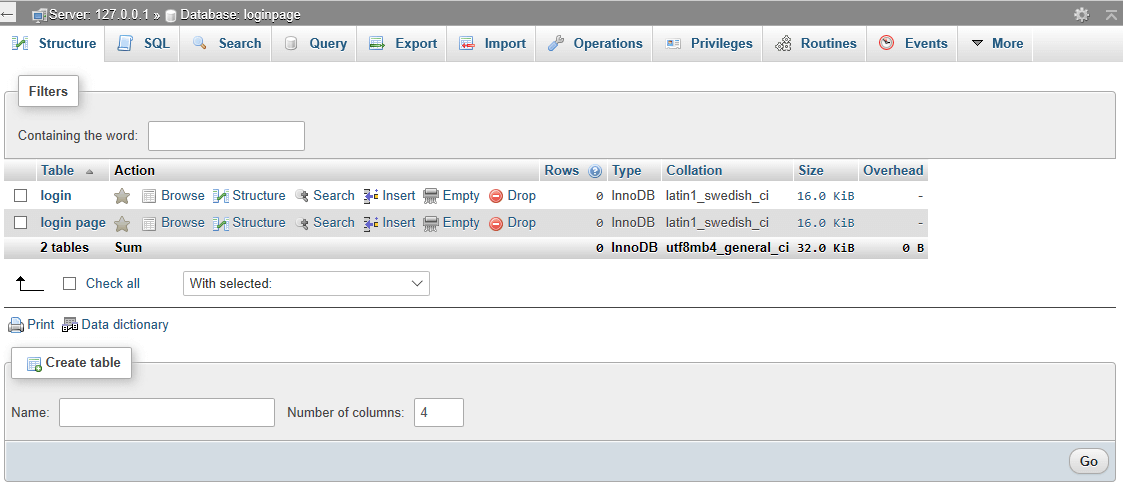
STEP 6- Now, we have to initialize our columns based on their type. Enter the names for each of your columns, select the type, and the maximum length allowed for the input field. Click on “Save” in the bottom right corner. The table with the initialized columns has been created. You can create any number of tables for your database.
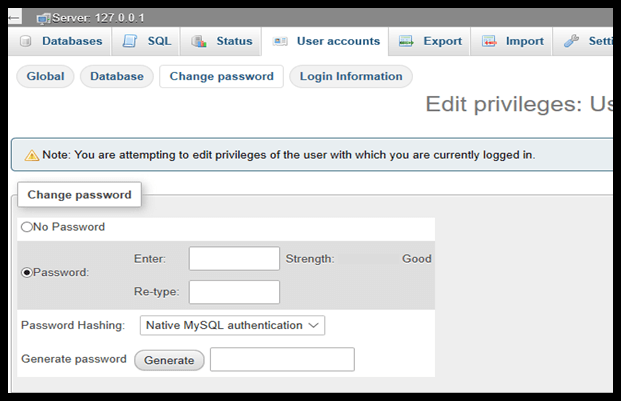
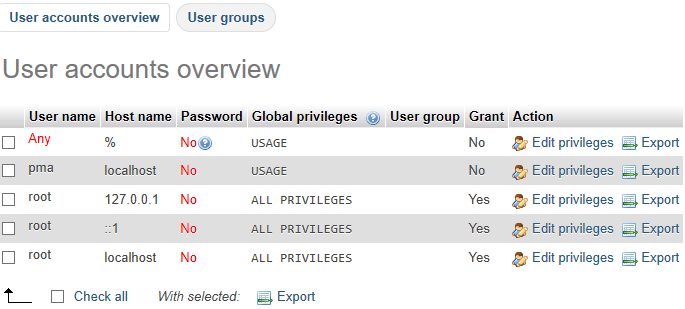
Controlling Access
In order to limit the audience in terms of users allowed to modify and read the data, you can set a password to the created database. In terms of default settings, the host’s username is “root” and there no password is provided. Follow the given steps to increase the privacy of your database:
STEP 1- Click on the “User Accounts” tab at the top of the page.

STEP 2- Press “Edit Privileges” under “Actions” option corresponding the Username= “root” and Hostname = “localhost”
STEP 3- Click on the tab ‘Change password’ and type your password in the provided field. Retype the password to confirm it and then finally click on the “Go.” Now the password has been set.