Creating Servlet Example in Eclipse
Eclipse is an open-source ide for developing JavaSE and JavaEE (J2EE) applications. You can download the eclipse ide from the eclipse website http://www.eclipse.org/downloads/.
You need to download the eclipse ide for JavaEE developers.
Creating servlet example in eclipse ide, saves a lot of work to be done. It is easy and simple to create a servlet example. Let’s see the steps, you need to follow to create the first servlet example.
- Create a Dynamic web project
- create a servlet
- add servlet-api.jar file
- Run the servlet
1) Create the dynamic web project:
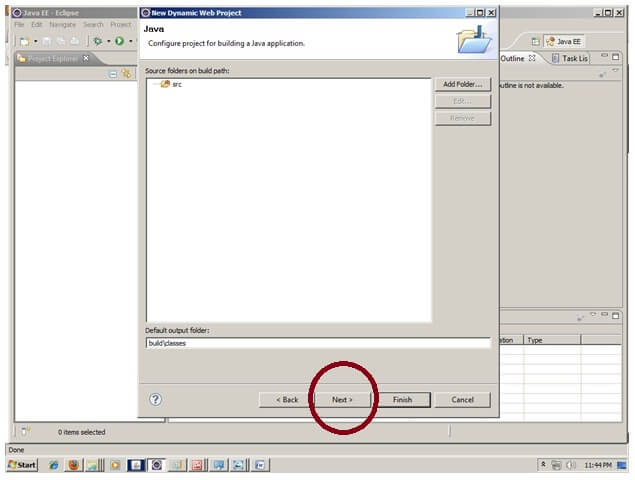
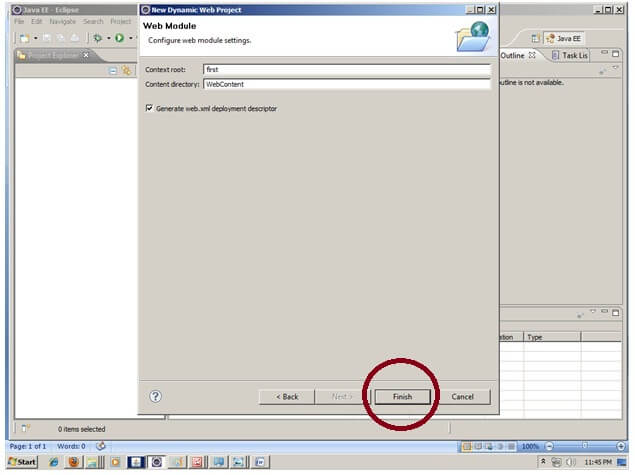
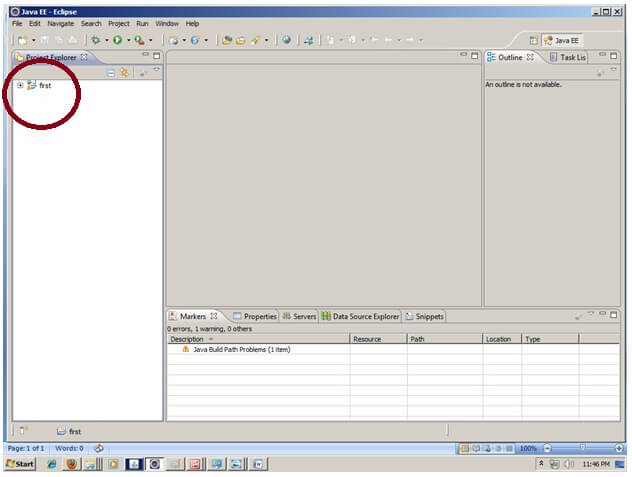
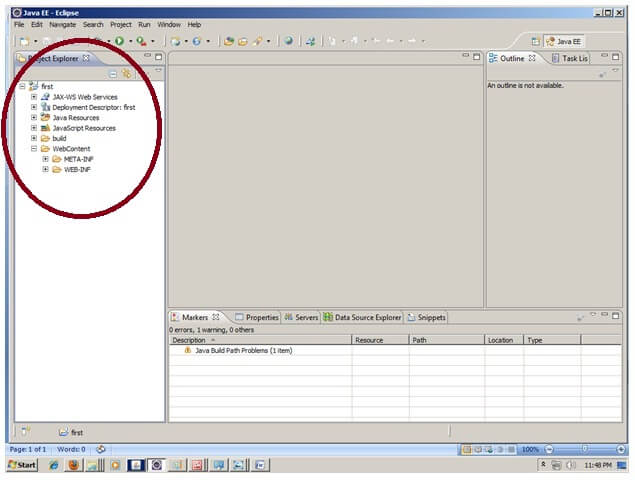
For creating a dynamic web project click on File Menu -> New -> Project..-> Web -> dynamic web project -> write your project name e.g. first -> Finish.


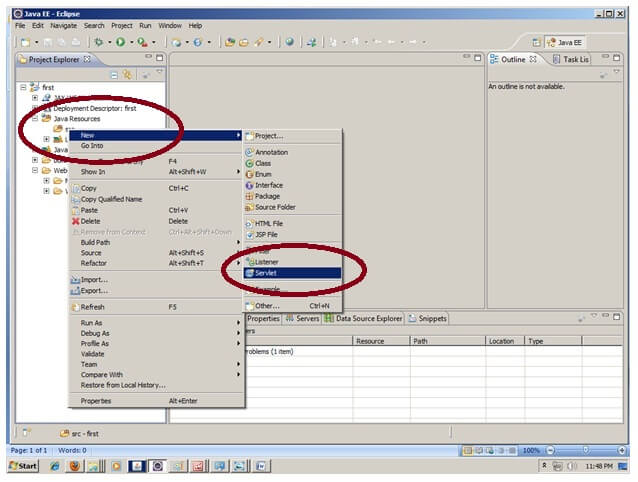
2) Create the servlet in eclipse IDE:
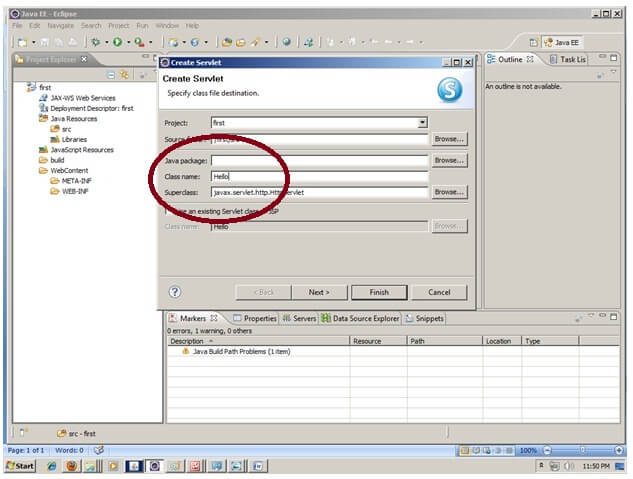
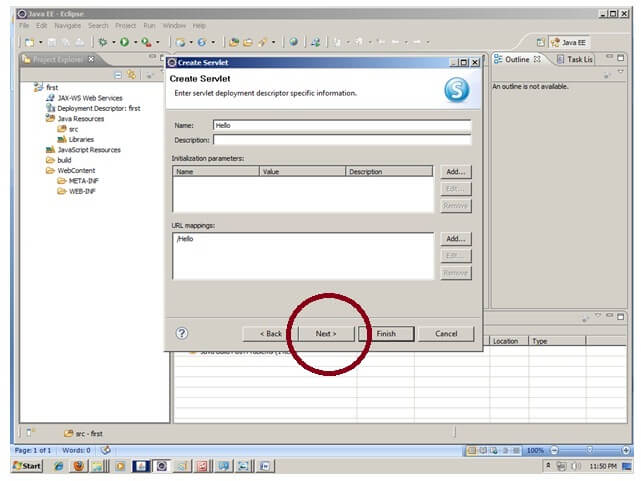
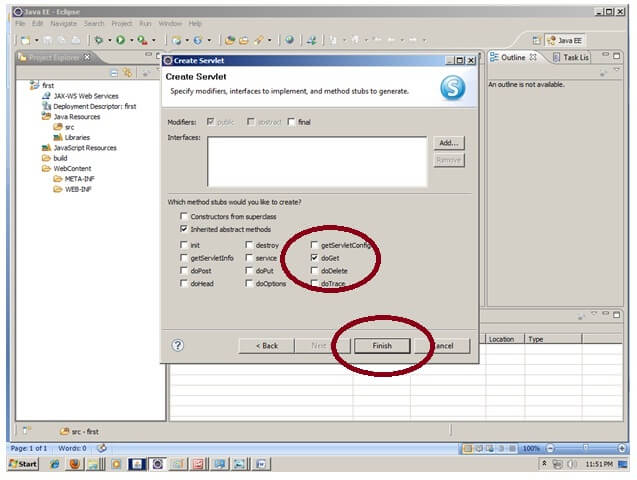
For creating a servlet, explore the project by clicking the + icon -> explore the Java Resources -> right click on src -> New -> servlet -> write your servlet name e.g. Hello -> uncheck all the checkboxes except doGet() -> next -> Finish.
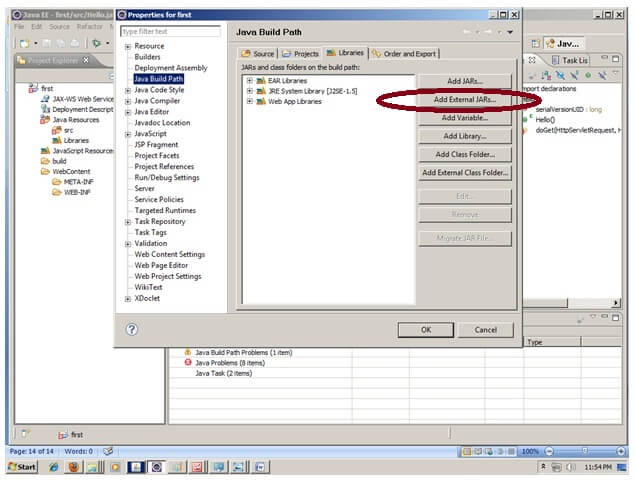
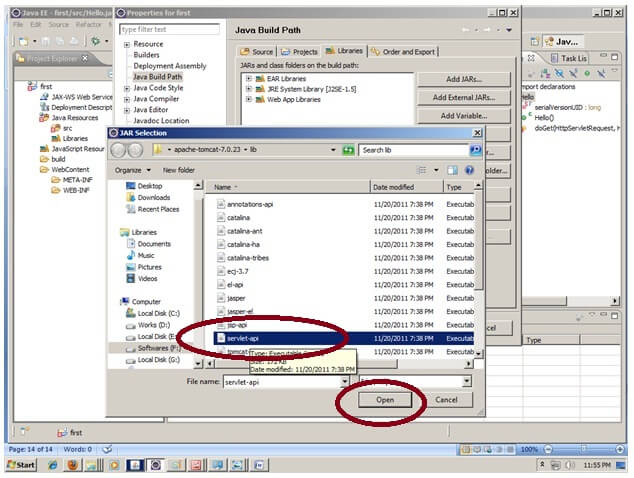
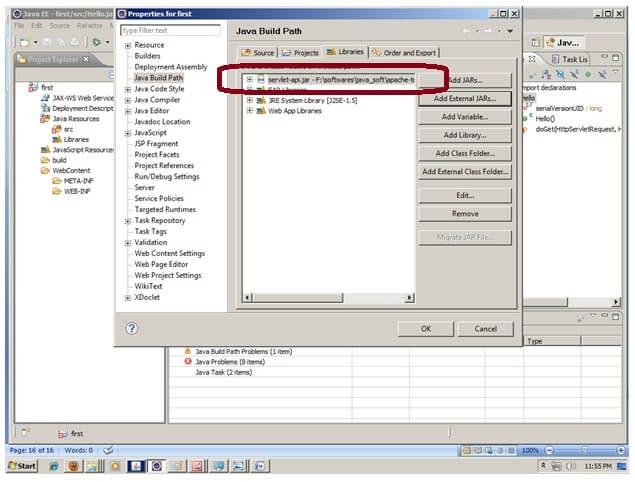
3) add jar file in eclipse IDE:
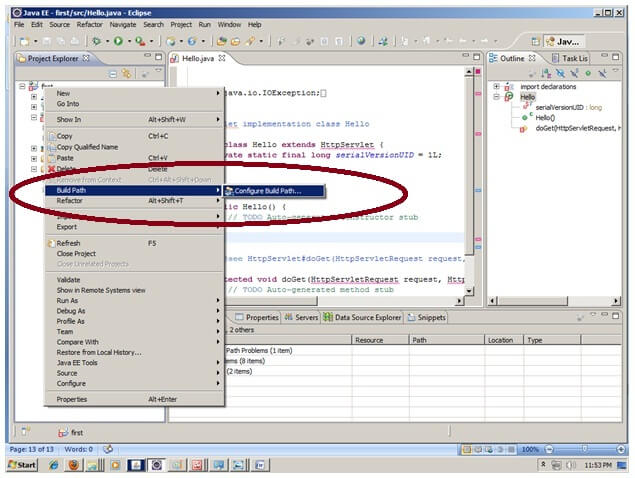
| For adding a jar file, right click on your project -> Build Path -> Configure Build Path -> click on Libraries tab in Java Build Path -> click on Add External JARs button -> select the servlet-api.jar file under tomcat/lib -> ok. |
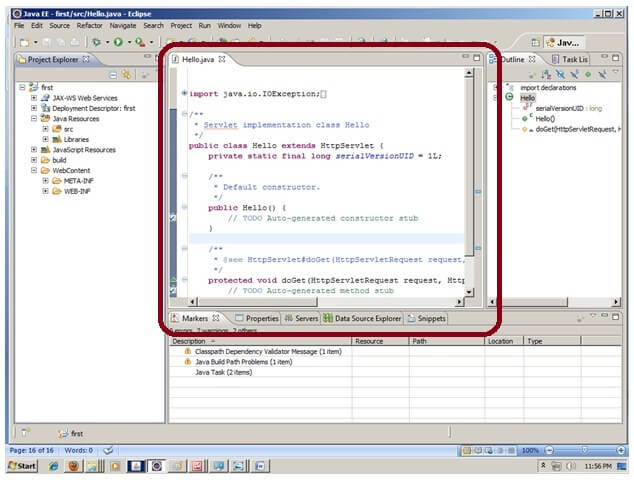
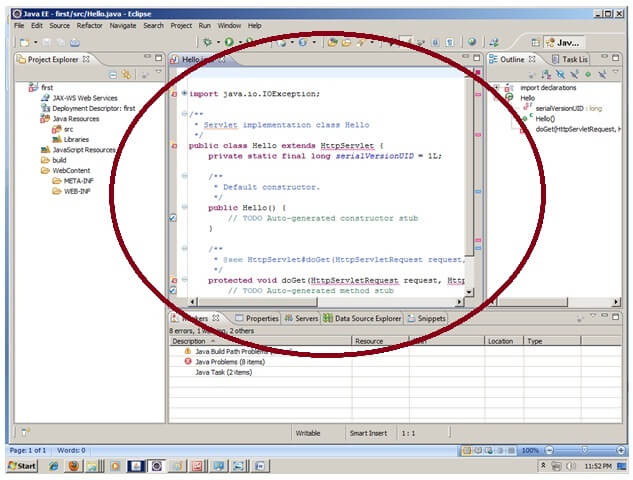
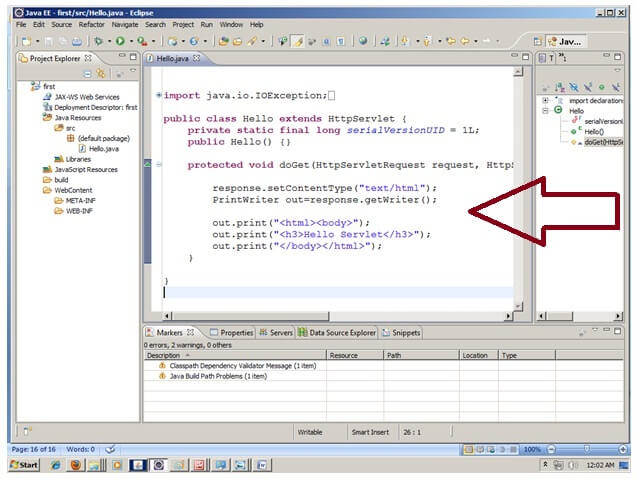
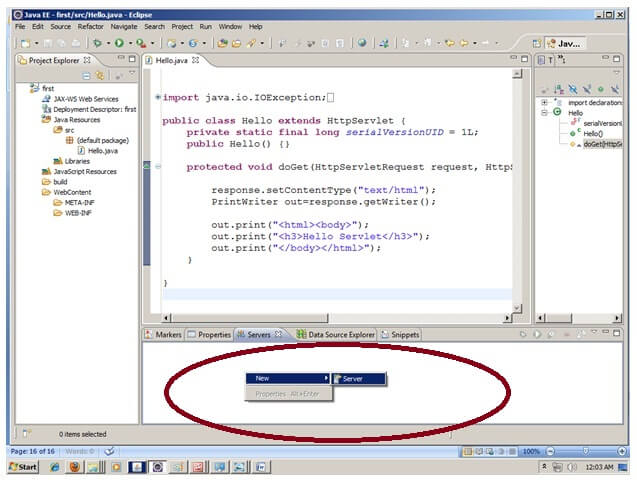
| Now servlet has been created, Let’s write the first servlet code. |
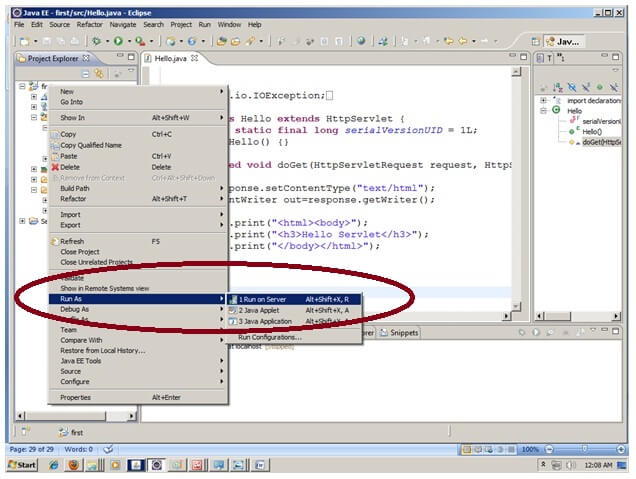
4) Start the server and deploy the project:
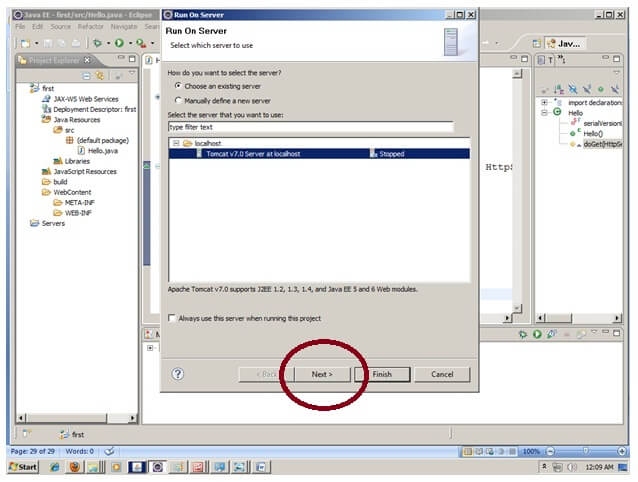
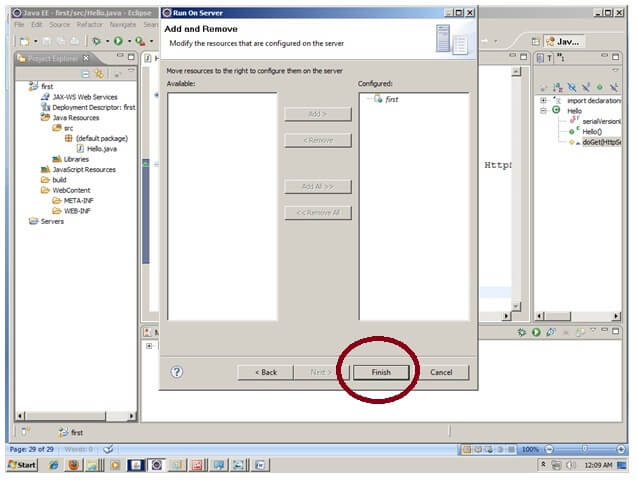
For starting the server and deploying the project in one step, Right click on your project -> Run As -> Run on Server -> choose tomcat server -> next -> addAll -> finish.
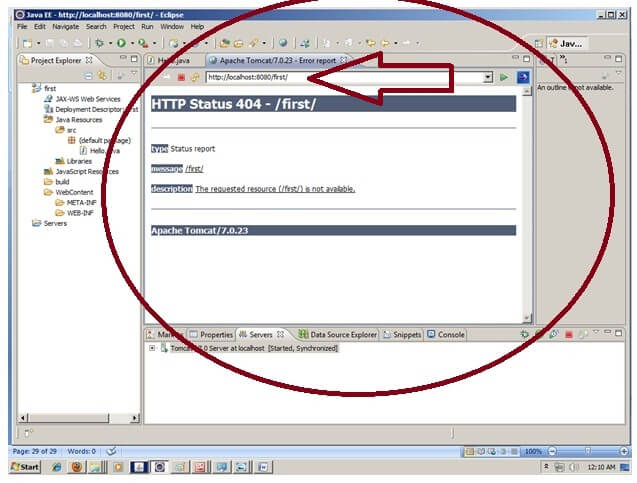
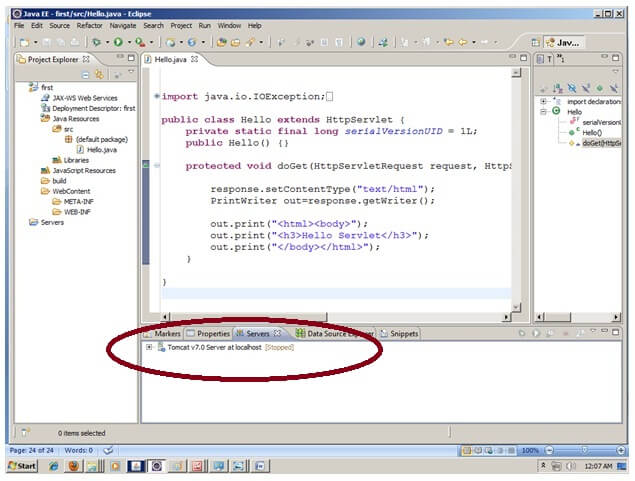
Now tomcat server has been started and project is deployed. To access the servlet write the url pattern name in the URL bar of the browser. In this case Hello then enter.

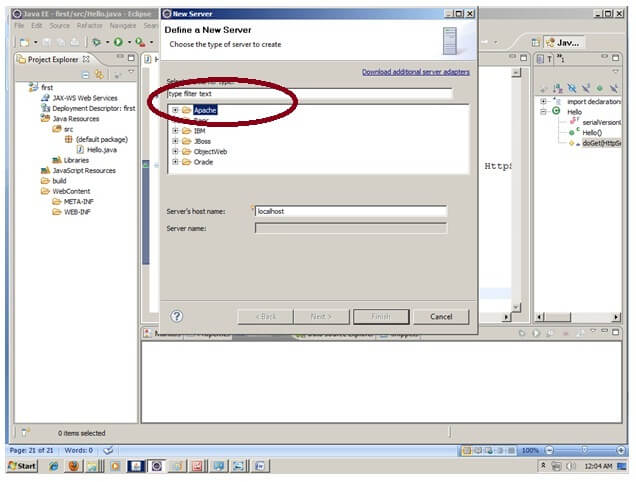
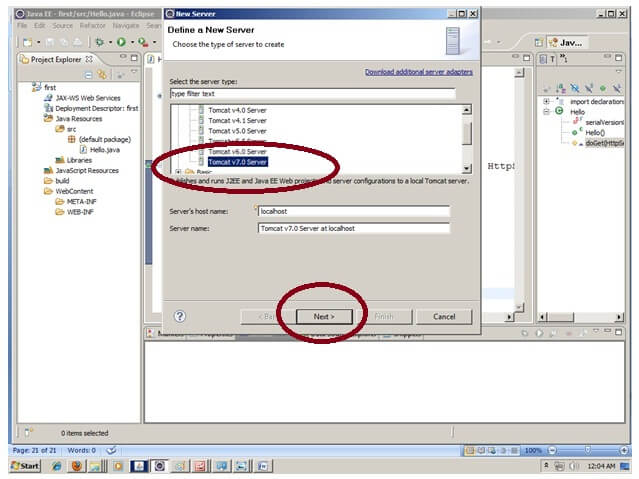
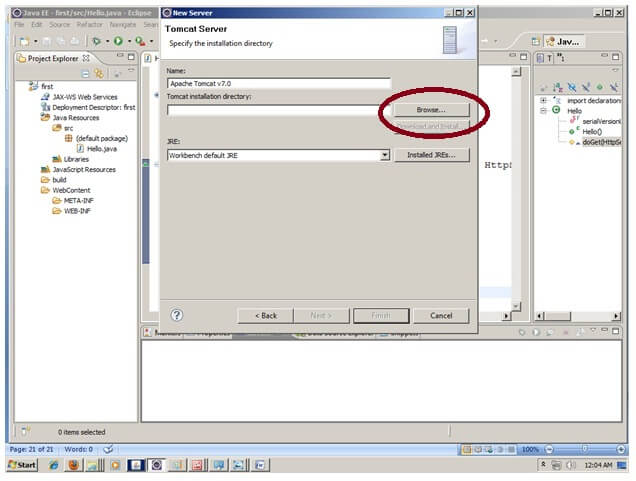
How to configure tomcat server in Eclipse ? (One time Requirement)
If you are using Eclipse IDE first time, you need to configure the tomcat server First.
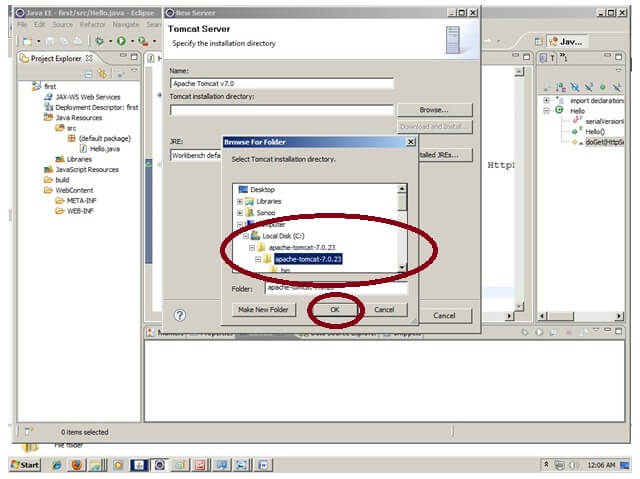
For configuring the tomcat server in eclipse IDE, click on servers tab at the bottom side of the IDE -> right click on blank area -> New -> Servers -> choose tomcat then its version -> next -> click on Browse button -> select the apache tomcat root folder previous to bin -> next -> addAll -> Finish.

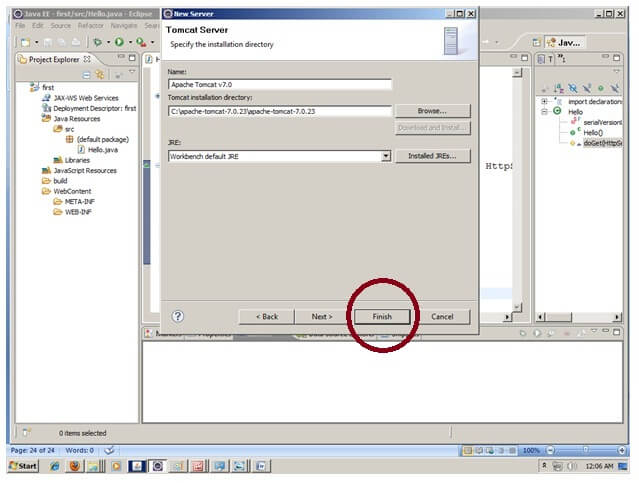
| Now tomcat7 server has been configured in eclipse IDE. |