Django Custom User Model
Django comes with an excellent built-in User model and authentication support. It is a primary reason most developers prefer Django over the Flask, FastAPI, AIOHttp, and many other frameworks.
But sometimes we are not happy with the User model or we want to customize according to the project requirements. Suppose we no longer want a username field at all. Or we want to take the user’s email instead of the default username. To do so, we need to customize our default Django User model.
In this tutorial, we will build the User Model from scratch. The one thing you should keep in mind is that customizing the Django defaults adds lots of complexity to the complex system. So try to stick with the default user model. But for the project requirements, we can do the default changes.
We will use the Django Build-in AbastractBaseClass which inherit by the custom class name.
If you are new to Django, then visit our Django tutorial.
Prerequisites
- Install Latest Django (2.2 +)
- Create Django project
- Do the basic configuration
- Create virtual environment
Creating Custom User Model in Django
Our first step is to create an app within the project using the following command.
The app will be created in the project directory. Now register the app to the settings.py file.
MyUserModel/setting.py
2. Creating Model for Custom User
Now we will create the custom user model in the models.py file. Let’s see the following code.
Let’s understand the above model; we created a class called CustomUser that inherits the AbstractbaseClass. Then, we added a field for email, is_staff, is_active, and date_joined.
- The username is set to be none because we want to authenticate the user by its unique email id instead of a username.
- The is_staff returns true if the user allows login to the admin panel.
- The is_active returns true if the user is currently active. If the user is not active, he/she won’t allow to log in.
- The USERNAME_FIELDS defines the unique identification for the User model – to email.
- The REQUIRED_FIELDS prompts the fields when we create a superuser by the createsuperuser command. It must include any field for which blank is False.
- The manager class object specifies that all objects for the class come from the CustomeUserManager.The has_permission returns true if the user has each of the specified permission.
3. Create the Model Manager
Django provides the built-in methods for the user manager. But if we are creating the custom user model, we need to override the default methods. Create a new file managers.py (can be vary) and create the User Model Manager. Below methods are provided by the BaseUserManager.
We created CustomManagerClass that inherits the BaseUserManager. It provides the below helper methods.
- The create_user() method creates, saves, and returns the User. It will automatically convert the email into the lowercase and the returned User object will have is_active set to true.
- The create_superuser() method sets the is_staff and is_active to True.
- The get_full_name() returns the user’s full name.
- The get_short_name returns the first_name of the user.
4. Register Custom User to setting.py
It is necessary to register the created custom user model to setting.py file otherwise Django will consider it as a custom user model. It will through an error. Open the setting.py file and register your custom user model.
In our case, it will be –
Now we can create and apply the make migration, which will create the new database that uses the custom user model. Let’s run the following command.
We will get the migration file as below.
As we can see that, there is no field of username because it was eliminated while creating the custom user model.
5. Create a Superuser
Run the below command to create superuser.
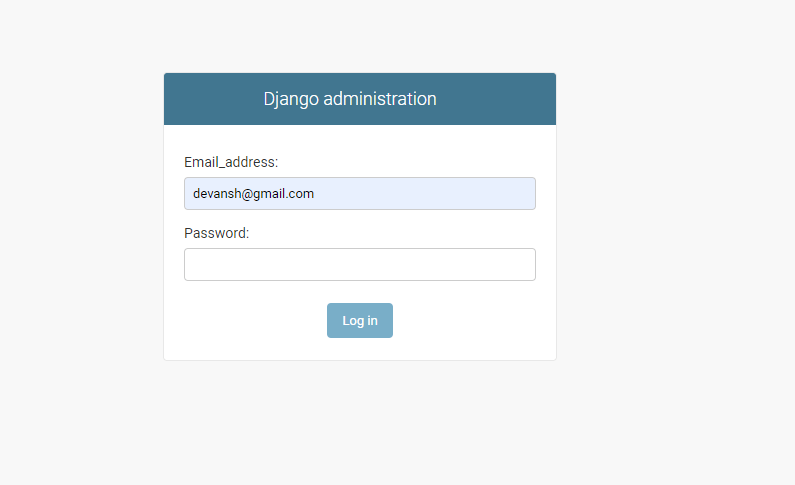
Above command will prompt the email and password field to create a superuser.
Email address: [email protected] Password: Password (again): Superuser created successfully.
Create Form to Store User Information
We will create a form using the default subclass UserCreationForm forms so that they can use the custom user model.
Let’s create a forms.py file in “MyUserModel”.
forms.py
The CustomUserCreationForm class inherits the UsecreationForm that consists of three fields – username, password1, and password2. The password1 matches to the password2, if both password matches, the validate_password() validates the password and sets the user’s password using set_password(). The password will be saved in the hashed format.
Now we will customize the Admin panel.
Custom Admin Panel
The default admin panel is quite useful and arranges the information efficiently but we can make it in our way by provides the required information. Let’s see the following code of the admin panel.
admin.py
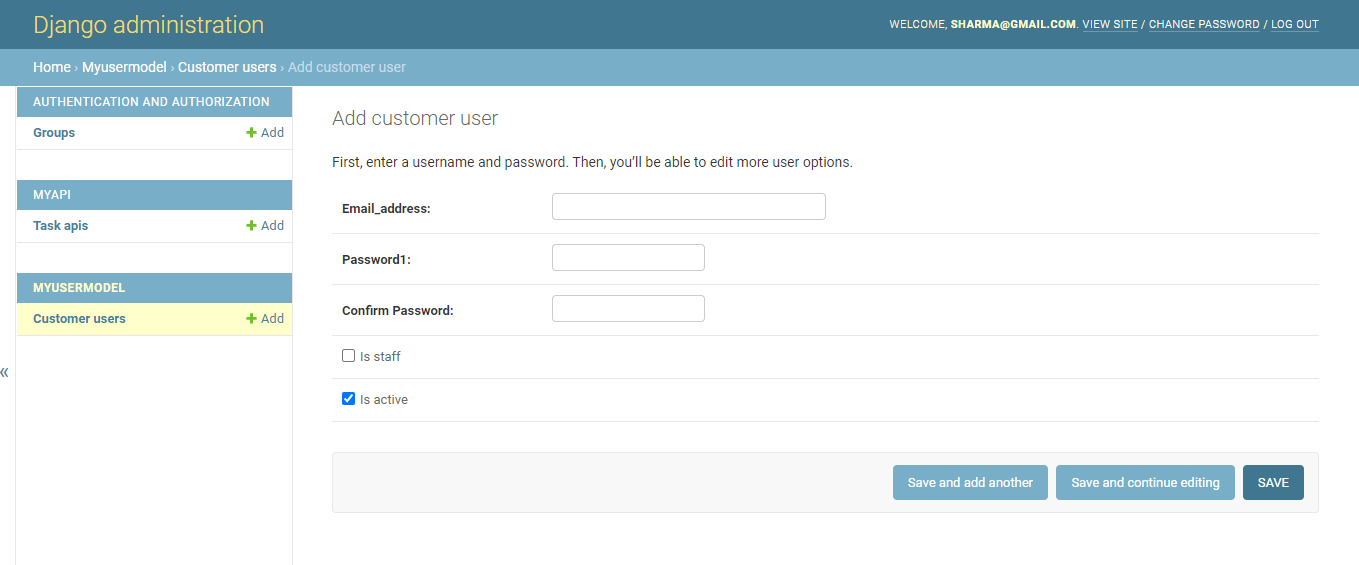
Now we are ready to create the new user. Run the following command and login to the admin panel with the super user credentials.
Once we login into the admin panel. We see ADD CUSTOM USER button, where create new users.
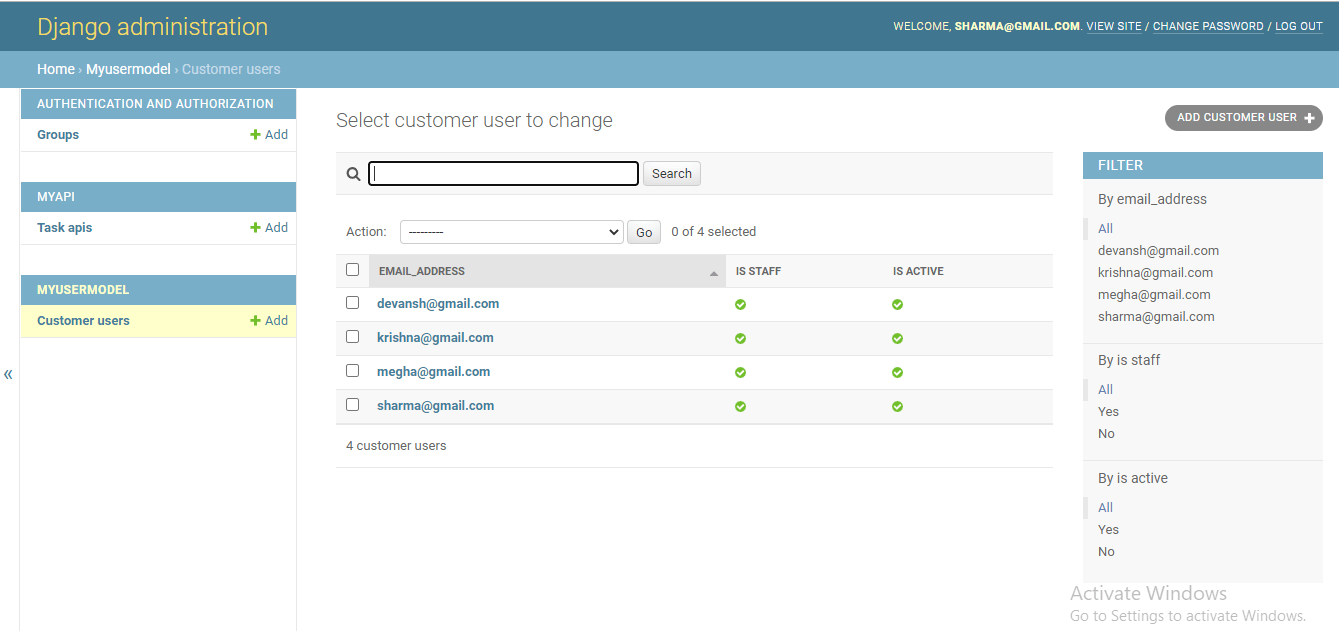
After creating some users the admin panel will look like as below.
Conclusion
Django is popular for its built-in functionality which saves the lot of time of the developer. But sometime we require such features that are not available in the built-in model. However, we can create them in own way. In this tutorial, we have created the custom user model by extending AbstractBaseClass. We have created manager class to manage the user object. You can create a new custom user model with the help of this tutorial. You can provide more authority to user and can make the fully featured User Model.