Eureka Naming Server
In the previous section, we have configured the Ribbon and distributed the load between the two services. In this section, we will set up the Eureka naming Server.
Naming server
The naming server is a computer application that implements a network service for responding to queries against a directory service.
Eureka naming server
Eureka naming server is a REST-based server that is used in the AWS Cloud services for load balancing and failover of middle-tier services.
Eureka naming server is an application that holds information about all client service applications. Each microservice registers itself with the Eureka naming server. The naming server registers the client services with their port numbers and IP addresses. It is also known as Discovery Server. Eureka naming server comes with the bundle of Spring Cloud. It runs on the default port 8761. It also comes with a Java-based client component, the eureka client, which makes interactions with the service much easier.
The need of naming server
We have another load balancer application, which is known as AWS Cloud. Because of its inherent nature, server ups and down. There is no middle-tier load balancer. Eureka naming server fills the gap between the client and the middle tier load balancer.
Suppose that we want to start another instance of currency-exchange-service that is CurrencyExchangeService3 and launch it on port 8002. Here a question arises, will ribbon be able to distribute the load to it?
If the Ribbon wants to distribute the load to the new server, we need to add it to the configuration. Based on the load, we can increase or decrease the number of instances of the services.
In this section, we will be able to increase or decrease the number of instances dynamically.
If we keep on changing in the CurrencyCalulationService, based on how many CurrenyExchangeService are active right, then, it becomes very difficult to maintain.
The Eureka naming server comes into existence when we want to make maintenance easier. All the instances of all microservices will be register with the Eureka naming server. Whenever a new instance of a microservice comes up, it would register itself with the Eureka naming server. The registration of microservice with the naming server is called Service Registration.
Whenever a service wants to talk with another service, suppose CurrencyCalculationService wants to talk to the CurrencyExchangeService. The CurrencyCalculationService first talk with the Eureka naming server. The naming server provides the instances of CurrencyExchangeService that are currently running. The process of providing instances to other services is called Service Discovery.
Service registration and service discovery are the two important features of the naming server. In the next step, we will set up a Eureka naming server.
Setting up Eureka naming server
There are a lot of steps that are involved in setting up the Eureka naming server are as follows:
- Create a component for the Eureka naming server
- Update the CurrencyCalculationService to connect to the Eureka naming server
- Connect CurrencyExchangeService to the Eureka naming server
- Configure the Ribbon
Once the instances of currency-exchange-service are registered with the Eureka naming server, then we will use the Ribbon to find the detail from the naming server. Let’s follow the steps specified above:
Create a component for the Eureka naming server
Step 1: Open Spring Initializr https://start.spring.io.
Step 2: Provide the Group name. We have provided com.tutoraspire.microservices.
Step 3: Provide the Artifact Id. We have provided netflix-eureka-naming-server.
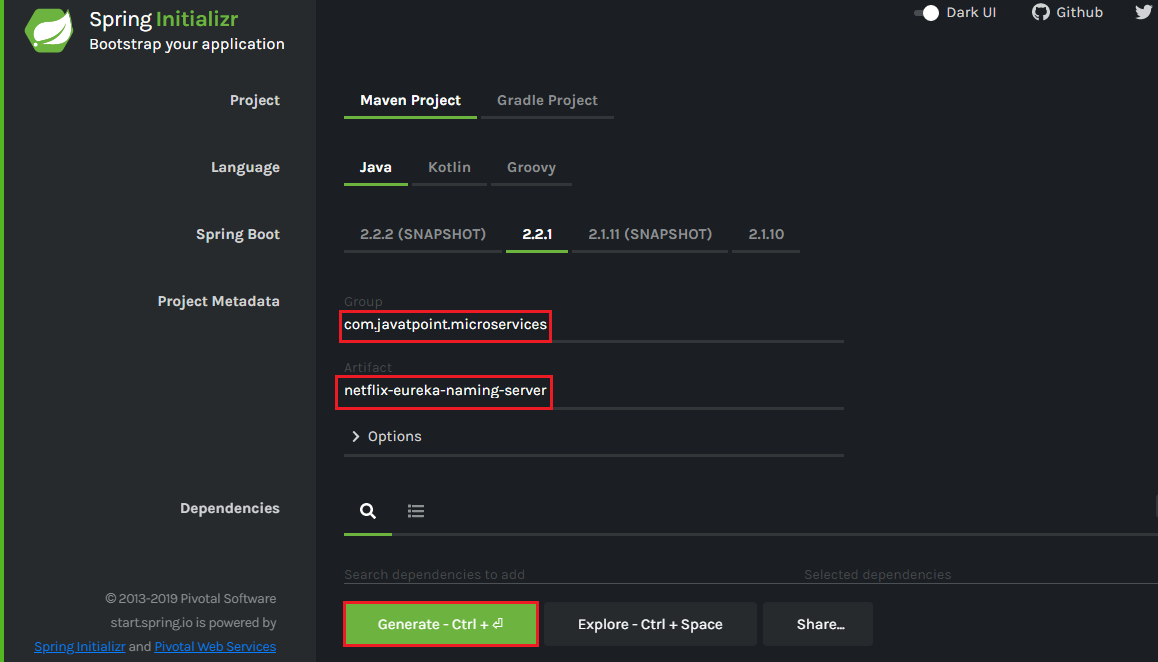
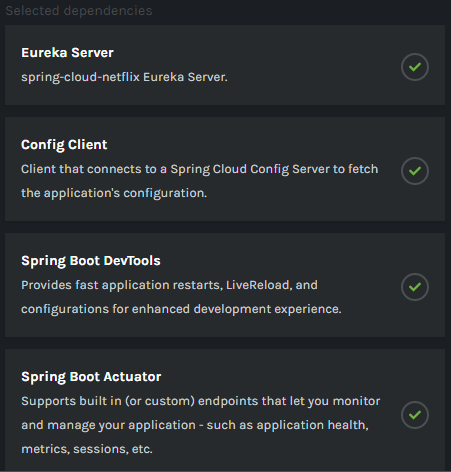
Step 4: Add the following dependencies: Eureka Server, Config Client, Actuator, and DevTools.
Step 5: Click on the Generate button. It downloads a zip file.
Step 6: Extract the zip file and paste the folder in the Spring Tool Suite (STS) workspace and then import it.
File -> Import -> Existing Maven Projects -> Next -> Browse -> Select the netflix-eureka-naming-server project -> Finish
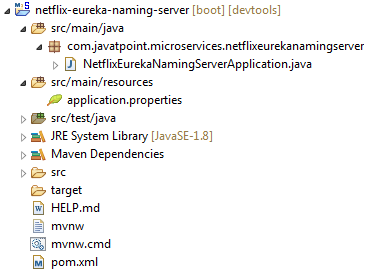
Step 7: Open the NetflixEurekaNamingServerApplication.java file and enable Eureka naming server by using an annotation @EnableEurekaServer.
NetflixEurekaNamingServerApplication.java
Step 8: Open the application.properties file and configure the application name, port, and eureka server.
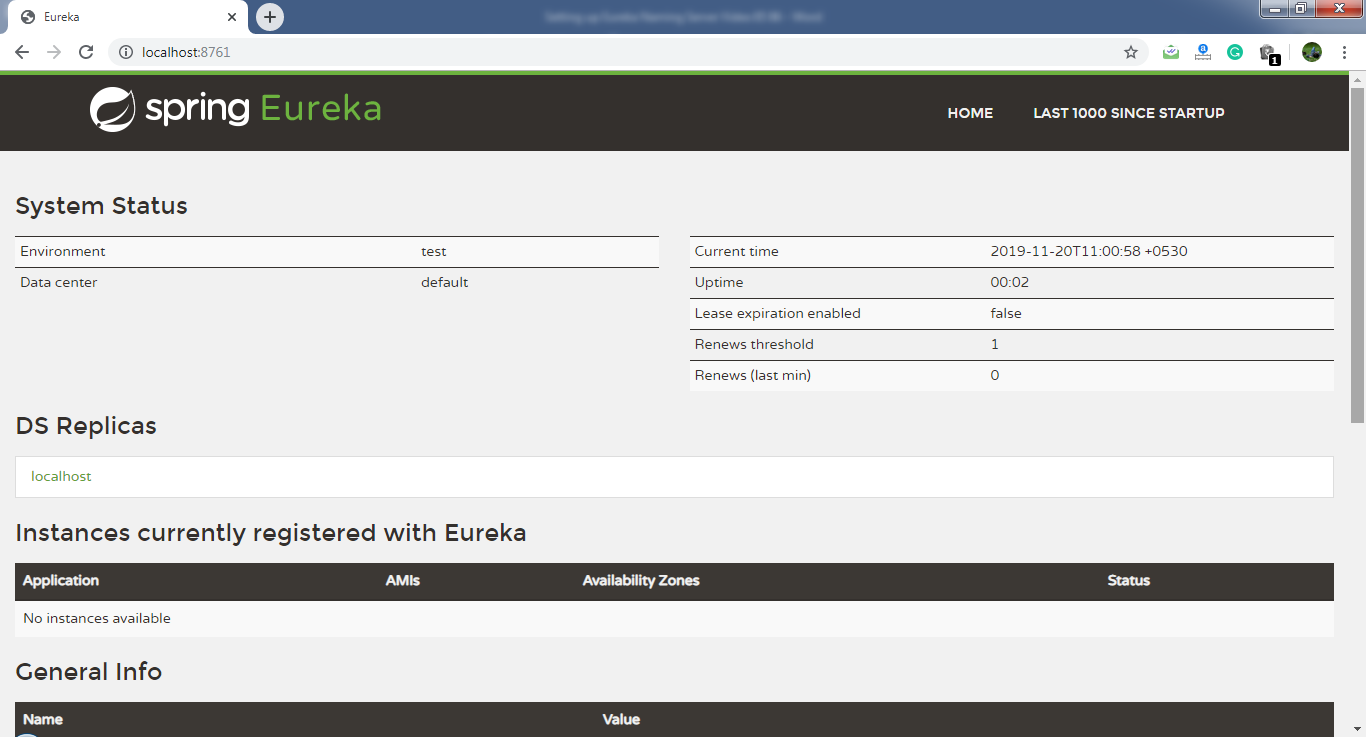
Port 8761 is the default port for the Eureka naming server.
Step 9: Run the NetflixEurekaNamingServerApplication.java file as Java Application.
Step 10: Open the browser and type the URL http://localhost:8761. It shows the Eureka server UI.
In this section, we have created a component Eureka naming server. In the next step, we will connect the microservices with the Eureka naming server.