Formatting text in CorelDraw
There are so many controls and tools available in CorelDRAW that can be used to format the text inside the frames, entire paragraphs, and individual characters.
This chapter includes the following essential topics:
- Selecting fonts and typefaces
- Formatting characters
- Change the text color
- Kerning the character’s range
- Adjusting paragraph and line spacing
- Inserting bullets to the text
- Adding drop caps
- Aligning text
- Hyphening text
Selecting fonts and typefaces
Text is an essential component in the document’s layout and design. CorelDRAW allows us to select the typeface. It is best for our project. We can describe the font style and size. In addition, we can apply the OpenType font for achieving a distinctive and unique style.
Typefaces vs. fonts
“Typeface” and “Font” are two terms of typography type that are mostly applied interchangeably, however they don’t contain similar meaning. The fonts are the group of various characters that contains symbols, numbers, and letters of an individual variation of the typeface, like italic or bold. The typeface is called the font family also.
| Font | Typeface (Font family) |
|---|---|
| Helvetica Bold-Italic | Helvetica |
| Normal | Times New Roman |
| Verdana Bold-Italic | Verdana |
To modify any font
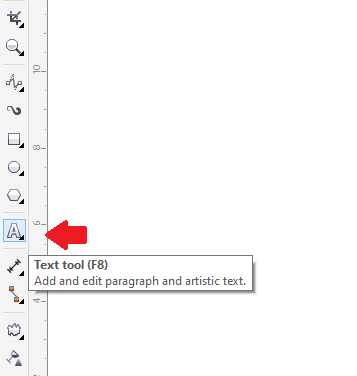
1. Select the Text tool, and choose the text’s block or character.
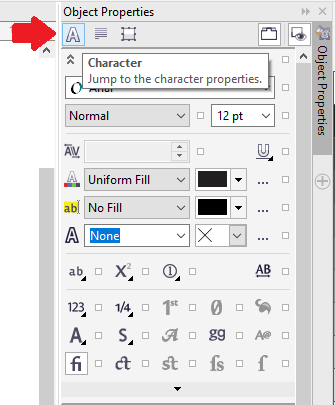
When the Object properties docker isn’t open, press Window > Dockers > Object properties.
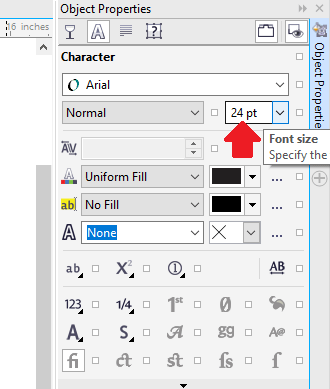
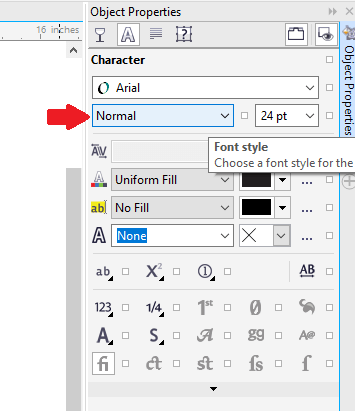
2. Within the Object properties docker, press the Character button for showing some character-related options.
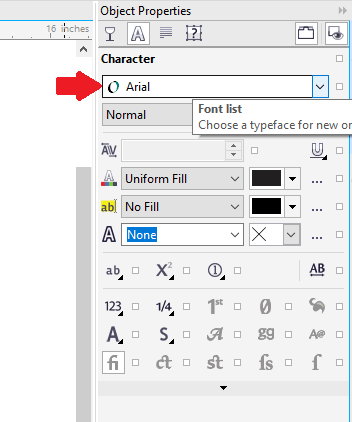
3. Within the Object properties docker’s Character area, implement anyone task from the below:
- Select the typeface through the Font list box to select the typeface.

- Type the value inside the Font size box to set the font size.
- Select the style through the Font style list box to modify a font style.
Formatting characters
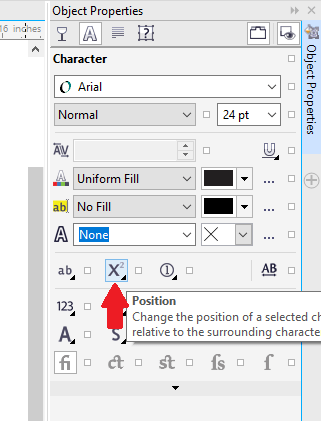
We can modify the appearance and position of characters by showing them as superscript or subscript, which is helpful in designs with some scientific notations. When we choose the OpenType font which supports superscripts and subscripts, we can use various OpenType features.
To add subscript and superscript text
- Select the Text tool, and choose the text’s block or character.
When the Object properties docker isn’t open, press Window > Dockers > Object properties. - Within the Object properties docker, press the Character button for showing some character-related options.
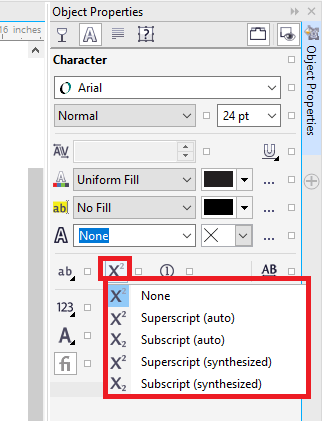
- Within the Object properties docker’s Character area, press the Position button, and select any one option from the below:
- None
- Superscript (auto)
- Subscript (auto)
- Superscript (synthesized)
- Subscript (synthesized)
Change the text color
We can quickly modify both the outline and fill color of the text. We can modify the background, outline, fill color of the text. We can modify an individual character’s color, every character, or text’s block inside the text object.
To quickly modify the text object’s color
1. Select the Pick tool, and press the text object to choose it.
2. Implement the task through the following options:
- Click a color swatch over the default color palette or drag any color swatch for the text object to fill some characters inside the text object along with a single color.
- Right-click a color swatch over the default color palette or drag any color swatch for a character’s edge inside a text object to use the outline color to every character inside the text object.


Kerning the character’s range
We can kern the selected character pairs. Kerning can be defined as two objects repositioning to balance an optical space among the objects. For example, the kerning can be used to reducing the space within the character’s pair like TA, VA, WA, or AW. Such a pair of characters called “kerning pairs.” The kerning raises the readability and enables the letters to look proportional and balanced.
To kern the text
- Select the Text tool, and choose the characters which we wish to kern.
When the Object properties docker has not opened, press Window > Dockers > Object properties. - Within the Object properties docker, press the Character button for showing the character-related options.
- Within the Object properties docker’s Character area, type the value inside the Ranging kerning
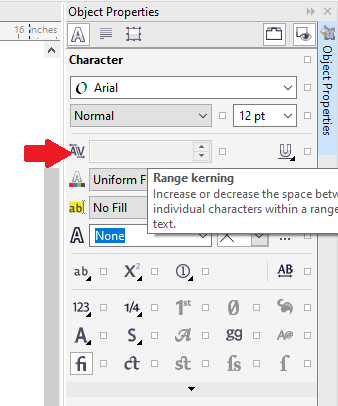
Positive values can raise the spacing among characters; negative values can reduce the spacing among characters.
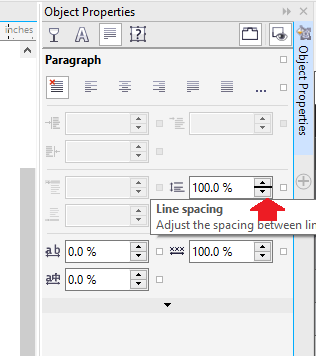
Adjusting paragraph and line spacing
We can modify the spacing among the text’s lines, which is called “Interline spacing” or “Leading.” CorelDRAW allows us to adjust the text object’s line spacing by selecting the Shape tool.
To adjust the interline spacing
1. Select the Text Tool, and choose the paragraph text.
When the Object properties docker has not opened, press Window > Dockers > Object properties.
2. Within the Object properties docker, press the Paragraph button for showing the paragraph-related options.
3. Within the Object properties docker’s Paragraph area, select anyone measurement’s units from the list box of Vertical spacing units:
- % of Pt.size: It enables us to use the percentage value which is relevant to the height of a character.
- % of Char height: It enables us to use the percentage value which is relevant to the point size of a character.
- Points: It enables us to use the points.

4. Fill the value inside the Line spacing
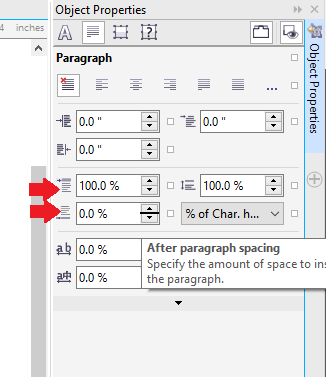
To adjust a space among paragraphs
1. Select the Text Tool, and choose the paragraph text.
When the Object properties docker has not opened, press Window > Dockers > Object properties.
2. Within the Object properties docker, press the Paragraph button for showing the paragraph-related options.
3. Within the Object properties docker’s Paragraph area, select anyone measurement units from the list box of Vertical spacing units for line spacing.
4. Fill the value inside anyone box which are as follows:
- After paragraph spacing: It enables us to describe the space amount to add below any paragraph text.
- Before paragraph spacing: It enables us to describe the space amount to add above any paragraph text.
Inserting bullets to the text
We can apply a bulleted list to format the information. We can wrap the text all around the bullets, or we can offset the bullet from the text for creating the hanging indent. In CorelDRAW, we can customize the bullets by modifying the distance through text, position, and size. Also, we can modify the spacing among elements inside the bulleted list. We can remove the bullets without removing any text.
To insert bullets
1. Select the Text Tool, and choose the paragraph text.
When the Object properties docker has not opened, press Window > Dockers > Object properties.
2. Within the Object properties docker, press the Paragraph button for showing the paragraph-related options.
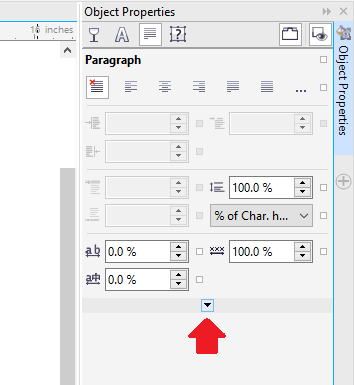
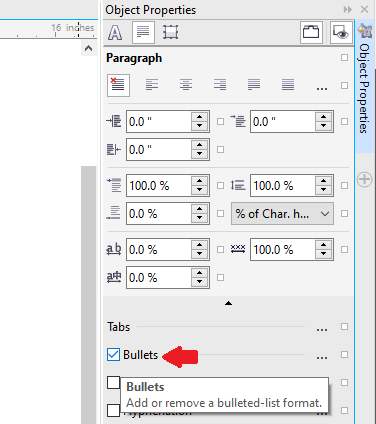
3. Within the Object properties docker’s Paragraph area, click on the Arrow button positioned at the Paragraph area’s bottom to show some other options.
4. Enable the checkbox of Bullets.
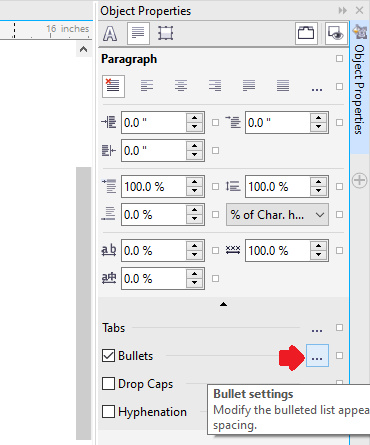
5. Press the Bullet settings button, positioned to the Bullets checkbox’s right side.
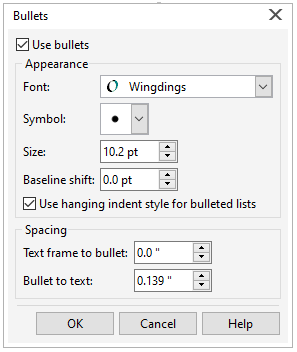
6. Within the Bullet dialog box, implement anyone task from the below tasks:
- Select the Preview checkbox to preview the text with some bullets.
- Type the value inside the Size box to set the bullet size.
- Type the value inside the Baseline shift box to adjust the bullet position.
- Type the value inside the Bullet to text box to set the text and bullet distance.
Adding drop caps
Using drop caps, called “initial caps” also, to paragraphs extends an initial character and insets these characters into the text’s body. We can customize the drop cap through modifying distinct settings. We can remove a drop cap without removing any letter.
To insert the drop cap, follow the below steps:
1. Select the Text Tool, and choose the paragraph text.
When the Object properties docker has not opened, press Window > Dockers > Object properties.
2. Within the Object properties docker, press the Paragraph button for showing the paragraph-related options.
3. Within the Object properties docker’s Paragraph area, click on the Arrow button positioned at the Paragraph area’s bottom to show some other options.
4. Enable the checkbox of Drop caps.
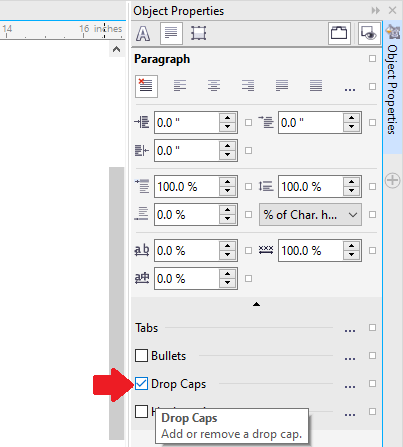
5. Press the Drop caps settings
6. Within the Drop cap dialog box, implement anyone task from the below tasks:
- Inside the Appearance area, fill the value within the Number of lines drooped box to describe the line’s number next to the drop cap.
- Inside the Appearance area, fill the value within the Space after drop cap box to set the text’s body and drop cap distance.
- Select the Preview checkbox to preview the drop cap.
- Inside the Object properties docker’s Paragraph area, disable the checkbox of Drop caps to remove the drop caps.

Aligning text
In CorelDRAW, we can align the text in several ways. We can align the paragraph text vertically and horizontally. We can align the paragraph text along with a baseline grid.
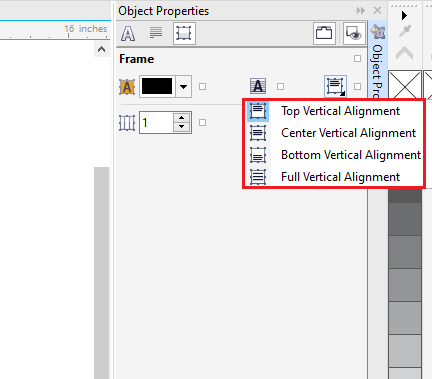
To vertically align the paragraph text
1. Select the Pick tool, press the text frame.
2. Inside the Object properties docker, press the Frame button for showing various frame-related options.
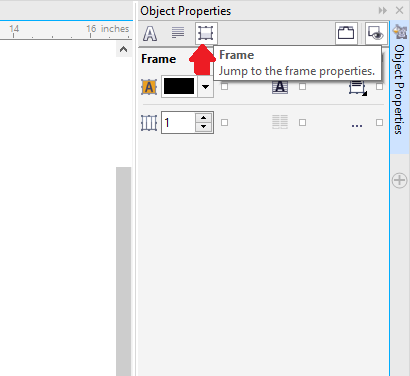
3. Inside the Object properties docker’s Frame area, select the alignment option through the Vertical alignment list box.
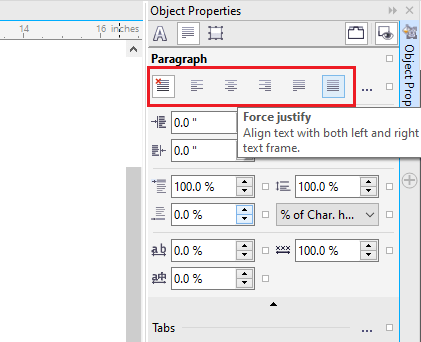
To horizontally align the paragraph text
- Do anyone from the following options:
- Select the Text tool, choose any text that we wish to align.
- Select the Pick tool, press the text frame, or artistic text object whose content we wish to align.
- Inside the Object properties docker, press the Paragraph button for showing various paragraph-related options.
- Inside the Object properties docker’s Paragraph area, select anyone from the following-mentioned options:
- Align left: It aligns the text along with the artistic text’s bounding box or text frame’s left side.
- No horizontal alignment: It uses the settings of default alignment.
- Center: It centers the text in a text frame.
- Full justify: It aligns the text, along with the last line exception, along with the text frame’s right or left sides.
- Align right: It aligns the text along with the artistic text’s bounding box or text frame’s right side.
- Force justify: It aligns the text, containing the last line, along with the text frame’s right or left sides.
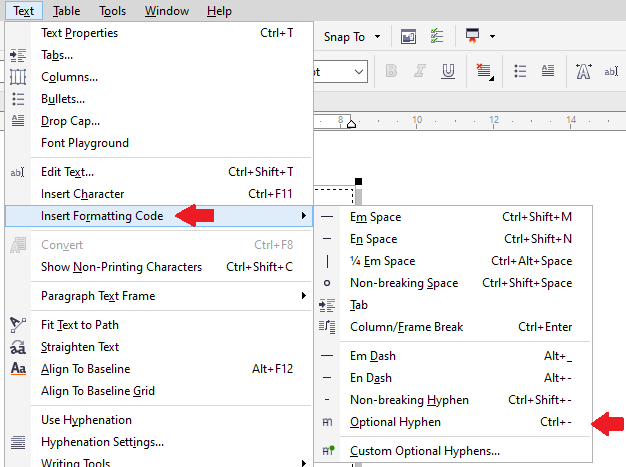
Hyphening text
It can be applied to break the word when an entire word is not fitted at the line’s end. We can automatically hyphenate with the use of the definition of the preset hyphenation in combination to our hyphenation settings. We can add the optional hyphen inside the word to generate a unique word at a line’s end.
To add the optional hyphen
- Select the Text tool, press in any word where we wish to locate an optional hyphen.
- Press Text > Insert formatting code > Optional hyphen.