GIMP DDS Plug-in
The DDS is a raster-based image format. The DDS stands for Direct Draw Surface; it is a file format developed by Microsoft. It is useful for storing the compressed and uncompressed files having graphical textures, and cubic environment maps data files. It uses the “.dds” file extension.
The DDS file can also be used to save the Windows desktop backgrounds and wallpapers. Mostly it is used to save the Windows textures and environments.
GIMP is a great image editor tool that supports several file formats, including JPG, PNG, PDF, PSD, GIF, and so on. It provides support for DDS image formats by using an external plug-in.
The plug-in support in GIMP makes it a more advanced image manipulation program. We can extend its functionality by adding plug-ins from external resources.
In this section, We are going to discuss how to use the DDS plug-in in GIMP. Further, we will see how to download and add it to GIMP.
How to Download GIMP DDS Plug-in
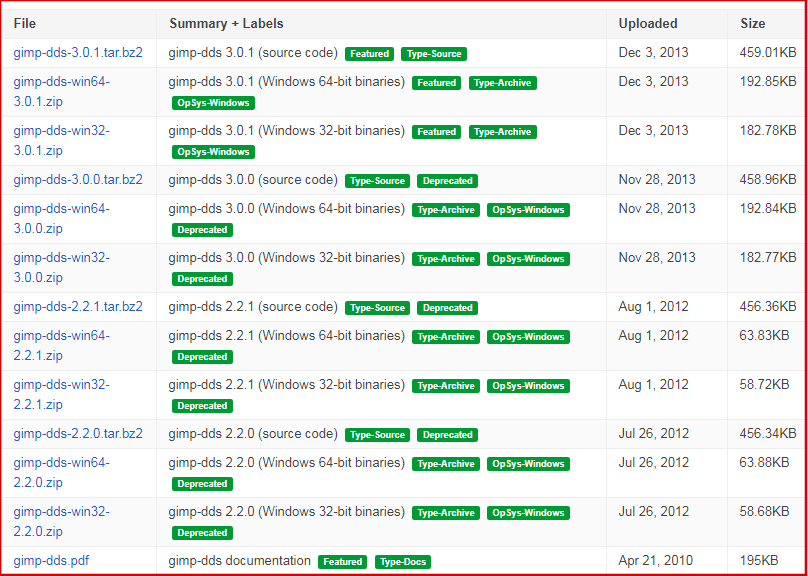
To download the GIMP DDS plug-in, follow this link and select the required format. For Windows, select the required format and, for Linux, select the required format according to Linux distribution.
How to Add the DDS plug-in in GIMP
To add the DDS Plug-in in GIMP, extract the plug-in file and paste it into the GIMP’s default plug-in folder. For example, in Windows, it should be “C:Program FilesGIMP 2libgimp2.0plug-ins”. For Linux, see how to add plug-in in Linux. Verify the right folder before proceeding further because it will not work if it is not placed in the right folder.
Now, paste the file in the default folder. Here, we can use the DDS plug-in in GIMP. To use it, restart the GIMP.
How to save Image in DDS format
As we have installed the DDS plug-in, now, we can save our image in DDS format. Before saving the image, read the general instruction for saving the image:
General Instruction for saving the image: To save an image using the DDS plug-in is a straightforward task, but some things should be kept in mind because later, they can create confusion or issues while saving the image. It happens for the images having multiple layers.
The easiest way to save the image is to composite all layers into a single layer. The composition of layers can be done by using the below tools:
- The Flatten Image Option from the Image menu
- Merge Visible Layers option from the layers menu
- Deleting all layers except the final one
We must perform one of the above task to save our image. Now, we can easily save our image without any issue.
To save the image in DDS formats, follow the below steps:
Step1: Open or Create Image
To open or create an image, select the Open or New option from the file menu. To create an image, select the New option and specify the image properties and click OK to create.
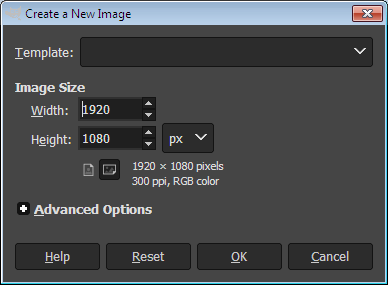
It will create a blank Image.
Step2: Draw or Edit Image
Draw the image using the various tools and filters available in GIMP.
Step3: Save the Image in DDS file
After drawing or editing the image, we can save it in the DDS file using the “.dds” file extension. To save it as a DDS file, select the Export As option from the File menu and specify the file name and extension.
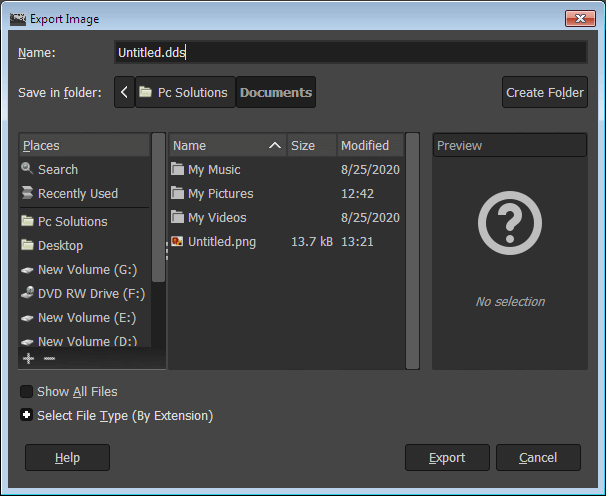
Or we can choose the DDS file type by expanding the Select File Type option from the bottom of the above Export As window. It will list the entire supported image format in GIMP.

Step4: Verify the File Type
It will open a dialog window to verify the option, click OK to continue.
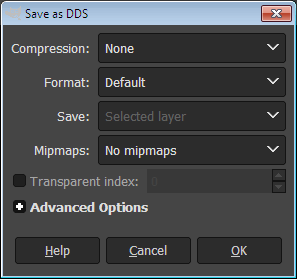
It will save the DDS image file in our specified directory. We can use it and share it now. Usually, these image files can be used as desktop backgrounds or wallpapers in Windows. The DDS images can not be opened by the general image viewer. To open a DDS image, we must have a DDS Viewer application. The DDS image can be edited or converted using GIMP, Photoshop or any other program that supports the DDS files.