GIMP Draw Arrow
Arrow is an essential and integral part of the image drawing. Most of the time, we need to draw arrows to our images for specifying or denoting something. There is no direct tool in GIMP to draw an arrow. But, as we know about the beauty of the GIMP that it supports plugins & brushes. We can draw an arrow using the plugins and brushes.
Drawing an arrow seems impossible in GIMP until we draw it. It is a straight forward process; all we need to install a proper plugin or brush. Several plugins and brushes are available for GIMP that allow us to draw an arrow on our images. We can draw different types and different sizes of arrows.
In this topic, we will discuss different methods to draw arrows.
GIMP Plugin for Drawing Arrow
One of the most acceptable plugins for the Drawing arrow is “Arrow set size.” Unfortunately, it is removed from the GIMP registry. The related link to arrow set size results in the blank page. Most of the blogs and tutorials provide a dead link. But, we can download it from this link. At the bottom of this post, we can find the related download link.
![]()
We can download it from the above link. However, there are many other ways to draw an arrow.
Download it and add it to GIMP’s Scripts folder. To install it in GIMP, open the Edit menu and navigate to Preferences. Here we can find settings and default locations for the GIMP.
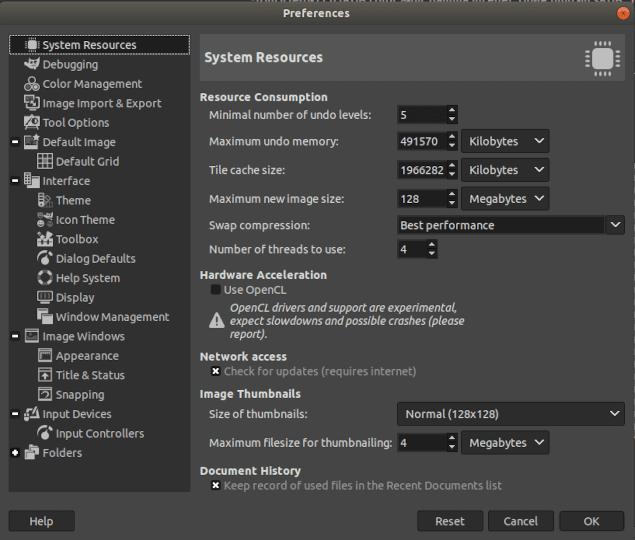
Now, expand the Folders menu. Here we can find the default folders of GIMP.
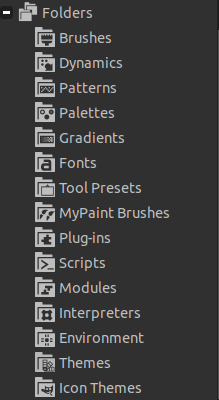
Now, select the Scripts option. It will display the default folder for the Scripts.
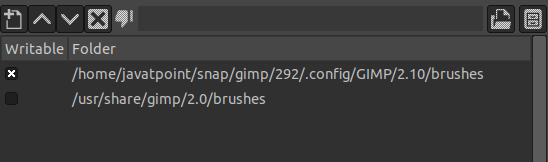
Navigate to this path and paste the arrow-set-size.scm file here and refresh scripts from the Filters-> Script-fu menu. If we are still unable to find the arrow option in the Tools menu, restart the GIMP.
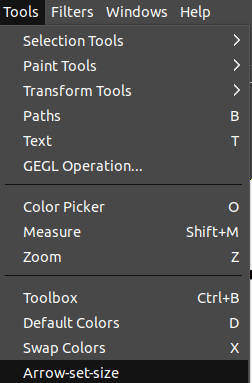
After a successful installation, we can find the arrow set size option in the Tools menu.
We have successfully installed the arrow plugin. Now, understand how to draw arrows:
How to Draw Arrow In GIMP
Drawing arrow in GIMP is a straight forward process; follow the below steps to draw an arrow using GIMP.
Step1: Create an image
The first step is to create or open an image. To create an image, navigate to File-> New menu and provide the image properties such as background, dimension, etc.

Step2: Select the path tool
Now, select the path tool from the Tools-> Path menu, or we can hit the B key.
Step3: Select arrow endpoints
select the two points on the image canvas where we want to draw arrow:

Step4: Select the set arrow size tool
Now, select the set arrow size tool from the Tools menu. It will open a dialog window to define the arrow properties:
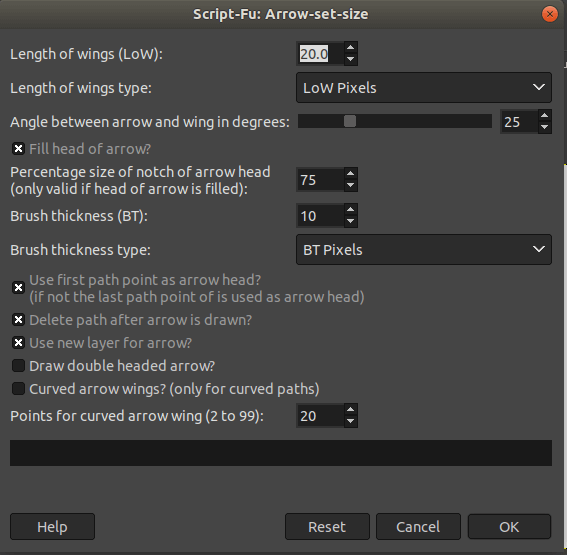
select the length, brush thickness and other options from this menu and click OK. It will draw an arrow on the specified path.

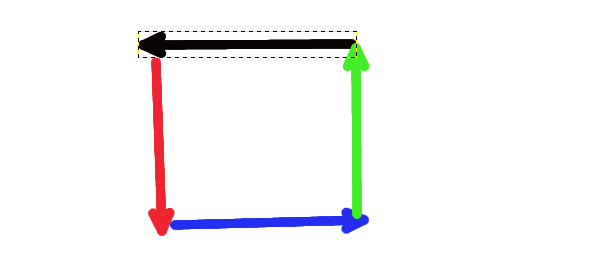
We can draw different types, colors, sizes of arrows using this tool:
Draw Arrows using Brushes
we can draw arrows using arrow brushes. However, we found the most convenient way of drawing arrows by using the plugin. But, the brushes also work fine. Several brushes are available on the web for drawing arrows.
One of the popular brushes are tango brushes; download it from here. Install it as we have installed the plugin. The only difference is that we have to paste the set up in the brushes folder.
After succesfull installation, restart GIMP.
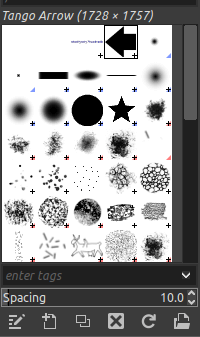
Now, select the Paintbrush tool from the Tools-> Paint Tools menu. And select the arrow brush from the brushes dockable dialog:
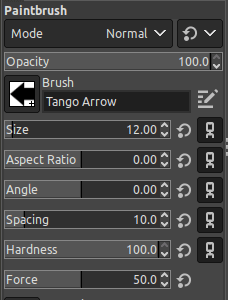
we can adjust the size, color, etc. from the tool options:
After creating the required setup, start drawing the arrow by holding the SHIFT key. We can draw different colors, sizes, directions, arrows:
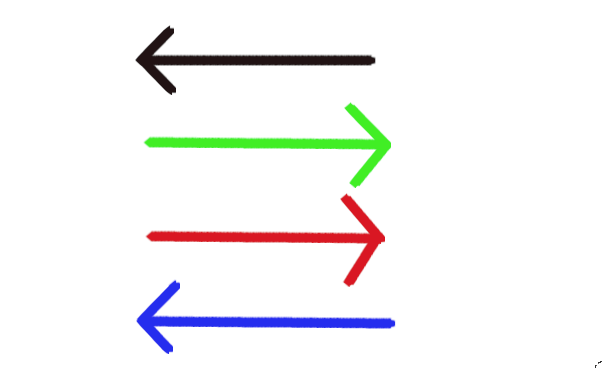
In the above image, all the arrows are created using the Arrow Brush.