HUD
The final piece of the game needs is a UI: an interface to display things like score, a “game over” message, and a restart button. Create a new scene and add a CanvasLayer node named HUD. It stands for “heads-up display,” an informational display that appears as an overlay on top of the game view.
The CanvasLayer node lets us draw our UI elements on a layer above the rest of the game so that the information it displays is not covered up by any game elements like the player or mobs.
The HUD displays the following information:
- The score changed by ScoreTimer.
- A message, such as “Game Over” or “Get Ready!“
- A “Start” button to begin the game.
The primary node for UI elements in Control. To create our UI, we will use types of Control Nodes: Label and button.
Create the following as children of the HUD node:
- The label named ScoreLabel.
- The label named MessageLabel.
- Button named StartButton
- Timer named MessageTimer.
Note
Anchors and Margins: It control nodes have a position and size, but they also have anchors and margins.
Anchors define the origin: The reference point for the edges of the node. Margins update automatically when we move or resize a control node. They represent the distance from the control node’s edges to its anchor. See Design interfaces with the control nodes for more details.
Arrange the nodes, as shown below. Click the “Anchor” button to set a control node’s anchor:
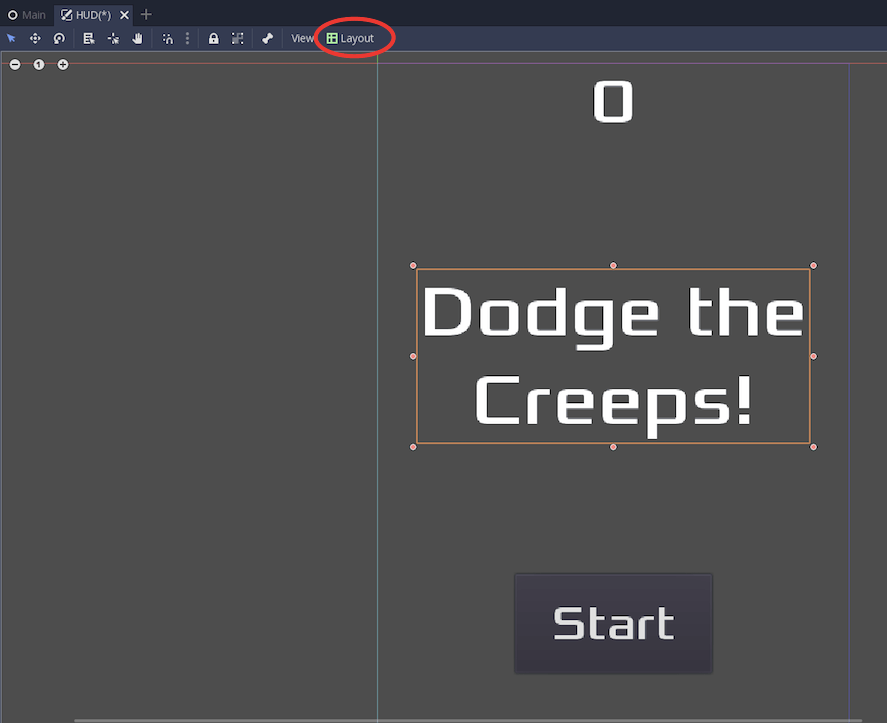
We can drag the nodes to place them manually, or for more precise placement, use the following settings;
ScoreLabel
- Layout: “Center Top”
- Text:0
- Margin:
- Left: -25
- Top: 0
- Right: 25
- Bottom:100
MessageLabel
- Layout: “Center’
- Text: Dodge the creeps!
- Margin:
- Left: -200
- Top: -150
- Right: 200
- Bottom:0
StartButton
- Layout: “Center Bottom”
- Text: Start
- Margin:
- Left: -100
- Top: 200
- Right: 100
- Bottom:100
The default font for Control nodes is small and doesn’t scale well. There is a font file included in the game assets called “Xolonium-Regular.ttf”. To use the font, do the following for each of the three Control nodes:
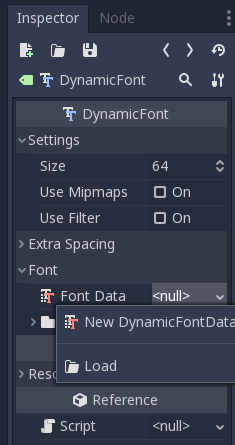
1. Under “Custom font”, choose “New Dynamic Font.”
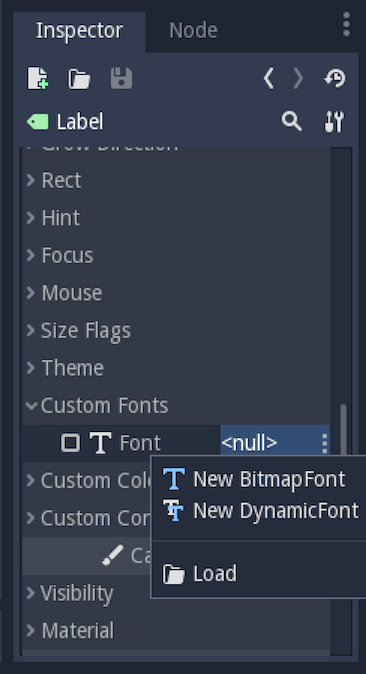
2. Click on the “DynamicFont,” we added, and under “FontData,” choose “Load” and select the “Xolonium-Regular.ttf” file. We must also set the font size. A setting of 64 works well.
Now add this script to HUD:
GDScript
This function is called in Main whenever the score changes.
Connect the timeout() signal of MessageTimer and the pressed() signal of StartButton.
GDScript
Connecting HUD to Main
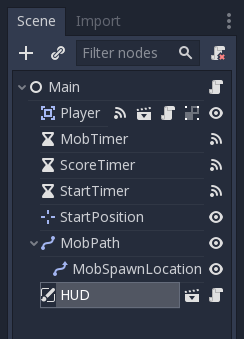
Now that we’re done creating the HUD scene, save it and go back to Main. Instance the HUD scene in Main like we did the Player scene, and place it at the bottom of the tree. The full tree should look like this, so make sure we didn’t miss anything:
Now we need to connect the HUD functionality to our Main script. This requires a few additions to the Main scene.
In the Node tab, connect the HUD’s start_game signal to the new_game function.
In new_game(), update the score display and show the “Get Ready” message:
GDScript
In game_over() we need to call the corresponding HUD function:
GDScript
Finally, add this to _on_scoreTimer_timeout() to keep the display in sync with the changing score:
GDScript
Now we are ready to play! Click the Play the Project” button. We will be asked to select the main scene, so choose Main.tscn.
Finishing Up
We have now completed all the functionality for our game.
Following are some remaining steps to add a bit more “juice” to improve the game experience. Feel free to expand the gameplay with our ideas.
Background
The default gray background is not very appealing, so let’s change its color. One way to do this is to use a ColorRect node. Make it the first node under Main so that it will be drawn behind the other nodes. ColorRect only has one property: color. Choose a colorRect so that it covers the screen.
We can also add a background image if we have one by using a Sprite node.
Sound Effects
Sound and music can be the single most effective way to add appeal to the game experience. In our game assets folder, we have two sound files: “House In a Forest Loop.ogg” for background music, and “gameover.wav” for when the player loses.
Add two AudioStreamPlayer nodes as children of Main. Name one of the Music and the other DeathSound. On each one, click on the Stream property, select “Load”, and choose the corresponding audio file.
To play the music, add $Music.play() in the new_game() function and $Music.stop() in the game_over() function.
Finally, add $DeathSound.play() in the game_over() function.
Particles
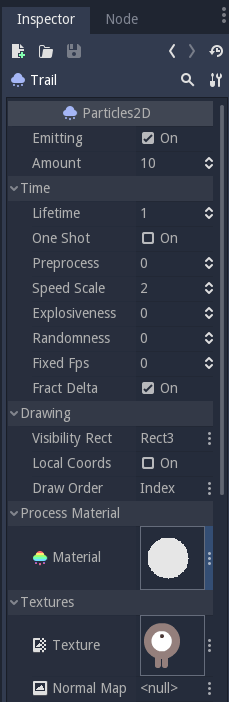
For one last bit of visual appeal, let’s add a trail effect to the player’s movement. Choose our Player scene and add a Particles2D node named Trail.
There are a large number of properties to choose from when configuring particles. Feel free to experiment and create different effects. For effect, in this example, use the following settings:
We also need to create a Material by clicking on <null> and then “New particlesMaterial.” The settings for that are below:
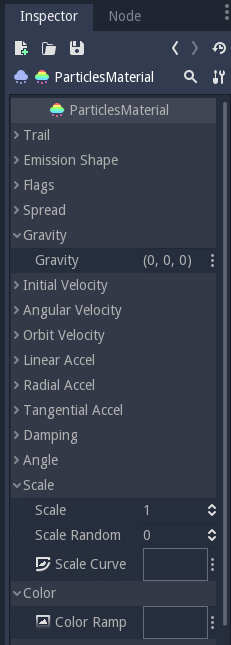
To make the gradient for the Color Ramp setting, we want a slope taking the alpha (transparency) of the sprite from 0.5 (semi-transparent) to 0.0(fully transparent).
Click “New GradientTexture”, then under “Gradient”, click “New Gradient“. We will see a window like this:
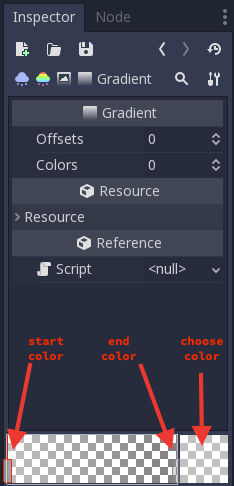
The left and right boxes represent the start and end colors. Click on each and then click the large square on the right to choose the color. For the first color, set the A (alpha) value to around halfway. For the second, set it to 0.
See Particles2D for more details or using particle effects.