Google Sign-in integration in iOS
There can be various ways to login into a mobile application, for example, login with Facebook, login with Twitter, log in with Apple, etc. Likewise, we can also integrate Google-Sign In into an iOS app. In this tutorial, we will cover the process of integrating Google Sign-in in an iOS app. We will also create a demo iOS application in which the user will sign-in with the google account.
Consider the following steps to Integrate Sign-in with Google in an iOS application.
1. Install Google Sign-in SDK
To integrate Google Sign-in, the first step is to install the google sign-in SDK. In this article, we will use CocoaPods to install the SDK. For this purpose, open the terminal and navigate to the project directory. Use the following command to generate a podfile.
Now, open the Podfile, add the following pod into it, and save.
Now, install the pod using the following command in the terminal.
We will get the pod installed using the above command. We need to close all the instances of XCode and open the .xcworkspace file, which contains the Google Sign-In SDK Installed.
To ensure whether the Google Sign-In SDK is installed correctly, try to import GoogleSignIn in AppDelegate.swift file. If the application runs without any error, we are ready to move on to the next section.
2. Create Client Id for Google Sign-In
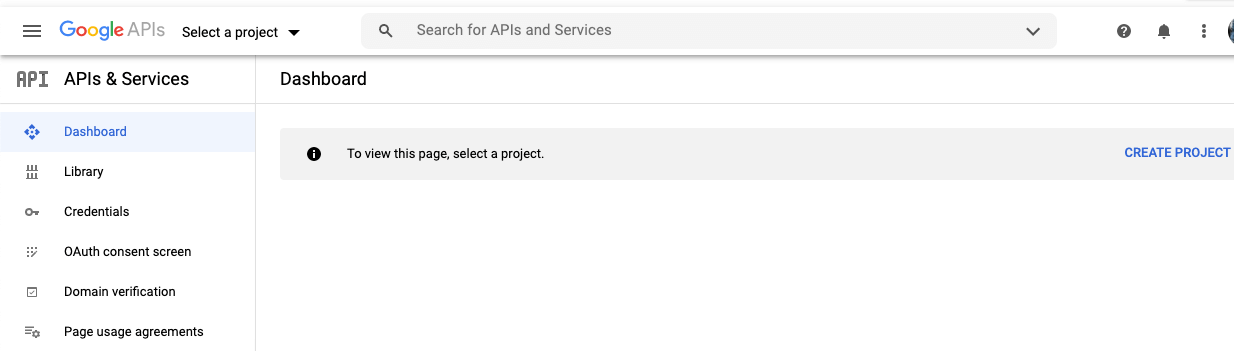
To continue with the Google Sign-In, we need to create a project on Google API Console for our demo application. For this purpose, navigate to https://console.developers.google.com/projectselector2/apis/dashboard?pli=1&supportedpurview=project and create a project. If we have already created any project, then we can select it from the project list.
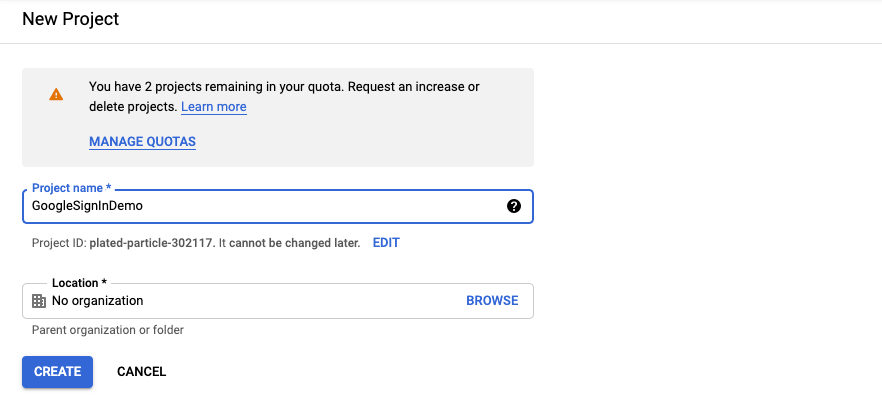
Click Create Project on the Screen and provide the project details as shown below.
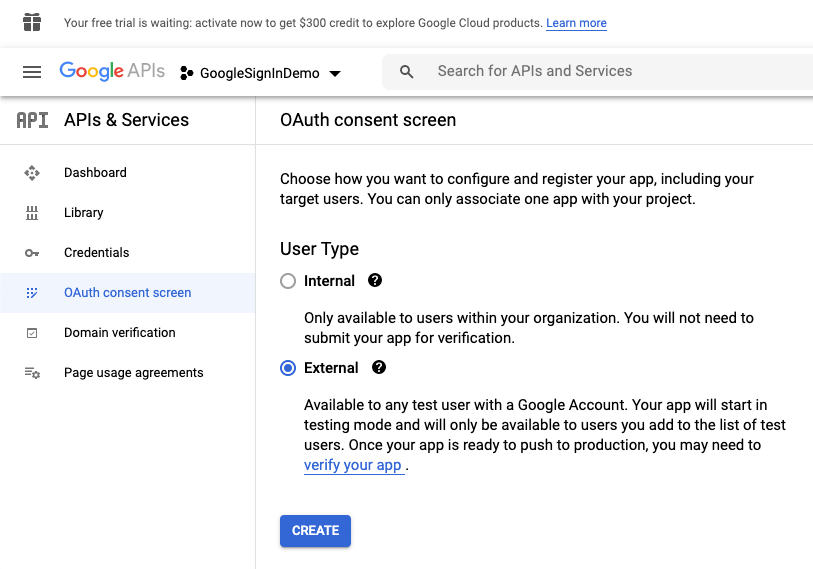
Once we have created the project, open the OAuth consent screen as shown below.
Once we choose User Type as External in the OAuth consent screen, we need to provide the App information on the next screen.
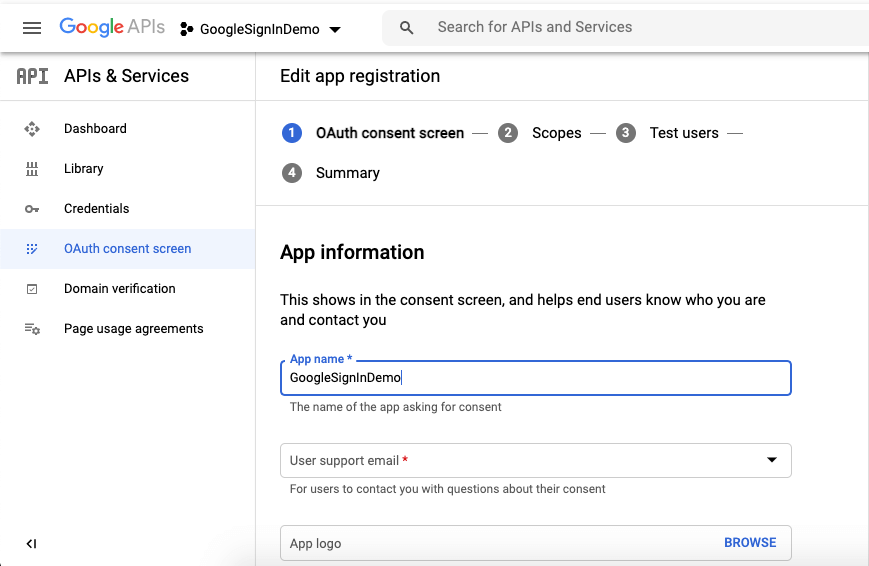
Here, the name of the app will be the one that is shown to the user while prompting for the google sign-in. Once we are done with providing the app information, scopes, and test user, we will create the OAuthClientID.
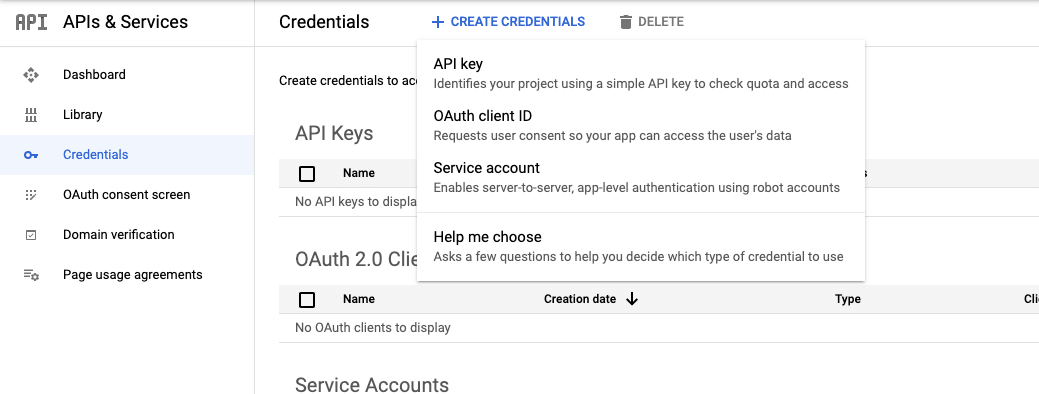
To create the OAuthClientID, select the Credentials in the Options Pane and click Create Credentials. Now choose OAuthClientID from the list of options as shown below.
Once we reach the OAuth client ID creation page, we will be prompted to provide the app information like Application Type, name, and bundle id. Choose iOS in Application Type, and provide application name and bundle id to continue.
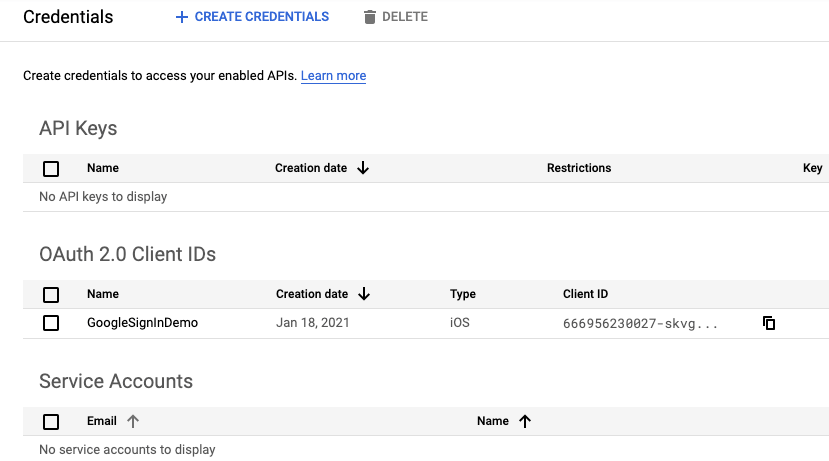
Once we provide the information, we will get the client OAuth client ID shown in the following image.
We will get back to XCode for SDK Configuration.
3. Google Sign-In SDK Configuration in XCode
Now, we need to configure XCode for Google Sign-In. This requires a custom URL Scheme to be added to the project. To add the URL Scheme, we need to navigate to project target -> info and add the iOS URL Schemes from the Google API Console project credentials.

Once we added iOS URL Schemes in XCode from Google API Console, we can now configure our application code for google sign-in.
Open AppDelegate.swift and import GoogleSignIn SDK which we have installed initially after the project setup.
Now, add the following code into didFinishLaunchingWithOptions(: ) method.
Here, we must replace the OAuth_Client_ID with the actual OAuth Client Id. We also need to restore the previous sign in state if the user has already signed into the application using the same credentials.
Now, we need to add the following AppDelegate method just after the didFinishLaunchingWithOptions() method.
The AppDelegate.swift code will look like the following after all the implementations.
Once we are done with configuring AppDelegate.swift, we need to implement GIDSignInDelegate protocol methods in View Controller. For now, let’s start configuring View Controller to implement Google Sign In.
Firstly, import GoogleSignIn in ViewController.swift file and set the GIDSignIn delegate property to self. Now, ViewController.swift contains the following code.
Since we have set the GIDSignIn delegate to self, we will need to conform to the GIDSignInDelegate protocol and implement the delegate methods. For this purpose, Add the following code to the ViewController.swift file.
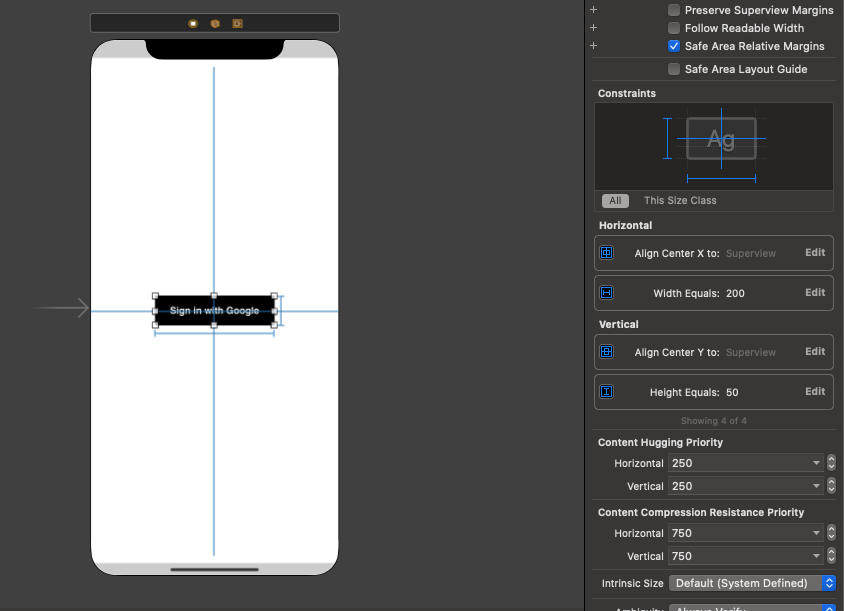
In the Main.storyboard, add a UIButton in View Controller and provide it some constraints to appear in the center of the screen. Consider the following image for the View Controller featuring in Main.storyboard.
Add an action outlet for this button in ViewController.swift and call GIDSignIn.sharedInstance()?.signIn() method inside it.
Add the code in sign(_ signIn: GIDSignIn!, didSignInFor user: GIDGoogleUser!, withError error: Error!) delegate method to handle the google sign in error. Since this method is called each time the sign-in attempt is successful, we can retrieve the user’s information like email and name. Also, we can navigate the user or show some alert to the user if the sign-in attempt is successful.
Replace the code of sign(_ signIn: GIDSignIn!, didSignInFor user: GIDGoogleUser!, withError error: Error!) with the following code.
In the above code, we are checking whether the method is being called with some error in the sign-in process or not. If so, then we are printing the error in the console. Otherwise, we are fetching the user information from the GIDGoogleUser object and printing it.
In the above code, we call the showAlert() method, which needs to be defined in the ViewController. Let’s define the showAlert() method.
Once we implement the above code, we are done with Google Sign-In in our iOS app. The ViewController.swift contains the following code.
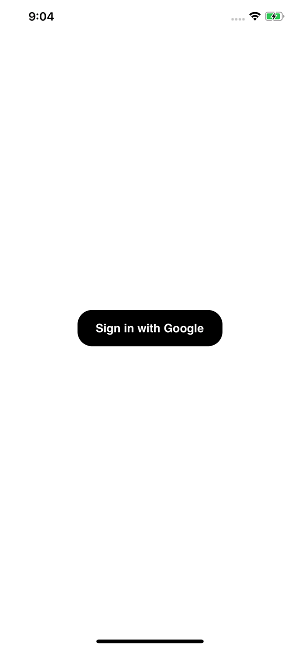
Now, build and run the application in XCode. We must see the following screen for the initial ViewController.
Click the Sign in with the Google button, and we will see the following screen, which prompts the user for permission.
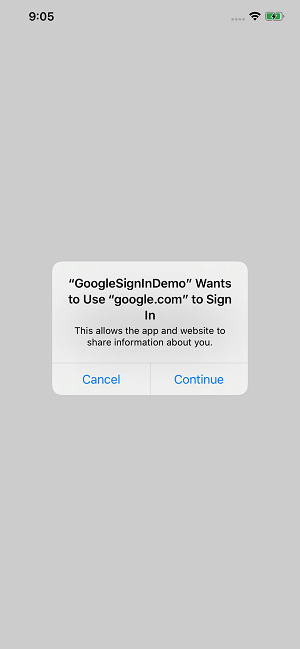
Click Continue to proceed with the sign-in attempt. It will prompt the user to select the google account or add a new account (if not already added). Once the user provides an email id and password, we will be alert in our application, as shown below.
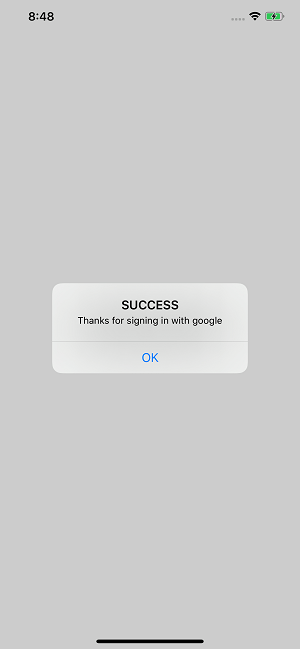
We will also get the user’s information like email, name, family name, and given name printed in the console. We can also hit an API with the information being passed to the server to create the user.