How to install Sublime Text on MacOS
Introduction
Sublime text is a proprietary cross platform source code editor with a python application programming interface. It supports many programming languages. Sublime text 2.0.2 was released on 8 July, 2013. It contains 22 different themes with the option to download additional themes. In this tutorial, we will install Sublime Text on MacOS.
Prerequisites
- MacOS
- Login as an administrator on terminal
Installation
This includes following steps.
1) Download the dmg file
In order to install sublime text editor, we have to download the disk image file by visiting its official website or by simply pasting the link https://download.sublimetext.com/Sublime%20Text%20Build%203143.dmg in our browser’s search bar.
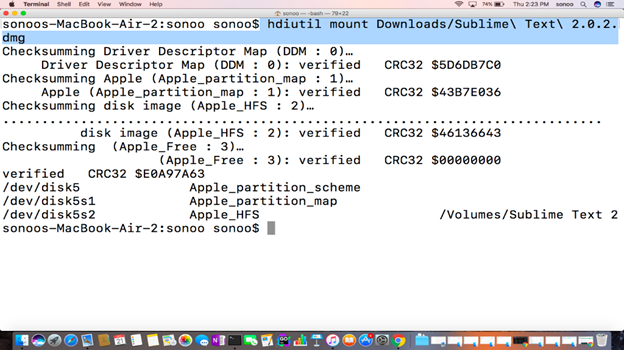
2) Mount the File:
The dmg file downloaded from the official website of sublime text needs to be mounted to a Volume. This will be done by the following command.
3) Create a link of sublime text into bin:
Sublime text editor is installed into the /applications. To run sublime globally on terminal, we have to first create a symlink of /Applications/”Sublime Text 2″/Contents/SharedSupport/bin/subl into /usr/local/bin. Since it contains all the binary executable files which are identified globally on the system hence now we can run sublime text editor by simply typing sublime on terminal from any location.
Link can be created by using following command.

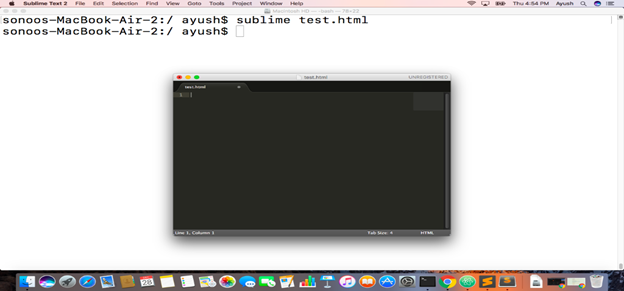
4) Test Sublime
Now we can create any text file with sublime by simply typing sublime along with file name.
5) Unmount the file
The file needs to be unmounted when we have competed the installation of sublime. For this purpose, use the following command.
Hence, we have installed sublime text 2 on our MacOS successfully.