How to set up Authorize.net method in Magento 2?
Magento 2 supports several third-party payment methods such as Payoneer, Paypal, and so on. But customers have to redirect to the third-party site to complete their checkout payment. However, Authorize.net is an onsite payment gateway, where the customers do not need to leave the site to finish their payments. Merchants have their accounts on Authorize.net, and they will complete all checkout forms and content on their sites.
To set up the Authorize.net payment method in Magento 2 website, follow the below steps:
Step 1: Login to the Magento 2 Admin Panel.
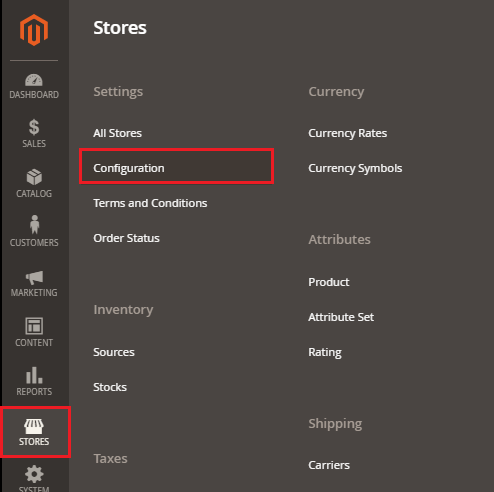
Step 2: On the left sidebar of Magento 2, Go to STORE >> Configuration.
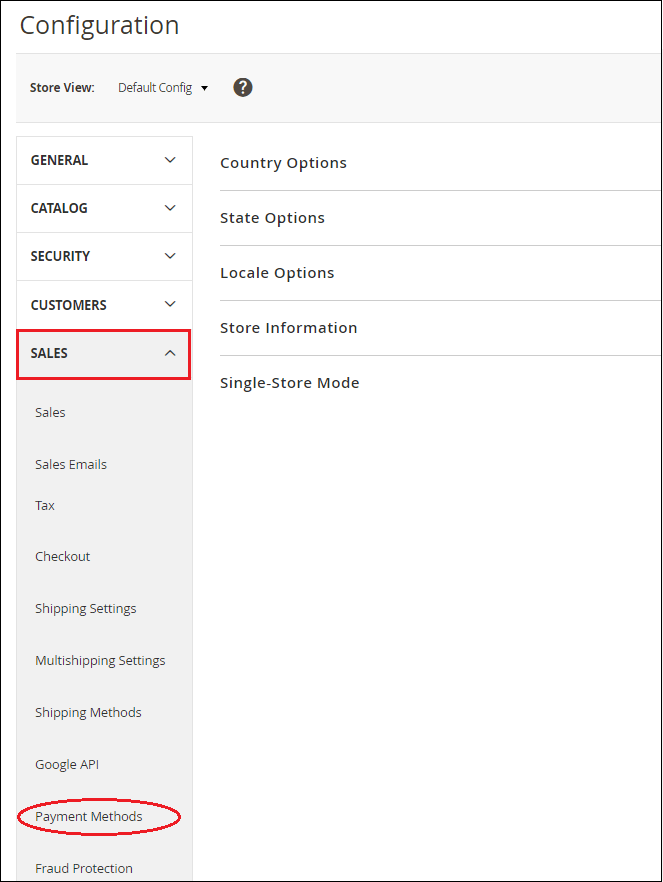
Step 3: Under the Sales section, click on the Payment Method.
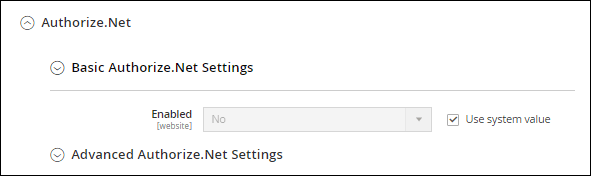
Step 4: Expand the Authorize.net section and set up the Basic and Advanced settings of Authorize.net.
Basic Authorize.net Settings
Explore this section and complete the basic setting by providing the required details in the given fields:
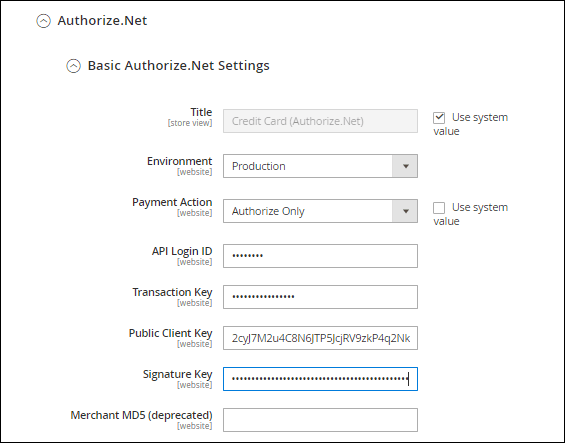
Title: Enter the title of the payment method, which will display on the frontend during customer checkout.
- Environment: Choose Production or Sandbox in Environment field.
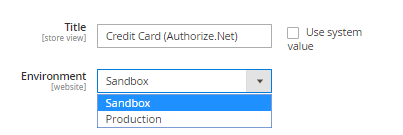
- If the Authorize.net is currently running in test mode, then choose Sandbox. Otherwise,
- To set up CardinalCommerce for Authorize.net in a live store, then select Production.
- Payment Action: In Payment Action field, choose one of the following options:
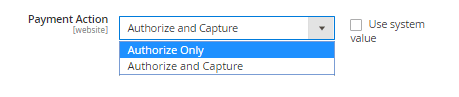
- Authorize Only: It authorizes customer’s funds and creates an order in our store. Later we can create an invoice and capture the customer’s funds.
- Authorized and Capture: It authorizes and captures customer funds as well as creates order and invoice in our store.
We need to fill the information API Login ID, Transaction Key, and Signature Key field for our Authorize.net account.
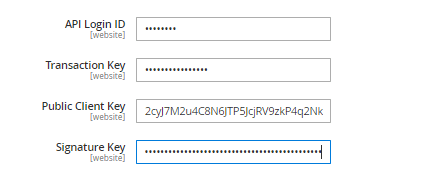
- API Login ID: Enter the API login id to this field.
- Transaction Key: Provide the transaction key in this field.
- Public Client Key: Enter the Public Client Key in this field.
- Signature Key: Enter the Signature Key in this field.
To get the API login ID, Transaction Key, and Signature Key follow the below instruction.
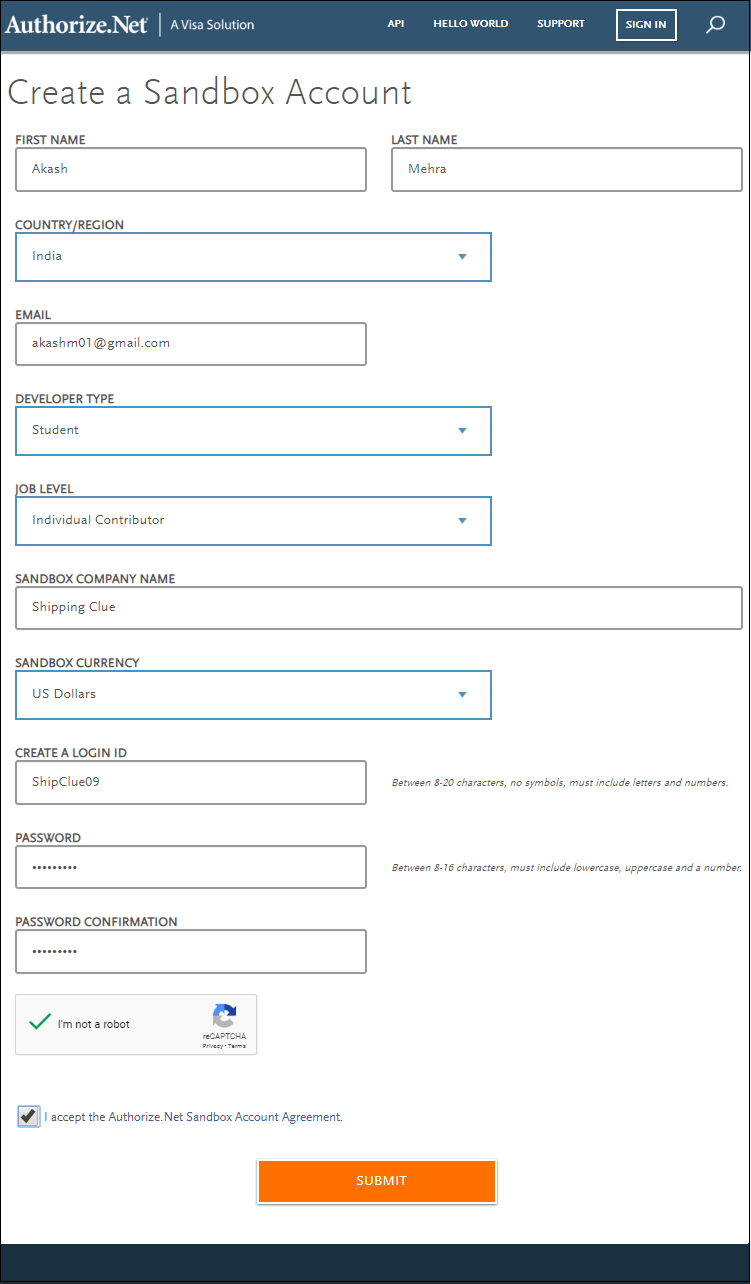
Step 1: Create an account on Authorize.net using the following link https://developer.authorize.net/hello_world/sandbox/. Fill the information and click on the submit button after accepting the Authorize.net Sandbox Account Agreement by marking on the checkbox.
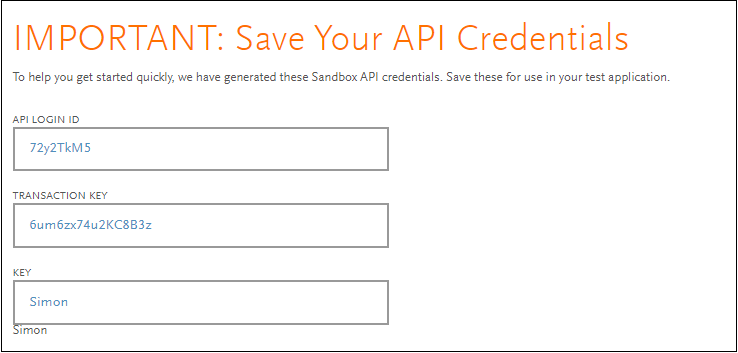
Step 2: It will redirect to the new window where you will get the API Login ID and Transaction Key. Copy them from here and paste in Authorize.net payment gateway in Magento 2.
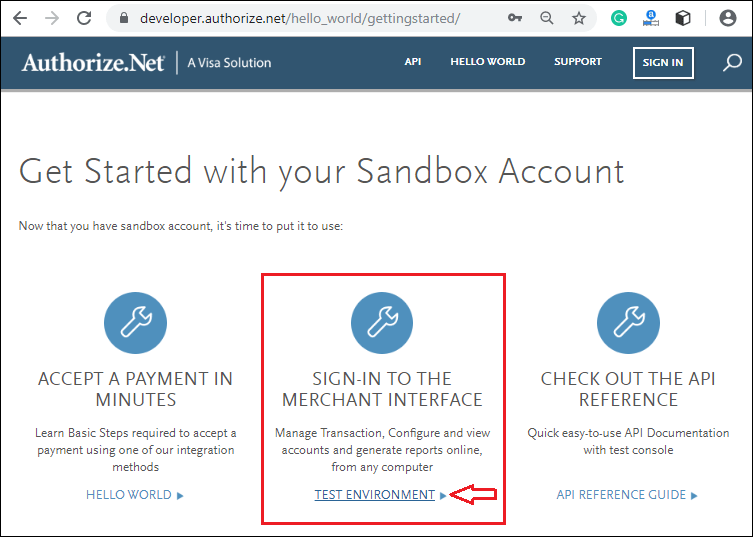
Step 3: To get the Public Client Key and Signature Key, you need to sign-in to the merchant interface of the Authorize.net account as given in the below screenshot.
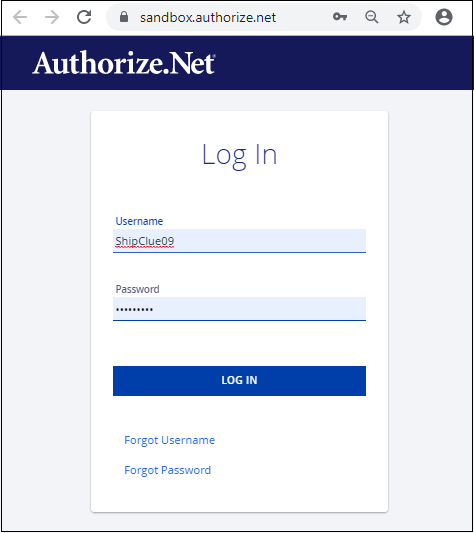
Step 4: Enter the username and password, which you have created while creating an account of Authorize.net.
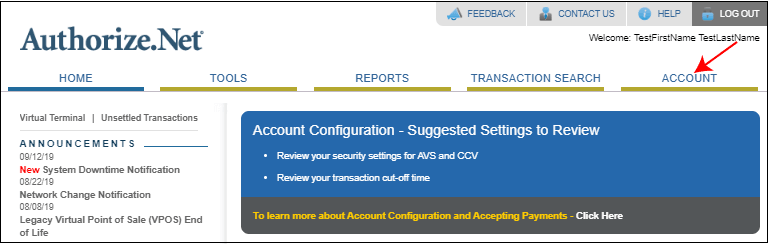
Step 5: On the Home page of Authorize.net, click on Account from the main toolbar at the upper-right corner.
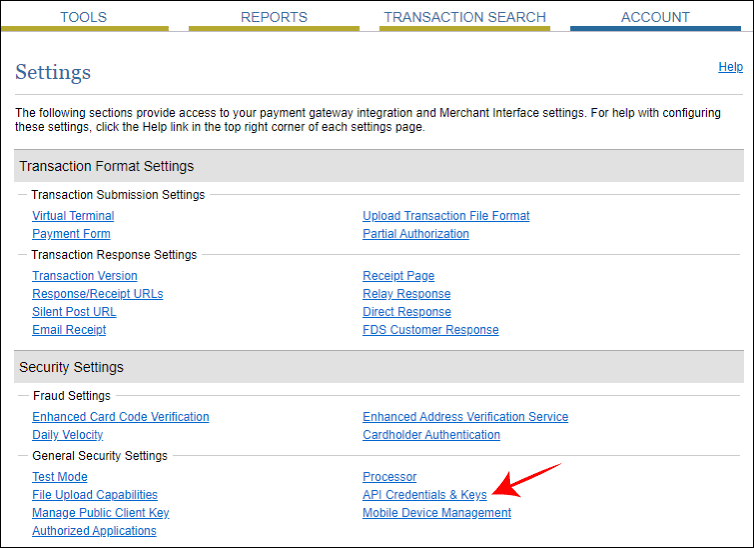
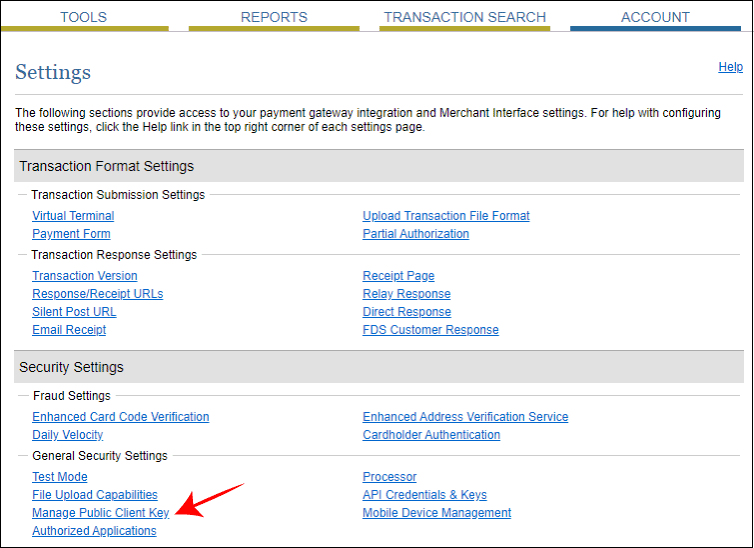
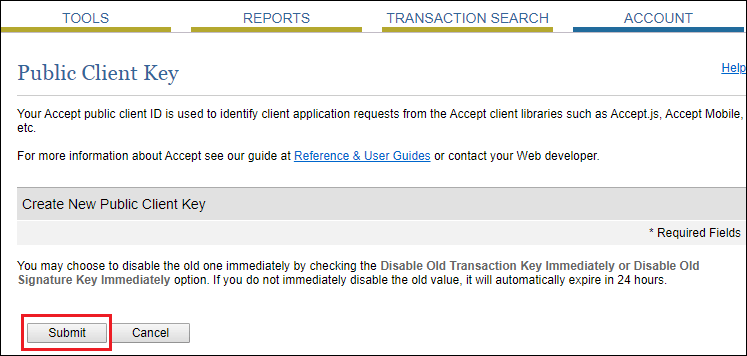
Step 6: To obtain the Signature Key, click on the API Credential and Keys under the General Security Settings.
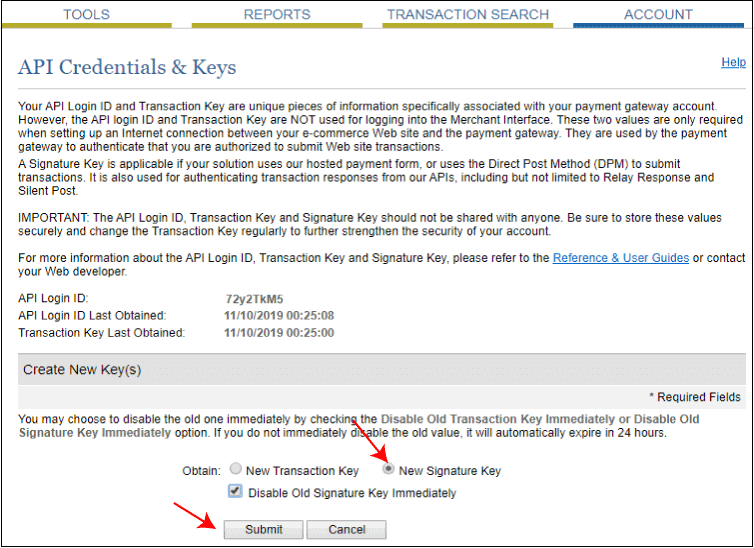
Step 7: Now, scroll down and click on the New Signature Key radio button. To disable the old Signature Key, click on the Disable Old Signature Key checkbox. If you do not select it, then the old Signature Key will automatically expire in 24 hours. Click on submit to continue.
Step 8: Click on the Request PIN for verification.
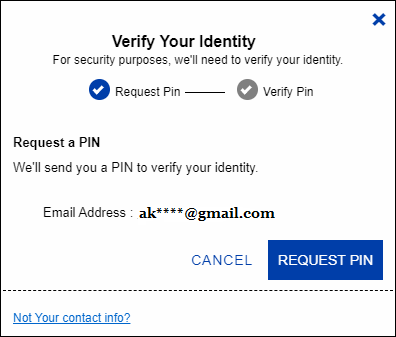
Step 9: Enter the verification PIN, which you got on your registered email id from the Authorize.net.
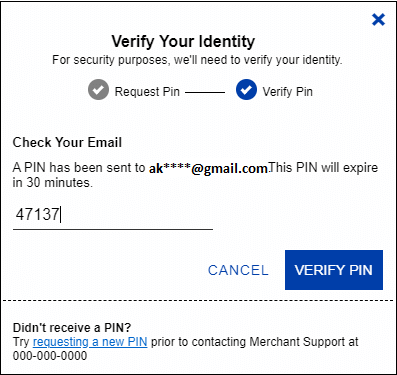
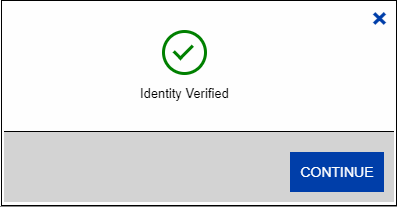
Step 10: Identity is verified successfully. Click on the Continue button, which will redirect you to a new page.
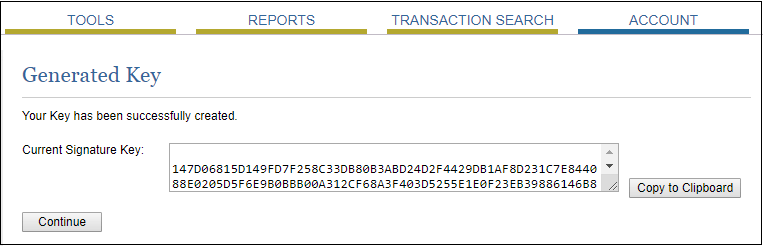
Step 11: Copy the new generated Signature Key and paste it to the Signature Key field in Magento 2 Authorize.net payment set up.
Step 12: To obtain the Public Client Key, click on the Manage Public Client Key under the General Security Settings on the same page.
Step 13: Click on Submit and continue.
Step 14: Request for the PIN and verify it in the same way as you verified the Signature Key.
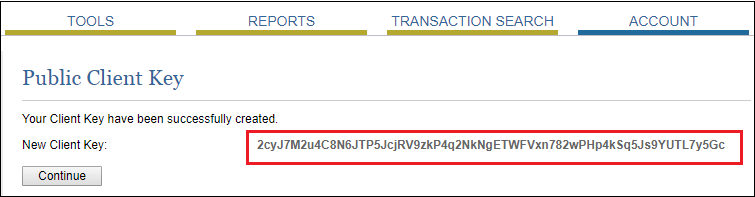
Step 15: Copy the New Client Key and paste it into the Public Client Key field in Magento 2.
Now, back to the Authorize.net page set up and continue.
- Enabled: Enable the Authorize.net payment method by setting Yes so that it will be visible to the customer during checkout.

Advanced Authorize.net Settings
Explore this section and complete the Advanced settings by providing required details in the given fields:
Accepted Currency: Set the accepted currency to the US dollar or any other currency that is acceptable at your online store.
Debug: To save the logs between Authorize.net system and your store set Yes to debug field.
Email Customer: Set Yes to this field, if you want to send an email to the customers and type your business email address in the Merchant’s Email field.
Enable Credit Card Verification Field: Enable this field by setting Yes that requires a credit card verification code (CVV).
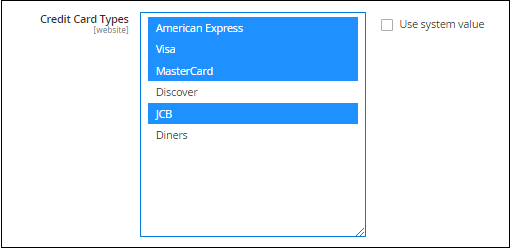
Credit Card Types: Select the cards from the list of Credit Card Types that is accepted by your store with the Ctrl key.
Payment from Applicable Countries: By selecting All Allowed Countries, customers from all countries are applicable to make the payment using the Authorize.net. Otherwise, select Specific Countries.
Payment from Specific Countries: If we choose Specific Countries, then the customer from specific countries will be applicable to use this payment method, which we select from the list. Select the number of countries with the Ctrl key.
Minimum Order Total: Set the minimum order total to qualify for the COD payment method.
Maximum Order Total: Set the maximum order amount to limit using this payment method.
Sort Order: Enter a number to sort the order of the payment methods to appear on the frontend during the checkout.
Step 5: When completed basic and advanced settings, click on the Save Config button to configure the Authorize.net payment method.

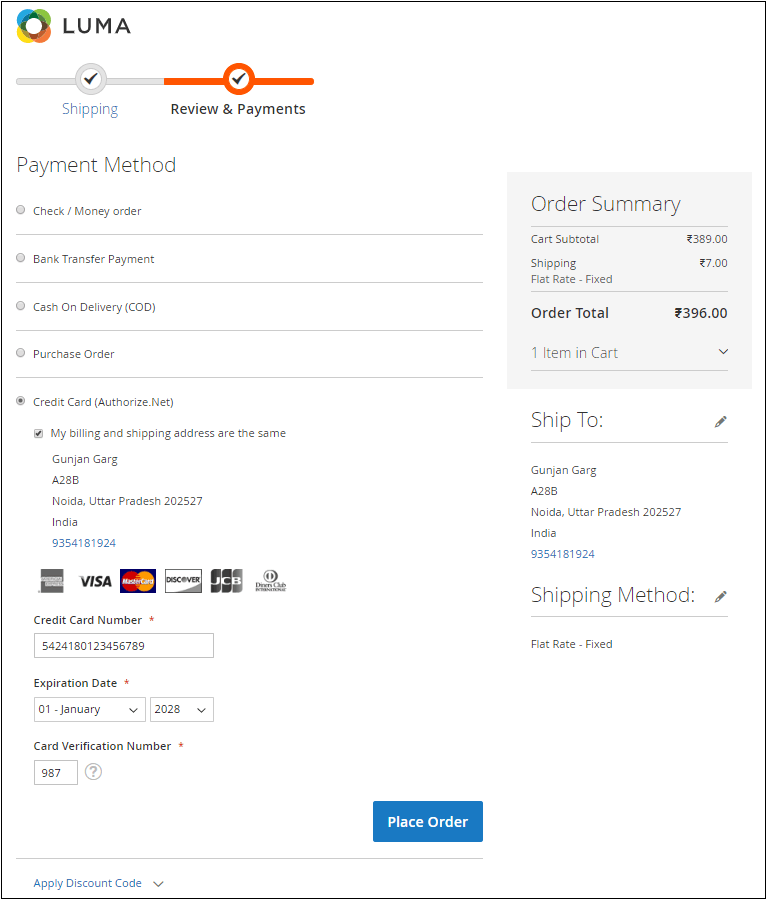
Step 6: Once we saved the Authorized.net payment method, it will show up on the frontend with the criteria we have set from the backend. Customers can select their preferred payment method and place orders successfully.
Here the customers need to provide the credit card details like credit card number, expiry date, and CVV number to place an order.