Inkscape Tutorial
Inkscape tutorial provides basic and advanced concepts of Inkscape. Our Inkscape tutorial is designed to help beginners and professionals. It helps you to clear your Inkscape concepts and provides knowledge on how to use Inkscape.
In this tutorial, we are going to discuss the following topic:
- What is Inkscape?
- What is SVG (Scalable Vector Graphics)?
- What is Vector Graphics?
- History of Inkscape
- Features of Inkscape
- Installation of Inkscape
- Inkscape Interface
- Conversion of Inkscape
- Path/ Boolean Operations
- Trace Bitmap
- Examples of Inkscape
- Inkscape vs. Illustrator
- Inkscape vs. GIMP
- Inkscape vs. CorelDRAW
What is Inkscape?
Inkscape is a graphics software used to create or edit graphics images such as illustrations, line-arts, charts, diagrams, logos, sophisticated web graphics, etc.
“It is an open-source, powerful vector graphics application used to create two-dimensional scalable graphic images.”
Primarily it acts as an illustrator tool, but it can also be used for a wide range of computer graphics tasks. It can be run on Windows, Mac OS X, and GNU/ Linux.
Inkscape uses the SVG (Scalable Vector Graphics) as its primitive graphics format, although it can also import or export various file formats such as AI (Adobe Illustrator Artwork), EPS (Encapsulated PostScript), PDF, PS (PostScript), and PNG.
The Inkscape provides various vector shapes (squares, polygon, spirals, and 3D boxes) and text. These shape can be transformed with the help of solid colors, patterns, and color gradients. We can also alter these shapes through some transformations like moving, rotating, scaling, and skewing.
What is SVG (Scalable Vector Graphics)?
Scalable Vector Graphics (SVG) is an open standard developed by the W3C (World Wide Web Consortium) group in year 1999. It is an XML-based vector image format that illustrates the images with vector shapes, embedded raster graphics, and text. It also supports interactivity, scripting, and animation. The SVG files contain lightweight graphics.
SVG vector images are defined in an XML file, it means they can be indexed, searched, scripted, and compressed. All the web browsers, including Google Chrome, Mozilla Firefox, Opera, Safari, etc., supports SVG format.
What is Vector Graphics?
Vector graphics is the creation of computer graphics images (digital images) that are described in terms of 2D points. It uses mathematical equations to create designs of polygons or other shapes, and these equations are converted into points that are connected via lines or curves, which are also known as vector paths.
In Vector graphics, every point has an exact position on the X-axis and Y-axis of the Cartesian plane and specifies the direction of the path. Vector graphics are generally found in SVG, EPS, PDF, and AI file format.
History of Inkscape
Inkscape was developed by a team of developers named Ted Gould, Bryce Harrington, Nathan Hurst, and Men TaLguY in 2003 as a code fork of Sodipodi (predecessor to Inkscape) project. The word Inkscape is a combo of the words ink and scape. It follows all the SVG standard.
During the development of Inkscape, developers made some changes that make it differ from the Sodipodi project. They changed the programming language from C to C++ and used the GTK+ toolkits C++ bindings. They have also redesigned the user interface and added several new features.
Inkscape has participated in the Google Summer of Code (GSoC) program in 2005.
Below is given the release history of Inkscape:
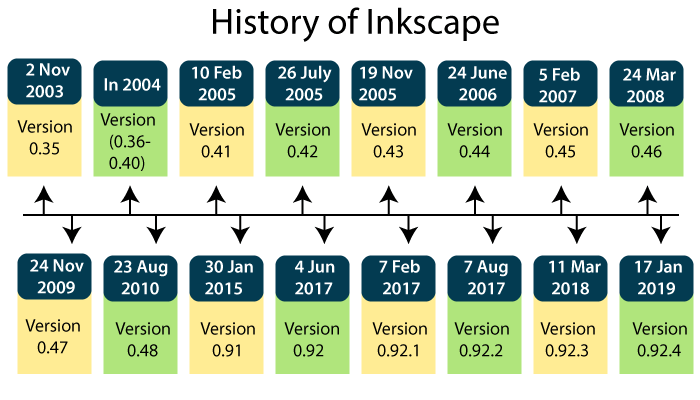
- On 2nd November 2003, the initial version of Inkscape (Version 0.35) was released.
- In 2004, many versions of Inkscape (Version 0.36 to Version 0.40) were released with the new features like the menu bar, context-sensitive toolbars, Boolean path operations, text kerning, letter spacing, markers, clones, multi-layer support, bitmap tracing,
- On 10th February 2005, a new version of Inkscape (Version 0.41) was released with some new features like clone tiler tool and color tracing.
- On 26th July 2005, a new version of Inkscape (Version 0.42) was released with some new features like flowing text support, styling text spans, and the new gradient tool.
- On 19th November 2005, a new version of Inkscape (Version 0.43) was released with some new features like connector tool, collaborative editing, and tablet angle sensitivity.
- On 24th June 2006, a new version of Inkscape (Version 0.44) was released with some new features like layers panel, support for clipping and masking, and PDF export with transparency.
- On 5th February 2007, a new version of Inkscape (Version 0.45) was released with some new features like Gaussian blur, pattern along path, a new Undo History panel, improved bitmap tracing, and color effects.
- On 24th March 2008, a new version of Inkscape (Version 0.46) was released with some new features like a Docking user interface, Paint Bucket, Tweak and 3D tools, Live Path Effects,
- On 24th November 2009, a new version of Inkscape (Version 0.47) was released with some new features like eraser tool, timed autosave, auto-smooth node for paths, basic support for SVG fonts,
- On 23rd August 2010, a new version of Inkscape (Version 0.48 to 0.48.5) was released with some new features like multipath node editing, tracking, new Airbrush (Spray) tool, LaTeX export with PDF/PS/EP,
- On 30th January 2015, a new version of Inkscape (Version 0.91) was released with some new features like Measure tool, new import/export formats, grayscale mode, alignment modes,
- On 4th January 2017, a new version of Inkscape (Version 0.92) was released with some new features like infrastructure focus, a variety of new path effects, and the default resolution has changed from 90dpi to 96 dpi.
- On 7th February 2017, a new version of Inkscape (Version 0.92.1) was released with a new feature called several bugfixes.
- On 7th August 2017, a new version of Inkscape (Version 0.92.2) was released with some new features like several bugfixes and batch converter 90 to 96 dpi.
- On 11th March 2018, a new version of Inkscape (Version 0.92.3) was released with some new features like snap package ready for Linux, Windows 32-bit and 64-bit,
- On 17th January 2019, the latest version of Inkscape (Version 0.92.4) was released with some new features like increased stability and bug fixes.
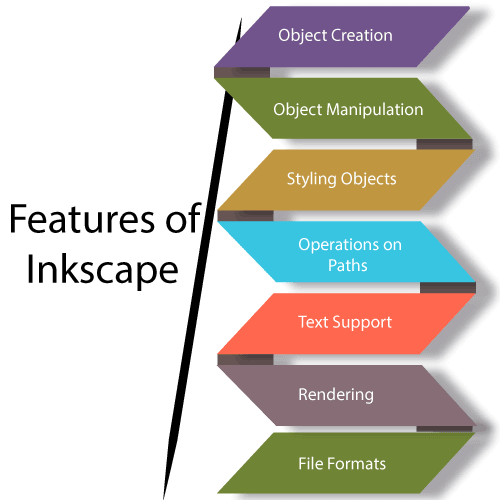
Features of Inkscape
Inkscape provides a variety of features, which are listed below:
1. Object creation
It defines the creation of an object in Inkscape. Objects in Inkscape can be referred to as a text, path, shape, or a drawing.
Following are the basic object creations in Inkscape:
- Drawing – It is the primary module of the object creation and further divided into a variety of tools such as pencil tools, pen (Bezier) tools, and calligraphy tools. The pencil tool allows a user to draw freehand drawings of lines. The pen tool is used to create a Bezier curve and a line segment on the same path. A Calligraphy tool is used to create a freehand calligraphic or brush-like stroke.
- Shape tools – Shape tools are also divided into a variety of tools such as rectangles & square tools, 3D boxes tool, circles/ ellipses tools, stars & polygons tool, and spirals tool.
Note – Corners of the rectangle and square shapes can be rounded.
- Text tool – It is used to create texts (single or multi-line), which can use any operating system outline and Unicode fonts. Text of Normal, Bold, Italics, Condensed and Heavy, Alignments, Vertical, and Horizontal types are implemented in Inkscape. We can transform the written text through Line Spacing, Letter Spacing, Word Spacing, Horizontal Kerning, and Vertical Shift.
Note – The Bullet list, number list, and underlined texts are not supported by the older versions (Below Version 0.92).
- Clones – Clone objects are identical to their parent objects. It can be created via Copies, Spray tool, or a Menu interface. A transformation to the clone object includes size, color, position, rotation, blur, and layout.
- Raster graphics – In Inkscape, the bitmap of selected objects can be embedded by using a specific command. It supports the export of bitmap images (as PNG) of the whole diagram.
2. Object manipulation
It defines the modifications and transformations made to the objects.
Following are the sub-parts of the object manipulation module:
- Transformation – In Inkscape, transformations can be done to any object of the image. Some of the primary transformations are scaling, moving, rotating, and skewing. They can also snap into grids, angles, and nodes of the other objects. Parameters of the transformations can be specified numerically in the Transform dialog.
- Z-order – It specifies the order in which the objects are drawn on the canvas.Objects with lower Z-order are drawn at the top of the canvas, whereas the objects with higher Z-order are drawn last. The order of the objects can be managed either by layers or by manually moving (up & down) the objects.
- Grouping of objects – In Inkscape, objects can be arbitrarily grouped together. The grouped objects can be edited by using Enter Group command, without ungrouping the objects. The Enter Group command edits the group by making it a temporary layer.
- Layering of objects – Layering of objects is performed to manage the order of the objects. Layers can be locked, hidden, or arranged, and avoids the modification and random selection.
3. Styling objects
In Inkscape, styling defines the styles, patterns, or layouts of an object.
Following are the sub-parts of styling module:
- Fill – It is used to fill solid color, pattern, linear or radial gradient, and swatch in an object. It selects a color with the help of a color selector, which consists of many colors options such as RGBA (Red Green Blue Alpha), HSL, Color Wheel, and CMS (Color Management System).
- Stroke – A plain or one-dimensional line is called a Stroke is further divided into two parts: one is stroke fill, and the other is stroke style. The stroke fill can have the same values as fill but applied to the object’s stroke only. Whereas the stroke style is used for styling the stroke. The styles can be set by nine different measurements (pixels, inches, meters, etc.).
- Filters – A number of filters can be applied to an image. All the filters of Inkscape are the combination of SVG filters.
Note – The appearance of an object can be further changed through masks and clipping paths.
4. Operations on paths
Inkscape contains an essential toolset to edit paths of the vector file. Following are the operations/ tools performed on the paths:
- Edit (Node Editing) – It allows editing of a single path or multiple paths or edits their associated node(s). There are four types of path nodes available in Inkscape: Cusp, Smooth, Symmetric, and Auto-Smooth. Editing is possible for the movement or positioning of nodes with their associated Bezier handles (angle and length). It is also responsible for the alignment and distribution of the nodes.
- Tweak tool (sculpting) – It is used to make minor changes to the objects, paths, and colors. It provides a node editing region of an object and can perform push, repel/ attract, shrink/ enlarge, rotate, copy/delete, and randomize positioning of the selected objects. With this tool, nodes can be dynamically created or deleted when needed.
- Path-Offsets – There are four types of offsets: Outset, Inset, Linked, or Dynamic (unlinked). Offsets are also used to expand or contract the shapes made in Inkscape. Path-offsets can create a Dynamic or Linked Inset. It also creates an Outset of an existing path of an object.
- Path-Conversion – Two types of conversion are available in Inkscape: one is object to path conversion, and the other is stroke to path conversion. Object to path conversion is used to convert objects like shapes (square, rectangle, polygons, etc.) or text into paths. Stroke to path includes the conversion of strokes of a shape into paths.
- Path-Simplify – It reduces the node count of a given object’s path while preserving the shape.
- Path-Operations (Boolean operations) – Inkscape supports a variety of operations performed on the path of an object. It makes the use of multiple objects to Union, Difference, Intersection, Exclusion, Division, and Cut
5. Text support
In Inkscape, the text support module highlights the attributes of the text used in the graphics images. Some of the major text attributes supported by the Inkscape are multi-line text, use of installed outline fonts, kerning, letter spacing, line spacing, text on a path, and text in shapes.
It supports both multi-line text (SVG’s <text> element) and flowed text (non-standard <flowRoot> element). It also supports italicized and bold text, as well as superscript and subscript character attributes.
Note – Underlining of the text is not yet implemented in Inkscape.
6. Rendering
Instead of using the GTK library, Inkscape uses its own library called “libnr” for creating graphic images. From version 0.91 or above versions, it uses the Cairo programming library to render graphics images, which results in the increase of the rendering speed of the application. It supports a fully anti-aliased display to make the edges (jagged) of the polygons appear smooth. It also supports the alpha transparency for image display and PNG export.
7. File formats
Inkscape uses the SVG (Scalable Vector Graphics) as its primitive graphics format. SVG is the most flexible file format for the creation and generation of graphics images. Inkscape can import (converted to SVG) or export (converted from SVG) any other file format like Adobe Illustrator Artwork (AI), CorelDRAW (CDR), Microsoft Visio Drawing (VSD), Portable Document Format (PDF), SVG Zip (SVGZ), Raster formats, etc.
Installation of Inkscape Software
Inkscape is an open-source, free vector graphics software. Follow the steps to install the Inkscape in your system:
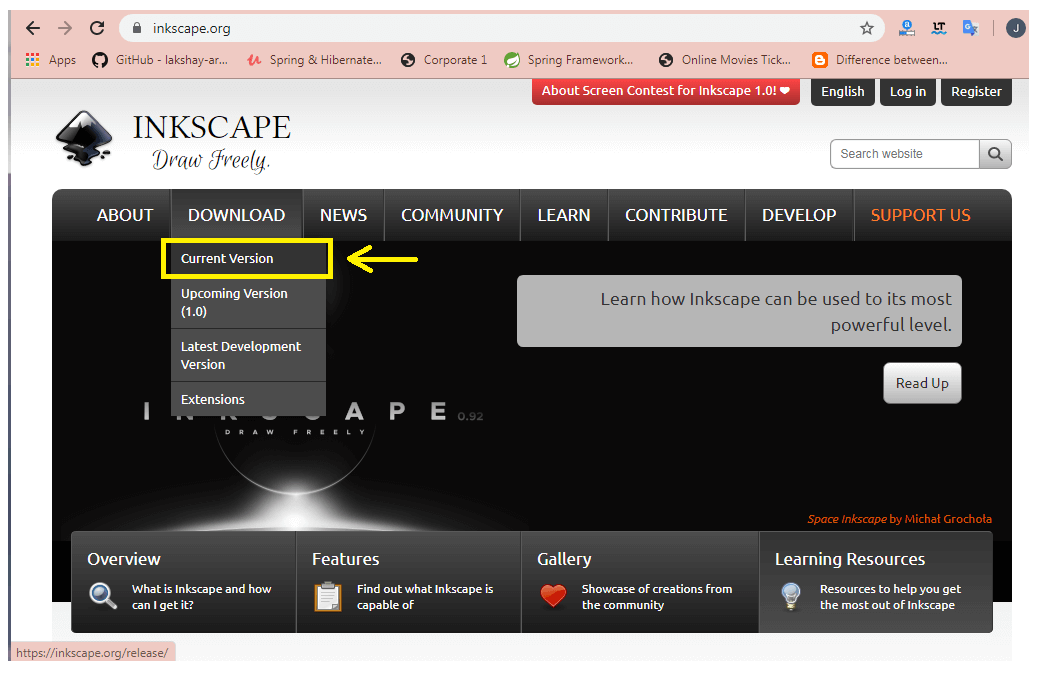
Step 1: Download the Inkscape from https://inkscape.org/. Click on the Current Version option of the Download tab, as shown below.
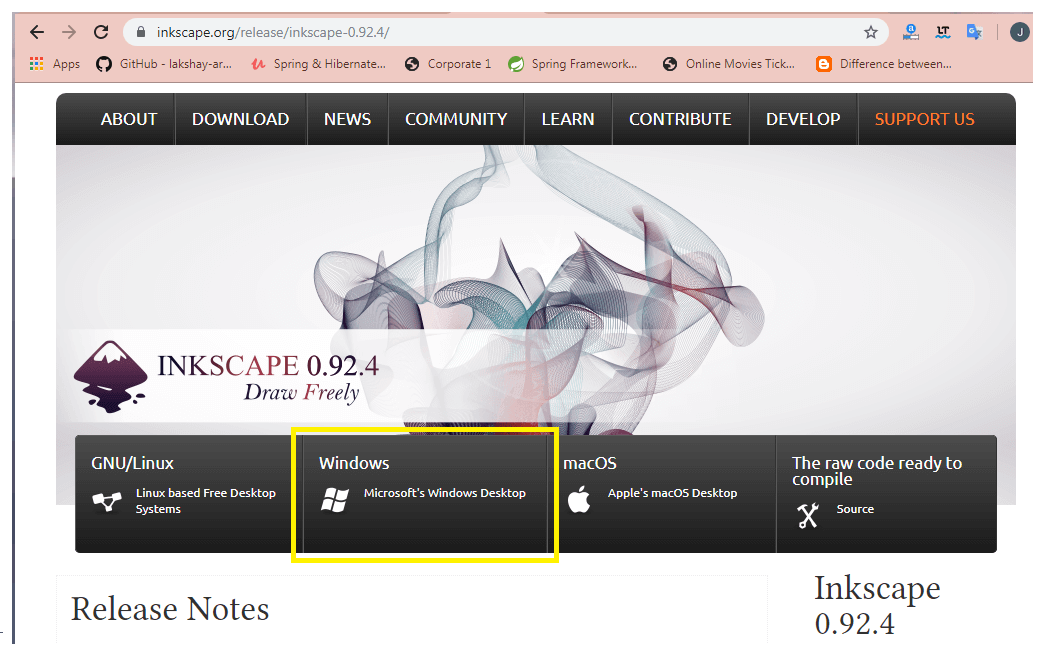
Step 2: According to your system’s OS, click on the respective GNU/Linux, Windows, or macOS button, as shown below.
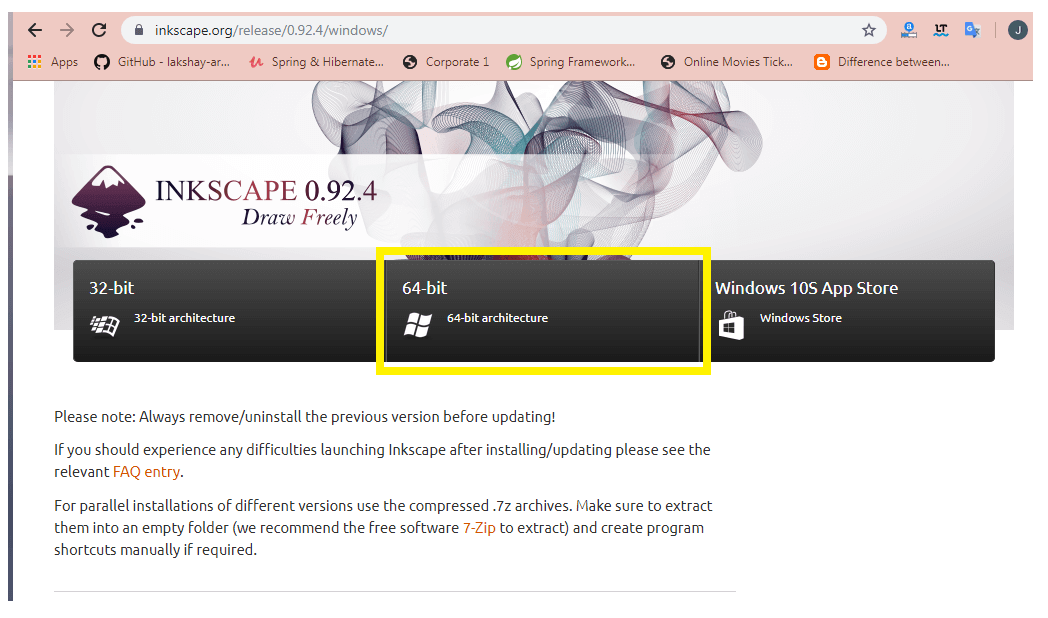
Step 3: According to your system configuration, click on the respective button, as shown below.
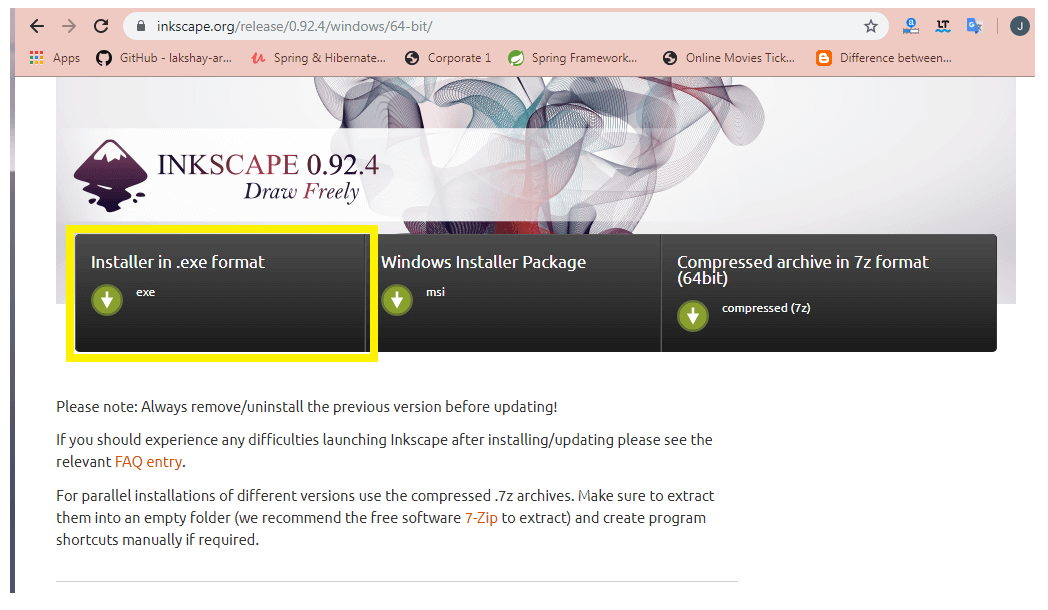
Step 4: Now, click on the Installer or Windows Installer package button to download the Inkscape as shown below.
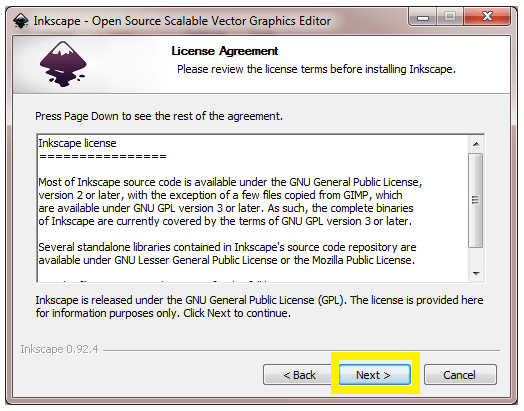
Step 5: Once the download is completed, you need to select the language for the installer. After that, a License Agreement dialog box will open. Click on the Next button, as shown below.
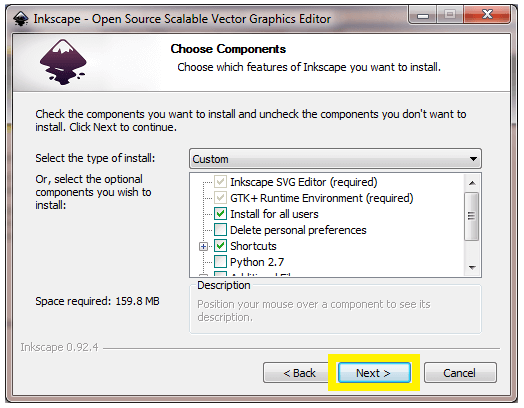
Step 6: Now, a new window Choose Components will open, where a list of components appears from which you can select those components which you want to install. Click on the Next button, as shown below.
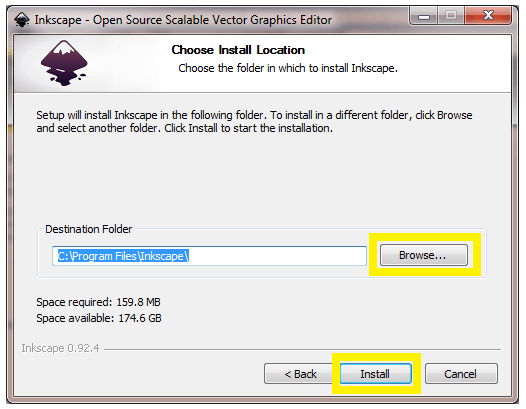
Step 7: Here, a Choose Install Location window will open. You can choose the destination folder or location as per your choice, which is done on clicking the Browse button. After selecting the destination folder, click on the Install button, as shown below.
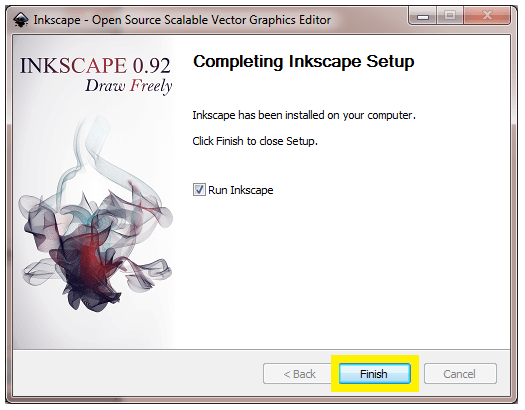
Step 8: Once the installation is completed, the following window will appear on the screen. Now click on the finish button, as shown below.
Inkscape Interface
The Inkscape interface is consists of several elements, which are used for the ease of developing the vector graphics images. It is based on the GNOME Human Interface Guidelines (HIG) standard.
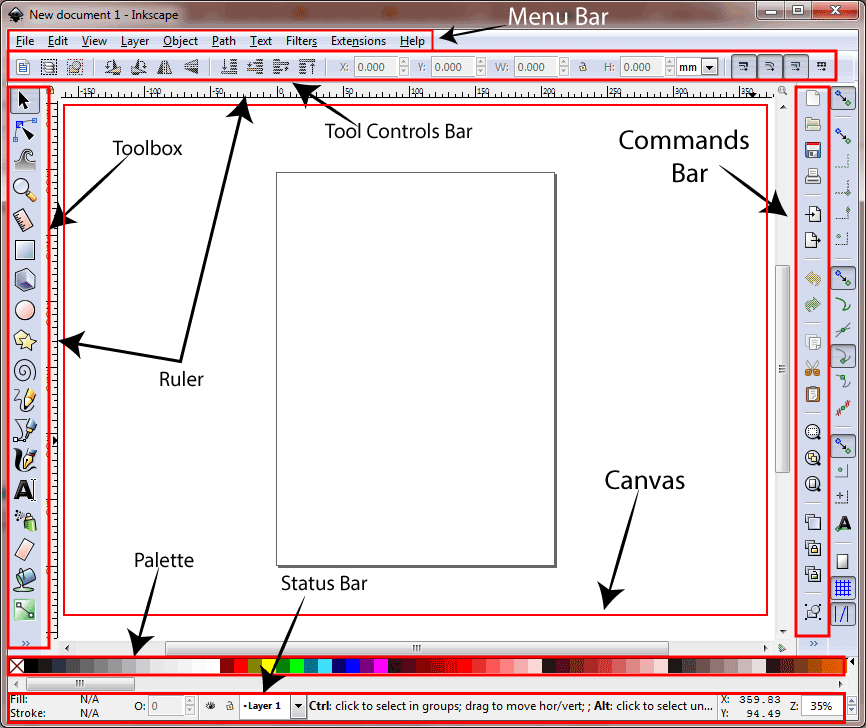
Inkscape is generally composed of a single-window on which drawings or images are created and manipulated. The default window elements are further divided into eight major areas, which are listed below:
- The Menu Bar
- The Commands Bar
- The Toolbox
- The Tool Controls Bar (also called Controls Bar)
- The Canvas
- The Rulers, Guides, and Grids
- The Palette
- The Status Bar
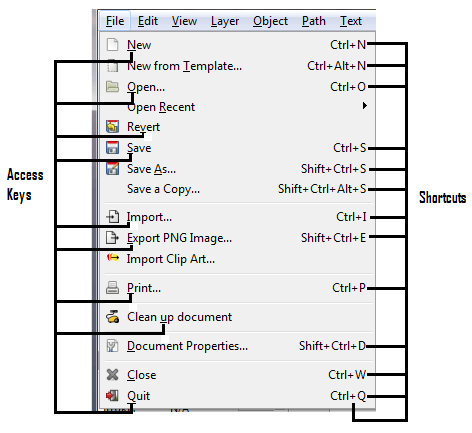
The Menu Bar

The Menu Bar appears on the top of the window. It contains the basic menu like File, Edit, View, etc., These menu contains a drop-down list of operations. Functions related to drawings are also available in the Menu Bar.
Most of the commands of Menu Bar are directly accessible from the keyboard, using access keys (underlined letter) or by keyboard shortcuts. For example, we are taking the File drop-down list to show the access keys and keyboard shortcuts of the list, as shown below.
The Commands Bar
The Commands Bar is vertically located on the right side of the user interface. It contains the icons that are shortcuts to the commands, which are accessible from the menus or shortcut keys. It also contains other controls used for manipulating the drawing objects and documents like file options, zoom levels, undo, cut, group, etc. The related function’s icons are grouped together and separated by a horizontal line.

The following table shows the brief description of Commands bar:
| Icons | Action | Description |
|---|---|---|
 | Create a new document from the default template | It is used to open a new Inkscape canvas. |
 | Open an existing document | It is used to open an existing file or import a raster or vector graphics image onto the canvas. |
 | Save document | It is used to save the existing document in SVG format. |
 | Print document | It is used to print the current document. |
 | Import a bitmap or SVG image into this document | It is used to import SVG files or other format images into the current document. |
 | Export this document or a selection as a PNG image | It is used to export the current document into PNG or other file formats. |
 | Undo the last action | It is used to undo the last action. |
 | Do again the last undone action | It performs the reverse function of the Undo button. |
 | Copy selection to the clipboard | It is used to copy an object to the clipboard. |
 | Cut selection to the clipboard | It is used to cut an object. |
 | Paste objects from clipboard to mouse point, or paste text | It is used to paste the objects. External images can’t be pasted into the Inkscape canvas. |
 | Zoom to fit selection in a window | It zooms the selected part to fit the window. |
 | Zoom to fit drawing in the window | It zooms only the drawing part of the canvas to fit the window. |
 | Zoom to fit the page in the window | It is used to zoom the page to fit the window. |
 | Duplicate selected objects | It is used to duplicate the selected object. |
 | Create a clone of selected objects | It is used to create a clone of the selected object. Cloning creates a “slave” of the original object, whereas duplicating creates a standalone object. |
 | Cut the selected clones’ links to its originals | It is used to cut the selected clone’s link from its original object. |
 | Group selected objects | It is used to group highly complicated shapes that need to be moved a lot. |
The Toolbox and Tool Controls bar
Toolbox

The Toolbox is vertically located on the left side of the window. It contains the basic set of utilities. It is used for creating and editing the shapes and images. These tools can be used for geometric shapes as well as free-form shapes, lines, text, and fills (colors and gradients).
The following table shows the brief description of the Toolbox:
| Name with icon | Action | Description |
|---|---|---|
 Selection Tool Selection Tool | Select and Transform objects | It is used to manipulate the basic components in Inkscape. It is also used to select, move, rotate, flip, raise, lower, change width/ height, and skew objects. |
 Edit Tool Edit Tool | Edit paths by nodes | It is used to edit an object’s shape accurately at a given time. It modifies the object’s nodes, the shape of paths or curves. |
 Tweak Tool Tweak Tool | Tweak objects by sculpting or painting | It is used to edit drawings by blurring the objects. It smoothly changes the shape or size of an object when it gets in touch with the tweak brush. |
 Zoom Tool Zoom Tool | Zoom in or out | It allows us to access a wide range of zoom operations. In Inkscape, the quality of onscreen Paths will not degrade as we zoom in or zoom out. |
 Measurement Tool Measurement Tool | Measure the objects | It allows us to update the measurements of length and angles. |
 Rectangle Tool Rectangle Tool | Creates rectangles and squares | It is used for creating and editing rectangles and squares, with an option of rounded corners. |
 3D Box Tool 3D Box Tool | Creates 3D boxes | It is used to create drawings that appear in three-dimensional. |
 Circle Tool Circle Tool | Creates circles, ellipses, and arcs | It allows us to create circles, ellipses, and arcs. In Inkscape, the object created with the circle tool can be converted from an ellipse to an arc and can be transformed into other shapes. |
 Star Tool Star Tool | Creates stars and polygons | It allows us to draw shapes like stars and polygons in the document easily. |
 Spiral Tool Spiral Tool | Creates spirals | It is a special class of tools that creates Live Shapes, like spiral arcs, etc. |
 Freehand Tool Freehand Tool | Draw freehand lines | It is used to draw freehand lines, shapes, and drawings. |
 Line Tool Line Tool | Draw Bezier curves and Straight lines | It is used for drawing shapes like Bezier curves, straight lines, Spiros, paraxial lines, polylines, and creating dots. |
 Calligraphic Tool Calligraphic Tool | Draw calligraphic and brush strokes | It is used to draw calligraphic and brush strokes using dynamic drawing techniques. |
 Text Tool Text Tool | Create and edit text objects | It allows us to write text in an SVG drawing. |
 Spray Tool Spray Tool | Spray objects by sculpting or painting | It is used to create copies or clones of an object by spraying like an airbrush. |
 Eraser Tool Eraser Tool | Erase existing paths | It is used to erase parts of a drawing. |
 Fill (Bucket) Tool Fill (Bucket) Tool | Fill bounded areas | It is used to fills a region of an object with the color. |
 Gradient Tool Gradient Tool | Create and edit gradients | It is used to create and edit radial or gradient lines to an object’s stroke. |
Tool Controls Bar
The Tool Controls Bar (also called Controls Bar) is located under the Menu Bar. It contains icons or clickable buttons that are specific to the selected tools. When each tool is selected in the Toolbox, the icons displayed in the Tool Controls Bar changes to show the icons related to that tool. Some of these options can affect the selected object, whereas the rest options take effect when creating a new object.

The Canvas
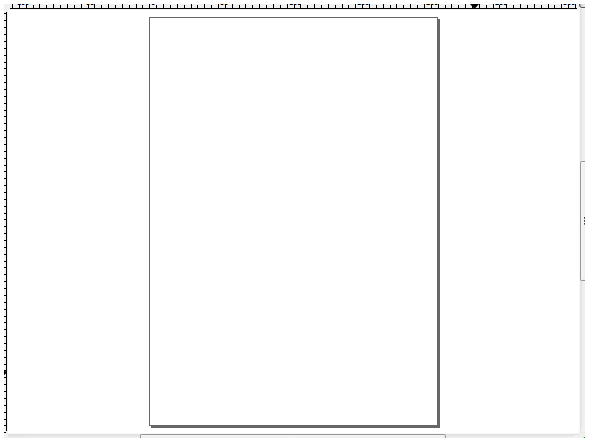
The Canvas is the main workspace and an essential part of the Inkscape interface. It is the main drawing area on which the drawing is created and viewed. It is located in the middle of the Inkscape window. The canvas can extend outside the viewable area of the window and can be panned (scrolled up/down and left/right) and zoom.
The Rulers, Grid, and Guide
Rulers
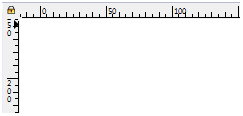
The Rulers are located on the top and left of the canvas. The first ruler is placed horizontally on the top of the canvas, which represents the X-axis coordinates. In contrast, the second one is placed vertically on the left side, which represents the Y-axis coordinates. The rulers may represent distances in several measurement units.
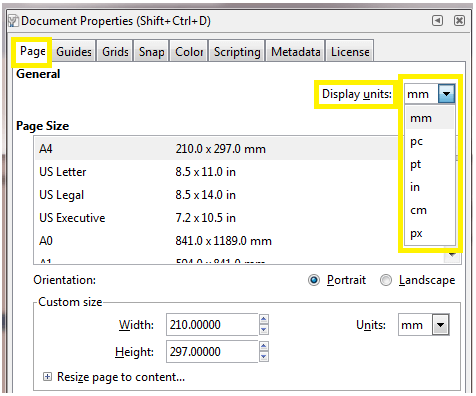
We can set the unit by using the following menu bar command File -> Document Properties -> Page tab -> Display units, as shown below.
Grid
The Grid is a set of vertical and horizontal lines. It is used to guide the drawing objects and images. There are two types of grids: rectangular and axonometric grid. The rectangular grid is one of the most commonly used grid, that is made up of horizontal and vertical lines. The axonometric grid allows a user to define any kind of angled grids.
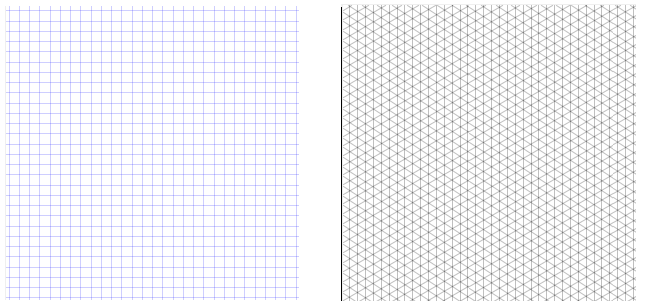
The above images shows the rectangular and axonometric grids, respectively.
Guides
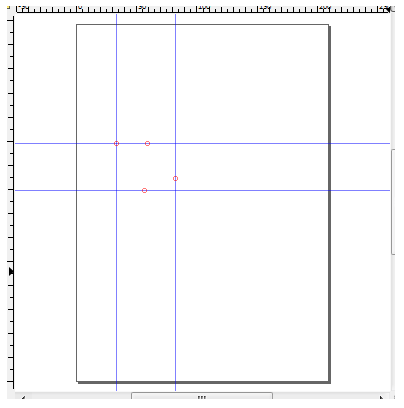
The Guides are the user-defined lines. It provides an easy alignment to an object. To use guides, click and drag from the ruler to the point where the guide is to be inserted and released. Clicking and dragging from the horizontal ruler produces a horizontal guide. Similarly, clicking and dragging from the vertical ruler produces a vertical guide.
In the following image, the vertical and horizontal blue lines on the canvas represent guides.
The Palette Bar

The Palette Bar is located at the bottom (above the Status Bar) of the window. It provides many fills and stroke style (color, gradient, patterns) options. Also, it is a quick way to apply colors on the shapes or diagrams. Colors can be dragged from the color palette and drop on the objects to change their fill. The colors in the palette can be changed by clicking on the arrow icon located at the rightmost side of the palette.
The Status Bar
The Status Bar is placed at the bottom of the window. It provides routine edit settings and a suitable focal point for all editing tasks. The Status bar seems like a redundant bar as most of its functions can be accessed from other menus.

The following table describes the brief description of the Status bar:
| Icon | Name | Description |
|---|---|---|
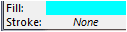 | Fill and Stroke Colors | It shows the fill and stroke colors of an object. Double-clicking on any of these color slabs invokes a fill & stroke window. |
 | Stoke Width | It shows the width of the selected object’s stroke. |
 | Master Opacity | It shows the opacity of the selected path. |
 | Toggle current layer visibility | It is one of the Layer management tool. On clicking the eye button, it will either hide (the shown layer) or show (hidden layer) the layer. |
 | Lock or unlock the current layer | It is used to lock or unlock the current layer displayed in the Layer Toggle. |
 | Layer Toggle | It is used to select a Layer on which we want to work. |
 | Description | It is the most useful function of the Status Bar. It shows the description and shortcut information of the selected object, tool, and handle. |
 | Cursor Coordinates | It shows the exact X and Y coordinates of the cursor. |
 | Zoom | It is used to zoom in or out of the canvas. |
Conversions in Inkscape
In Inkscape, conversions are referred as “to convert one form into another for editing purposes.” Inkscape supports two types of conversions:
- Object to Path Conversion
- Stroke to Path Conversion
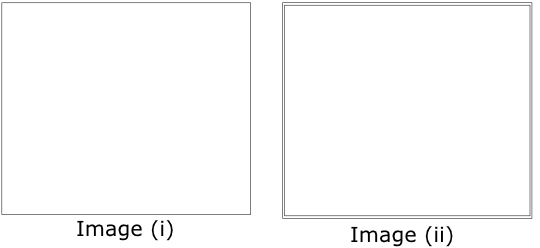
- Object to Path Conversion- It converts the shape or text object into the path, without changing the appearance of the object. But it removes all the capabilities of that particular object. The converted path cannot be edited with the tool it is made with. It can be edited only with the Node tool.
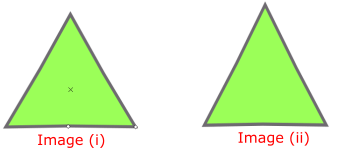
The above image shows the Object to Path conversion. Image (i) is of an object whereas, Image (ii) is of a path.
- Stroke to Path Conversion- It converts a stroke into a path. It means the object’s outline is converted from stroke to path. The converted path can only be edited by the Node Tool.
The above two images show the Stroke to Path conversion. In the first image, we have shown the stroke and in the second image, we have shown the path. The basic difference between the stoke and path is the outline of the object.
Path Operations (Boolean Operation)
In Inkscape, a number of commands are available to form new paths from the two or more existing paths. In the new path, the most important thing is the Z-order of the paths. Almost, in all paths operations, the top path is considered as running on the bottom path. It means the bottom path remains unchanged, and the top path is thrown away.
Let’s discuss the concept of path operations briefly.
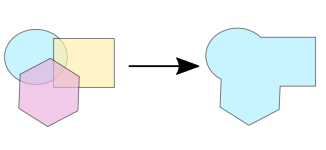
1. Union (Ctrl++) – It provides the union of one or more paths. When a new path is created, it consists of all the areas of the original paths. It removes self-intersections and creates individual sub-paths for each section.
The following image shows the union of paths:
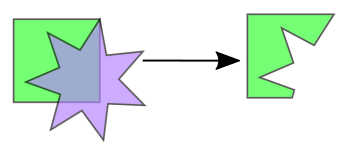
2. Difference (Ctrl+-) – It provides the difference between two or more paths. The difference between two or more paths is defined as the area removed from the top (star) path from the bottom path (square).
The following image shows the difference between two paths.
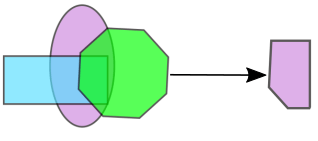
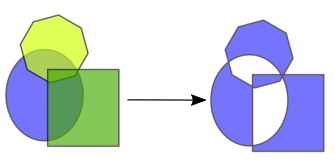
3. Intersection (Ctrl+*) – It produces the intersection of two or more paths. The intersection is defined as the common area among all the objects, that provides a new path.
The following image shows the intersection of paths.
4. Exclusion (Ctrl+^) – It provides the exclusion of two or more paths. According to an Even-Odd Fill rule, a new path is created by combining multiple sub-paths. It is called exclusion of paths.
The following image shows the exclusion of paths:
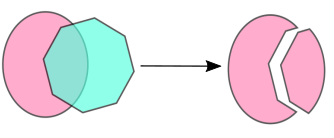
5. Division (Ctrl+/) – It provides the division among two or more paths. The bottom path is divided by the top path, that results in two or more new paths.
The following image shows the division of paths:
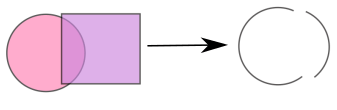
6. Cut Path (Ctrl+Alt+/) – It provides cutting of path. The bottom path is cut by the top path, that results in two or more new paths. The new paths are created without Fill.
The following image shows the cutting of paths:
Trace Bitmap
In Inkscape, the bitmap images are converted to paths via tracing. It uses the Potrace Bitmap tracing engine developed by Peter Selinger. Potrace is a tool for tracing and transforming a bitmap image into a smooth, scalable image. It takes bitmap image (.pbm, .bmp formats) as input and gives one of the various vector file formats as the output. It provides a set of curves, which results in an image.
We can open the Trace Bitmap window by pressing the keys Shift+Alt+B. The window has three tabs: Mode, Options, and Credits. The Mode tab is for selecting the tracing mode. The Options tab contains a list of options, and Credits tabs gives information about the author of Potrace. All windows are shown below.
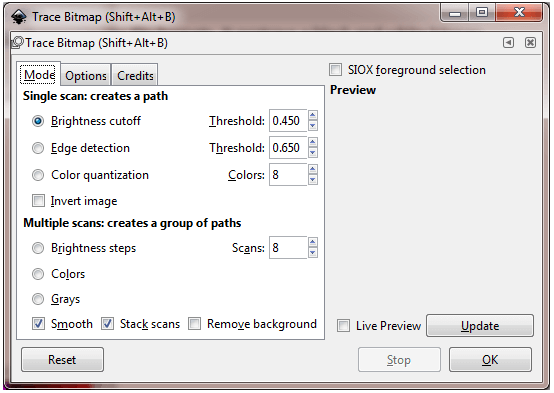
The above image shows the Mode tab of the Trace Bitmap window.
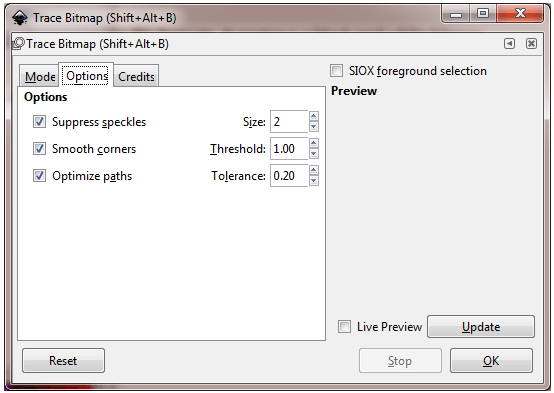
The above image shows the Options tab of the Trace Bitmap window.
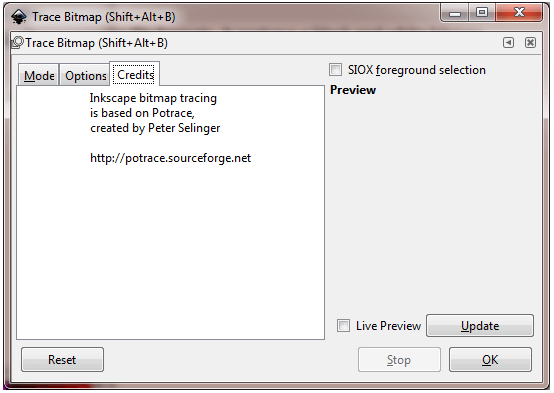
The above image shows the Credits tab of the Trace Bitmap window.
There are three types of tracing modes are as follows:
- Brightness Cutoff
- Edge Detection
- Color Quantization
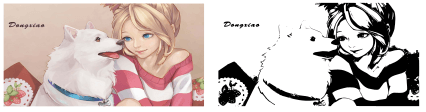
Brightness Cutoff
It slightly uses an amount of red, green, and blue (with shades of grey) of a pixel as an indicator. It indicates the given image, either black or white. The threshold can be set from 0.0 to 1.0 (white to black). In the case of the maximum threshold, a few number of pixels are considered to be “white,” and the produced image will be darker.
The following image shows the brightness cutoff.
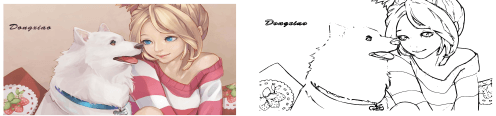
Edge Detection
It uses an edge detection algorithm that is designed by J. Canny. It provides a quick way of finding a set of lines of similar contrast. Like brightness cutoff, the threshold can be set from 0.0 to 1.0. It adjusts the darkness or thickness of the edge in the output.
The following image shows the edge detection.
Color Quantization
It is a complex method in which the algorithm identifies the color transformation instead of modifications in brightness and edges.
The following image shows the color quantization.
Examples of Inkscape
In the following examples, we have performed different operations on the image and we have also drawn different shapes.
1. Creating an Arrow
Let’s draw an arrow in Inkscape.
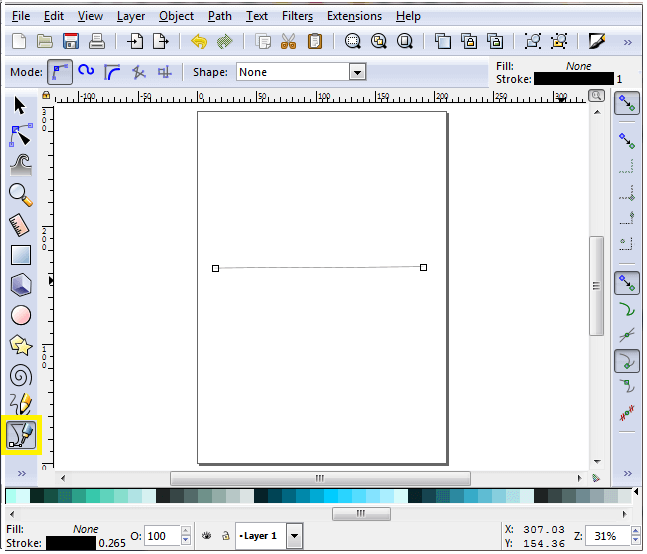
Step 1: Open the Inkscape, click on the Pen tool and draw a straight line, as shown.
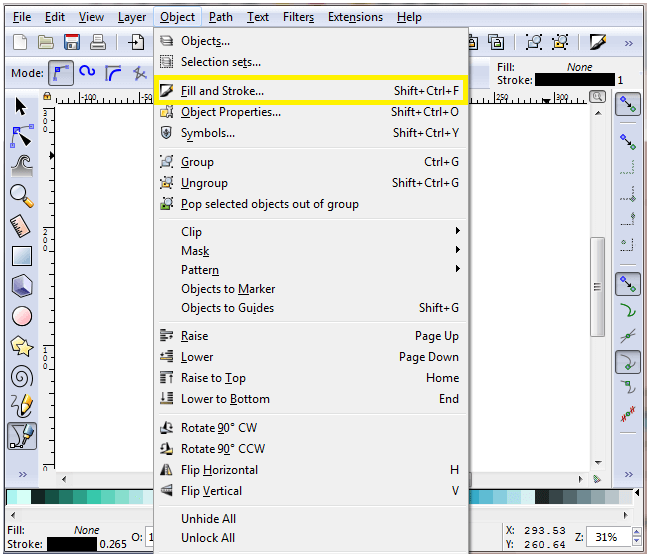
Step 2: Click on the Object menu and select Fill and Stroke (or press Shift+Ctrl+F) from the drop down list.
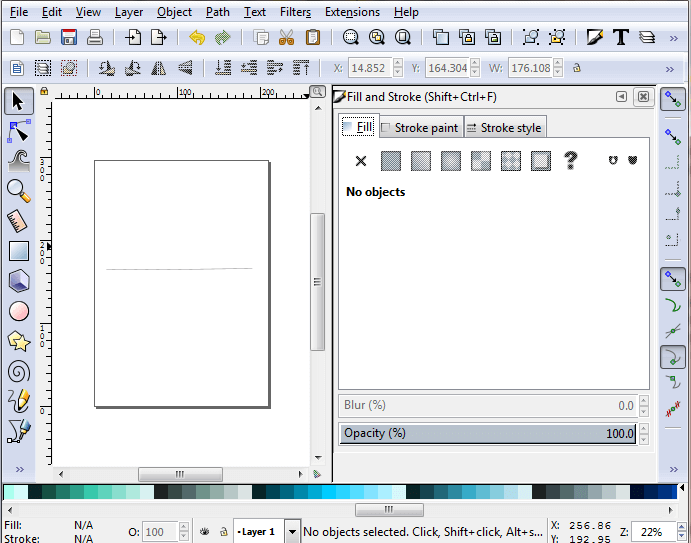
Step 3: The Fill and Stroke window will open once you click on the Fill and Stroke button, as shown.
Step 4: Select the line and click on the Stroke style button of the Fill and Stroke window. Select the arrow type and add it on either of its sides, as shown.
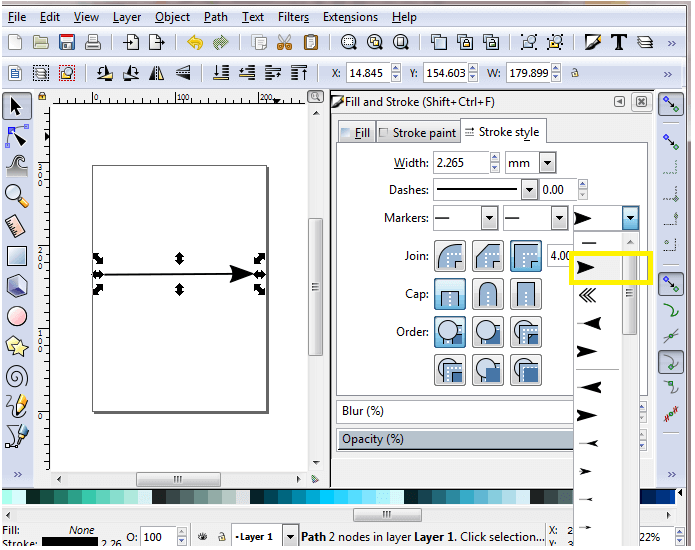
Similarly, we can create different designs of the arrows.
2. Crop an image in Inkscape
Note: Before moving to the next step, make sure that each object is grouped together.
Step 1: To group each object do the following:
Select all -> click on Object -> Group or press Ctrl+G.

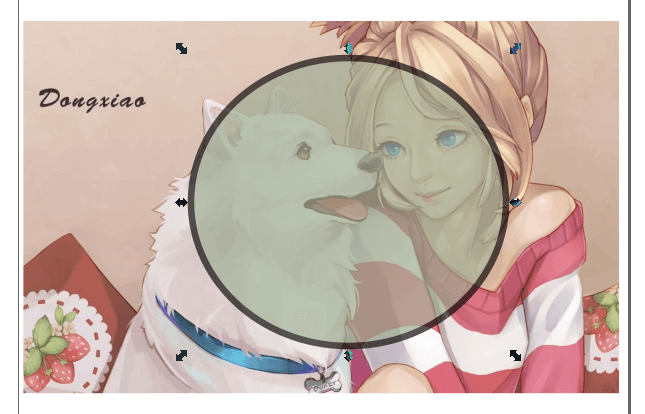
Step 2: Now, click on the Circle tool and draw a circle on the area you want to crop, as shown below. You can choose any shape to crop an image.
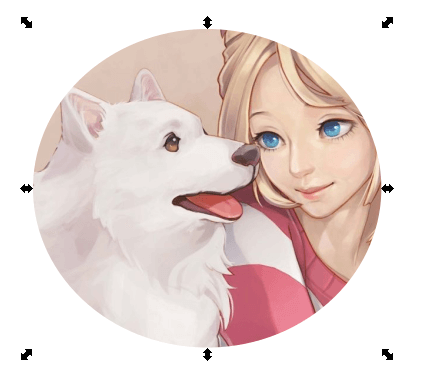
Step 3: Select the circle and scene. Now click on Object menu -> Clip -> Set to crop the image.

Step 4: The cropped image is shown below.
3. Creating a logo in Inkscape
Follow the steps to create a logo in Inkscape.
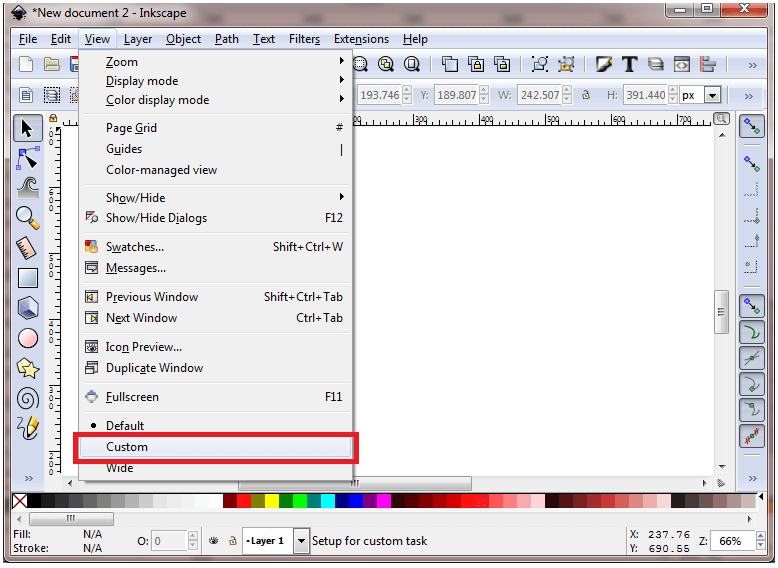
Step 1: Open the Inkscape, click on View menu, and select Custom.
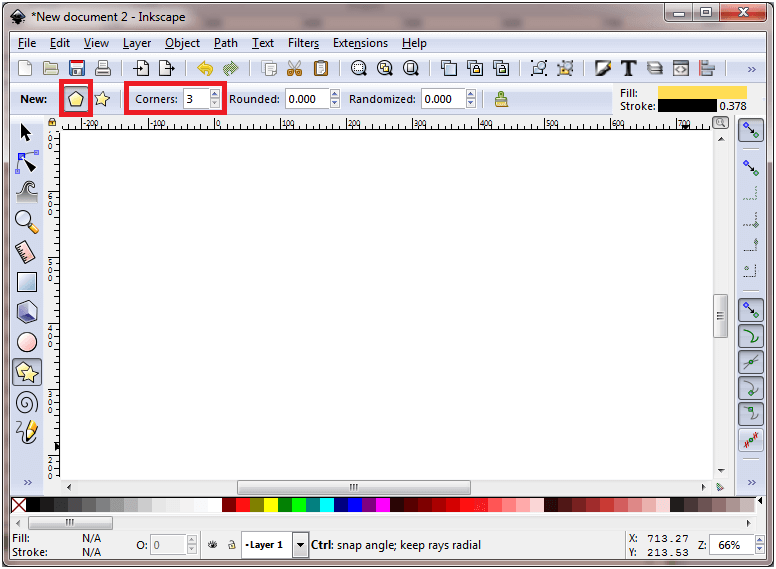
Step 2: Now, click on the Polygon Tool and select polygon in the Tool Controls bar. After that, set the number of corners to 3, as shown below.
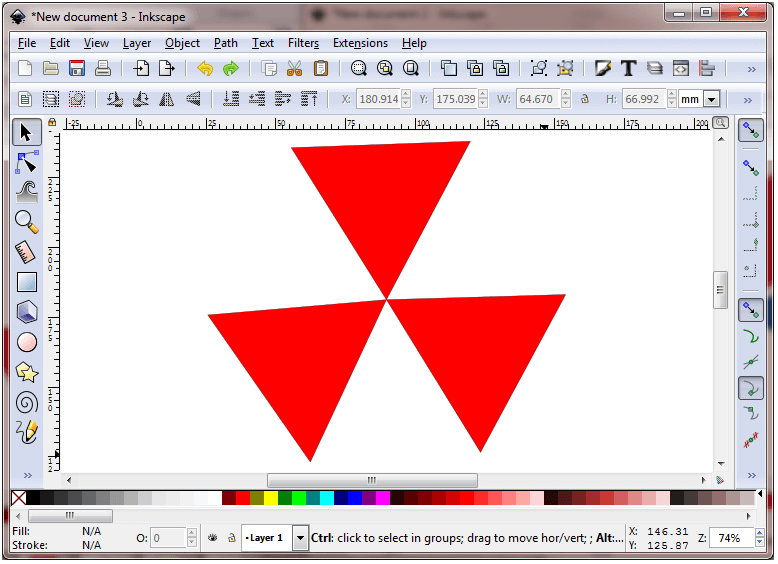
Step 3: Now we are going to draw three triangles in a pattern for logo, as we have shown below.
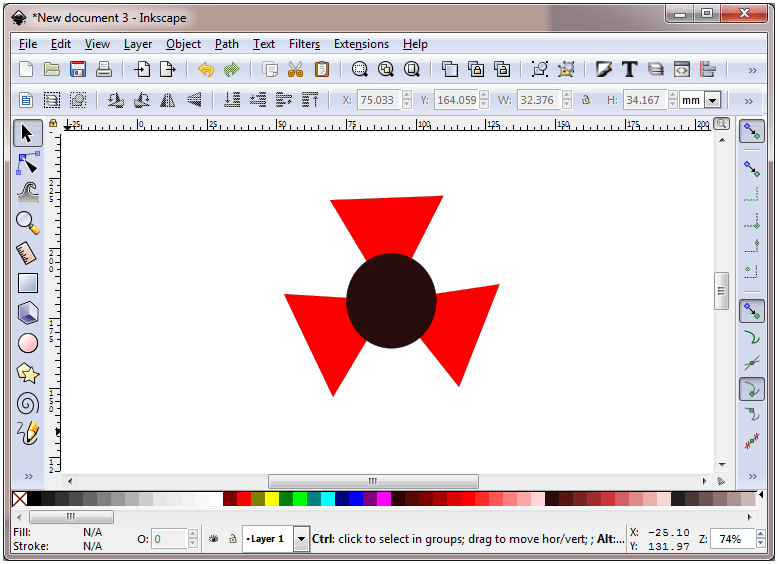
Step 4: In this step, we are going to create a circle in the middle (intersection point of all triangles) of the drawing by using the Circle Tool, as shown below.
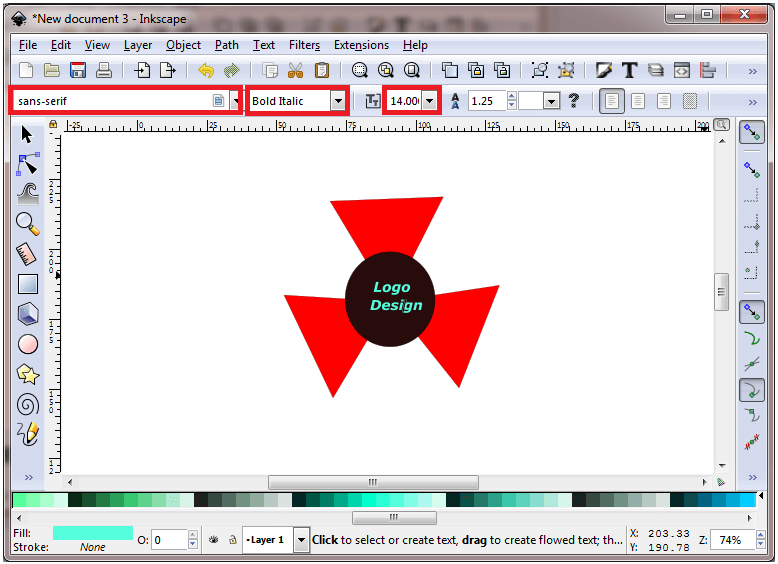
Step 5: In this step, we are going to add text in our logo design with the help of the Text Tool. We can also set the font, font style, and font size in the Tool Controls bar.
Similarly, we can create different types of logos in Inkscape.
Inkscape vs. Illustrator
Inkscape is vector graphics software. It is used by beginners and professionals to create illustrations, logos, diagrams, 3D images, maps, etc.
Adobe Illustrator is a vector graphics application. It is built for professional graphic designers. It is a part of the Adobe family (Adobe Creative Cloud). It allows us to create logos, drawings, sketches, and typographies.
| Parameters | Illustrator | Inkscape |
|---|---|---|
| Flexibility | Illustrator is a very flexible software as it provides support for almost all types of file formats. | Inkscape is also a graphics software. It does not support .eps file format. It cannot export a file in .jpeg format, but it can be added to the Inkscape with the help of an extension. |
| Cost | Illustrator is an expensive software with extensive customer support. It offers several tutorials and videos, a lot of chatting and calling options. | Inkscape is an open-source and free software, that provides an open community forum to its users. In the forum the users can discuss issues. |
| Versatility | Illustrator cannot run on Linux systems. We can use it on Windows and Mac OS only. | Inkscape runs on all operating systems, such as Windows, Linux/ GNU, and Mac OS. |
| Cross-platform | Vector graphics files created with Adobe Illustrator can be imported to After Effects, Premiere Pro, etc. | Images created with any other graphics software cannot be imported in Inkscape. |
| Easy to use | Illustrator offers a very perfect, polished, and oversimplified interface for professionals. | Inkscape offers a well-organized and managed interface for both beginners and professionals. |
| Hardware requirements | It requires high-performance hardware. | Inkscape can run good enough with low-end computers and outdated software. |
Inkscape vs. GIMP
GIMP (GNU Image Manipulation Program) is a raster graphics software. It is used for image editing, transformations, free-form drawing, etc. It provides many sophisticated tools for editing, conversion between various image formats, etc. It was released under the GPLv3+ and can be run on Linux, Mac OS, and Windows.
Inkscape is a vector graphics software. It is used to create graphics images, illustrations, icons, logos, 3D images, etc. It can run on any platform.
| Parameters | Inkscape | GIMP |
|---|---|---|
| Description | It is a vector graphics software for creating and editing graphic images. | It is a raster or bitmap graphics editor software for creating and editing images. |
| Creation logic | It uses mathematical equations, the geometry of points, lines, and curves for creating vector graphic images. | It uses pixels for creating raster or bitmap graphics images. |
| Image quality | The quality of the image remains unchanged while we zoom-in. | It degrades the quality of the image while we zoo-in. |
| Usage | It is used, when we want to draw basic or simple designs. | It is used, when we want to create complex images. |
Inkscape vs. CorelDRAW
Inkscape is an open-source vector graphics application. It is used to create and edit 2D and 3D images such as logos, icons, illustrations, patterns, etc.
CorelDRAW is robust vector graphic software developed by the Corel Corporation. It is used by graphics designers and professionals for editing 2D images such as logos, patterns, illustrations, icons, etc. It offers several design tools for image editing that helps us to work smarter and faster.
| Parameters | Inkscape | CorelDRAW |
|---|---|---|
| Cost | Inkscape is an open-source and free vector graphics software. | CorelDRAW is a paid software with affordable pricing. |
| CMYK output | Inkscape cannot output images in CMYK color format, which makes it a wrong choice. | CorelDRAW can output images in CMYK color format. |
| Versatility | Inkscape is a versatile software. It can run on any platform. | CorelDRAW runs only on Windows platform. It is not compatible with Linux and Mac OS.` |
Prerequisite
To learn Inkscape, you don’t need to have any prior knowledge in graphic designing, as Inkscape is easy to learn and understand.
Audience
Our Inkscape Tutorial is designed to help beginners and professionals.
Problem
We assure you that you will not find any problem with our Inkscape Tutorial. But if there is any problem or error, please post the same in our contact form.