IoT Project: Google Firebase using NodeMCU ESP8266
In this IoT (Internet of Things) project, we will connect Arduino NodeMCU device with Google Firebase database and by using Android application, we shall send data to Firebase to control LED.
Google Firebase database is a real-time, high speed and free database provided by Google.
Hardware Requirements
- Wi-Fi Node MCU ESP8266
- Standard USB cable to connect Node MCU
- Jumper wires female to female
- LED
- Bulb holder
- Wire
- AC 220v/120v home appliances or 9v Hi-Walt Battery
Software requirements
- Arduino software
- Android Studio
Working principle of the project (Android app, Google Firebase, and Node MCU)
In this project, there are three main components which use an Android app, Firebase database, and Wi-Fi Node MCU.

The Android app sends the serial data 1 or 0 to the Firebase database. The Firebase database interacts with Wi-Fi NodeMCU and this NodeMCU acts on the basis of data received from Firebase Database. If NodeMCU receives serial data 1, it turns ON the LED, and if NodeMCU receives serial input 0 then it turns OFF the LED.
This project is classified into three different steps:
- Connecting Arduino Node-MCU with Google Firebase
- Control Led Using Firebase Console
- Control Led with Android App using Firebase database
Connecting Arduino Node-MCU with Google Firebase
Download the Firebase Arduino library from https://github.com/FirebaseExtended/firebase-arduino

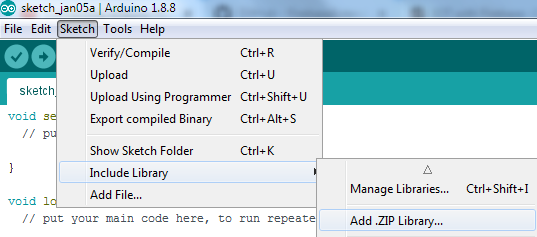
Add the Firebase Arduino library to Arduino IDE, click Sketch -> Include Library -> Add .ZIP Library…. and select downloaded library.
If Firebase Arduino library is successfully added, it shows in Include Library.
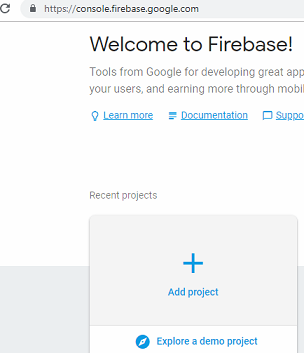
Now, Login the Google Firebase using your Google account. Create a Firebase project by clicking Add project.
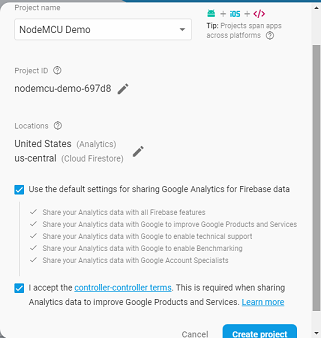
Provide a project name and create project.
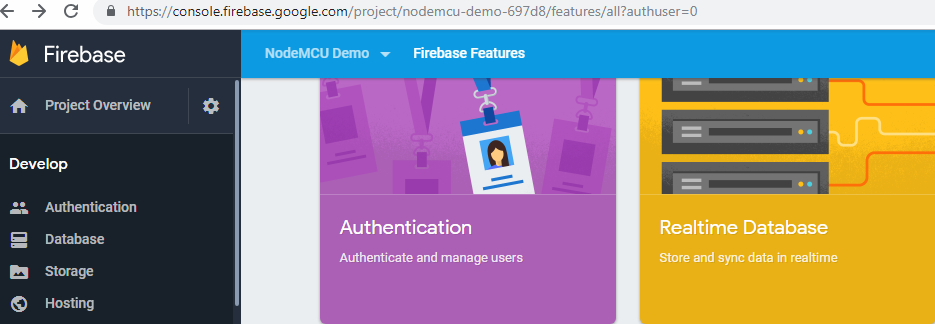
Click, Project Overview setting where you will find your project’s detail. Now, click on Service accounts option to view database secrets.
A program on Arduino IDE to connect NodeMCU and Google Firebase
Click, File > Examples > FirebaseArduino > FirebaseDemo_ESP8266
Click on Project Overview > Project Settings > Service Account > Database secrets to view firebase auth secrets, add this secret to your Arduino program’s FIREBASE_AUTH.
Go to database section at left-menu and search for Realtime Database, where you find the Firebase host URL. Copy this URL without “https://” and “/” the at end and paste it at FIREBASE_HOST in the program.
Add Realtime database in your project, click Project Overview setting > Realtime Database.
Add your WIFI name and password in WIFI_SSID and WIFI_PASSWORD respectively.
Connect your NodeMCU ESP8266 with your personal computer via standard USB cable and upload code in it. While uploading the code into NodeMCU, the device continuously blinks.
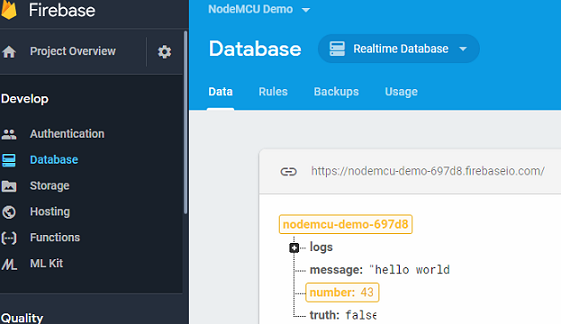
Now open the serial monitor form Tools, you will find data are uploaded to Firebase database.
Note: If you got setting /number failed: message in serial monitor then updates the fingerprint: go to C:/Users/{username}/My Documents/Arduino/libraries/firebase-arduino-master/src open FirebaseHttpClient.h file, and update the fingerprint with => 6F D0 9A 52 C0 E9 E4 CD A0 D3 02 A4 B7 A1 92 38 2D CA 2F 26
Output:

Google Firebase database is one of the fastest, real-time and free databases for IoT.