Joomla – Adding Menu Items
Each menu in Joomla may contain several menu items. Menu Item processes the predefined type of page, which is determined by the type of Menu Item. Menu item types include several options such as articles, configuration managers, contacts, news feeds, privacy, search, smart search, system links, tags, users, and wrappers, etc. In this article, we are going to explain how to create the menu items in Joomla. We are going to create a menu item with a single article page.
Create Menu Items
Step 1
Log into your Joomla account and click on “Menus – [Your Menu Name] – Add New Menu Item” from the Joomla Taskbar. It will look like the following image:

Or you can click on the “Menu(s)” option from the Joomla Control Panel page and click on the “Menu Items” from the left sidebar. Then, click on the ‘New‘ button from the toolbar.
Step 2
You should get the form, as shown below:
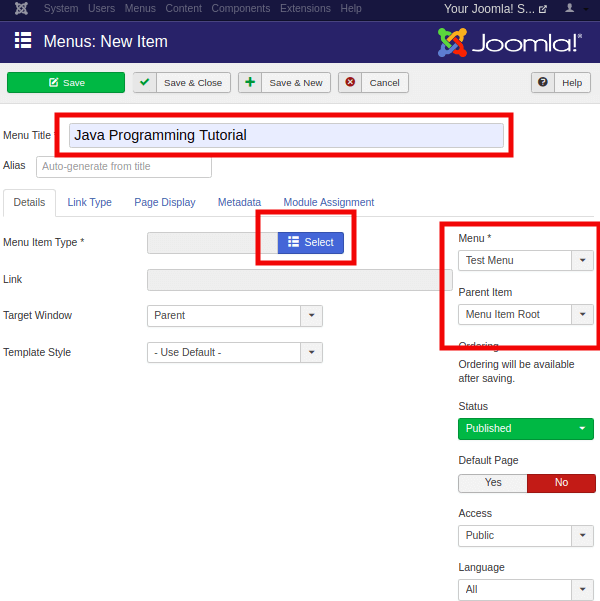
There are several boxes and tabs available in this page. You have two fields above the tabs, which are:
| Menu Title | It is used to define the title of the Menu Item. |
| Alias | It is used as a SEF (Search Engine Friendly) URL. Joomla assigns the value automatically as per the title. It does not allow using spaces and underscores. |
By default, you will be redirected into the ‘Details‘ tab. Now, you are required to choose options that are present under the ‘Details’ tab.
Menu Item Type
It is used to specify the type of menu item that you are going to create. It can be an article, tag, web link, system link, contact, etc. To assign the type of menu item, you need to click on the ‘Select‘ button, and you will get the list of different types of menu items.
Now click on the ‘Articles‘ option, and you will get a new window. Choose ‘Single Article‘ option, as shown below:
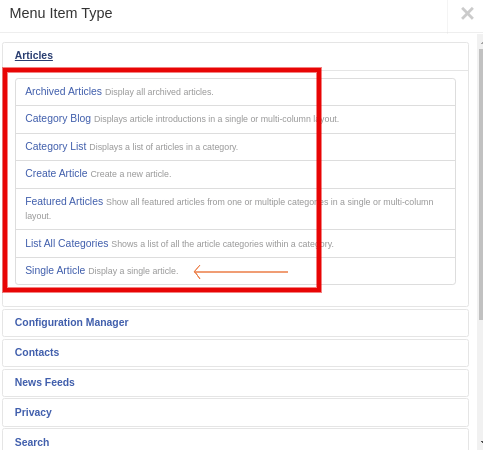
After clicking on the ‘Single Article’ button, you will get a new field (Select Article), which will ask you to choose the article that you want to link with this menu item. Select the article from the list and process it further.
Rest of the options under the ‘Details’ tab are defined below:
| Link | It is used to specify the link assigned to the menu item. It is generated automatically. |
| Target Window | It is used to target the window for menu items such as a parent, new window with navigation, or without navigation. |
| Template Style | It is used to select the template style for the site. There are pre-installed templates (Beez3 and Protostar) that you can use. |
| Menu | It is used to specify the menu link, either the main menu or the created ones. |
| Parent Item | It is used to select the parent item by choosing either the Menu Item Root or Home. |
| Status | It is used to specify the status of the menu item, such as published, unpublished, or trashed. |
| Default Page | It is used to select the menu item as the default or home page of the site. There is only a slider button to choose ‘Yes’ or ‘No’ options. |
| Access | It is used to allow access to the selected users. There is a drop-down list to allow access to the guest, public, super users, registered, or special users. |
| Language | It is used to specify the language of the menu item. |
| Note | It is used to put text information for the reference. |
Step 3
After selecting the type of menu item, there will be a new ‘Options‘ tab generated automatically. You can either ‘show’ or ‘hide’ different details on your site using the ‘options’ tab. These details include titles, category, author name, publish date, tags, etc. This page looks like the following screenshot:
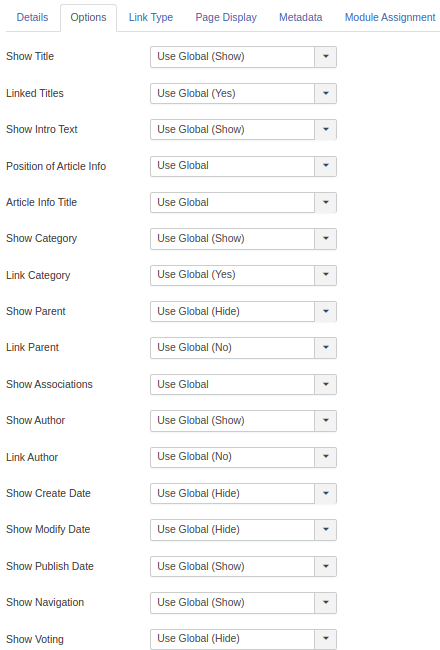
Customize these fields as per your preference.
Step 4
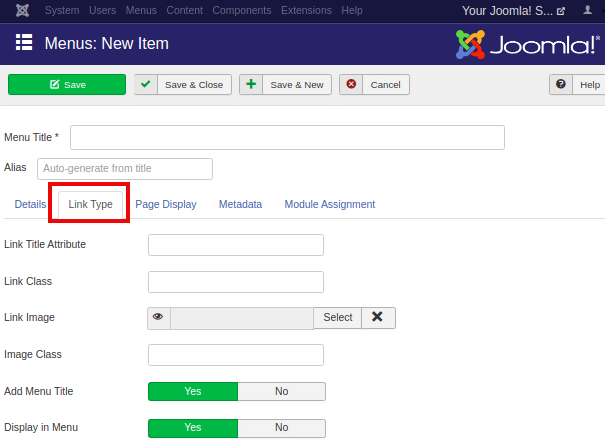
Next tab is ‘Link Type‘, which contains the following options:
| Link Title Attribute | It is used to specify the description for the title attribute of the assigned hyperlink. |
| Link Class | It is used to define a class for the link. |
| Link Image | It is used to attach an image as a hyperlink. |
| Image Class | It is used to define a class for the attached image. |
| Add Menu Title | It is used to add a menu title next to the image. There is a slider to choose either ‘Yes’ or ‘No’ option. By default, it remains ‘Yes’. |
There is no mandatory field, so you can also leave it as default. It will look like the following image:
Step 5
Click on the ‘Page Display‘ tab, and you will get the following screen:
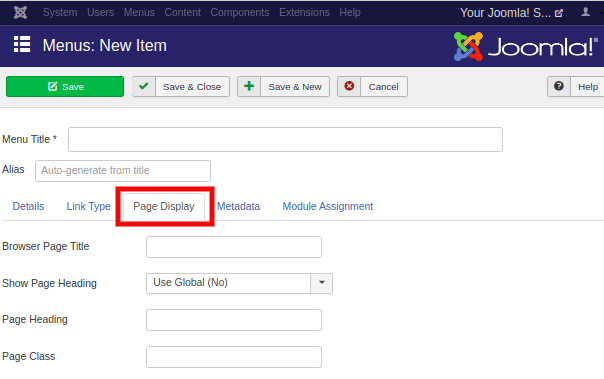
Enter the following details as per your choice. These are not mandatory but good for better customization.
| Browser Page Title | It is used to specify the description for the browser page title. |
| Show Page Heading | It is used to select ‘Yes’ or ‘No’ to display the page heading. |
| Page Heading | It is used to specify the text for the page heading. |
| Page Class | It is used to set the optional CSS class to style the elements of the page. |
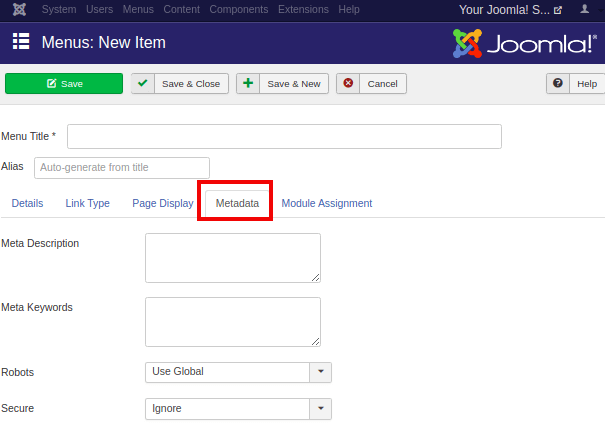
Step 6
Next tab is the ‘Metadata‘ tab which contains the following options:
| Meta Description | It is used to specify the description of the page, which will be displayed in the results of the search engines. |
| Meta Keywords | It is used to define related keywords that help search engines to show relevant results. |
| Robots | It is used to specify the robotic instructions such as Global, Index-Follow, No Index-Follow, Index-No Follow, No Index-No Follow. |
| Secure | It is used to specify whether the link should use SSL or Secure Site URL. It provides a drop-down menu with three options, such as Off, On, Ignore. |
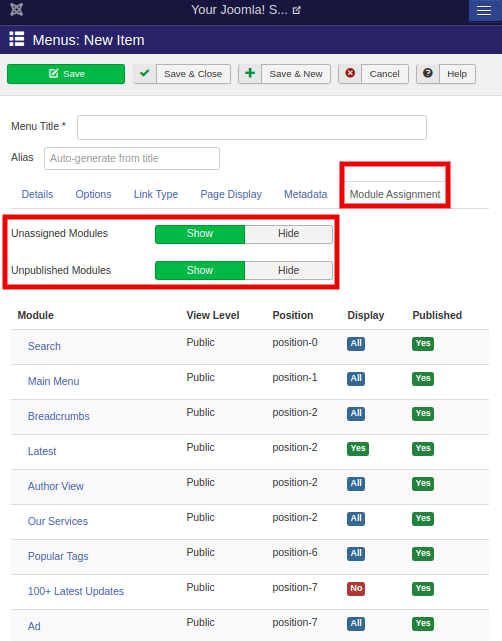
Step 7
‘Module Assignment‘ is the last tab that controls the module display on the page. You can show or hide the unassigned modules and unpublished modules. The following image displays the options available under the ‘Module Assignment’ tab:
After filling the details in all the required fields, you need to click on the ‘Save‘ button from the toolbar.
It is the way to create menu items in Joomla.
Note: The created Menu Items will not be displayed on the site if you have not assigned a module to the created Menu.