Joomla Components Menu
Navigate to the “Components” menu from Joomla Taskbar. After you click on the “components” button, a drop-down menu will be displayed. It contains several options, as shown below:
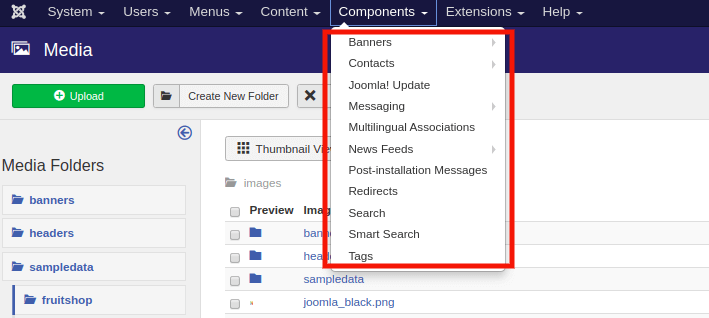
Banners
Banners are used to set or arrange the banners on the website. If you click on Banners, you will get the submenu with the following options:
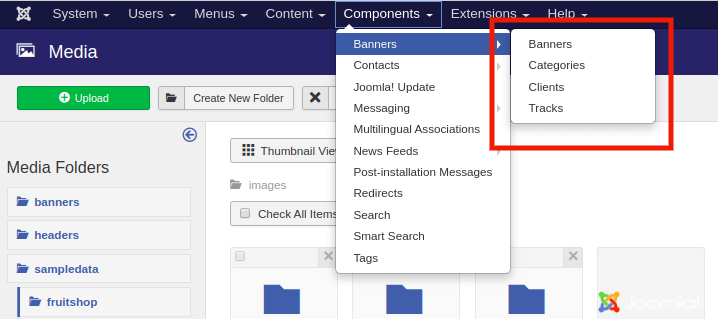
1) Banners
Banners are used to edit, modify, or add the banners on the Joomla website to display. To access the banners, navigate to the “Components – Banners – Banners” from the Joomla Taskbar. The following screenshot will be displayed after clicking on the ‘banners’ button:
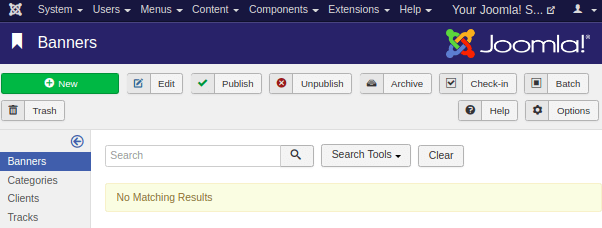
There are some options in the toolbar, which include some buttons to perform various tasks. These tasks include features like adding a new banner, editing the existing one, publishing or unpublishing the banner, deleting the banner, etc.
2) Categories
The category manager provides you an option to create a new banner category or edit the existing one. You need to click on “Components – Banners – Categories” to access the category manager. The category manager page looks like the following screenshot:
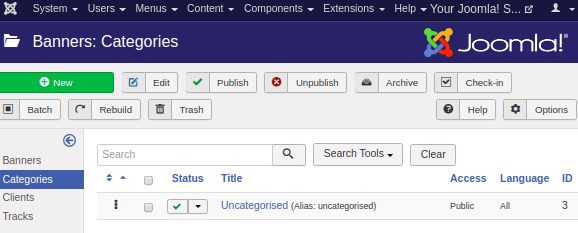
The category manager page also includes the toolbar on top of the page containing several buttons so that you can create, edit, publish/unpublish, or delete the banner categories. Then, there is a search box with some filters to find the created banner category easily from the list. Below, there is a column specifying the various details related to the banner categories. A column header contains the following options:
| Ordering | It is indicated by the ‘Up-Down Arrows’ and used to set the desired order of items. You can activate this option, drag and drop the items by dragging the three dots bar icon on the desired position. |
| Checkbox | It is used to select one or more banner categories by clicking on the box. It can be used to perform actions such as edit, publish, or unpublish for multiple items. |
| Status | It is used to specify the status of the banner categories, i.e., Published/Unpublished or Trashed. |
| Title | It is used to specify the name of the title in the banner category. |
| Access | It is used to specify the access level, i.e., public or private. |
| Language | It is used to specify the language used to create the banner categories. |
| ID | It is the unique identification number, which is assigned to the banner categories automatically. |
3) Clients
The client manager is used to create a new client banner or edit the existing ones. To access the client manager, navigate to the “Components – Banners – Clients” from the Joomla Taskbar. It will look like the following screenshot:
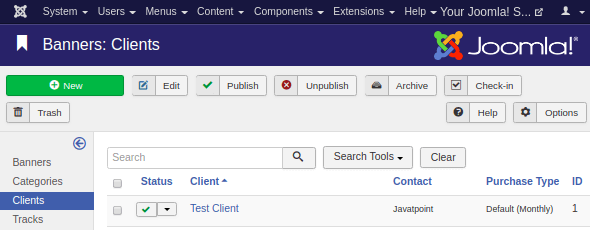
The toolbar on the client manager page contains the basic options to create, edit, publish/unpublish, or delete the clients. The column header in the “Banner Manager – Clients” page contains the following details:
| Checkbox | It is used to choose one or more clients by clicking on the box. |
| Status | It is used to specify the status of the clients, i.e., Published/Unpublished or Trashed. |
| Client | It is used to specify the name of the Banner clients. |
| Contact | It is used to specify the contact information of the clients. |
| Purchase Type | It is used to specify how the clients are purchasing the banners, i.e., Yearly or Monthly. By default, it is always monthly. |
| ID | It is the unique identification number, which is assigned to the items automatically. |
The search box helps to find the client from the list easily.
4) Tracks
This page helps to view the tracking information for a list of existing banners. Navigate to the “Components – Banners – Tracks” from the Joomla Taskbar to open a tracking page. It will look like the following screenshot:
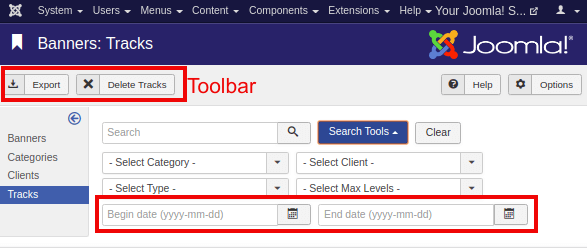
There are two options available in the toolbar:
| Export | It is used to export the banner tracking information in the CSV file. |
| Delete Tracks | It is used to delete the information of the selected tracks. |
There is a search box and some filter options available below the toolbar. You can choose the “Begin Date” and the “End Date” to track the information of banners within a particular period.
Contacts
It is used to add the contact information of the client on the Joomla site such as name, address, telephone number, email, etc. To open contacts manager, navigate to the “Components – Contacts” from the Joomla Taskbar. The following screenshot displays the contact manager:
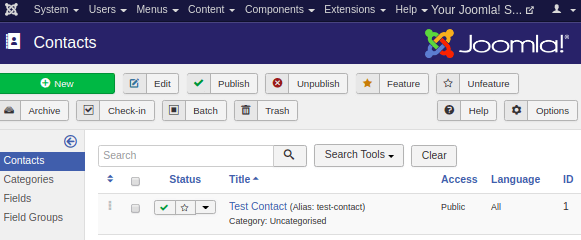
You can also create contact categories, fields, and field groups for contacts.
Joomla Update
Click on the “Components – Joomla! Update” It displays the installed Joomla version. There are three buttons on the toolbar of Joomla Update page:
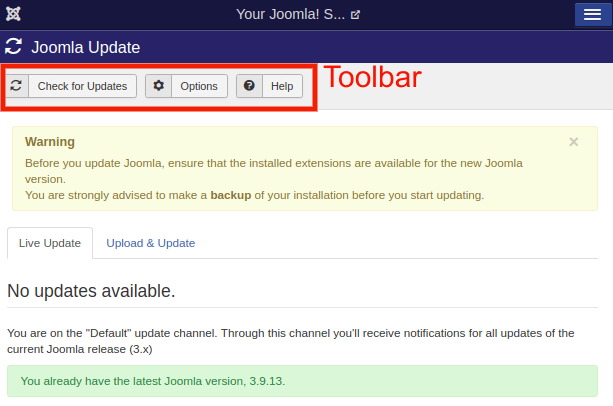
| Check for updates | It is used to check whether there is a newer version available or not. |
| Options | It is used to open the setting window where you can change or modify the settings for the Joomla Updates. |
| Help | It is used to open the help screen. |
There are two sections below the toolbar:
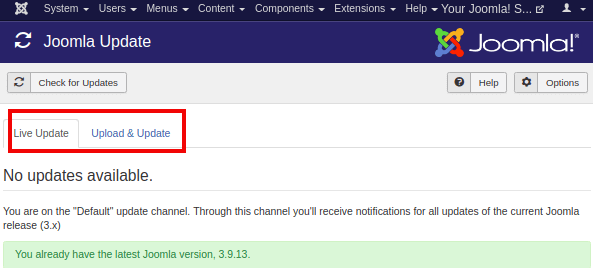
| Live Update | It automatically checks for the newer version and notifies about it. If an update is available, you can directly download and install the update using this option. |
| Upload & Update | This option is used when you have the latest Joomla update package. You need to upload the Joomla package and install it manually. |
Messaging
The message manager allows you to send and receive messages in Joomla. Click on “Components – messaging” from the Joomla Taskbar to access the message manager page. It looks like the following screenshot:

This option is used to send messages to the other backend of Joomla site. You can create or delete the messages from this page.
The toolbar in the message manager page contains the following options:
| New | It is used to create a new message. |
| Mark as Read | It is used to mark the selected messages as the messages which have been read. |
| Mark as Unread | It is used to categorize the selected messages in a category, which has not been read yet. You can mark the messages as unread even if you have already read them. |
| My Settings | It is used to specify the settings related to messages. |
| Trash | It is used to delete the selected messages permanently. |
If you want to create a new private message, then you need to click on a “New” button from the toolbar. It will open a new window like the following screenshot:
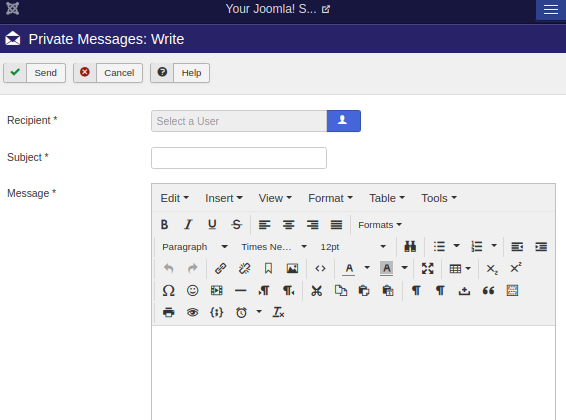
You can also create a new private message directly from the Joomla Taskbar. Navigate to the “Components – Messaging – New Private Message“.
Newsfeeds
It is used to add a news feed on the Joomla site from other sites.
To open a newsfeed page, navigate to the “Components – News Feed” from the Joomla Taskbar. The following image displays the newsfeed page:
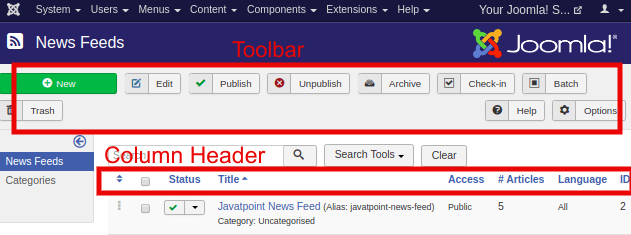
The toolbar provides several options such as create new newsfeed, or edit, publish/unpublish, archive, check-in, trash or batch process existing newsfeeds. Then there is a search box to find the created newsfeed easily from the list. Below, there is a section containing details in columns for the created newsfeeds. A column header contains the following options:
| Ordering | It is indicated by the ‘Up-Down Arrows’ and used to set the desired order of items. You can activate this option, drag and drop the items by dragging the three dots bar icon on the desired position. |
| Checkbox | It is used to select one or more newsfeeds by clicking on the box. |
| Status | It is used to specify the status of the created newsfeeds, i.e., Published/Unpublished or Trashed. |
| Title | It is used to specify the name of the title in the newsfeeds. |
| Access | It is used to specify the access level, i.e., public or private. |
| Articles | It is used to specify the number of articles to be displayed in the newsfeed. |
| Cache Time | It is assigned automatically as per the response time. |
| Language | It is used to specify the language used to create the newsfeeds. |
| ID | It is the unique identification number, which is assigned to the newsfeed items automatically. |
You can also create newsfeed categories using the categories option from the newsfeed manager page.
Post-Installation Messages
If you click on the “Components – Post Installation Messages“, you will get the screen where you can review an actionable message from Joomla after installation.
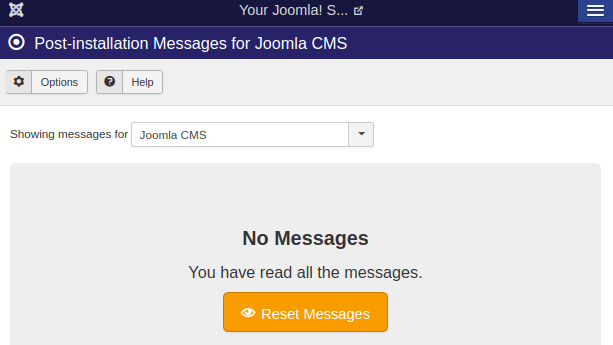
It is used to deliver messages after a successful installation of Joomla or its extension.
Redirect
The redirect manager is used to redirect the URLs which do not exist on the website with the working web pages. Navigate to the “Components – Redirect” option to open a redirect manager. It will look like the following screenshot:
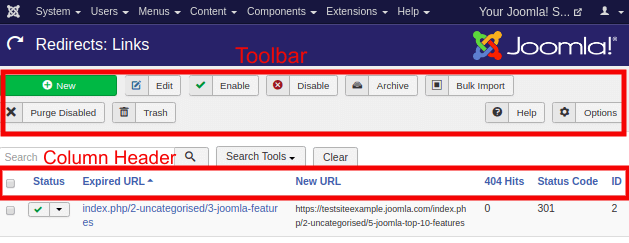
The following are the options available on the toolbar present on the redirect manager page:
- New- It is used to create a new redirect URL.
- Edit- It is used to edit the existing redirect URL.
- Enable-It is used to enable the redirect feature for selected URLs.
- Disable- It is used to disable the redirect feature for selected URLs.
- Archive-It is used to change the status of the selected redirect item to published or unpublished items by changing the archive status.
- Bulk Import- It is used to create one or more than one redirect items simultaneously.
- Purge Disabled- It is used to delete all the disabled redirect links.
- Trash- It is used to delete all the selected redirects.
Just like other pages, the redirect manager page also provides a search box with filters to find the particular redirect easily.
The column header contains the following options:
| Checkbox | It is used to select one or more redirects by clicking on the box. |
| Status | It is used to specify the status of the created redirects, i.e., Published/Unpublished or Trashed. |
| Expired URL | It is used to specify the URL that is to be redirected towards the website. |
| New URL | It specifies the designated URL. |
| Referring Page | It is used to redirect the referring web pages. |
| Created Date | It is used to specify the date of URL creation. |
| 404 Hits | It is used to inform that the pages were not forwarded after making several requests. |
| ID | It is the unique identification number that is assigned to the created redirects automatically. |
Search
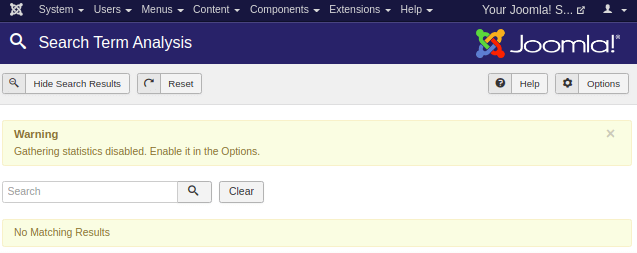
The search manager allows you to track how many searches were made for each key combination and what was the result for each search. Navigate to the “Components – Search” from the Joomla Taskbar to open the search analysis page. It will look like the following image:
Smart Search
It is used to enhance the site search. Click on the “Components – Smart Search” from the Joomla Taskbar to access the Joomla Smart Search page. The following image will be displayed after clicking on “Components – Search”:
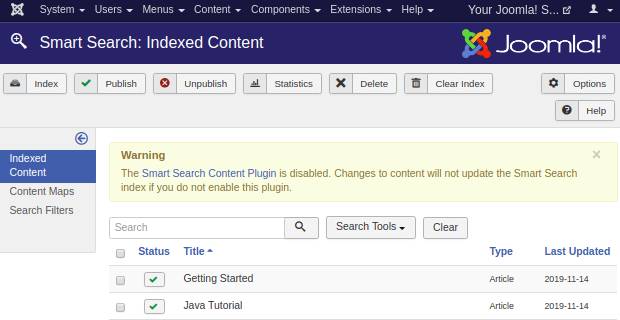
A column header present in the smart search page contains the following options:
| Checkbox | It is used to select one or more items from the list by clicking on the box. |
| Status | It is used to specify the status of the smart search items, i.e., Published/Unpublished or Trashed. |
| Title | It is used to specify the name of the title of the article. |
| Type | It is used to specify the type of the item, i.e., Article or Tag. |
| Last Updated | It is used to specify the date of the last modification. |
| Details | It is used to specify the link date information. |
| Raw URL | It is used to specify the relative links of the items. |
Tags
It is used to manage the list of tagged pages. Click on the “Components – Tags” from the Joomla Taskbar to open the Joomla Tags page. It looks like the following screenshot:
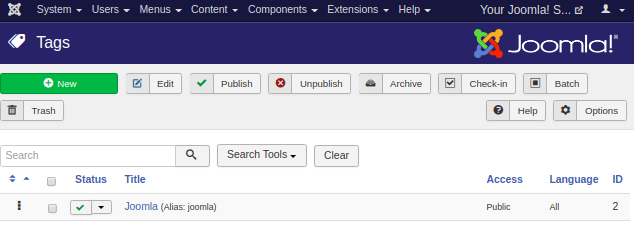
Here, you get several options so that you can create new tags, edit tags, publish/unpublish tags or delete tags, etc. Using a search box, you can easily find the tags from the list.