Kibana GUI
In this section, we are going to discover and learn about the Interface of the Kibana GUI. We will also learn about the creation of the Index, how to view it, and how we can alter the index.
This tutorial addresses the Kibana UI Discover Tab. We’ll read more about the following concepts:
- Index without date field
- Index with date field
Index without date field
Pick Explore as shown in the left-hand menu:
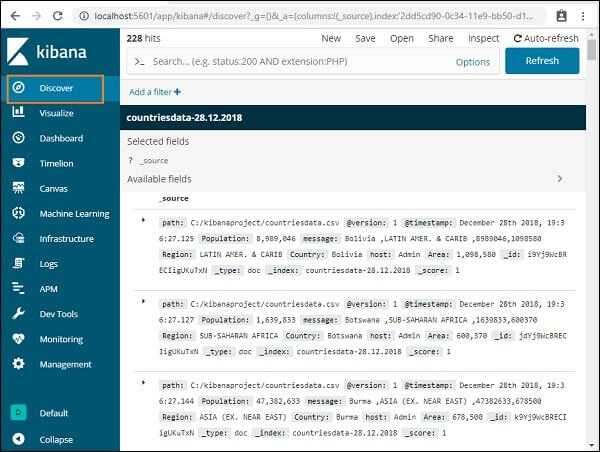
It shows the details of the data available in-country data on the right-hand side- 28.12.2018 index we created in the previous chapter.
The total number of records available will be shown at the top left corner.

In this tab, we can get the data information inside the index (countriesdata-28.12.2018). Here, we can see buttons like New, Save, Open, Share, Inspect, and Auto-refresh in the top left corner of the above screen.
Clicking Auto-Refresh will display the screen as shown below:

We can set the interval for auto-refresh by clicking from above on the seconds, minutes, or hour. After every interval timer, we set Kibana will auto-refresh the screen and get fresh data.
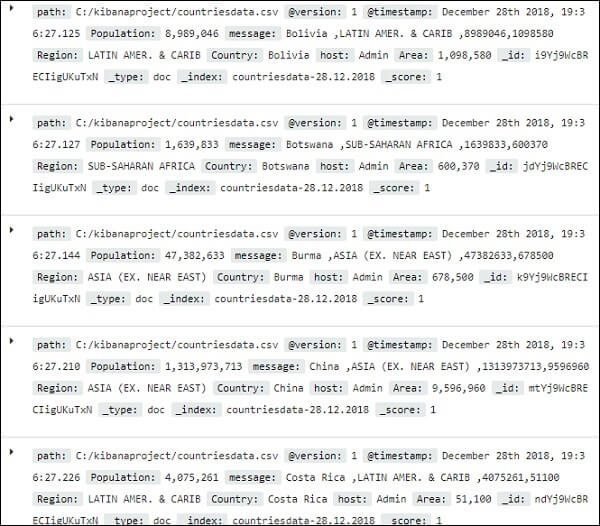
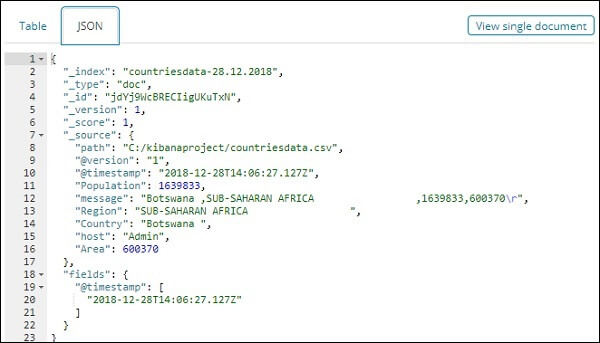
The index data: countriesdata-28.12.2018 is shown below.
All fields are shown in row-wise, along with the data. Click the arrow to widen the row, and we will receive information in Table or JSON format.
JSON Format
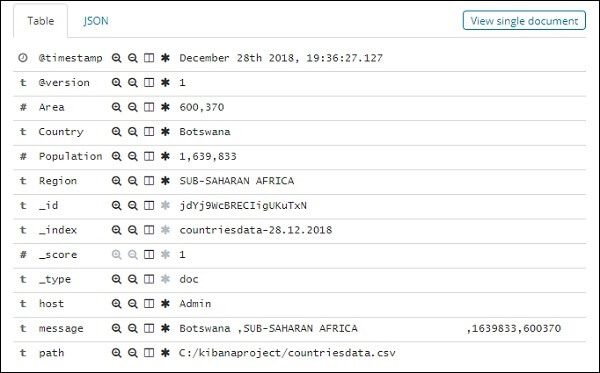
On the left-hand side, there is a button called View single document.

If we click it, the row of data in the row within the page will be shown, as shown below.
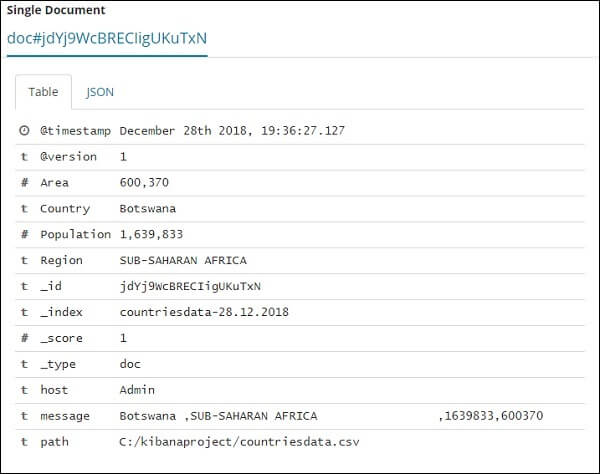
Although we get all the data specifics here, it is hard to get through each of them.
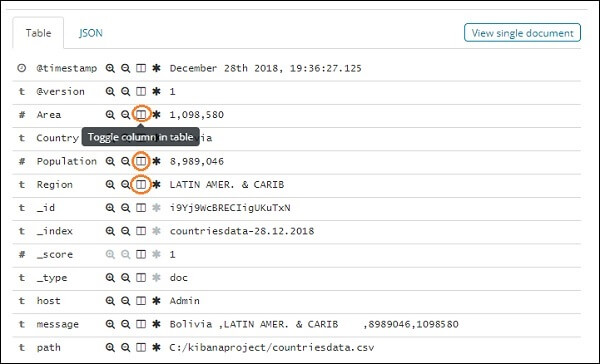
Now let’s try to get the details in tabular format. One way to extend one of the rows and press the appropriate toggle column choice in-field is shown below.
Click the Toggle column in the available table option, and we will see the data in table format.

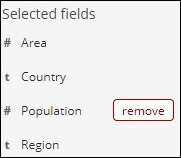
Here, we selected the Country, City, Region, and Population fields. The extended row collapses, and we can now see all the data in tabular format.
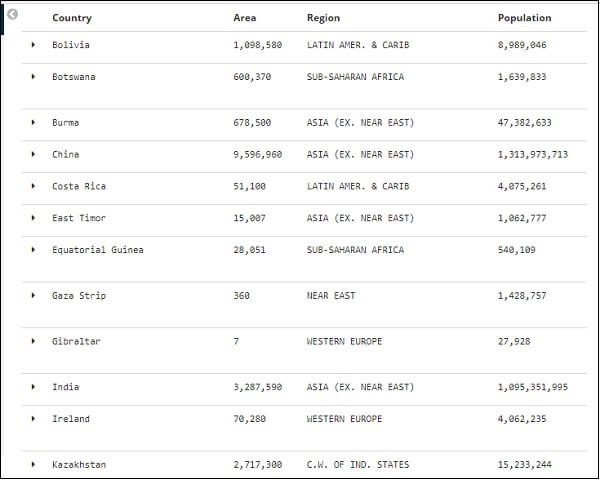
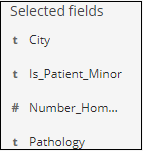
The fields that we selected are displayed on the left side of the screen as seen underneath:
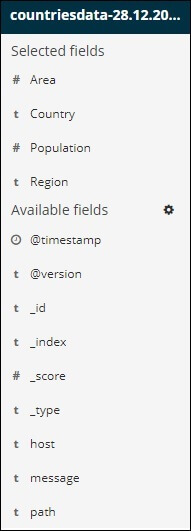
Observe that selected fields and usable fields have two choices. The fields we selected to view in the tabular format are a part of the fields selected. If we choose to delete any field, we can do so by clicking the remove button in the selected field option, which will be shown throughout the field name.
If the field is deleted, it will be included in the Available fields, which we can add back by pressing the add button that will be shown around the field we want. This method can also be used to get the data in tabular format by selecting the appropriate fields from Available Fields in the options available.
We have a search option available in Discover section of the Kibana, which we can use to search for data inside the index. Let us try examples related to search option here.
Suppose we want to search for country India, we can do as follows:
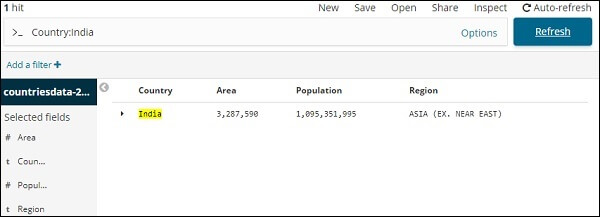
We can enter the details of our quest and then press the Update button. If we want to look for countries that start with Aus, we can do so as follows:
Select Update to see outcomes.
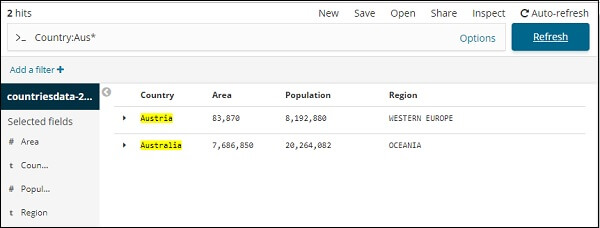
Here we have two countries with Aus * beginning. As seen above, the search field has a button with Options. When a user clicks on it, a toggle button is displayed, which helps to write the search question.
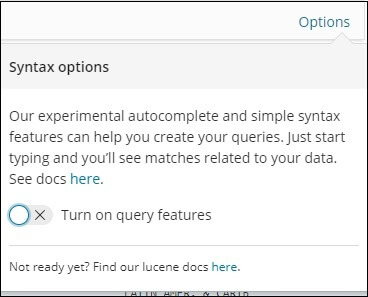
Switch on query functions and type the name of the field in search, showing the options available for that field.
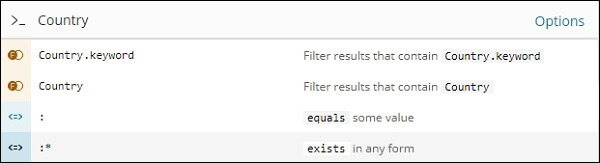
For example, Country is a string, and it shows the following string options:
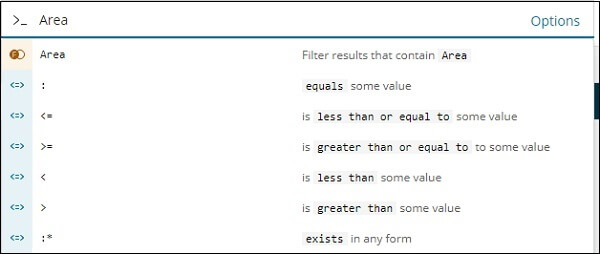
Similarly, Region is a Number field, and it shows Number field options:
In the Discover field, we can try out various combinations and filter the data according to our preference. We can save the data within the Discover tab using the Save button so that we can use it for future use.
Click the Confirm Save button at the top right corner to save the data inside, as shown below.
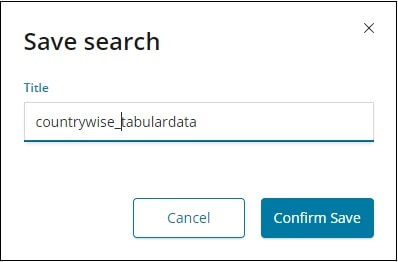
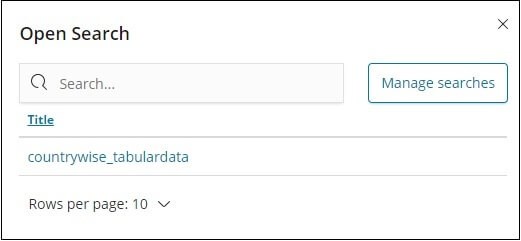
Offer the search title, and press Confirm Save to save it. When saved, we can press the Open button at the top right corner next time we visit the Discover tab to get the saved titles, as shown below.
Use the Sharing button located at the top right corner to share the data with others, too. Clicking it will allow we to find sharing options as shown below –
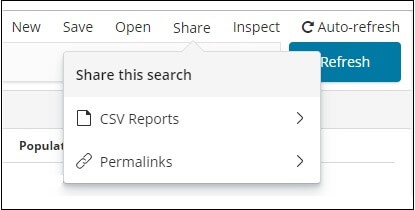
We can share it using CSV Reports or in Permalinks format.
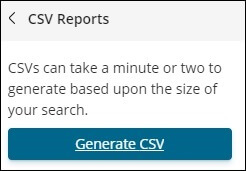
The choice on CSV report is:
To share the report with others, click Generate CSV.
Then click on alternative Permalinks, as follows:

The Snapshot option will include a connection to Kibana that will view data currently available in the quest.
The Saved object choice will include a Kibana connection that will show the available recent data in our quest.
We can work with the available Discover tab and search tools, and we can save and share the result obtained with others.
Index with Date Field
Go to the tab Explore and choose index: medical visits-26.01.2019
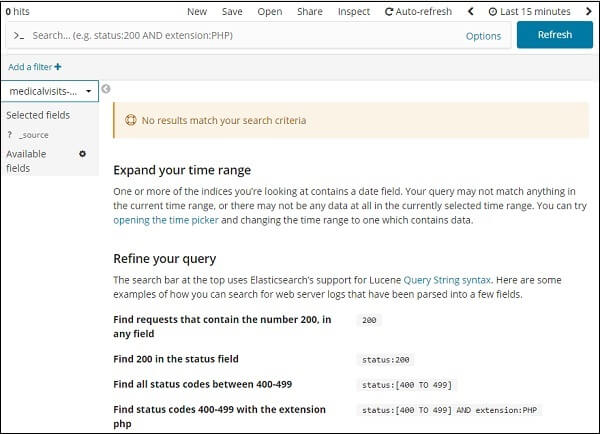
It shows the message No results fit our search criteria; on the index we have selected for the last 15 minutes. The index includes data for the 2015, 2016, 2017, and 2018 years.
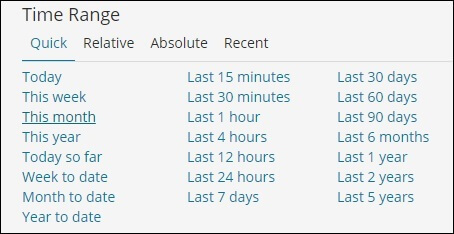
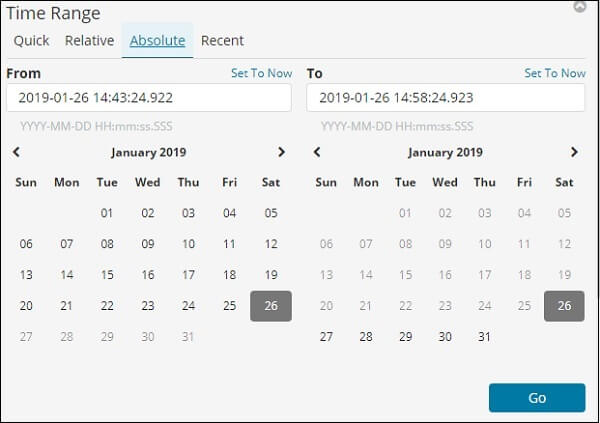
Adjust the time limits as shown below:
Click the Complete tab.
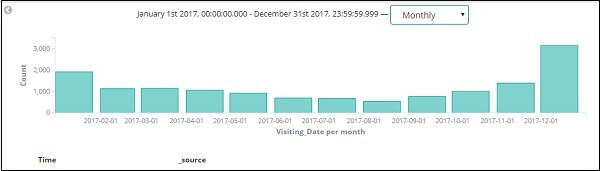
From 1st January 2017 to 31st Dec 2017, pick the date as we will review data for 2017.
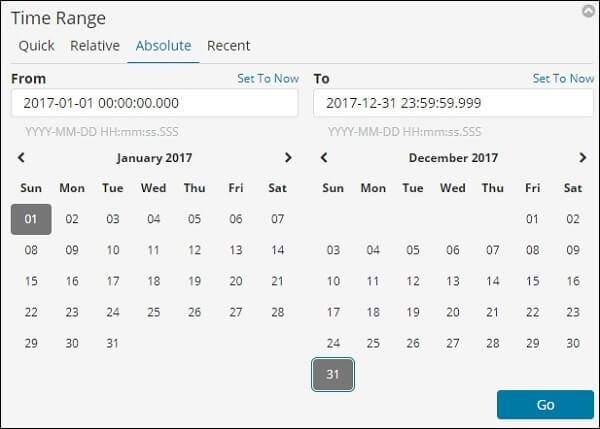
To add the Timerange, press the Go button. It displays the data and bar diagram as follows:
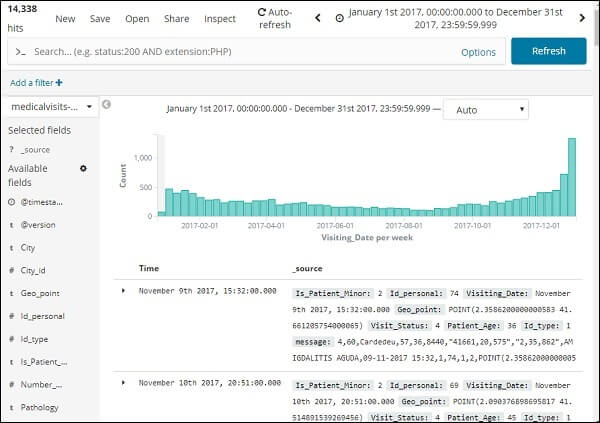
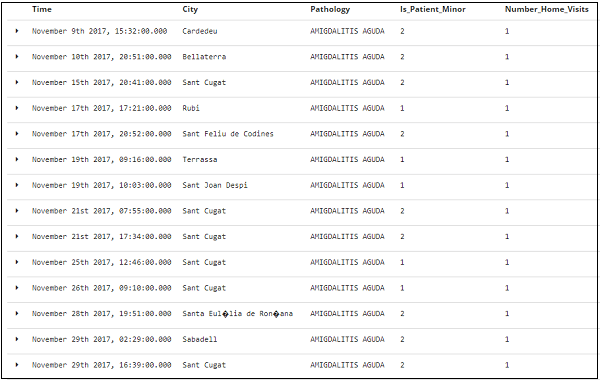
This is the monthly data for the year 2017:
Since we also store the time along with the date, we can filter the data on hours and minutes as well.
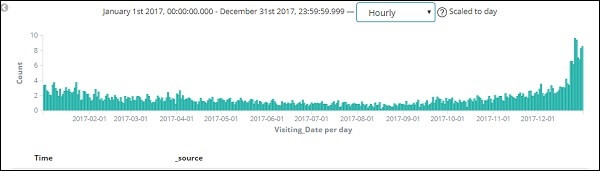
The above figure shows the hourly data for the year 2017.
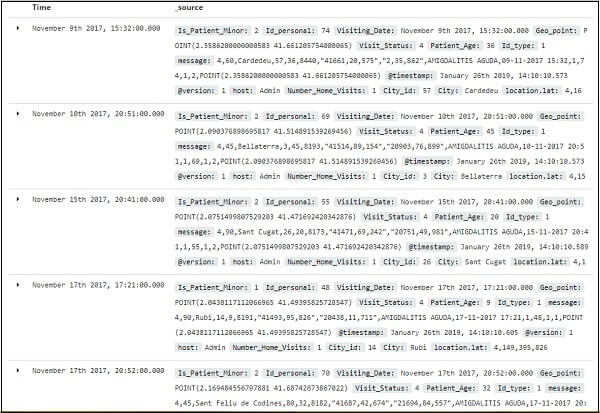
Fields from the index patient visits-26.01.2019 can be seen here
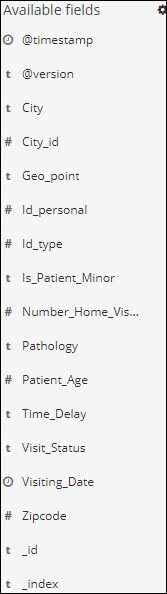
We have the fields on the left as seen below:
We can pick the fields from available fields as shown below and convert the data into tabular format. Here we chose the following fields –
Tabularly data for fields above as shown here: