Kibana – Management
A visualization of data in any domain is worth a thousand log lines. In this case, Kibana offers plenty of options so that we can showcase our results in a very effective manner. When our data is best visualized, Lens allows us to move easily between forms of visualization. In this section, we are going to learn about the Management of the Kibana.
By using Kibana’s Dashboard, we can gather all these features at one place until our visualizations is just the way we want it to be. From multiple viewpoints, the dashboard in Kibana provides insights into our results.
There is one very important feature in the Kibana is the creation of the Index on the dataset.
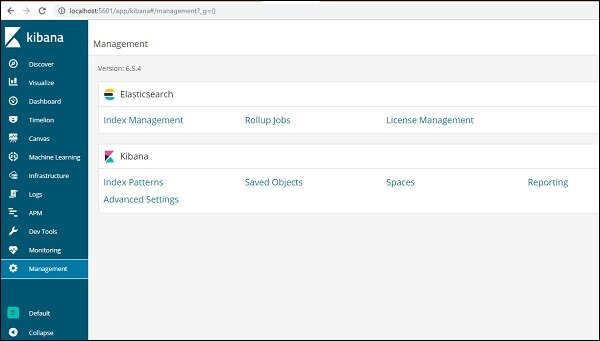
We can perform this by going to the MANAGEMENT option in the Kibana interface.
The management is the Kibana software is used to handle the index trends. We’ll address the following in this section:
- Build Index Pattern without the Field Time Filter
- Build index pattern with the field Time Filter
Build Index Field without the Time Filter
Go to the Kibana UI to perform the following operation, and then on the bottom left menu, we can see a management option. Click on it.
In the image below, we can see the same as told earlier.
In order to work with Kibana, we must first build Index, which is populated by Elasticsearch. We can get all the available indices, as seen in Elasticsearch:
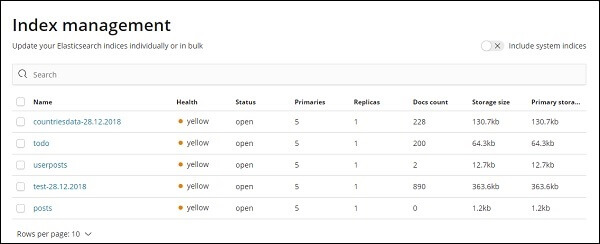
Currently, Elasticsearch has the indices given above. The count of Documents tells us the number of available records in of Index. If there is some index changed, the count of docs will continue to adjust. Primary storage informs us the size of each uploaded Index.
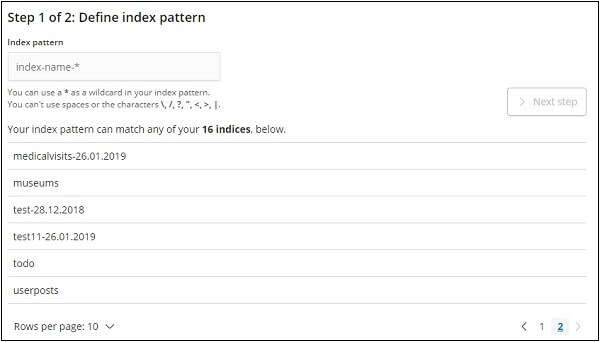
We need to select Index Patterns to construct a new index in Kibana as shown below.

After clicking Index Patterns, we will get the following screen –

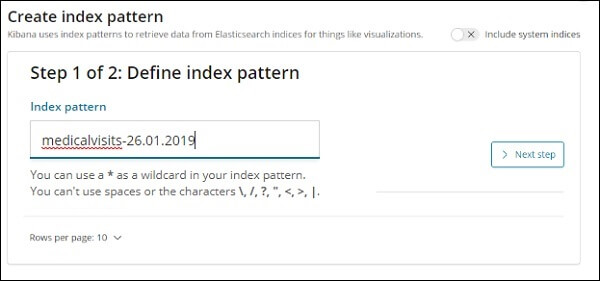
Note that a new index is created using the Build Index Pattern button. Notice that we’ve already generated country data-28.12.2018 at the very beginning of the tutorial.
Creating Index Pattern with Field Time filter.
To create a new index, click on Build Index Template.
The Elasticsearch indices are shown, now we are selecting one to construct a new index.
Click now on the Next Step button. The next step is to set the environment.
The name of the time filter field is used to filter the time-based data. The dropdown shows all fields relevant to the time and date from the Index.
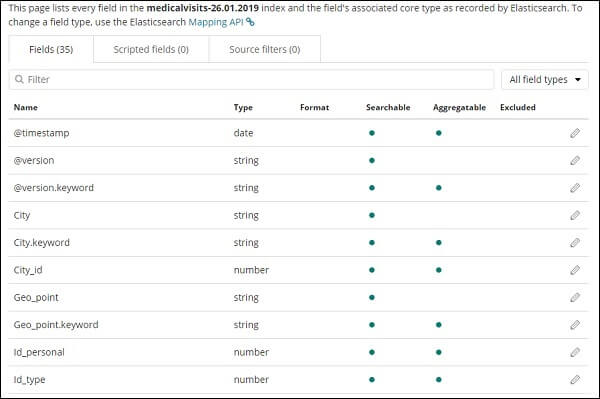
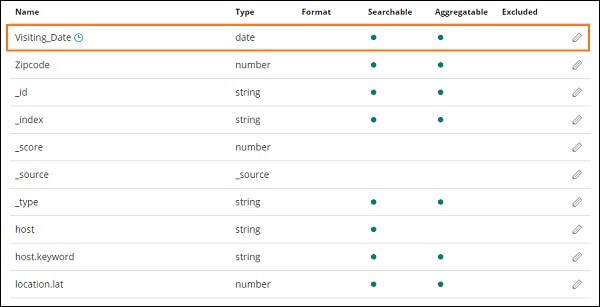
We have Visiting Date as date field in the picture shown below. Select Visit Date as the name of the field in Time Filter.

To create the index pattern, click on the create index pattern button. After it has been completed, it will reveal all the fields in our medical visits index-26.01.2019.
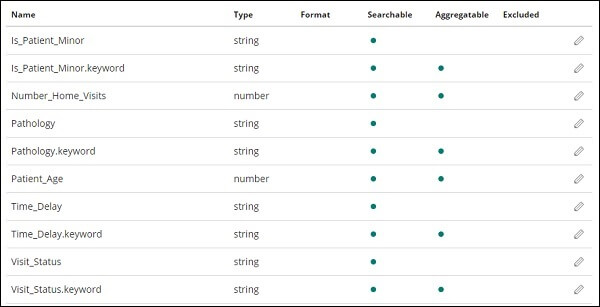
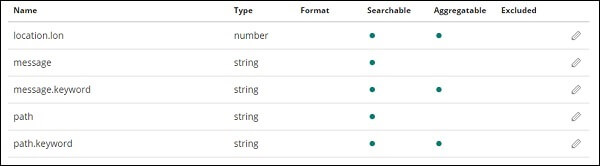
We have the following fields in the Patient Visits index-26.01.2019-
The Index includes all the data for medical visits to your house. When imported from logstash, there are some additional fields added by Elasticsearch.