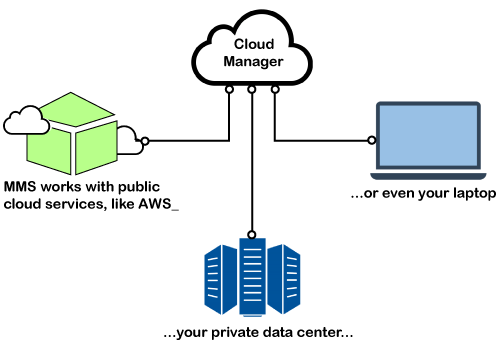
MongoDB Cloud Manager
The MongoDB cloud manager is used to manage our infrastructure by automating, monitoring, and backups.
- Automation: MongoDB nodes and clusters will be configured and maintained with the help of automation. We can maintain our MongoDB deployment if we use automation on each MongoDB host.
- Monitoring: It provides real-time reporting, alerting, and virtualization on key database and hardware indicators.
- Backup: The scheduled snapshot and point-in-time recovery of our MongoDB sharded cluster and replica sets are offered by the backup facility of the cloud manager.
How Backup works
The cloud manager takes a snapshot of the data that we have specified to take Backup when we activate backup for the MongoDB deployment. First, creates an invisible member of the replica set and performs the initial sync of the deployment’s data and. Then the backup tails all the replica set’s oplog to update the Backup continuously. Based on a user-defined snapshot retention policy, it takes and stores the snapshot.
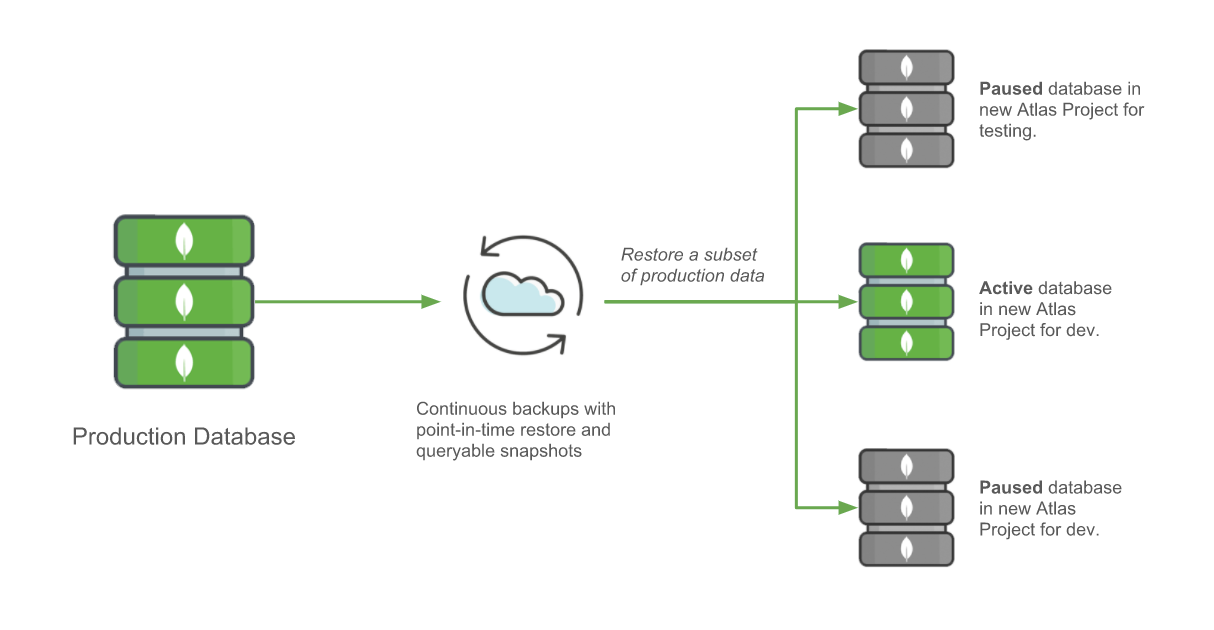
Restoration of Data
We can restore data from a complete scheduled snapshot or a selected point between pictures.
- We can restore from checkpoints between snapshot for a sharded cluster
- We can restore from selected points in time for replica sets.
Cloud Manager reads directly from the stored clone of data called a snapshot when we restore data from the storage.
Getting started with Cloud manager
The cloud manager allows us to create, manage, monitor, and take Backup of MongoDB deployment. We can design and manage new deployment using the cloud manager. We can download the Cloud Manager agent to our deployment servers to manage existing deployments. To get access to a distinct set of MongoDB processes and users, we need to create a cloud manager project to use a cloud manager.
Login to MongoDB Account if you have, or you can create a new account to get started with the cloud manager.
Creating a MongoDB Account
Step 1: Go to https://www.mongodb.com/cloud/cloud-manager
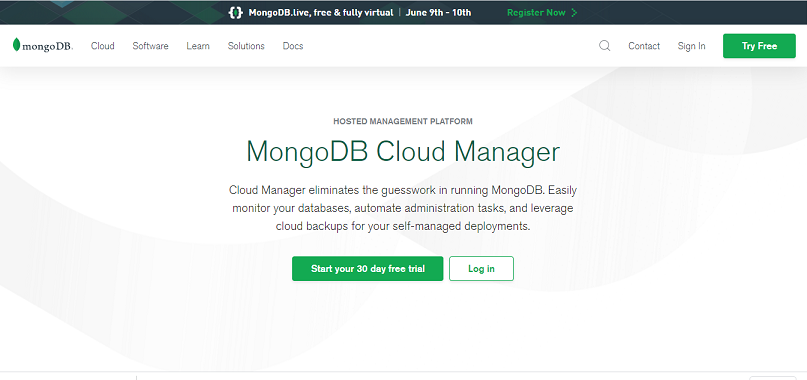
Step 2: Now, on the MongoDB website, click Start your 30-day free trial to start a free trial.
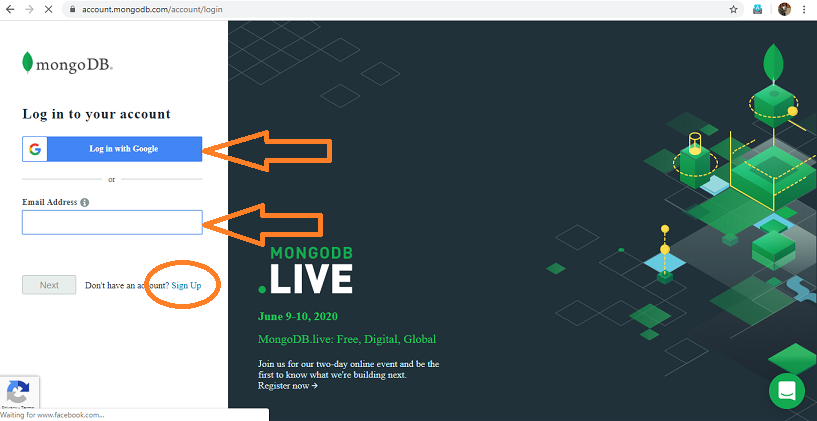
Step 3: Click on sign up to create a MongoDB account
- You can sign-up using your Google account or using any other email address.
Step 4: Setup Cloud Manager by registering.

Step 5: Setup the first deployment after you create your first Cloud Manager project.
You can use the same credential to log in to Cloud Manager
After all that, the next step you have to take is:
- Connect your MongoDB deployment to the server to begin creating the databases.
- Now, add servers to your MongoDB deployment
Creating and Importing Deployment
System Requirements
- You need at least 10 GB of free disk space and space necessary to save MongoDB data.
- 4 GB of RAM required
- If you are using AWS EC2 instance, then you have to use the m3 medium, at least.
- You can install it on 64-bit architecture.
Installation Option
If the MongoDB Agent is deployed to a host onto which you want to have automation before installing MongoDB. You have to ensure the owner system user MongoDB Agent has Read and Write permissions on the MongoDB data and log directories you want to use.
Already runs MongoDB: The agent’s system user must have the following permission if you want to install the MongoDB agent to host where the automation is managing the processes.
- Using its own set of MongoDB binaries, the agent restarts the process to stop the MongoDB process. You have to use the same package manager that you had already installed. It assigns the MongoDB agent as the same owner as MongoDB.
- Performs the read and write operation to the MongoDB data and log directories.
Setting up the Provision Server
For the Cloud Manager Automation or Monitoring, we have to set up the provisioning server. We have to add a server on which we want to deploy managed MongoDB deployments.
You have to install the automation on all the servers you want to run the Cloud manager. Follow the procedure below:
Step 1: Click on the deployment in the cloud manager à then the Agent tab à then download and settings option.
Step 2: Click the operation and follow the popups to install and run the agent under automation.
You can deploy the replica set, cluster, or standalone after the successful installation of the agent to the server.
- Adding a MongoDB process to cloud manager
- Step 1: Click on the Deployment option.
- Step 2: Click on the Add new and select the Existing MongoDB Deployments option.
- Step 3: Now, follow the steps that are prompted to add the deployment.
Deploy a Replica Set to the Cloud Manager
A replica set is the basic functionality of all production deployment architecture. It is a group of MongoDB deployment that has the same data set. Follow the steps given below to deploy a replica set.
Step 1: Click on the Deployment option of the Cloud Manager.
Step 2: Now, click over the Cluster Creation view. Then you are prompted to the new popup window.
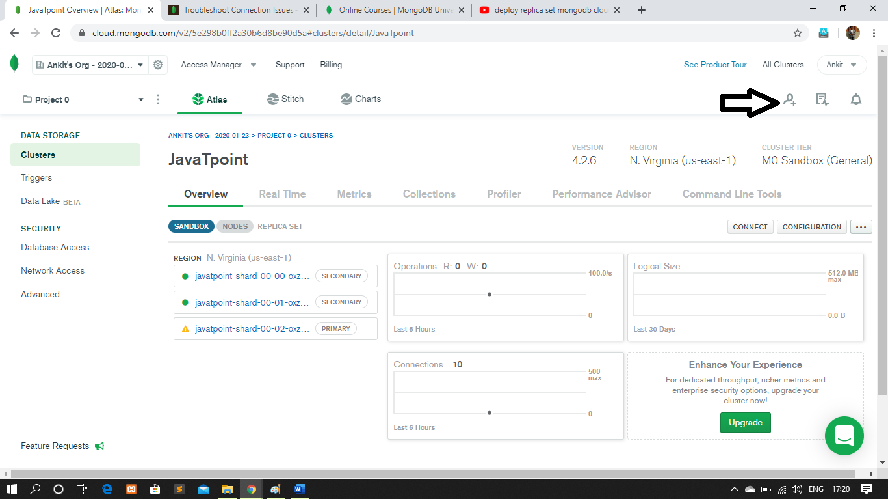
Step 3: Go to the top-right corner of the Deployment page and click on the Add New arrow button.
Step 4: Now, to open the Create New Replica Set view, select the new Replica Set option from the drop-down menu.
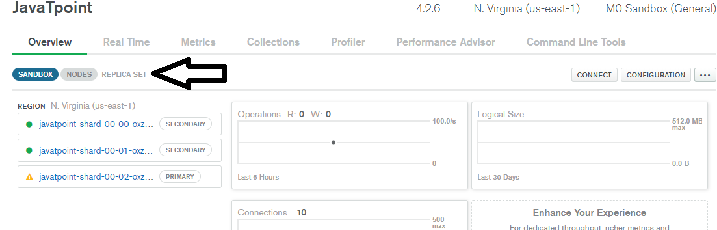
Step 5: Select the Replica Set configuration to configure the Cluster-Wide Settings. You need to configure at least those settings which are marked with asterisk*.
Step 6: After that, you need to configure each Replica Set Member.
Step 7: After configuring the Replica Set Member configure your Replication settings.
Step 8: Finally, click on the Create Replica Set option. You can now able to monitor the progress of cluster deployment from the Deployment view.
Deploy a Sharded Cluster in Cloud Manager
The sharded cluster distributes the data set across a group of servers and provides horizontal scaling for large data sets and enables high throughput operations.
Steps to deploy the sharded cluster:
Step 1: First, log in to your cloud manager account, and at the home page, click on the deployment option.
Step 2: Now, click over the Cluster Creation view. Then you are prompted to the new popup window.
Step 3: Click on the Add New arrow button on the top-right corner of the Deployment page.
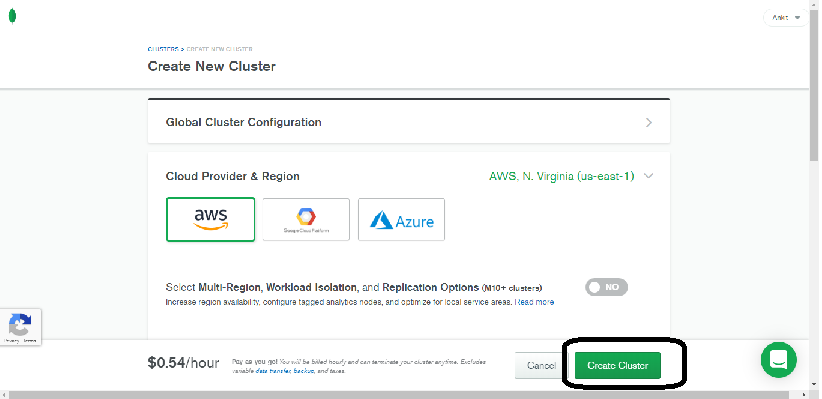
Step 4: Now, to open the Create New Cluster menu, select the New Cluster from the drop-down menu.
Step 5: Select the cluster configuration to configure the Cluster-Wide Settings. You need to configure at least those settings which are marked with asterisk*.
Step 6: Now, click on the shard settings to open the shard configuration options from the Member Configuration.
Step 7: After that, configure Each configuration Server and mongos in the cluster.
Step 8: Now, from the replication setting, configure each replica set in the cluster.
Step 9: Finally, click on the Create cluster button.
Step 10: you can now review and deploy your changes.
Deploy a Standalone MongoDB Instance into Cloud Manager
We can use the instance for testing and development to deploy a standalone MongoDB instance for Cloud Manager. We cannot use these deployment systems for a production system as they lack in replication and development.
Step 1: First, log in to your cloud manager account, and at the home page, click on the deployment option.
Step 2: Now, click over the New Standalone. Then you are prompted to the new popup window.
Step 3: Click on the Add New button on the top-right corner of the Deployment page.
Step 4: Now, to open the Create New Standalone menu, select the New Standalone from the drop-down menu.
Step 5: Select the standalone configuration to configure the Standalone Settings. You need to configure at least those settings which are marked with asterisk*.
Step 6: Now, click on the shard settings to open the shard configuration options from the Member Configuration.
Step 7: After that, configure Each configuration Server and mongos in the cluster.
Step 8: Now, from the replication setting, configure each replica set in the cluster.
Step 9: Finally, click on the Create Standalone button.
Step 10: You can now review and deploy your changes.