React create-react-app
Starting a new React project is very complicated, with so many build tools. It uses many dependencies, configuration files, and other requirements such as Babel, Webpack, ESLint before writing a single line of React code. Create React App CLI tool removes all that complexities and makes React app simple. For this, you need to install the package using NPM, and then run a few simple commands to get a new React project.
The create-react-app is an excellent tool for beginners, which allows you to create and run React project very quickly. It does not take any configuration manually. This tool is wrapping all of the required dependencies like Webpack, Babel for React project itself and then you need to focus on writing React code only. This tool sets up the development environment, provides an excellent developer experience, and optimizes the app for production.
Requirements
The Create React App is maintained by Facebook and can works on any platform, for example, macOS, Windows, Linux, etc. To create a React Project using create-react-app, you need to have installed the following things in your system.
- Node version >= 8.10
- NPM version >= 5.6
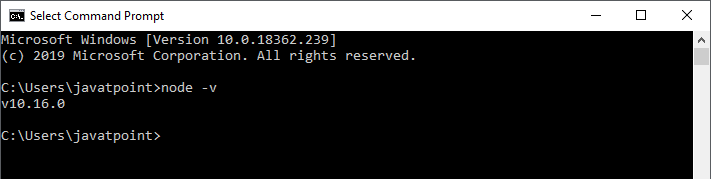
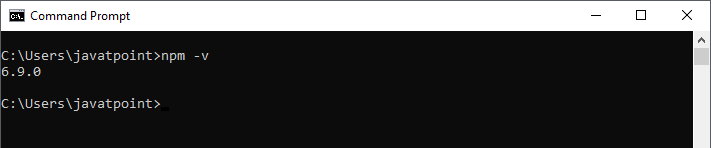
Let us check the current version of Node and NPM in the system.
Run the following command to check the Node version in the command prompt.
Run the following command to check the NPM version in the command prompt.
Installation
Here, we are going to learn how we can install React using CRA tool. For this, we need to follow the steps as given below.
Install React
We can install React using npm package manager by using the following command. There is no need to worry about the complexity of React installation. The create-react-app npm package manager will manage everything, which needed for React project.
Create a new React project
Once the React installation is successful, we can create a new React project using create-react-app command. Here, I choose “reactproject” name for my project.
NOTE: We can combine the above two steps in a single command using npx. The npx is a package runner tool which comes with npm 5.2 and above version.
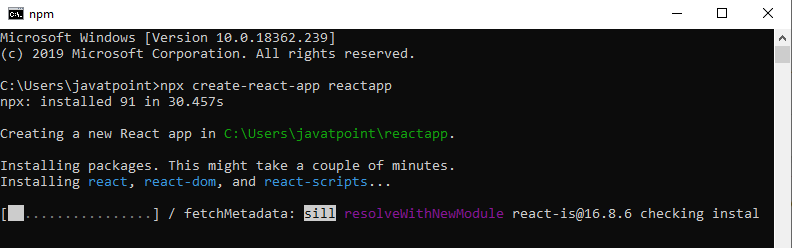
The above command will take some time to install the React and create a new project with the name “reactproject.” Now, we can see the terminal as like below.
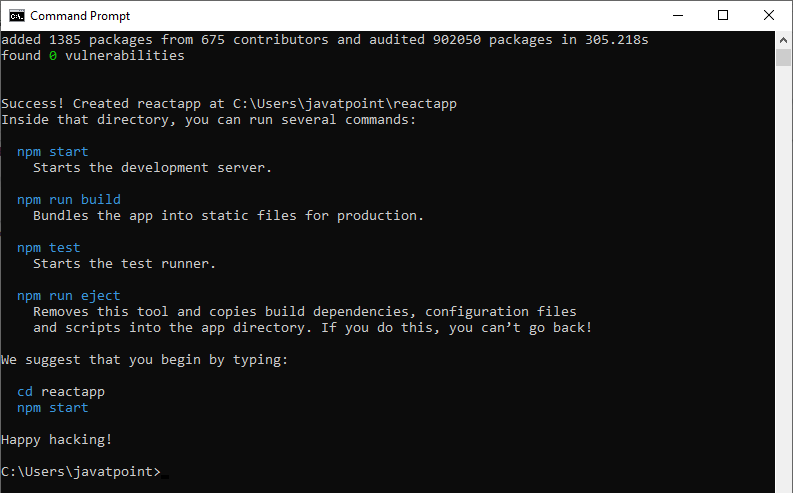
The above screen tells that the React project is created successfully on our system. Now, we need to start the server so that we can access the application on the browser. Type the following command in the terminal window.
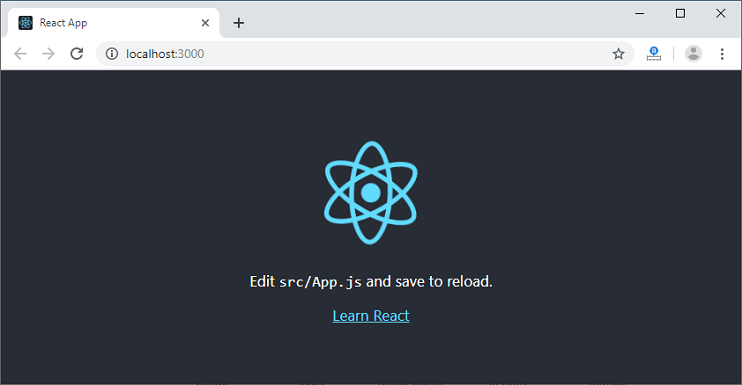
NPM is a package manager which starts the server and access the application at default server http://localhost:3000. Now, we will get the following screen.
Next, open the project on Code editor. Here, I am using Visual Studio Code. Our project’s default structure looks like as below image.
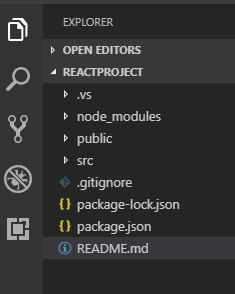
In React application, there are several files and folders in the root directory. Some of them are as follows:
- node_modules: It contains the React library and any other third party libraries needed.
- public: It holds the public assets of the application. It contains the index.html where React will mount the application by default on the <div id=”root”></div> element.
- src: It contains the App.css, App.js, App.test.js, index.css, index.js, and serviceWorker.js files. Here, the App.js file always responsible for displaying the output screen in React.
- package-lock.json: It is generated automatically for any operations where npm package modifies either the node_modules tree or package.json. It cannot be published. It will be ignored if it finds any other place rather than the top-level package.
- package.json: It holds various metadata required for the project. It gives information to npm, which allows to identify the project as well as handle the project?s dependencies.
- README.md: It provides the documentation to read about React topics.
React Environment Setup
Now, open the src >> App.js file and make changes which you want to display on the screen. After making desired changes, save the file. As soon as we save the file, Webpack recompiles the code, and the page will refresh automatically, and changes are reflected on the browser screen. Now, we can create as many components as we want, import the newly created component inside the App.js file and that file will be included in our main index.html file after compiling by Webpack.
Next, if we want to make the project for the production mode, type the following command. This command will generate the production build, which is best optimized.