Rectangular Arrays in AutoCAD
What is an array?
The array is the command used to draw multiple copies of an object in a particular pattern or order. We can also manage the distance between the objects in the array.
The shortcut key for Array is AR.
To implement an array, we can type Array or AR on the command line and then press Enter.
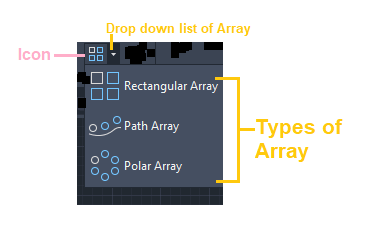
We can also select the Array option from the Ribbon Panel. The Array icon will look like the given image:
What is the difference between Copy and Array?
The copy command is used to copy the elements in an order defined by us. In contrast, the array is used to copy the objects with predefined angles and numbers in a fixed order (rectangular, polar, or path array).
There are three types of arrays, which are listed below:
- Rectangular Array
- Polar Array
- Path Array
1. Rectangular Array
The rectangular array is defined as the arrangement of the object into rows, columns, and levels that form a rectangle.
In AutoCAD, we can create multiple copies of an object in the form of a rectangle using the Rectangular Array.
Let’s consider an example.
The steps to create a rectangular array are given below:
- Open the AutoCAD software.
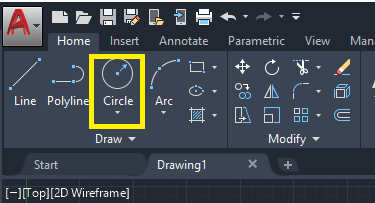
- Click on the Circle icon on the Ribbon Panel, as shown in the below image:

We can also write Circle or C on the command line. - Specify the center point on the workspace or drawing area to draw the circle.
- Specify the diameter of the circle. Here, we have specified the value 1. We can provide any value of diameter according to the requirements.
- Select the Rectangular Array from the ribbon panel.
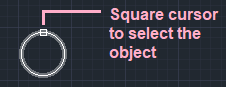
- Select the object with the small square cursor and Press Enter, as shown in the below image:
- The default rectangular array will be created, as shown in the below image:
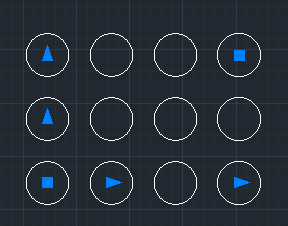
We can also type AR – select the object with the square cursor- select Rectangular – and then Press Enter on the command line.
8. Press the Esc button on the top left of the keyboard to exit the array command. If you want to modify the rectangular array further, without exit, follow the steps given below.
Note: To modify the array, do not exit. Continue with the steps.
Elements Modification
To modify the above array, the steps are given below:
9. Go to the top row of the screen, which will look like the below image:
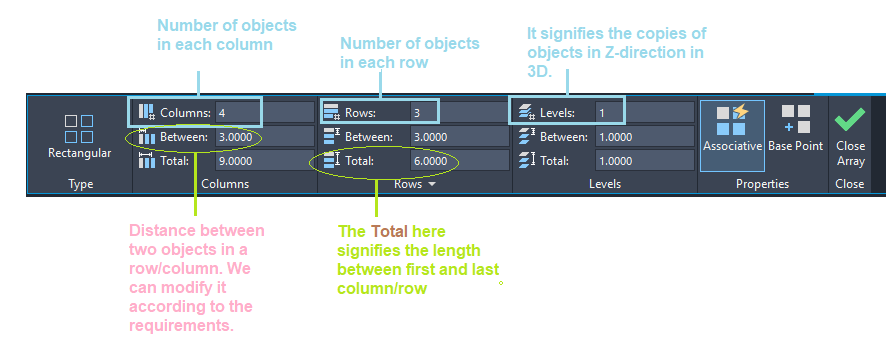
10. Let’s modify with the values:
Column= 3
Rows= 5
Between under column= 1.5
Between under row= 1.2
The figure will now look like the given image:

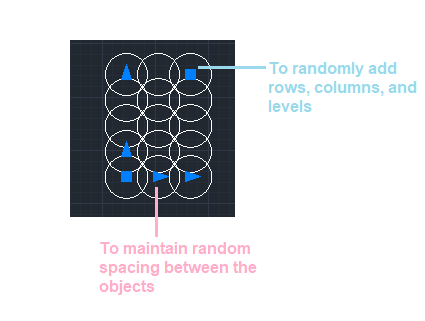
To randomly add rows, columns, and spacing, we can use the blue arrow and square block, as shown in the below image:
11. Press the Esc button on the top left of the keyboard or press the Enter to exit the array command.