Reflecting the Token Expiration in the UI in MEAN Stack
In our previous section, we successfully guarded our routes, and from an authentication perspective, the application is now looking good. We are redirecting, we are updating the UI, we are protecting, and we are protecting the backend. Now, the remaining part is to reflect the token expiration in the UI. Our user doesn’t recognize this because our UI would not update. We got a token, and it is just invalid, but on the frontend, we don’t know that, so we don’t know that the token expired. Well, we can know it because we know that the token will expire in one hour, and actually, we can even pass that information along with the response. We will use the following steps to do that:
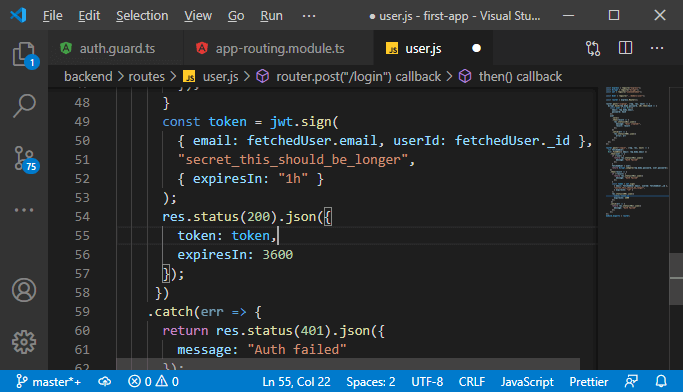
1) We will go back to our js file, where we send back the token as a response. Here, we will add another property, i.e., expiresIn and pass the expiring information. We know that it is going to be one hour from now, but then one hour, we don’t want to send a hard timestamp because the server of time cloud deviates from the client time.
Instead of this, we send back this duration, and we could send back one hour and let the client parse this.
2) Now, we will use that information in frontend. When we are storing that token in the login() method of our service.ts file, we also parse that when it expires thing and then set timer. For that, in our subscribe method of login, we know that we get that expiresIn information, and it only matters to us if we got a token. So, we will extract it in the if check, there we will get the expiresInDuration property which will be equal to response.expiresIn like this:
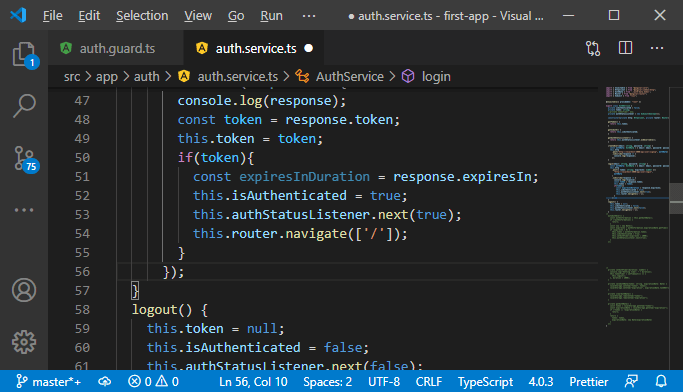
We already updated the generic type. We have expireIn property already in the generic type, so we will not get an error there.
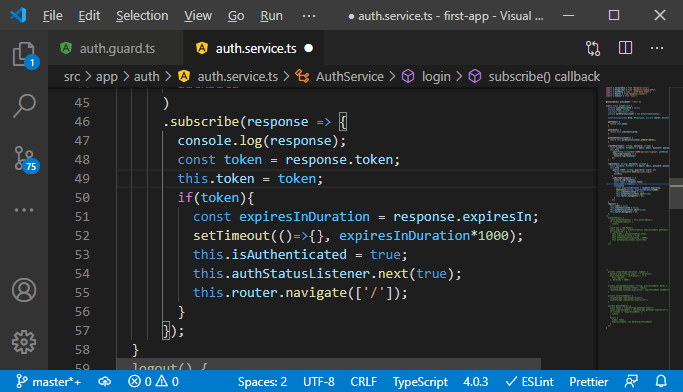
3) Now, we just need to set a timer, and we can do that with the setTimeout() method. This method will return a NodeJS timer, and well, this method will also take a function that should execute after that duration and then the duration will be passed as a second argument.
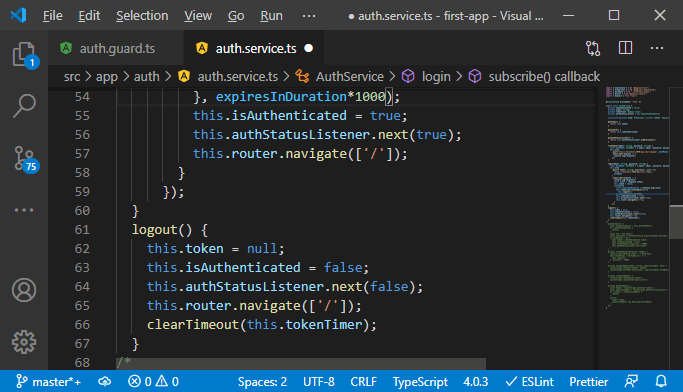
The setTimeout() method works with milliseconds, not with seconds. So, we have to multiply this by 1000 because we get it back in seconds, as we know.
4) After this duration, it will execute this function, and in this function, we want to call the logout function.
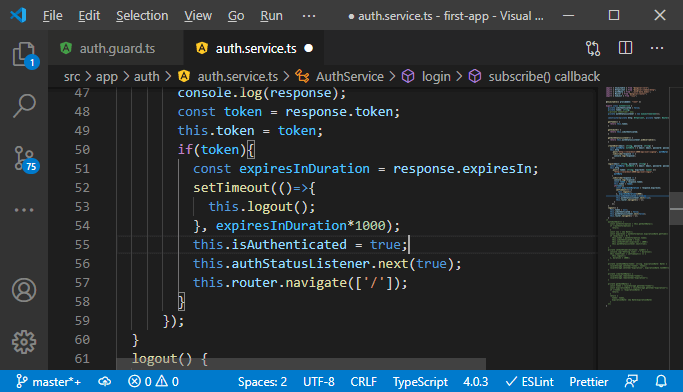
5) We also should store the times in some variable so that we can clear the timer if we do call logout because if we manually logout, we want to clear the timer. So that if we then login again after that, we don’t have that old logout timer going on in the back. So, we will add a new private property, i.e., tokenTimer, which will be of type any.
6) Now, in this property, we store the result returned from the setTimeout() method, and in the logout() method, we will call the clearTimeout() method and pass this tokenTimer as a value to clear timer whenever we do logout.
Now, it will work fine, and everything will work well. Now, one thing that is not good is that if we reload the page without login, we have to log in again, and that is because we are not persisting in that login state. The token is only stored in memory, and as we mentioned before, this will get cleared whenever the angular app restarts. We will solve this by storing that token into our machine’s local storage later in the next section.