Rotate Cells in Excel
Excel is powerful spreadsheet software with various features. It helps us record a huge amount of data and format the data as per our choice. Similarly, we use different alignment options to change the way data appears within a cell. We can change the position of text in different styles. There are some general alignment options in Excel to rotate cells, which generally help us rotate the font angle within the desired cells.

In this article, we are discussing the step-by-step methods to rotate cells in Excel. Before discussing the methods, let us first know all the alignments options in Excel to rotate cells.
What are the alignment options to rotate cells in Excel?
When we need to rotate cells in Excel, we have multiple alignment options based on different angles. We can choose predefined options to rotate cells or texts to specific angles or specify any desired value for the rotation angle. Excel has the following alignment options to help us rotate cells:
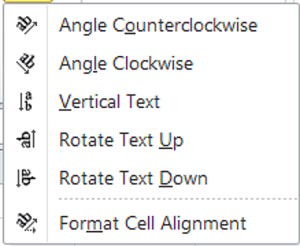
- Angle Counterclockwise: This option allows users to rotate the texts in cells from the bottom left side to the top right side of the cell.
- Angle Clockwise: This option allows users to rotate texts in cells from the top left side to the bottom right side of the cell.
- Vertical Text: This option allows us to position the texts in cells to the center position and place one letter on the top of another vertically.
- Rotate Text Up: This option allows us to position the texts in cells to the lower-right side and further run the texts vertically up within the cell.
- Rotate Text Down: This option allows us to position the texts in cells to the lower-left side and further run the texts vertically down within the cell.
- Format Cell Alignment: This option allows us to open the Alignment tab from the Format Cells dialogue box, where we can enter any custom angle of rotation to rotate the desired cell accordingly.
How to rotate cells or text in Excel?
Excel has a wide range of built-in features, and it allows users to use most of these features in different ways. Likewise, we can also rotate cells using different methods. The most common methods to rotate cells or texts in Excel documents are as follows:
- Rotating Cells using Ribbon Tools
- Rotating Cells using the Format Cells Dialogue Box
- Rotating Cells using the Keyboard Shortcuts
Let us discuss each method in detail:
Rotating Cells using Ribbon Tools
In Excel, accessing any specific feature or tool from the ribbon is the most common and straightforward method. Excel has almost all of its inbuilt features on the ribbon, separated across different tabs and groups.
By default, when we enter text in Excel cells, it is automatically aligned to the left side of the cell. Likewise, the numbers are aligned to the right side position of the Excel cells. However, we need to apply other alignment options or styles manually using the Excel tools. When we need to rotate cells in Excel, we can perform the following steps:
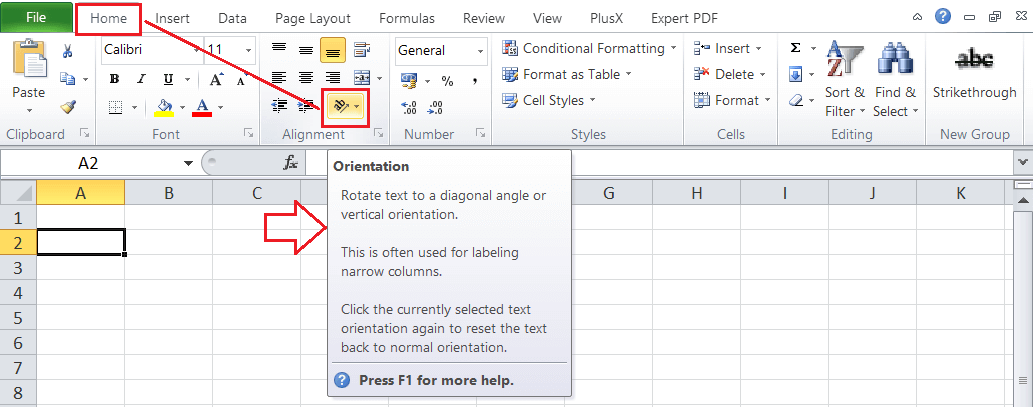
- First, we need to select a cell or a range of cells in which we want to apply the rotation of the cell.
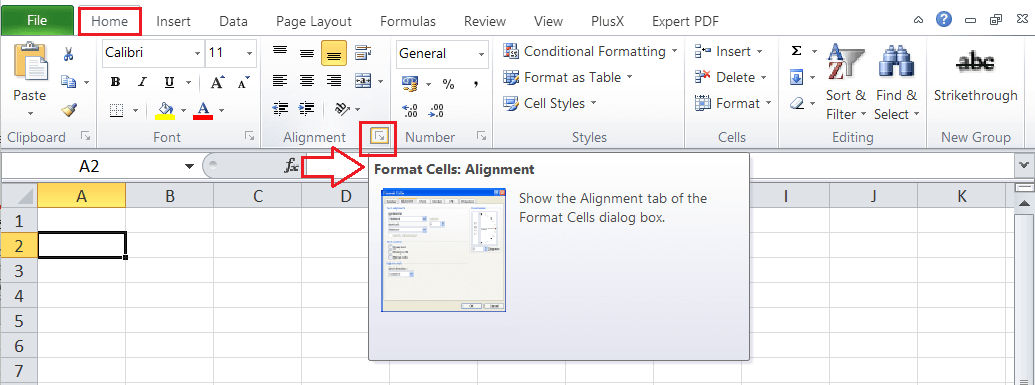
- Next, we need to go to the Home tab and click the Orientation option, as shown below:

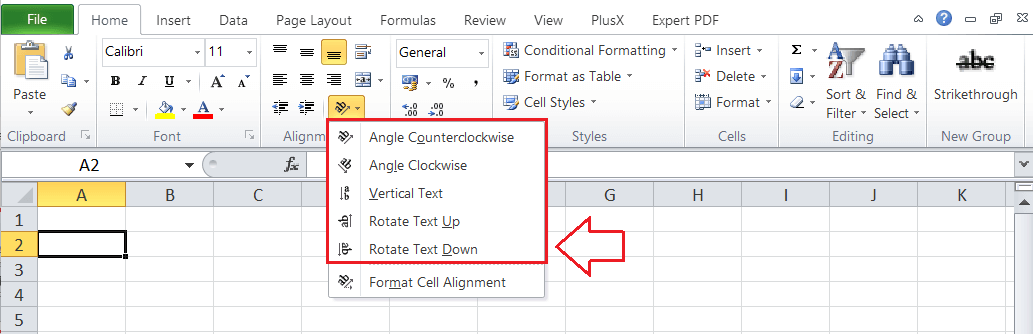
- In the next window, Excel displays various predefined options to rotate cells in Excel.
We can click on any desired predefined rotation option, which will be instantly applied to the selected cell (s). However, clicking the ‘Format Cell Alignment’ option will launch the Format Cells dialogue box.
Rotating Cells using the Format Cells Dialogue Box
Another efficient method to rotate cells in Excel is to use the Format Cells dialogue box. This method is useful for rotating cells at any specific angle, other than the predefined angle orientation options. To use this method, we need to perform the steps discussed below:
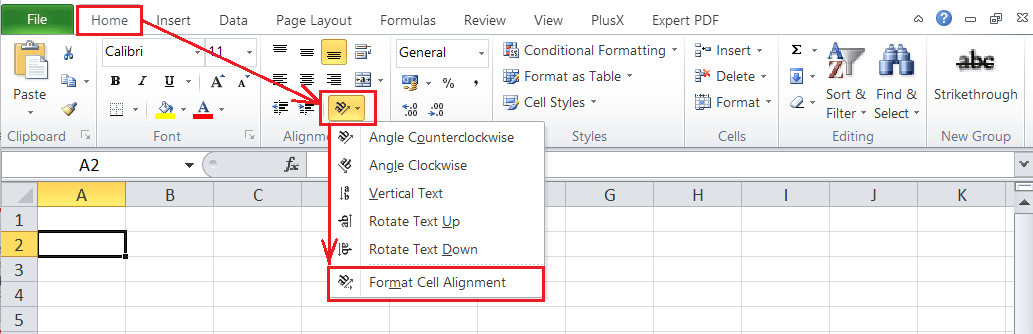
- First, we need to select a cell or a range of cells in which we want to apply the rotation of the cell.
- Next, we need to launch a Format Cells dialogue box. For this, we need to go to the Home tab and click on the Orientation icon and choose the option ‘Format Cell Alignment‘.
Alternately, we can click on the arrow icon from the bottom right corner of the Alignment group.
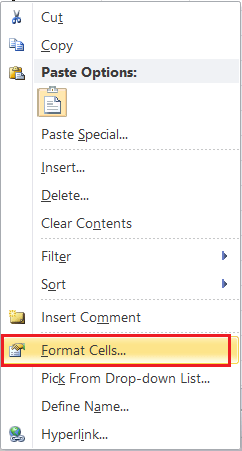
We can also right-click on the selected cells and select the ‘Format Cells’ option from the list to launch the Format Cells dialogue box.
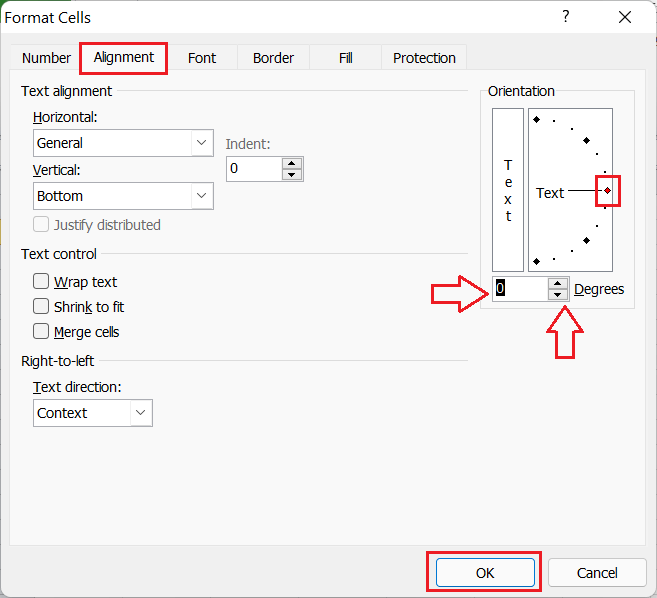
The keyboard shortcut to access the Format Cells dialogue box is ‘Ctrl + 1‘, where the key ‘1’ must be pressed from the keyboard area only, not from the numerical pad. - In the Format Cells window, we must specify the desired rotation angle for the selected cells in an Orientation section under the Alignment
The spin buttons (up and down arrows linked with the box) can also be used to autofill values for rotating the selected cells for small values. Alternately, we can click, hold the red dot and rotate it using the mouse to get the desired alignment. - After setting up a desired angle of rotation, we must click the OK The desired/ selected angle of rotation will be applied to the selected cells within the sheet.
Rotating Cells using the Keyboard Shortcuts
When we often need to rotate cells in Excel, it is good to use the keyboard shortcuts after selecting the cells in the sheet, which drastically saves our time.
The following table displays the keyboard shortcut to rotate text in the selected cells:
| Action | Shortcut Key |
|---|---|
| Angle Counterclockwise | Alt + H + F + Q + O |
| Angle Clockwise | Alt + H + F + Q + L |
| Vertical Text | Alt + H + F + Q + V |
| Rotate Text Up | Alt + H + F + Q + U |
| Rotate Text Down | Alt + H + F + Q + D |
| Format Cell Alignment | Alt + H + F + Q + M |
While using the above keyboard shortcuts, we need to press each key one after another in a sequence.
Remove the Cells Rotation
We can also remove the rotation of the cell if we don’t like them. We can do this by following the ways discussed below:
- If we want to remove the rotation of the cell just after applying them in our Excel sheet, we can use the Undo button from the Excel window. Alternately, we can also use the Undo shortcut, i.e., Ctrl + Z.
- If there is a single cell from which we want to remove cell rotation, we need to select the particular cell. This will display the applied rotation style on the selected cell under the Home > Orientation (Rotate) command. We can click on the applied rotation option again to disable it. However, this method does not work if any custom rotation angle is applied using the Format Cells dialogue box.
- The most efficient method to remove the rotation of the cell is to use the ‘Clear Formats’ option in Excel. For this, we need to select the specific cell or range of cells and then go to Home > Clear > Clear Formats under the Editing group. This method is mainly useful when we want to remove cells rotation later within the Excel documents or when we have applied any specific angle of rotation.
Example of Cells with Rotated Texts
As we have discussed above, Excel has various alignments options for the rotation of cells. We can easily rotate the desired cells or data to different angles, whether clockwise, counterclockwise, or vertically.
The example of rotated cells can be seen in the following Excel sheet:
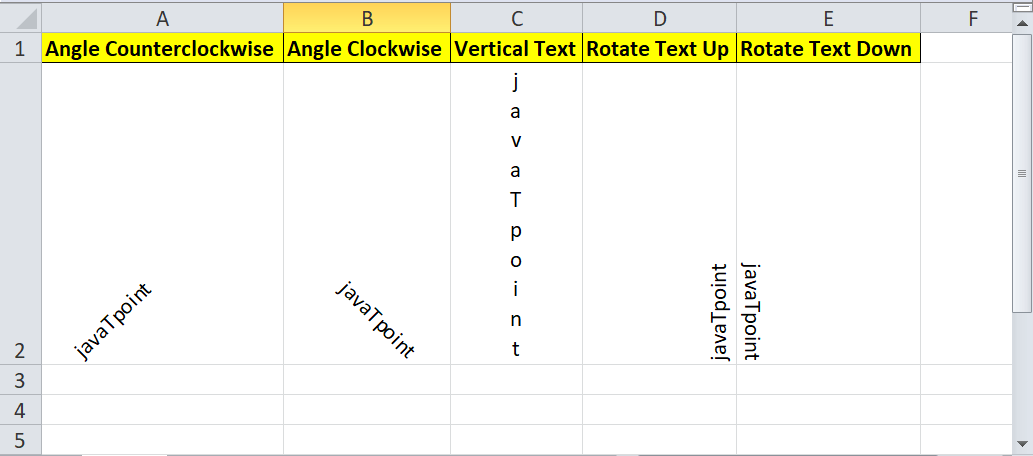
In the above image, the cells with their data are rotated using the predefined rotation options. If we want to rotate to any precise angle, we can specify the number of degrees for rotation using the Format Cells dialogue box.