Locating Strategies- (By Class Name)
In this section, you will learn how to locate a particular web element using the value of its Class attribute.
Let us consider a test case in which we will automate the following scenarios:
- Invoke Chrome browser
- Open URL: https://www.testandquiz.com/selenium/testing.html
- Click on the checkbox value “Automation Testing”
We will create our test case step by step in order to give you a complete understanding of how to use Locators to identify and locate a particular web element.
Step1. Launch Eclipse IDE and open the existing test suite “Demo_Test” which we have created in earlier sessions of this tutorial.
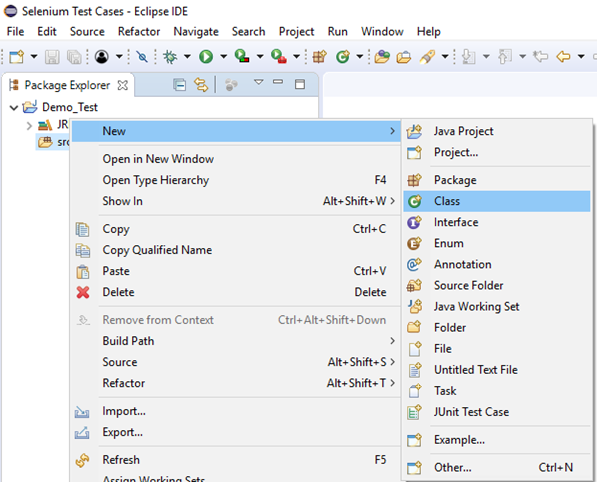
Step2. Right click on the “src” folder and create a new Class File from New > Class.
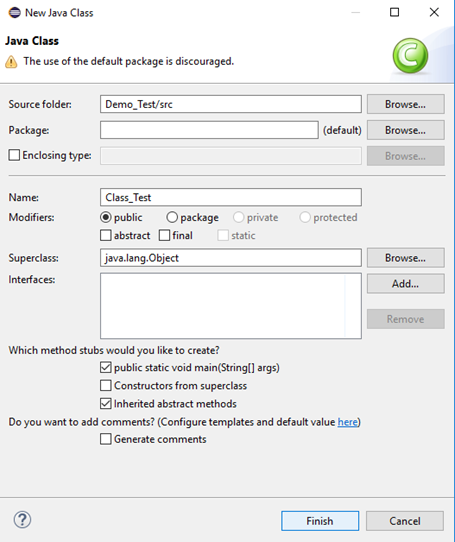
Give your Class name as “Class_Test” and click on “Finish” button.
Step3. Let’s get to the coding ground.
- To invoke Google Chrome browser, we need to download the ChromeDriver.exe file and set the system property “webdriver.chrome.driver” to the path of your ChromeDriver.exe file. We have already discussed this in earlier sessions of this tutorial. You can also refer to “Running Test on Firefox Browser” to learn how to download and set System property for Chrome driver.
Here is the sample code to set system property for Chrome driver:
- After that we have to initialize Chrome driver using ChromeDriver Class.
Here is the sample code to initialize Chrome driver using ChromeDriver class.
Combining both of the above code blocks, we will get the code snippet to launch Google Chrome browser.
- After that we need to write the code which will automate our second test scenario (navigate to the desired URL).
Here is the sample code to navigate to the desired URL:
The complete code till now will look something like this:
Step4. Now, we will try to locate the desired web element by using the value of its Class attribute. In Selenium, locating a particular web element involves inspection of its HTML codes.
Follow the steps given below to locate the Checkbox on the sample web page.
- Open URL: https://www.testandquiz.com/selenium/testing.html
- Right click on the Automation Testing Check box and select Inspect Element
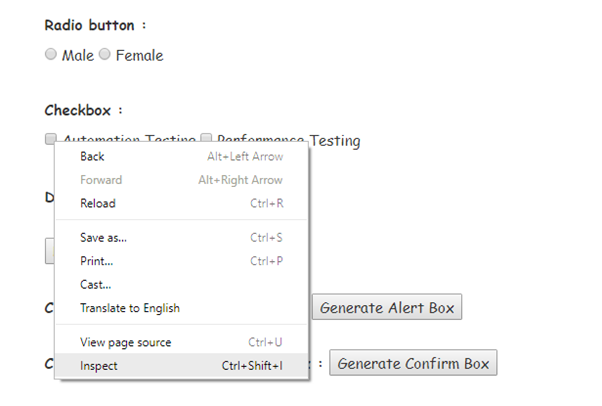
- It will launch a window containing all the specific codes involved in the development of the Checkbox.
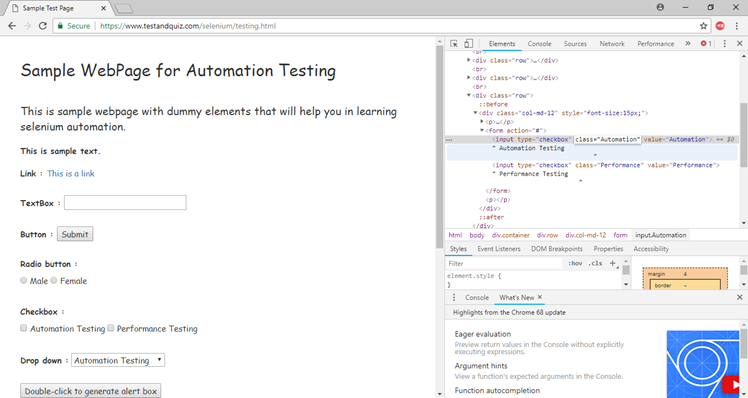
- Pick the value of Class attribute i.e. “Automation”.

The Java Syntax for locating a web element using its Class attribute is written as:
Therefore, for locating the Checkbox on the sample web page we will use the value of its Class attribute as:
Step5. To automate our third test scenario, we need to write the code which will click on the Checkbox value “Automation”.
Here is the sample code to click on the Checkbox value “Automation”.
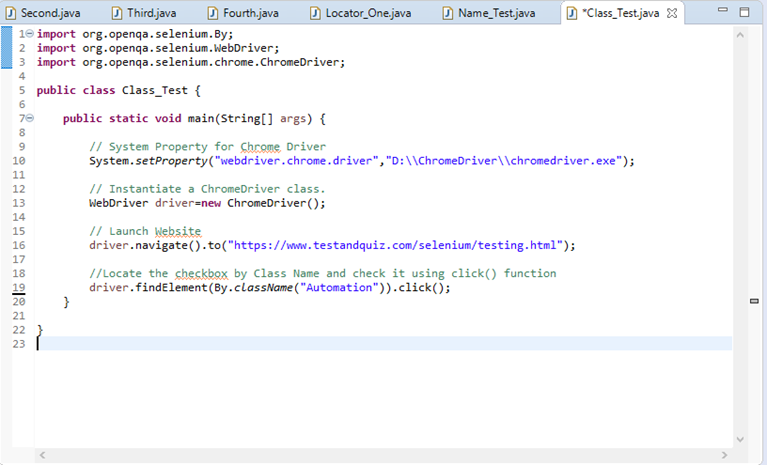
Thus, our final test script will look something like this:
The following screenshot shows the Eclipse window for our test script.
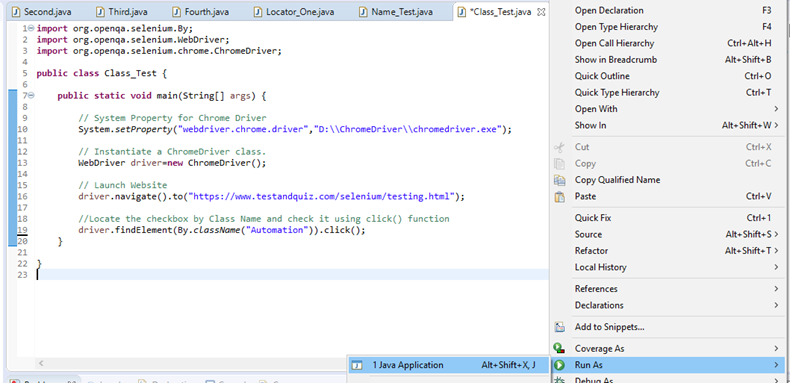
Step6. Right click on the Eclipse code and select Run As > Java Application.
Upon execution, the above test script will launch the Goggle Chrome browser and automate all the test scenarios.