SoapUI Security Test
Security testing is a type of testing used in a SoapUI to measure the uncovers potential risks, threats, vulnerabilities in web services or web APIs. It prevent malicious attacks from the hackers or intruders. The purpose of using Security testing is to identify all possible loopholes, unveiling faults and the web service’s weakness that may affect data and some sensitive information of the web. Therefore, SoapUI uses a security test to ensure web services and web APIs’ authorization and authenticity.
Types of Security Testing
The following are the various types of security tests used in a SoapUI.
- SQL Injection: SQL injection scans are used in a SoapUI to detect poor integration of database coding and any possible SQL injection that may damage the database. In this way, the SQL injection protects the database.
- XPath Injection: XPath injection is used in a SoapUI, to utilize XML’s poor processing inside the web services as the target.
- Invalid Types: As the name suggests, the invalid types are used to check and exploit all invalid input data used in a web service.
- Malicious Attachment: Malicious security attachments are used to scan all bad handling of the attached files.
- Boundary Scan: The Boundary-scan security test is used to check the poor handling of the web service values outside of the range definition.
- Malformed XML: Malformed XML security scans are used to check and exploit poor handling of the invalid XML that can be rendered either on a web server or in a web service.
- Custom Script: Custom scripts are a type of security scan that allows us to use scripts to create custom parameters that cover up values.
- XML Bomb: The term XML Bomb is a type of Security scan used to handle the malicious XML request that can corrupt the whole web service on the server or steal some sensitive information.
- Cross-Site Scripting: It is a type of security scan used during the cross-site scripting to find any vulnerable risk of service parameter in a web server.
Other SoapUI Security Scan Features
- Stack Overflow: The Stack Overflow is a type of security testing used in a SoapUI to scan and locate the huge documents within a message, causing a stack overflow.
- Lifesaving Scans: The Lifesaving scan is a type of security test used in a SoapUI to perform the number of scans and ensure the security of web service and web APIs.
Steps to perform Security Test in SoapUI
For creating a Security test of the Soap project, follows the given below steps.
Step 1: Right-click on the Security Tests of the Calculate Sum TestCase, as shown below.
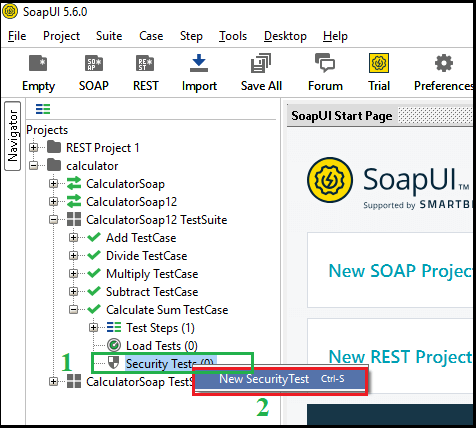
Step 2: Click on the New Security test that displays a pop-up dialog box to enter the Security Test, as shown below.
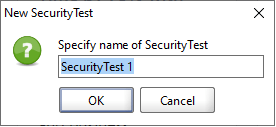
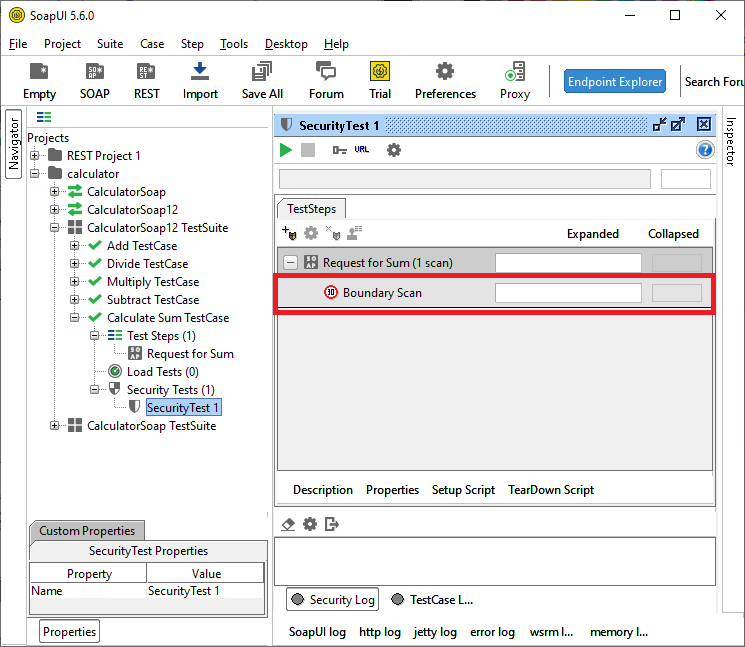
Step 3: Once the OK button is clicked, it displays a pop-up window for the Security Test 1, as shown below.
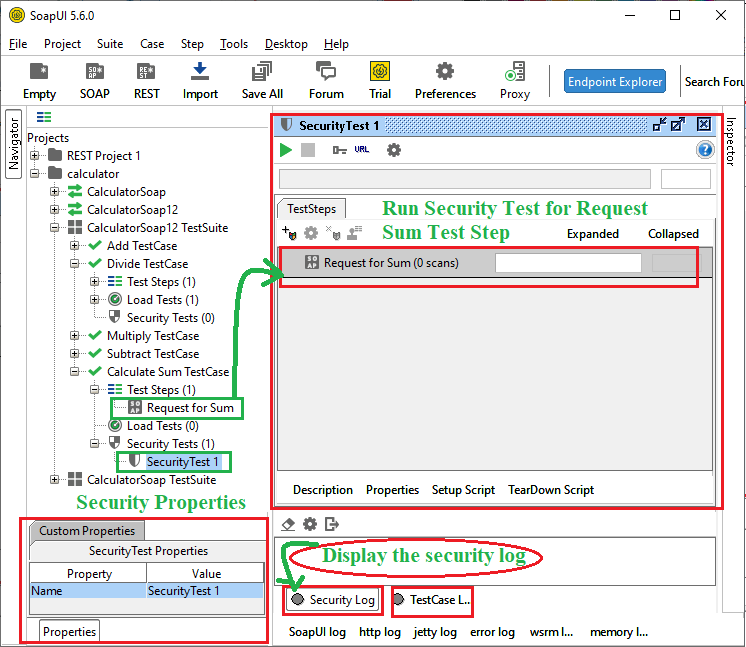
In the above image, we run the Security Test for the “Request for Sum” Test Step inside the Calculate Sum TestCase. Furthermore, we can also check the authenticity of the login and logout testcase by creating a new Soap project, even we can also check the security test for the REST project.
Step 4: Here, we check the security test for the “Request for Sum” Test Step. Select the Request for Sum and click on the  icon that displays a pop-up dialog box to select the security test, as the image is shown.
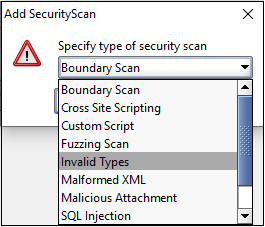
Step 5: Here, we select the Boundary Scan to run the security test and then click the OK button. As the OK button is clicked, it displays a pop-up window for Boundary Scan, as shown below.
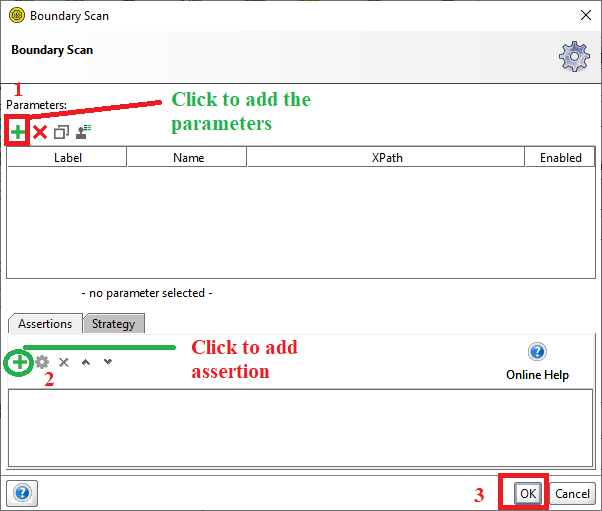
Step 6: Now, click on the (+) icon to add the parameter that shows pop up a dialog box to set the parameters like Label, Name, and the XPath, as shown.
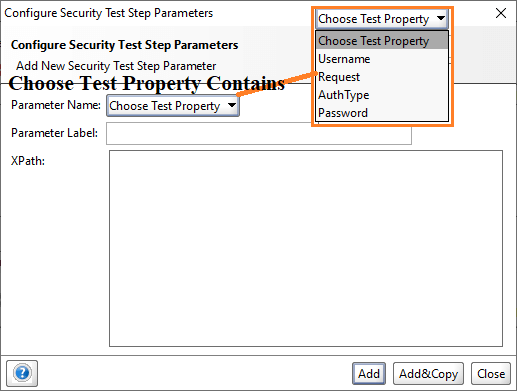
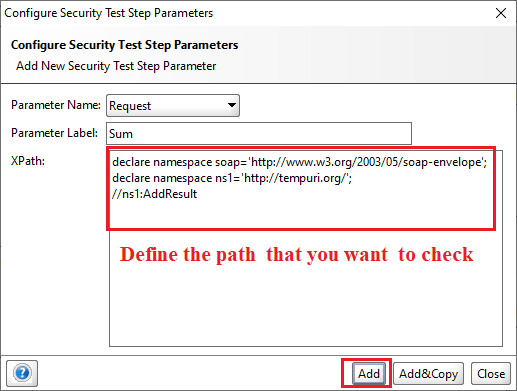
Here, we select Request for Parameter Name, Label is Sum, and the XPath is //ns1:AddResult and then click OK, as shown in the below image.
Step 7: Once the Add button is clicked, the Security Test Step parameters will be added to the Boundary Scan window, as shown below.
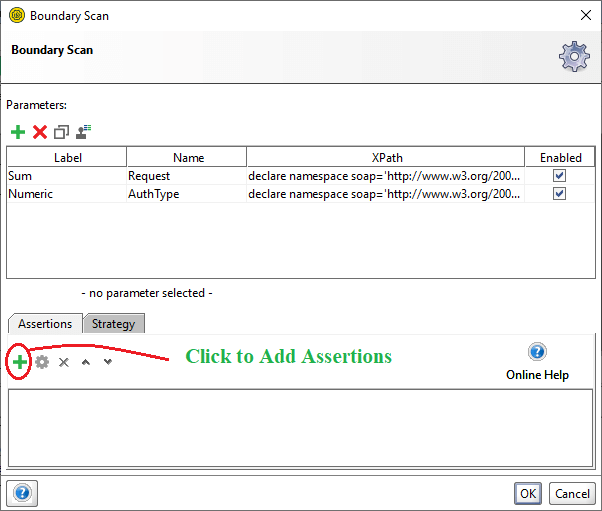
Step 8: Now click on the (+) icon to add the assertion for each parameter. As the (+) icon is pressed, it displays a pop-up window to add the assertion, as shown below.
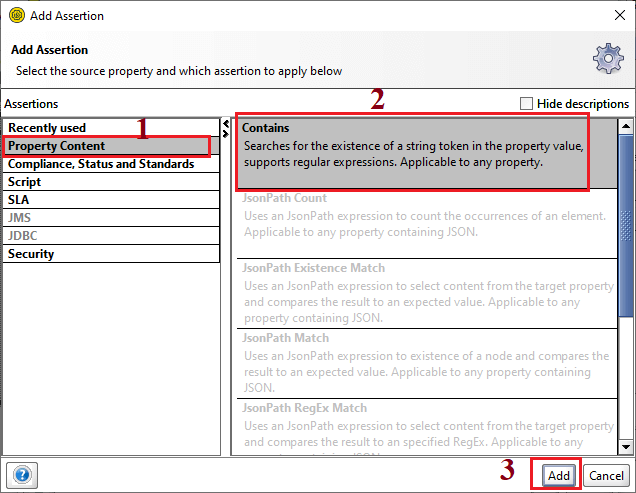
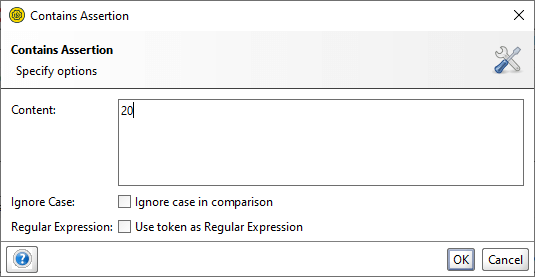
Step 9: Click the OK button to set the assertion for the Contains and then click the OK button to further process, as shown in the image.
Step 10: After this, click the OK button to add the Boundary Scan’s assertion. Similarly, add one more assertion for another parameter, as shown below.
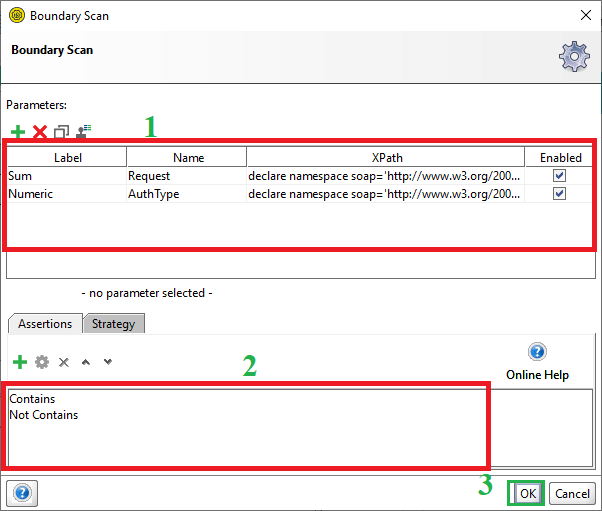
Step 11: Click the OK button to add the Boundary Scan in a Security Test 1 Window, as shown in the below image.
Similarly, add more types of security tests and then click the run button to test a testcase’s security, as shown below.
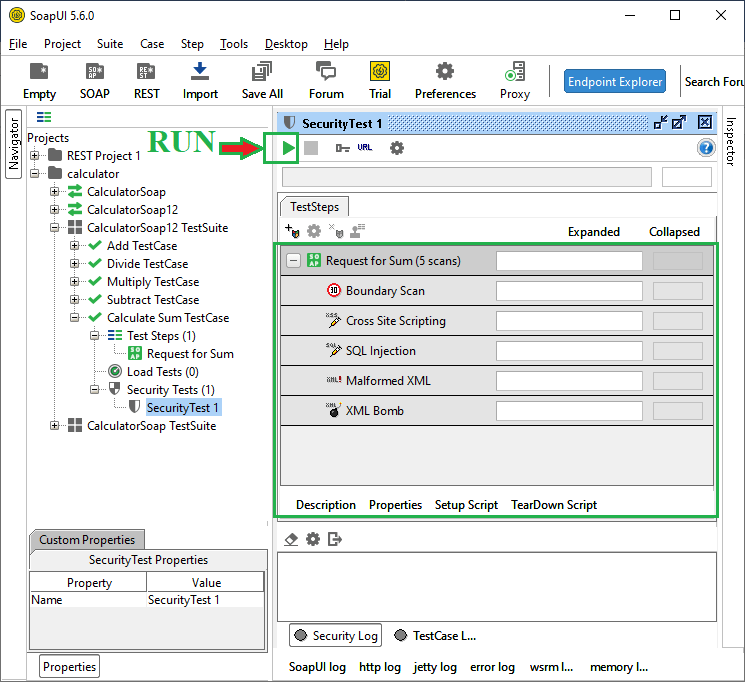
Step 12: Now, click the Run icon (triangle in green color) to execute the security test, as shown in the below image.
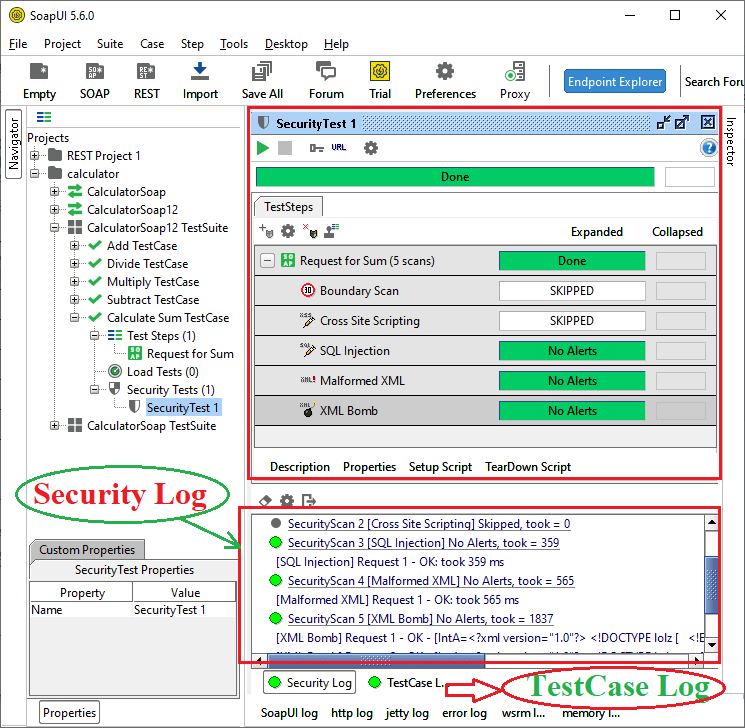
Furthermore, we can check the status of the Security test 1 by clicking on the Security log.