Store Configuration in Magento 2
After successful installation of Magento 2 on our system, we need to configure some general settings. Magento 2 provides configuration files that enable us to customize the store components easily. The Store configuration includes General, Catalog, Security, Customers, Sales, Engagement Cloud, Services, and Advanced.
Before starting store configuration, we will suggest you to create a new role and users for that role. Here, we will create a manager role.
Create a User Role
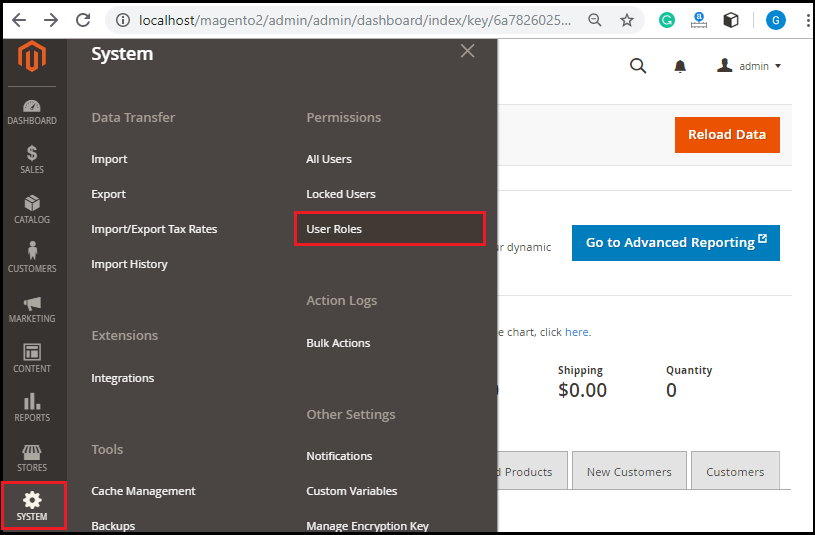
- Go to the System and click on User Roles to create a specific role for you.
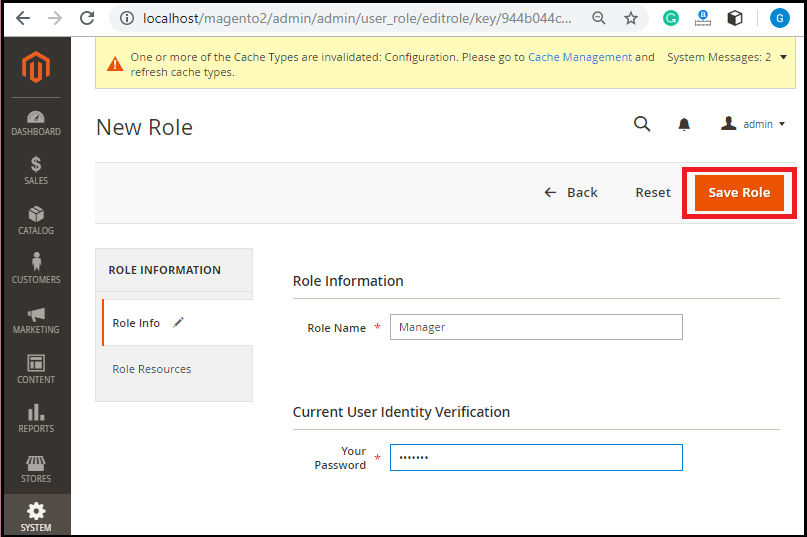
- Click on Add New Role, and Enter the role name and password in the given fields in Role Info. We can also allot permission to this role either may be custom or all.
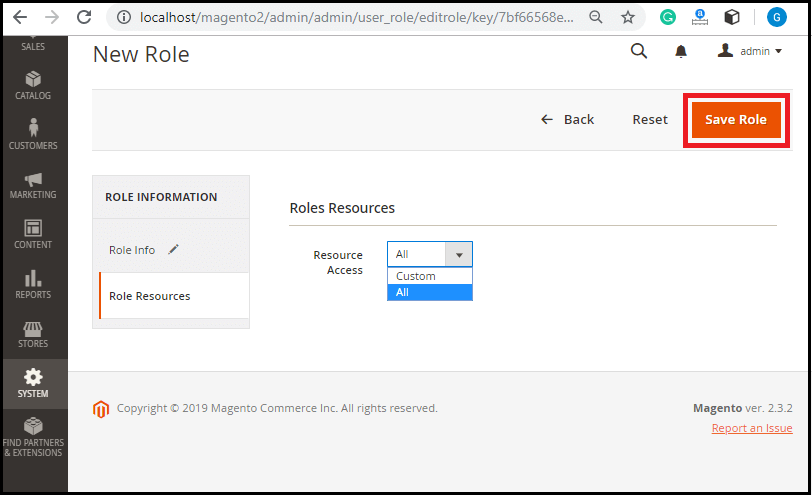
- Click on Role Resource and allot permission to all or custom permission to the role from the drop-down list. Click on Save Role.
- The manager Role is added now. Manager and Administrator have the same privileges here because we gave all the permission to the Manager.

It is not the Magento standard. It is a standard for AWS Community as well as for other community, where we keep our root account separate. We can reduce the privileges of manager role like – we do not allow them to create a new user. After creating the user role, we will create users for the Manager.
Create Users
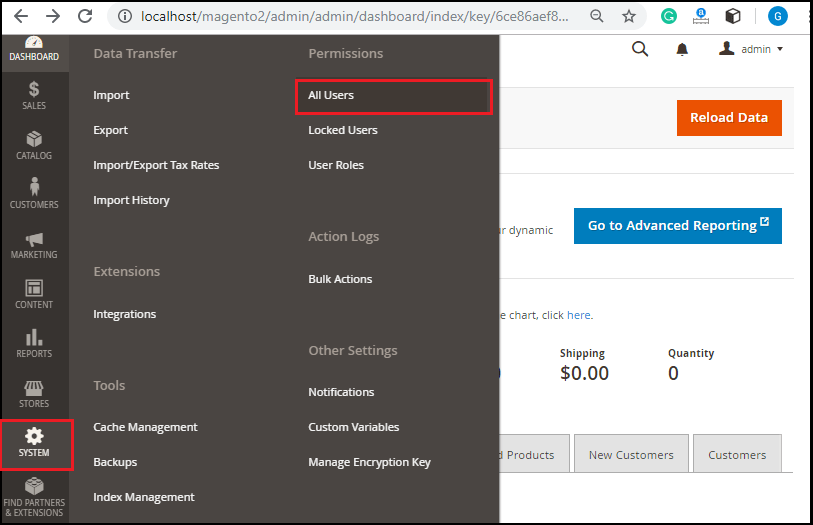
- Go to the System and click on All Users to create the users for the Manager role. We can create users from here.
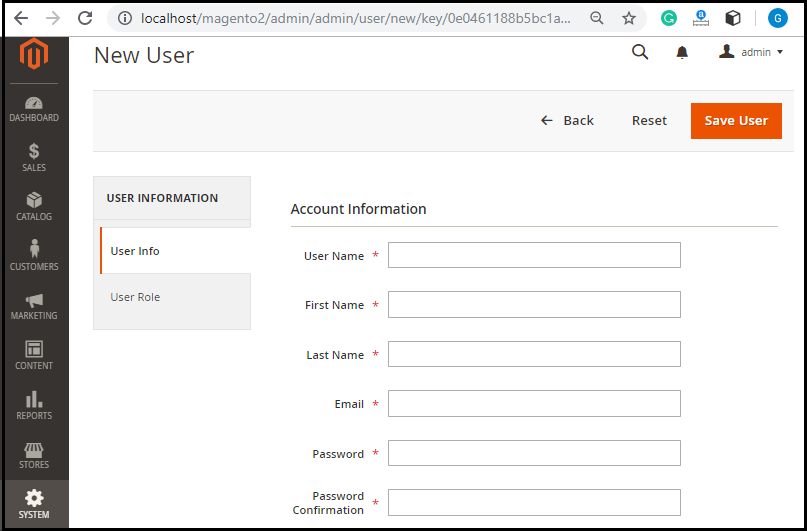
- Click on Add New User, and fill all the required information in the given fields to create a new user.
Store Configuration
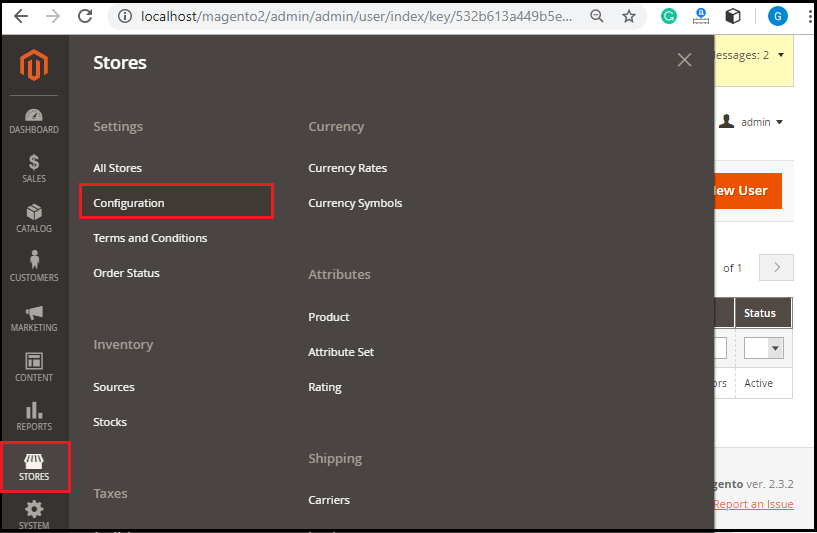
Store Configuration should only be done in the beginning, because in future if we perform this kind of change, certain things break and we have to do some couple of parts again. Now, we will configure the general settings of our web store. So, Go to Store -> Configuration.
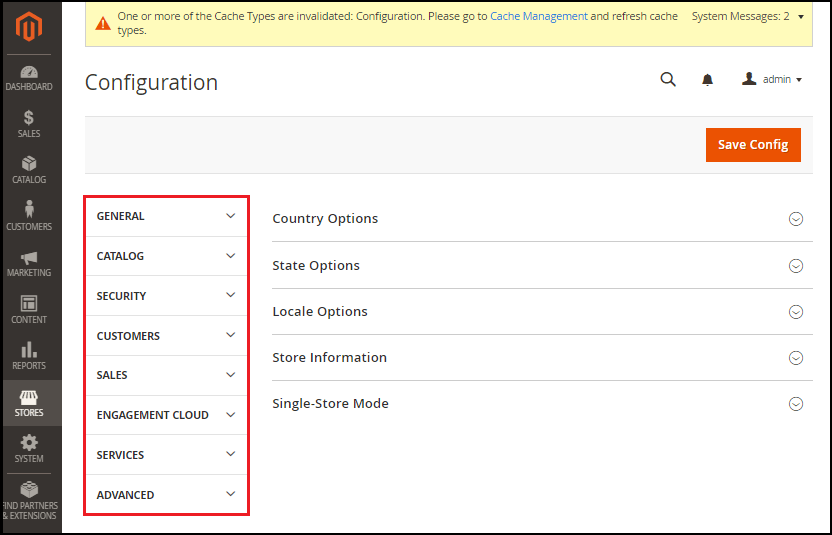
We will get the different setting options, but here we are considering general configuration. We will discuss the important fields below:
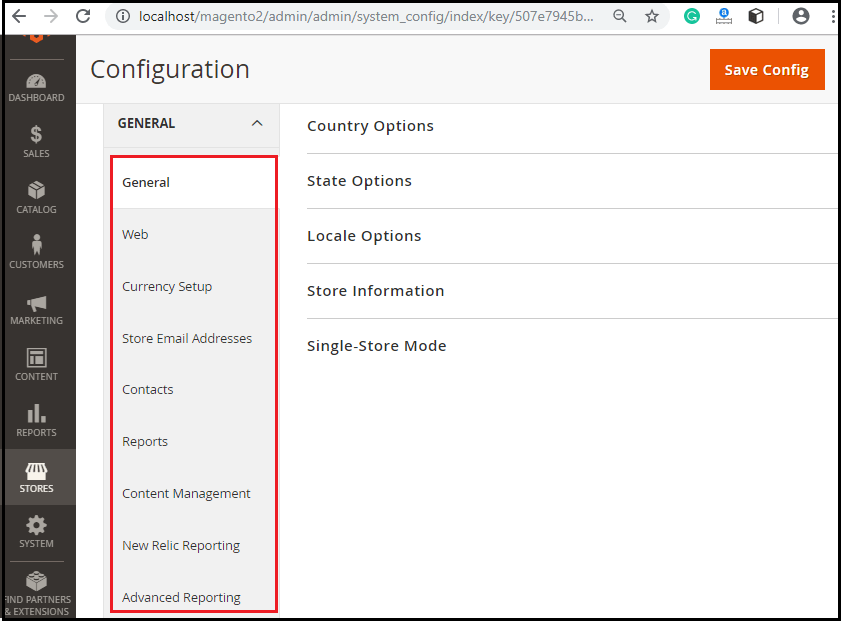
Step 1: General
The General section includes Web, Currency setup, Store Email Addresses, Contacts, Reports, Content Management, New Relic Reporting, and Advance Reporting. So, the first one is general.
Step 1.1 General
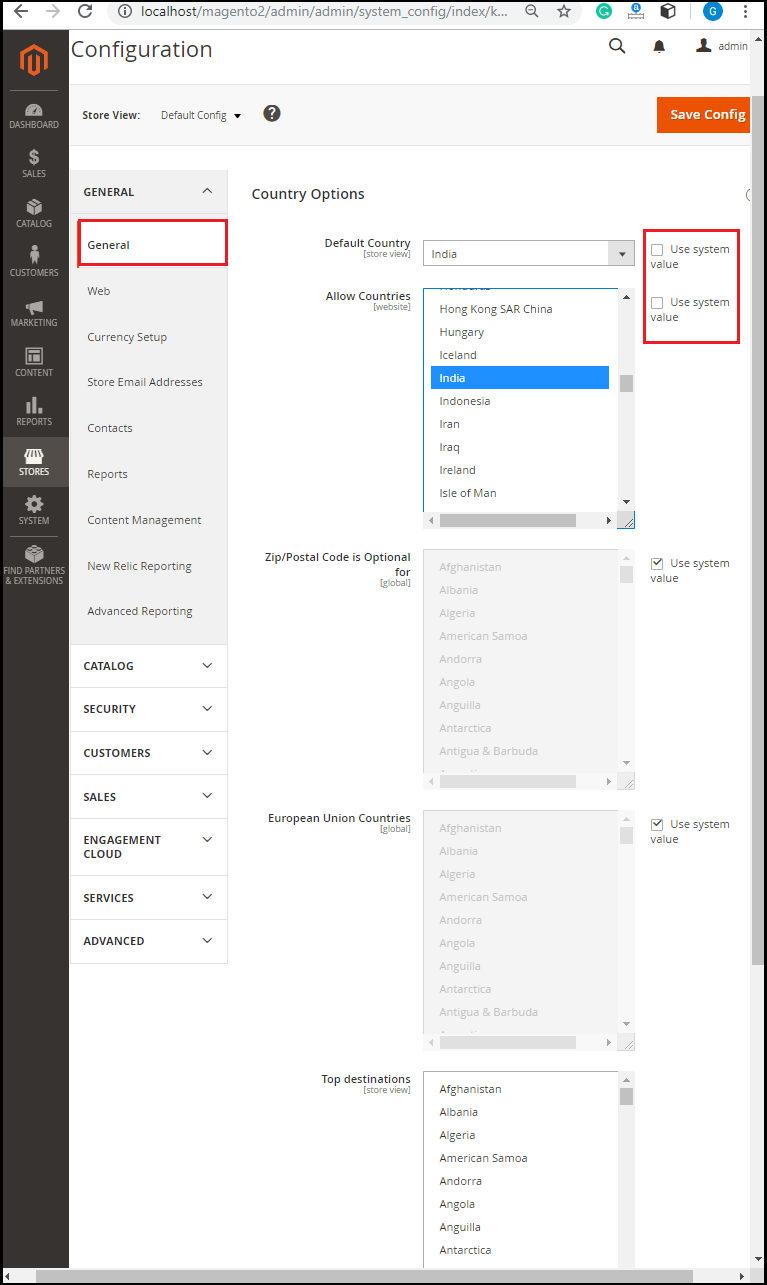
Country Options
Expand Country option and uncheck use system value at the right side. Here, we will set India in the country field as well as in Allow countries field from which we are willing to accept the order. We can multi-select the country using ctrl. Leave the other fields as it is.
Default country: Select your default country. In our case, it is India.
Allow Country: By default, all countries are allowed. We can remove the country here.
Zip Postal Code, European Union Countries, and Top destination: Do not need to change.
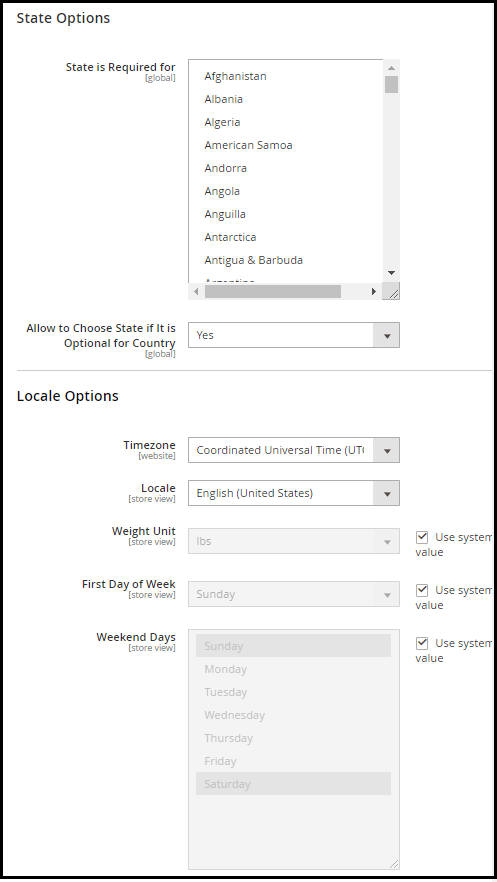
State Options
We have State Option that is not required now, because we have changed the country.
State is required for: No need to change.
Allow to choose state if it is optional to country: Choose Yes or No.
Locale Options
The timezone is set from our setup screen. So, there is no need to change anything in both State Options and Locale Options.
Timezone: Timezone of our store.
Locale: Default Language
Weight Unit: The weight unit will be used in our store, as well as the shipping process.
First day of Week: Setup the calendar
Weekend days: Choose weekdays.
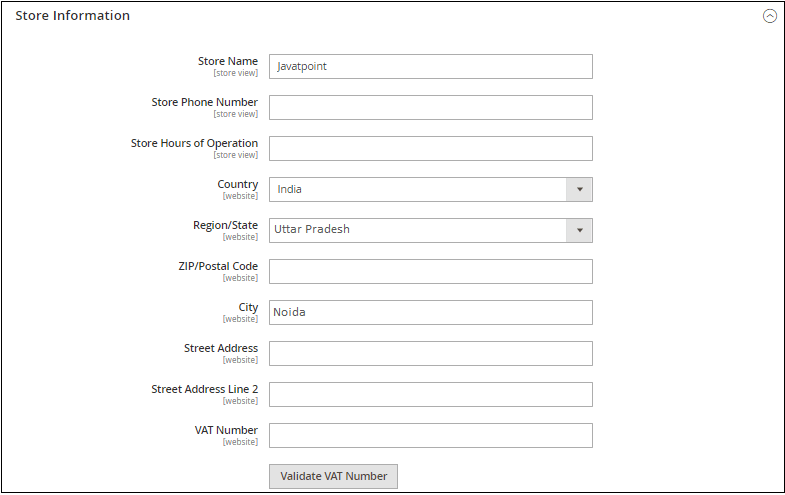
Store Information
In the store information section, add the current information of your store.
Single-Store Mode
In single-store mode, we set it to “Yes” because we expect that there would not be any store view or much languages where customer can switch from. It will give us decent performance optimization. In case if our store has multiple languages, then we can disable it.
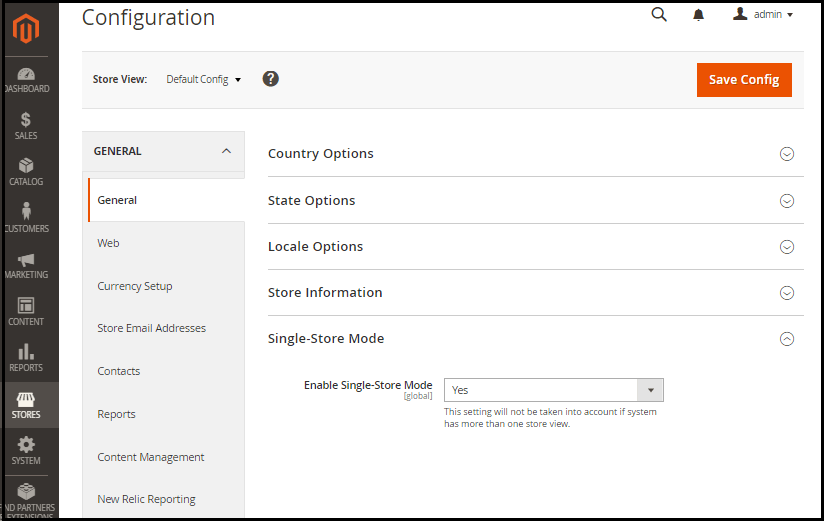
Note: This setting will be only taken if the system has more than one store views.
Step 1.2: Web
In the web section, we will get these fields:
URL Option
Do not need to change anything here.
Search Engine Optimization
We must have to enable this option if we want Search Engine to crawl and index our website. For this, Choose Yes in “Use Web Server Rewrites“.
Base URLs (secure)
This field will qualify the URL by using the Secure Base URL. It has two essential field options:
Use Secure URLs on Storefront: If we want to open our store frontend via HTTPS only, then set this option to Yes.
Use Secure URLs in Admin: It is similar to the frontend. Also, set this option to Yes to secure the Admin of the store with SSL.
Default Pages
Generally, this option will be left as default. However, we should notice these given options to avoid related problems.
Default Web URL: The default Web URL of our store.
CMS Home Page: The default is the Home page.
Default No-route URL: The default No-route URL (cms/route/index).
CMS No Route Page: 404 Not Found by default.
CMS No Cookie Page: The Default is Enable Cookie.
Show Breadcrumbs for CMS Pages: By default, it is Yes.
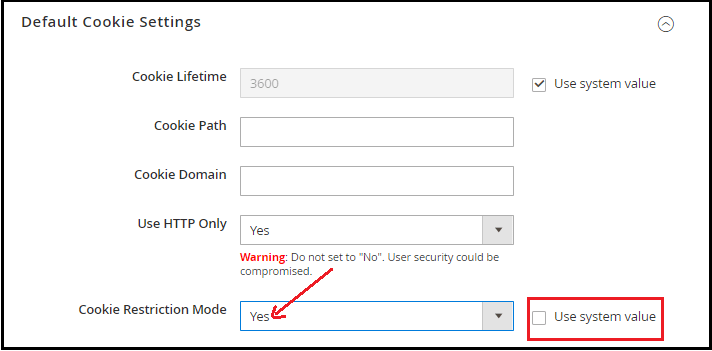
Default Cookie Setting
This is the “default cookie setting” option to which we need to consider the checking. There are certain countries like UK or European Countries it is mandatory that if our website is accepting the cookies, then we should give them a notice. It is legally mandatory there. So, we should enable the Cookie Restriction Mode.
To enable the Cookie Restriction Mode, we just uncheck the Use System Value and choose Yes in Cookie Restriction Field.
In other countries, it is not required so based on your requirements you can set or unset it.
Step 1.3: Currency Setup
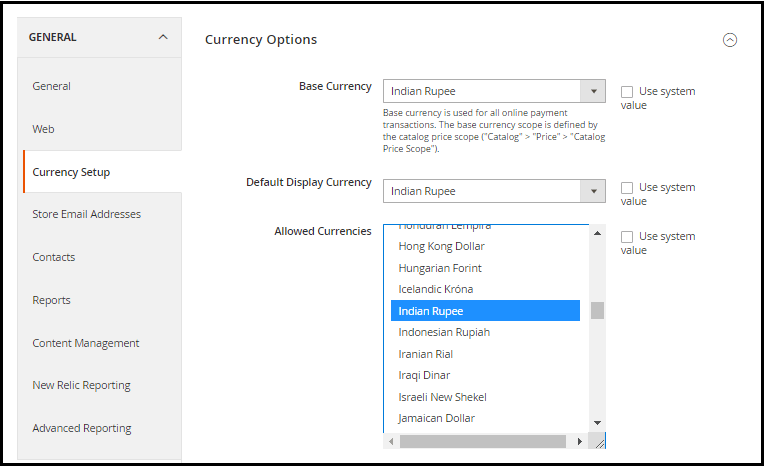
Now, we will go to the next step that is currency setup. Here, we will set our base currency. So, we will set Indian Rupees as a base currency.
Currency Options
Base Currency: The Base currency is the currency, which is used in all online payment transactions. If we have more than one store view in our website, then the base currency scope is defined by the catalog price scope. We choose the currency in fourth step Customization of Store while installing Magento 2.
Default Display Currency: The display currency is the currency in which products will be displayed at the frontend in our store. Choose it same as with the Base Currency.
Allowed Currency: This is the currency, which will be allowed in payment of our store. These are the other currency, in which a customer can switch. Set Indian rupees to basic, default, and allowed currency.
Step 1.4: Setup Email Address
Now, we will go to the setup Email Address, where we have a number of email addresses belongs to us.
Step 1.5: Contacts
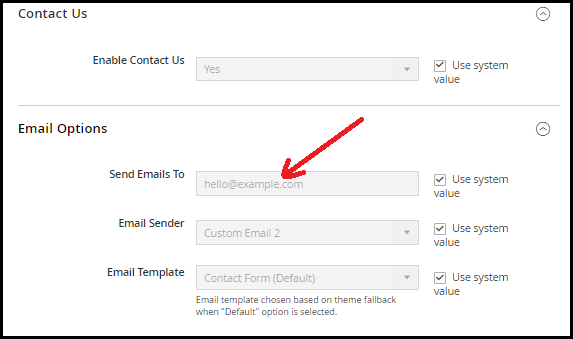
Contact Us
Enable the Contact Us and set it to Yes so that your customer can easily contact you.
Email Options
In Email option, just change the setting, so, the email of Contact Us email reaches to you.
Step 2: Catalog
The catalog contains the catalog, Inventory, XML Sitemap, RSS feed, and Email to a friend field.
Step 2.1: Catalog
Go to the Storefront section inside the catalog menu, where we have Use Flat Catalog Category and Use Flat Catalog Product. We set Yes in both of these options and Save Config.
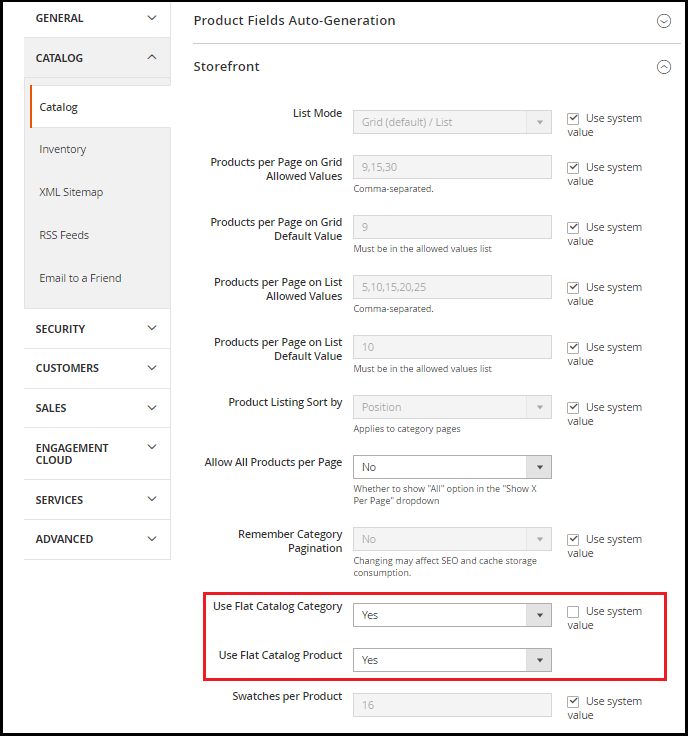
By default, Magento 2 has EAV database structure, so we have one entity let’s say Product. Its value stored in six different tables so, our Magento is comparatively slow, when EAV models are used. When we change it to the catalog, it’s quite easier and very fast for Magento to load the data from the database. So, we will change it to Yes.
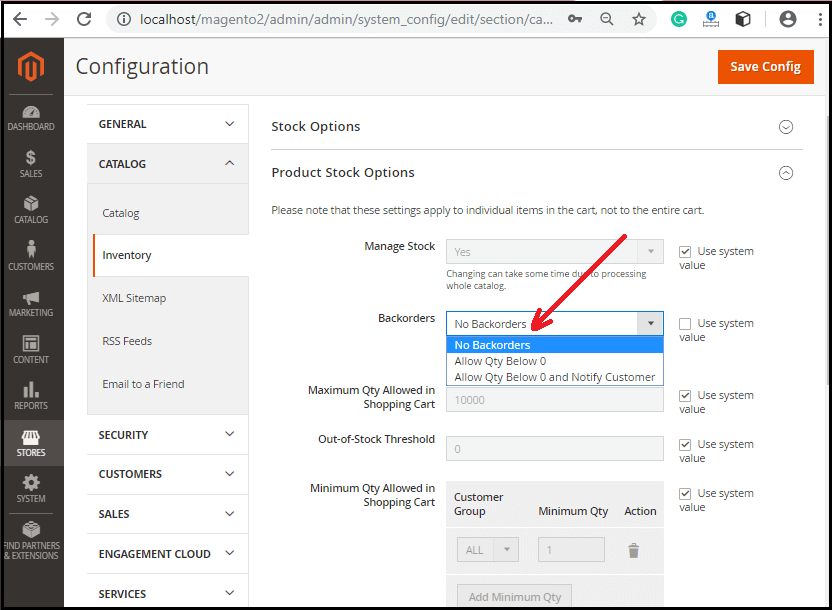
Step 2.2: Inventory
Go to the Inventory section, where we have Stock Options, Product Stock Options, Admin bulks operation, Distance Provider for Distance Based SSA, and Google Distance Provider. There is no change needed except Product Store Options.
Expand Product Stock Options. In case we accept backorders then we can allow backorder here, otherwise we do not need to change anything here.
Step 3: Customer
The customer section is fine, so no updates are needed.
Step 4: Sales
Sales section provides multiple sub-sections here. In this, we will go to shipping methods first. We will set the shipping charges from here which we are going to accept. We can enable and disable the shipping methods from here.
Expand the sales section and click on the Shipping method first.
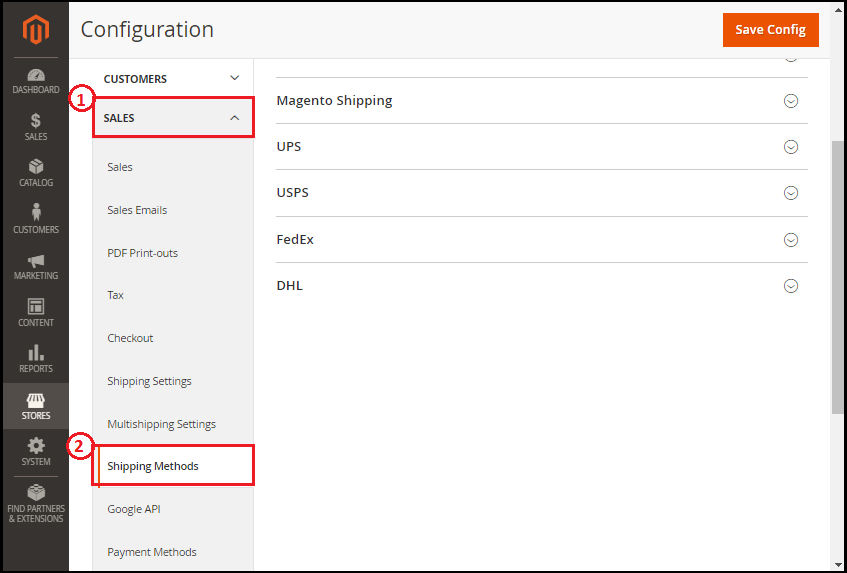
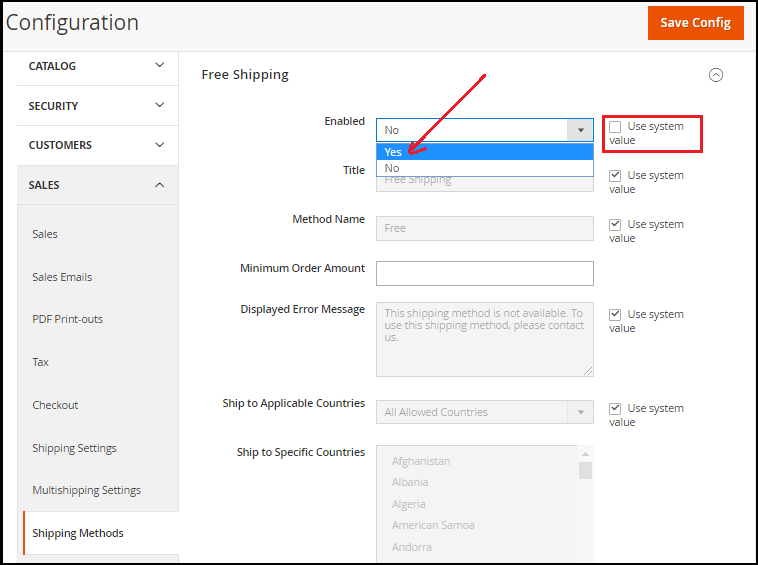
Step 4.1: Shipping Methods
We will accept a Flat rate which is by default enabled, and it is 5.00 rupees. If we also want to accept free shipping, we can enable and disable the shipping methods from here.
Firstly, uncheck the Use System Value and then set Yes in the Enabled field. Click on Save Config to save the updated values.
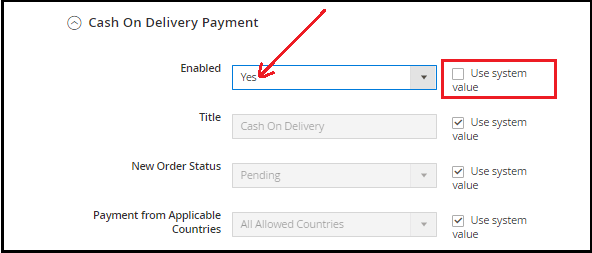
Step 4.2: Payment Methods
In the Payment Methods, we can set the different methods of payment such as Cash on Delivery, or using a debit card, credit card, PayPal, or Braintree, etc. To set the payment methods, Go to the Payment Methods inside the Sales and Enable the Cash on delivery.
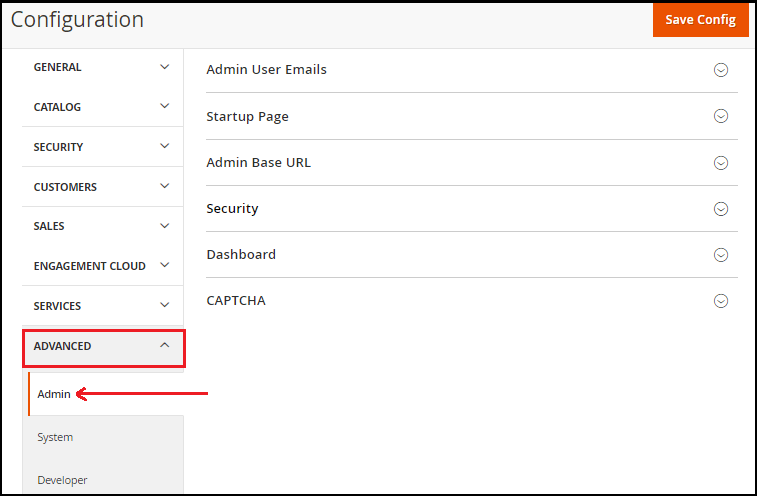
Step 5: Advanced
Now, we will go to the Advanced section and click on Admin.
Step 5.1: Payment Methods
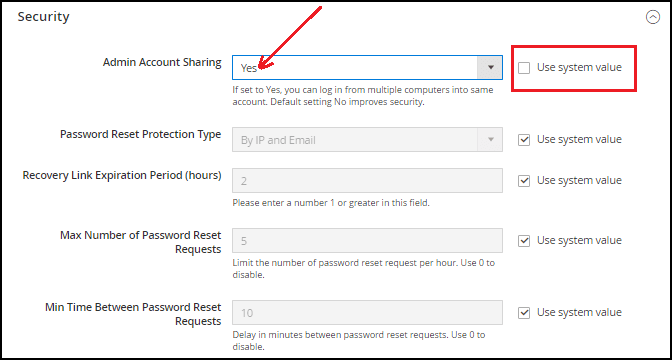
Security
Now, expand the security section and enable the Admin Sharing Account. So that More than one person can log in from multiple systems with the same details in the Admin.
Uncheck the Use System Value and Set Yes to the Admin Account Sharing.
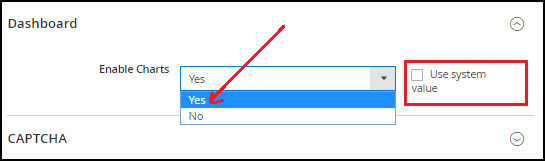
Dashboard
Now, we will enable the chart for our dashboard. Uncheck the Use System Value and set Yes in the Enable chart under the Dashboard. Click on Save Config to save the changes in store.
Step 5.2: Developer
Next step is to move on the Developer inside the Advanced section.
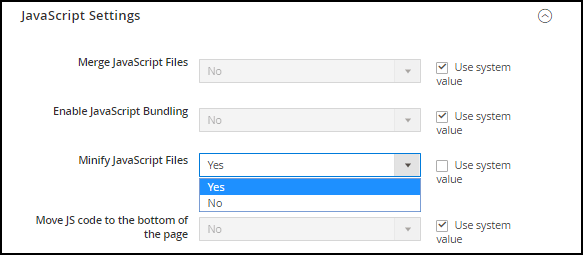
JavaScript Settings
Expand the JavaScript setting and set Yes to the Minify JavaScript Files from the drop-down list after unchecking the Use System Value.
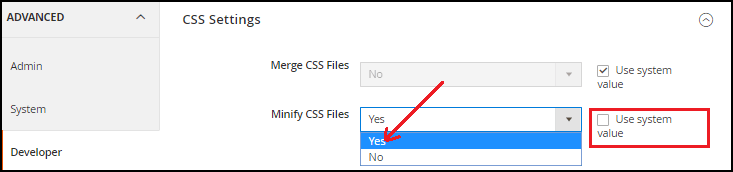
CSS Settings
Expand the CSS setting and set Yes to the Minify CSS Files after unchecking the Use System Value.
Grid Settings
Uncheck the Use System Value to enable the Asynchronous Indexing from the drop-down list and click on Save Config.
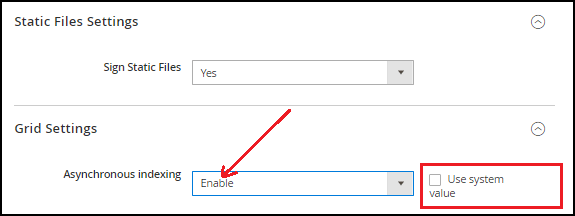
Files Sign means, whenever you deploy your content, the new static file will be created in a separate sign folder. So that the changes in your live website reflect easily, otherwise they are cached, and the new changes do not reflect.
Asynchronous Indexing means that your grids are not automatically loaded. E.g., if you place an order in Magento, it is stored in sales_orders table, but the admin grid is loaded from sales_orders_grid table. If we set it to asynchronous that entry goes after some time using crons only. So, this way, your Magento do not stuck on the place order functioning to insert into two tables in a particular moment.
Clear the Cache
After store configuration, Go to System and click on cache Management as given in the below screenshot and flush the cache.
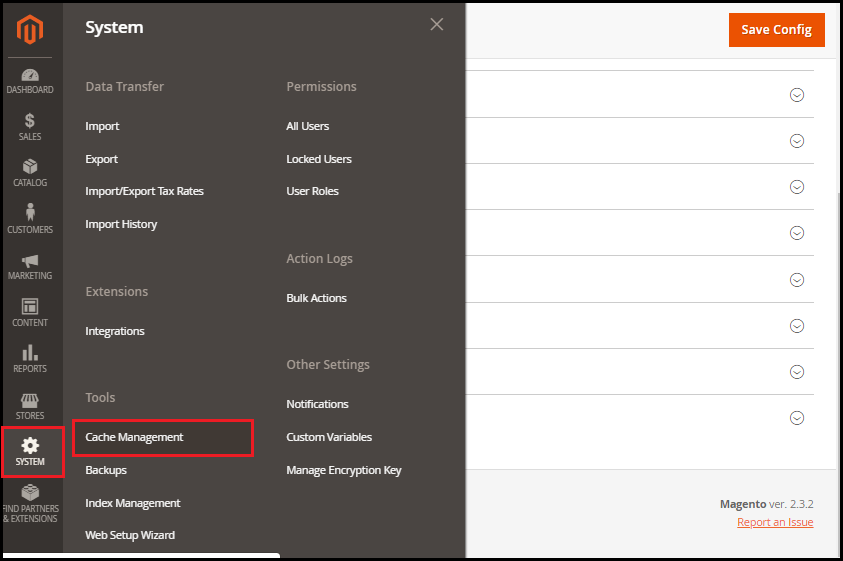
Select all from the drop-down list and click on Submit button.
