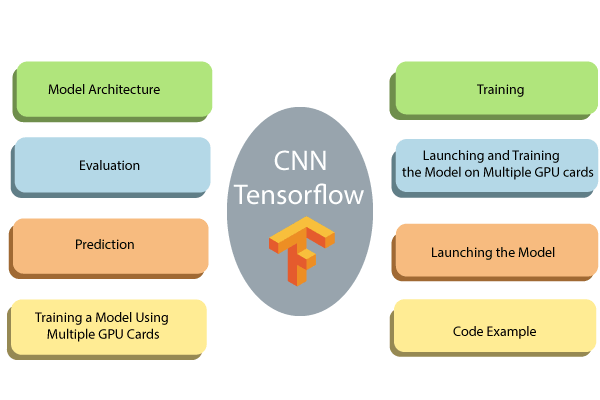
Training of CNN in TensorFlow
The MNIST database (Modified National Institute of Standard Technology database) is an extensive database of handwritten digits, which is used for training various image processing systems. It was created by “reintegrating” samples from the original dataset of the MNIST.
If we are familiar with the building blocks of Connects, we are ready to build one with TensorFlow. We use the MNIST dataset for image classification.
Preparing the data is the same as in the previous tutorial. We can run code and jump directly into the architecture of CNN.
Here, we are executing our code in Google Colab (an online editor of machine learning).
We can go to TensorFlow editor through the below link: https://colab.research.google.com
These are the steps used to training the CNN (Convolutional Neural Network).
Steps:
Step 1: Upload Dataset
Step 2: The Input layer
Step 3: Convolutional layer
Step 4: Pooling layer
Step 5: Convolutional layer and Pooling Layer
Step 6: Dense layer
Step 7: Logit Layer
Step 1: Upload Dataset
The MNIST dataset is available with scikit for learning in this URL (Unified Resource Locator). We can download it and store it in our downloads. We can upload it with fetch_mldata (‘MNIST Original’).
Create a test/train set
We need to split the dataset into train_test_split.
Scale the features
Finally, we scale the function with the help of MinMax Scaler.
Defining the CNN (Convolutional Neural Network)
CNN uses filters on the pixels of any image to learn detailed patterns compared to global patterns with a traditional neural network. To create CNN, we have to define:
- A convolutional Layer: Apply the number of filters to the feature map. After convolution, we need to use a relay activation function to add non-linearity to the network.
- Pooling Layer: The next step after the Convention is to downsampling the maximum facility. The objective is to reduce the mobility of the feature map to prevent overfitting and improve the computation speed. Max pooling is a traditional technique, which splits feature maps into subfields and only holds maximum values.
- Fully connected Layers: All neurons from the past layers are associated with the other next layers. The CNN has classified the label according to the features from convolutional layers and reduced with any pooling layer.
CNN Architecture
- Convolutional Layer: It applies 14 5×5 filters (extracting 5×5-pixel sub-regions),
- Pooling Layer: This will perform max pooling with a 2×2 filter and stride of 2 (which specifies that pooled regions do not overlap).
- Convolutional Layer: It applies 36 5×5 filters, with ReLU activation function
- Pooling Layer: Again, performs max Pooling with a 2×2 filter and stride of 2.
- 1,764 neurons, with the dropout regularization rate of 0.4 (where the probability of 0.4 that any given element will be dropped in training)
- Dense Layer (Logits Layer): There are ten neurons, one for each digit target class (0-9).
Important modules to use in creating a CNN:
- Conv2d (). Construct a two-dimensional convolutional layer with the number of filters, filter kernel size, padding, and activation function like arguments.
- max_pooling2d (). Construct a two-dimensional pooling layer using the max-pooling algorithm.
- Dense (). Construct a dense layer with the hidden layers and units
We can define a function to build CNN.
Let’s see in detail how to construct every building block before wrapping everything in the function.
Step 2: Input layer
We need to define a tensor with the shape of the data. For that, we can use the module tf.reshape. In this module, we need to declare the tensor to reshape and to shape the tensor. The first argument is the feature of the data, that is defined in the argument of a function.
A picture has a width, a height, and a channel. The MNIST dataset is a monochromic picture with the 28×28 size. We set the batch size into -1 in the shape argument so that it takes the shape of the features [“x”]. The advantage is to tune the batch size to hyperparameters. If the batch size is 7, the tensor feeds 5,488 values (28 * 28 * 7).
Step 3: Convolutional Layer
The first convolutional layer has 18 filters with the kernel size of 7×7 with equal padding. The same padding has both the output tensor and input tensor have the same width and height. TensorFlow will add zeros in the rows and columns to ensure the same size.
We use the Relu activation function. The output size will be [28, 28, and 14].
Step 4: Pooling layer
The next step after the convolutional is pooling computation. The pooling computation will reduce the extension of the data. We can use the module max_pooling2d with a size of 3×3 and stride of 2. We use the previous layer as input. The output size can be [batch_size, 14, 14, and 15].
Step 5: Pooling Layer and Second Convolutional Layer
The second CNN has exactly 32 filters, with the output size of [batch_size, 14, 14, 32]. The size of the pooling layer has the same as ahead, and output shape is [batch_size, 14, 14, and18].
Step6: Fully connected (Dense) Layer
We have to define the fully-connected layer. The feature map has to be compressed before to be combined with the dense layer. We can use the module reshape with a size of 7*7*36.
The dense layer will connect 1764 neurons. We add a Relu activation function and can add a Relu activation function. We add a dropout regularization term with a rate of 0.3, meaning 30 percent of the weights will be 0. The dropout takes place only along the training phase. The cnn_model_fn() has an argument mode to declare if the model needs to trained or to be evaluate.
Step 7: Logits Layer
Finally, we define the last layer with the prediction of model. The output shape is equal to the batch size 12, equal to the total number of images in the layer.
We can create a dictionary that contains classes and the possibility of each class. The module returns the highest value with tf.argmax () if the logit layers. The softmax function returns the probability of every class.
We only want to return the dictionary prediction when the mode is set to prediction. We add these codes to display the predictions.
The next step consists of computing the loss of the model. The loss is easily calculated with the following code:
The final step is to optimizing the model, which is to find the best values of weight. For that, we use a gradient descent optimizer with a learning rate of 0.001. The objective is to reduce losses.
We are done with the CNN. However, we want to display the performance metrics during the evaluation mode. The performance metrics for the multiclass model is the accuracy metrics. TensorFlow is equipped with an accuracy model with two arguments, labels, and predicted value.
We can create our first CNN and we are ready to wrap everything in one function to use it and to train and evaluate the model.
A CNN takes many times to training, therefore, we create a logging hook to store the values of the software layers in every 50 iterations.
We are ready to estimator the model. We have a batch size of 100 and shuffle the data into many parts. Note that, we set training steps of 18000, it can take lots of time to train.
Now, the model is trained, we can evaluate it and print the results easily.
With the help of architecture, we get an accuracy of 97%. We can change the architecture, batch size, and number of iterations to improve accuracy. Architecture, batch size and number of iterations to improve accuracy.
CNN neural networks have performed far better than ANN or logistic regression. In the tutorial on artificial neural networks, we had an accuracy of 96%, which is low CNN. CNN’s performances are impressive with an extensive image set, both in terms of speed calculation and accuracy.
To build CNN, we need to follow these six steps:
1) Input layer:
This step resets the data. Size is equal to the square root of the number of pixels. For example, if a picture has 156 pixels, the figure is 26×26. We need to specify whether the image contains color or not. If so, we had a size 3 to 3 for RGB-, otherwise 1.
2) Convolutional layer
We need to create consistent layers. We apply various filters to learn important features of the network. We define the size of the kernel and volume of the filter.
3) Pooling Layer
In the third step, we add a pooling layer. This layer reduces the size of the input. It does by taking the maximum value of the sub-matrix.
4) Add Convolutional Layer and Pooling Layer
In this step, we can add as many pooling layers as we want. It uses Google architecture with more than 20 hard layers.
5) Dense Layer
Step 5 flattens the previous to form fully joined layers. In this step, we can use a different activation function and add the dropout effect.
6) Logit Layer
The final step is the prediction.