WPF GridView Control
Grid is known as the powerful and useful layout control in the WPF. With the help of the grid, we can arrange the child element in the cells. The grid contains the columns and rows. Visual Studio will automatically add the grid as the first container in the window element when we add the new XAML document or when we create the new WPF project.
Grid Panel provides us a flexible area containing the rows and columns. We can arrange the child elements in a Grid in the form of the table. We can add the element in any row or column by using the grid .row and Grid.column properties.
Grid always contains the one row and one column by default. By using the ColumnDefinition and RowDefinition properties, we can add multiple rows and multiple columns.
The Functionality of the grid is just like the HTML table, but the grid is more flexible.
We can define the height of the rows and width of the column in three ways:
- Fixed Value: We use fix value to assign the size of the logical unit.
- Auto: Auto will acquire the space required for the control in the specific column and rows.
- Star(*): Star will acquire the remaining space after the Auto and Fixed Size are filled.
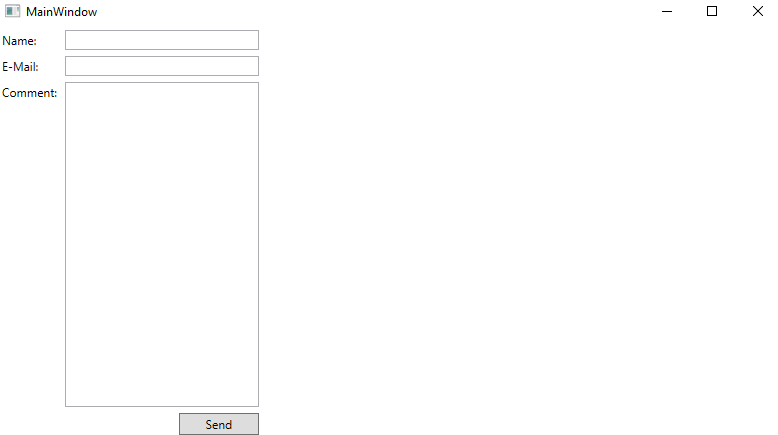
Now we will write a code to define the Grid which is having the width and height of the column in the above three ways:
MainWindow.XAML
The output of the above code in the form of the grid will look like as shown in the below screenshot:
OUTPUT
Resize the Columns and Rows
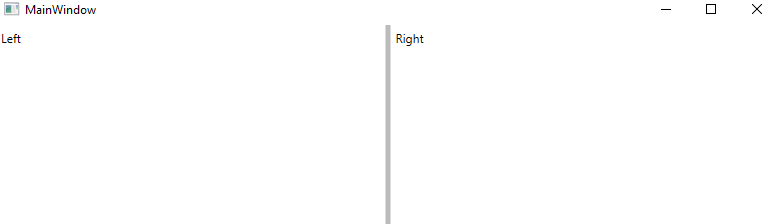
WPF provides the control, which is called GridSplitter. GridSplitter will change its size automatically when we change the size upto the next and previous cell. For that we will set the ResizeBehaviour to the PreviousAndNext. Splitter knows the resize direction according to the ratio between the height and width. We can also manually set the Resize direction, depends on the columns and rows.
To resize the column and rows, we will write the following code:
MainWindow.XAML
The output of the above code is shown in the below screenshot:
OUTPUT
Another example of Grid Layout
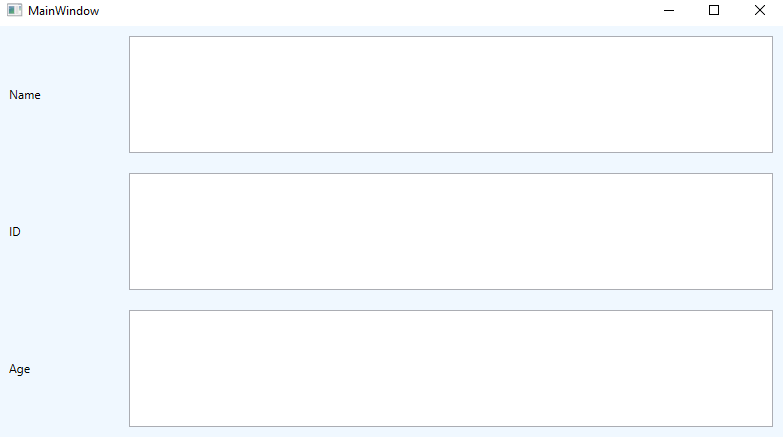
Now we will show how to add the child element to the grid to specify it in the tabular form.
Now we will add the Text Block in the first column and the textbox in the second column of the grid by using the XAML implementation.
MainWindow.XAML
The output of the above code is shown below:
OutPut