Angular 8 Tutorial
![]()
Angular community has released its latest version which is known as Angular 8. If you are familiar with previous version of Angular, it will not be difficult for you. You can easily upgrade your Angular CLI to version 8.
What is Angular 8?
Angular 8 is a client-side TypeScript based framework which is used to create dynamic web applications. It is very similar to its previous versions except having some extensive features.
Note: Dynamic web applications are simply dynamic websites i.e. www.gmail.com, www.yahoo.com, etc. which has tendency to change data/information with respect to 3 parameters:
- Time-to-time (eg. news update webs applications)
- Location-to-location (eg. Weather-report web applications)
- User-to-user (eg. Gmail, Facebook type applications)
You can see how to upgrade Angular CLI to version 8. Click Here
New Features of Angular 8
The Angular community has released its latest version Angular 8 with an impressive list of changes and improvements including the much awaited Ivy compiler as an opt-in feature.
These are the most prominent features of Angular 8:
- Angular 8 supports TypeScript 3.4
- Angular 8 supports Web Workers
- The new compiler for Angular 8 is Ivy Rendering Engine
- Angular 8 provides dynamic imports for lazy-loaded modules.
- Improvement of ngUpgrade
TypeScript 3.4
Angular 8 supports TypeScript 3.4 and it is required to run your Angular 8 project. So you have to upgrade your TypeScript version to 3.4.
Web workers class
JavaScript is single threaded, so it is common for more critical tasks like data calls to take place asynchronously. Web Workers facilitates you to run the CPU intensive computations in the background thread, freeing the main thread to update the user interface.
Web workers can also be helpful, if your application is unresponsive while processing data.
If you want to outsource such a calculation to a background, we must first create the web worker using the Angular CLI.
More about Ivy and Bazel
Ivy is the new rendering engine and Bazel is the new build system. Both are ready for proper use with Angular 8. The preview of these two should be available shortly. Ivy is a new compiler/runtime of Angular and Angular 8 is a first release to offer a switch to opt-in into Ivy officially.
Ivy is supposed to be a by default rendering engine in Angular version 9.
Bazel provides one of the newest features of Angular 8 as a possibility to build your CLI application more quickly.
The main advantages of Bazel are:
- The incremental build and tests.
- It provides a chance to make your backends and frontends with a same tool.
- It has a possibility to have remote builds and cache on the build farm.
Dynamic imports for lazy-loaded modules
Angular 8 facilitates you to use standard dynamic import syntax instead of a custom string for lazy-loaded modules.
It means lazy-loaded import that looked like this:
Will be looked like this:
Improved Angular CLI Workflow
The Angular CLI is continuously improving. Now, the ng build, ng test and ng run are equipped by 3rd-party libraries and tool. For example, AngularFire already makes use of these new capabilities with a deploy command.
Prerequisite for Angular 8 tutorial
- You must have installed Node.js version > 10. NPM will be updated also because it will be used by default. Here, I am using Node version 12.4.0
- You must have installed MongoDB on your system. You can see how to install MongoDB. Click here…
Workflow of Angular 8 Tutorial
Here, we will create two separate projects:
One for front end (in Angular) and one for backend (in Node.js | Express | MongoDB). We will also create a backend API which will be used by frontend.
Here, we use the following technologies:
- Node: 12.4.0
- Angular CLI: 8.0.2
- NPM: v12.4.0
- MongoDB shell version v4.0.10
- MongoDB version v4.0.10
- Windows 10
Note: You can check your node, angular, npm, and mongoDB versions by using the following commands:
- To check Node and Angular CLI version, use ng –version command.
- To check npm version, use node -v command.
- To check MongoDB version, use mongod –version command.
- To check MongoDB shell version, use mongo –version command.
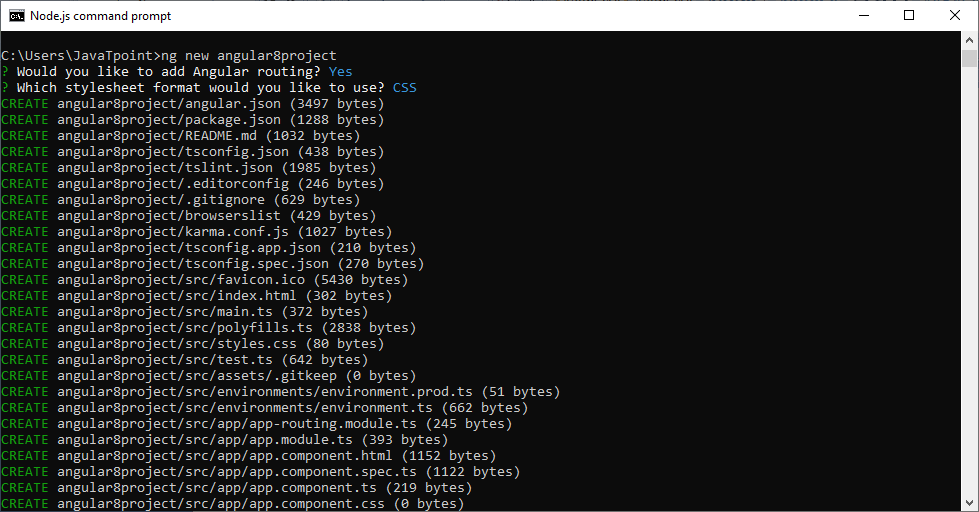
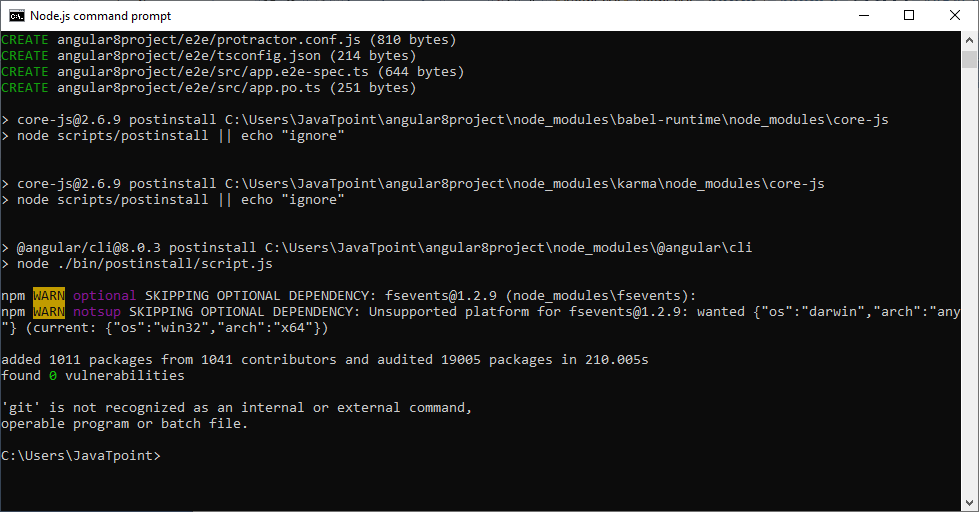
Create an Angular 8 project
Let’s create an Angular 8 project by using the following command:
Here, angular8project is the name of the project.
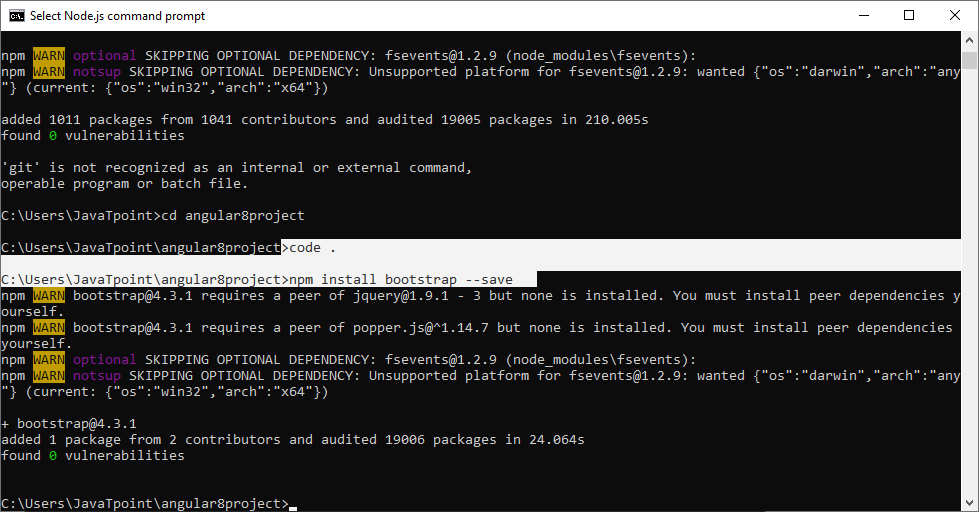
Install Bootstrap 4 CSS framework
Use the following command to install bootstrap in your project.
Now, add the following code inside the angular.json file.
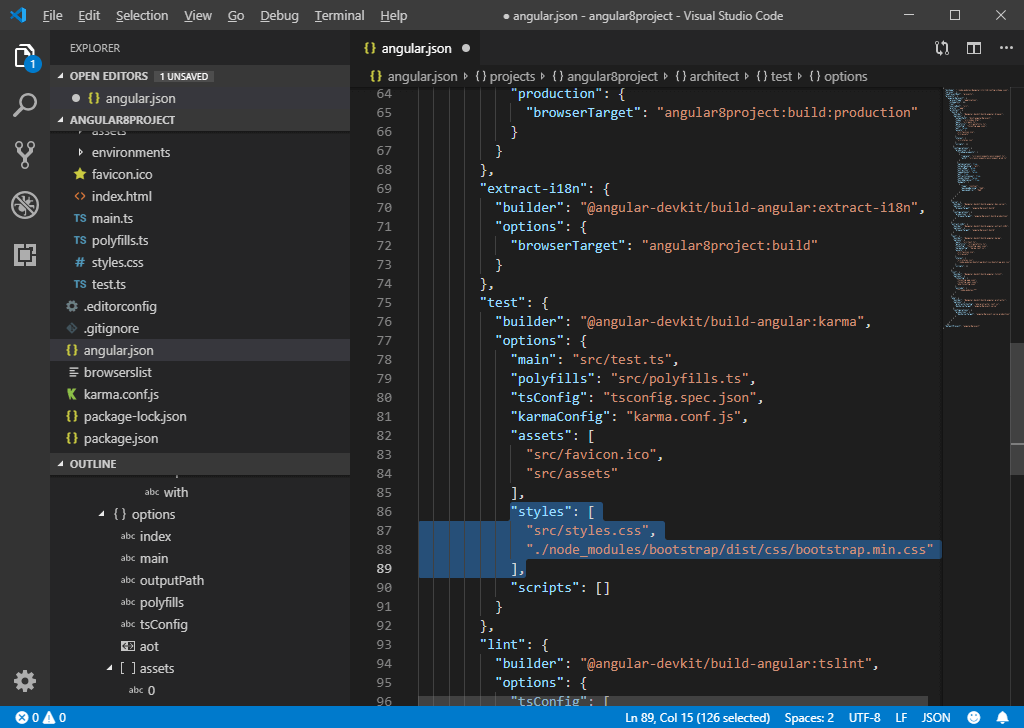
The above CSS is used that we can use the bootstrap classes inside any file.
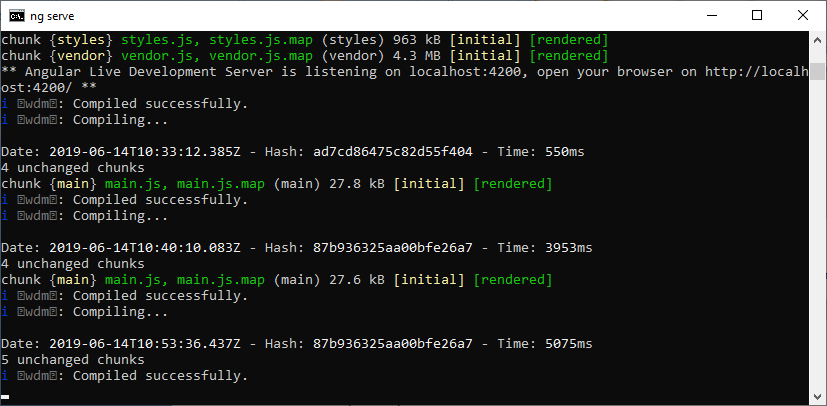
Start the Angular development server using the following command.
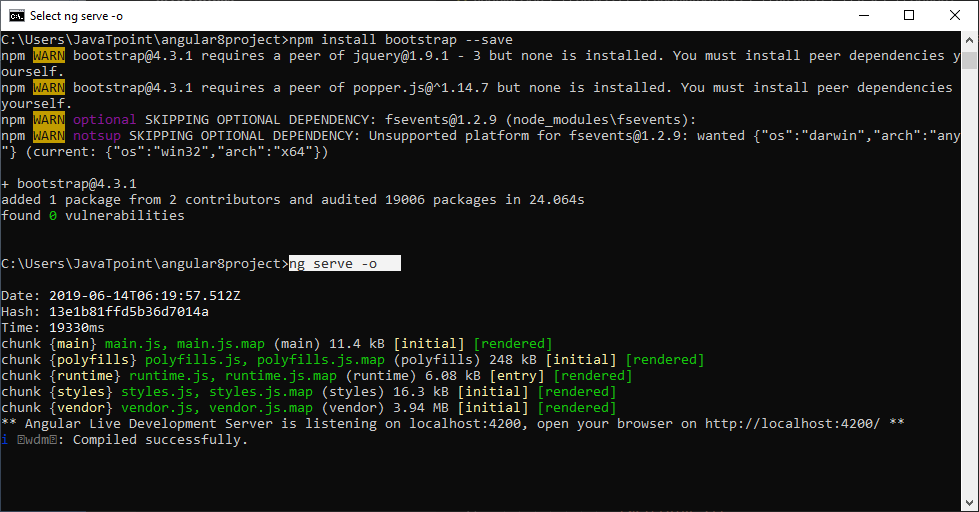
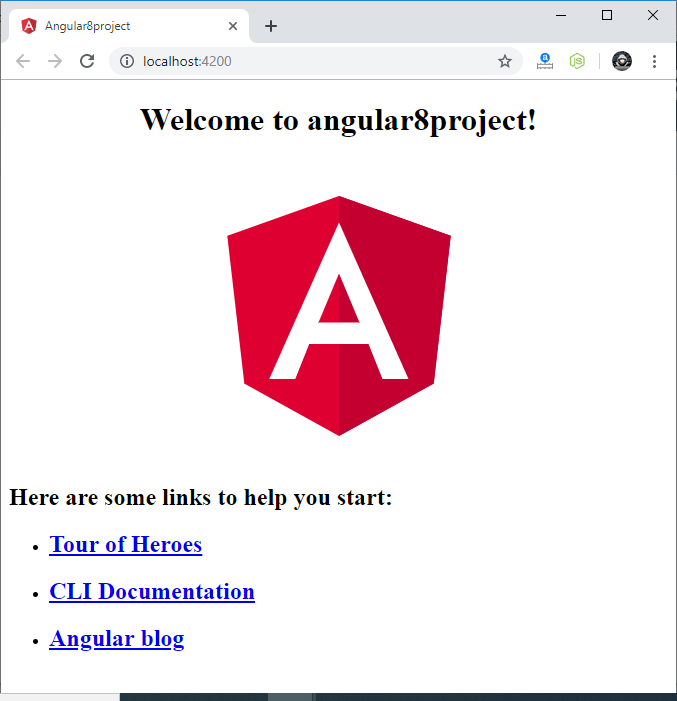
The server starts at the http://localhost:4200/
You can see the output. It is the initial Angular home screen.
Project Description
In this project, we will facilitate users:
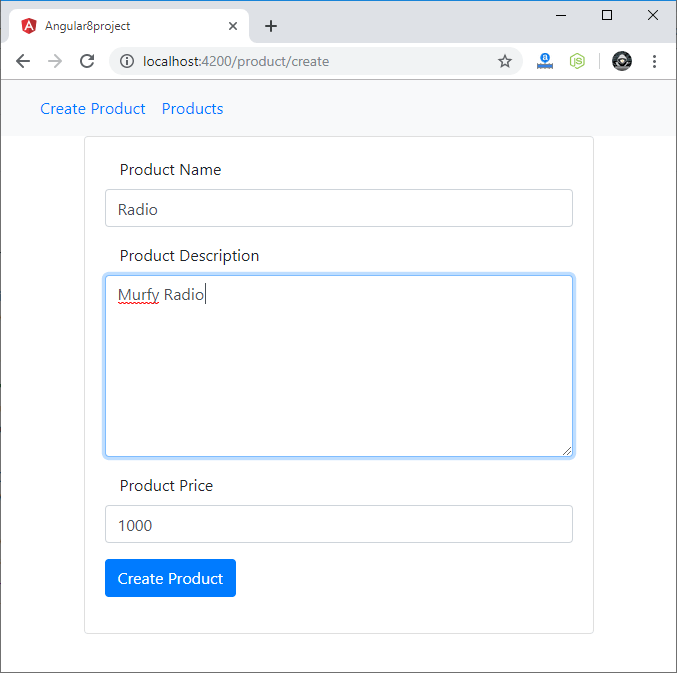
- To enter their ProductName, Product Description, and ProductPrice to a form and submit the form.
- Validate the form against values. If values are incorrect, then it will be validated at the frontend and form will not be submitted.
- If all values are correct, send the form to the Node.js backend API.
- Store the values inside the MongoDB database.
- Show the data on the frontend.
- Facilitates users to edit and delete the data also.
- Show the data on the MongoD CLI.
- Show the data on MongoDB Compass Community (a GUI of MongoDB database.).
Generate Angular Components
We are going to make a CRUD operation to create, read, and update data. So, we will create three components.
Use the following command to generate 3 Angular Components:
Note: The “spec” command is deprecated in Angular 8. You have to use “skipTests” instead.
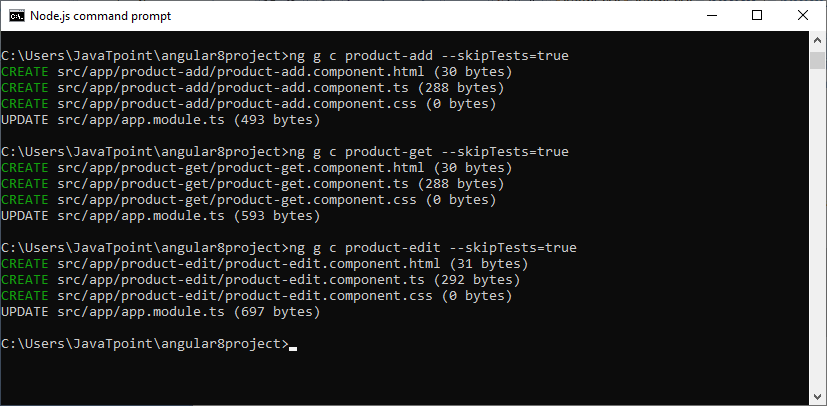
All the above 3 components are automatically added to app.module.ts file. Now, we have to configure the routing of angular components inside an app-routing.module.ts file.
You can check the app-routing.module.ts file inside the src >> app folder in your project file. It is created because when we install an angular app, we permit angular cli to generate the routing file for us.
Now, write the following code inside an app-routing.module.ts file:
Now, you can see inside the app.component.html file that directive is there. This directive helps us to render the different component based on the route URI.
Create Angular Navigation
Write the following code inside the app.component.html file.
Install Angular Routing Progress Indicator
Type the following command to install the ng2-slim-loading-bar library.
If you have installed third-party packages right now, then it is not compatible with Angular 8. To solve the problem between Angular 8 and third-party packages, you have to install the following library.
Now, import the SlimLoadingBarModule inside an app.module.ts file.
Now, include the styling that comes with the library inside src >> styles.css file.
Adding Router Events
Angular RouterModule gives us the following event modules.
- NavigationStart
- NavigationEnd
- NavigationError
- NavigationCancel
- Router
- Event
Now, write the following code inside the app.component.ts file.
In the above code, we have specified in Angular application that when the user navigates from one component to another component, it will show the progress result.
When the user clicks the other route, angular progress indicator start showing, and when the navigation is complete, it will stop displaying. So, it is kind of UX for the user.
The above code intercepts the routing event and add the loading bar component to every route, so that we can see the routing indication every time when we change the routes.
We have to add the ng2-slim-loading-bar directive inside the app.component.html file at the top of the page.
Add Bootstrap Form
Add the following bootstrap 4 form Inside the product-add.component.html file.
Open the localhost browser and see the output. It will look like the image given below.

Add Angular 8 Form Validation
Here, we use reactive form module to add the validation in our form. Import the ReactiveFormsModule inside the app.module.ts file.
Here, you need to aware that it is not a template driven form, so you need to change in the app.component.ts file.
Here, we have to import the FormGroup, FormBuilder, Validators modules from @angular/forms and create a constructor and instantiate the FormBuilder.
So, write the following code inside the product-add.component.ts file.
Here, we use form builder to handle all the validation. Now, in that constructor, we have to create a form with the validation rules. In our example, there are three fields. If the input text is empty, then it will give an error, and we need to display that error.
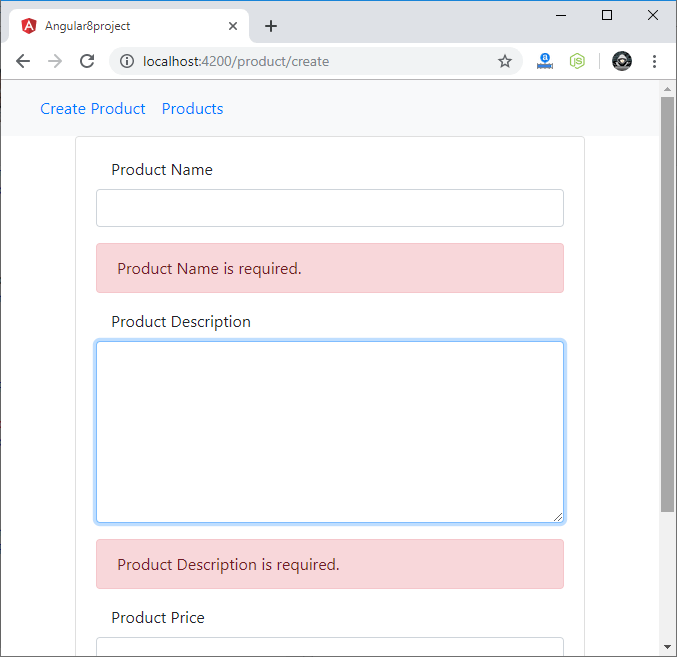
Now, write the following code inside the product-add.component.html file.
Now, you can check that the form is validated.
Configure the HttpClientModule
The Front-end applications always need HTTP protocol to communicate with the backend services. Modern browsers support two different APIs for making HTTP requests: the javaHttpRequest interface and the fetch() API.
Import the HttpClientModule inside an app.module.ts file.
Create a model file
Inside the src >> app folder, create one file called Product.ts and add the following code.
Create an Angular Service file
Type the following command to generate the service file.
After creation, it will look like this:
Now, import the products.service.ts file into the app.module.ts file.
Submit the data to the node server
Now, we have to write the code that will send the HTTP POST request with the data to the Node.js server and after that save the data into the MongoDB database.
Write the following code inside the products.service.ts file.
Note: Here, we have defined our backend API URL, but we have not created any backend yet. Let’s create it.
Now, we have to add the click event to the Add Product Button. So, add the following code inside the product-add.component.html file.
Now, add the addProduct() function inside the product-add.component.ts file. So, write the following code inside the product-add.component.ts file.
Create a Node.js backend API
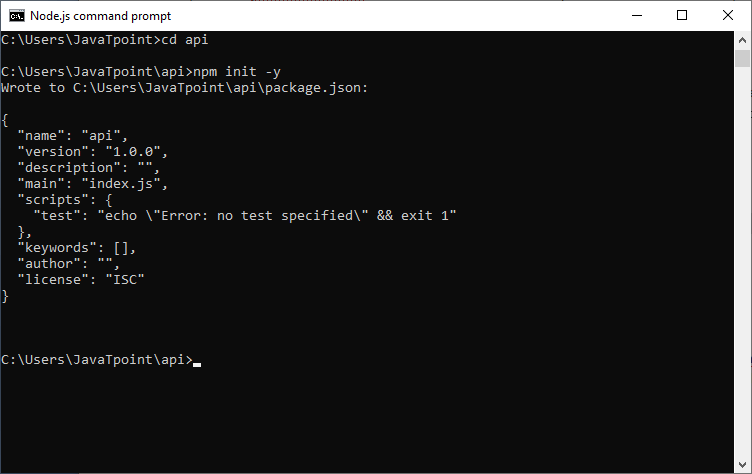
Create a folder called the api inside an angular root folder, and go inside that folder. It will be the complete separate project from your Angular project. So, its node_modules folders are different from the Angular project.
Open the terminal inside the api folder and type the following command. It will generate the package.json file using NPM.
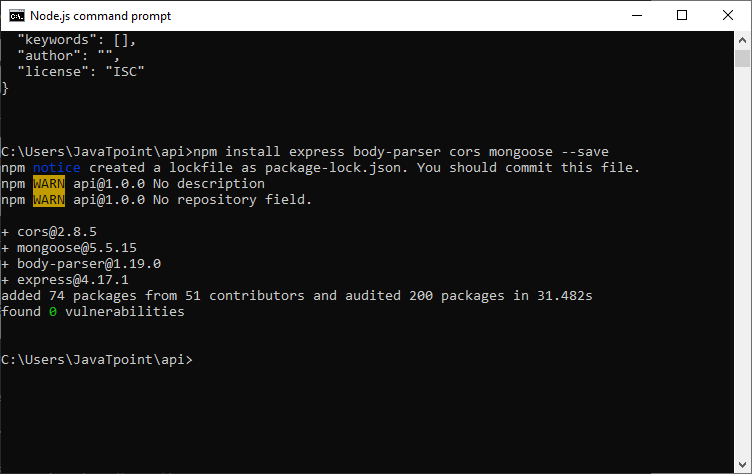
Install the following node specific modules.
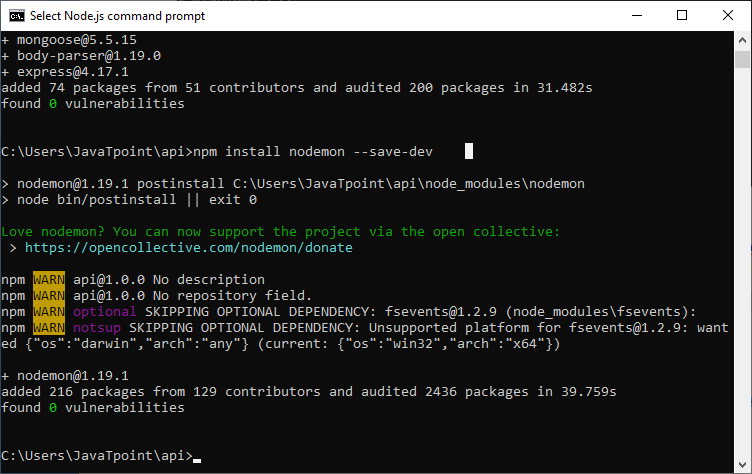
Install the nodemon server, it will facilitate you to not to start node server every time you make changes it. It restarts the node.js server automatically.
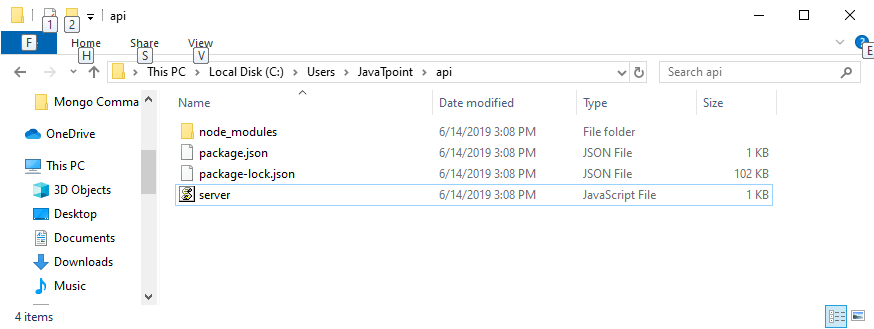
Now, inside the api folder, create one file called the server.js file. Add the following code inside the server.js file.
Now, connect to the MongoDB database with our node express application.
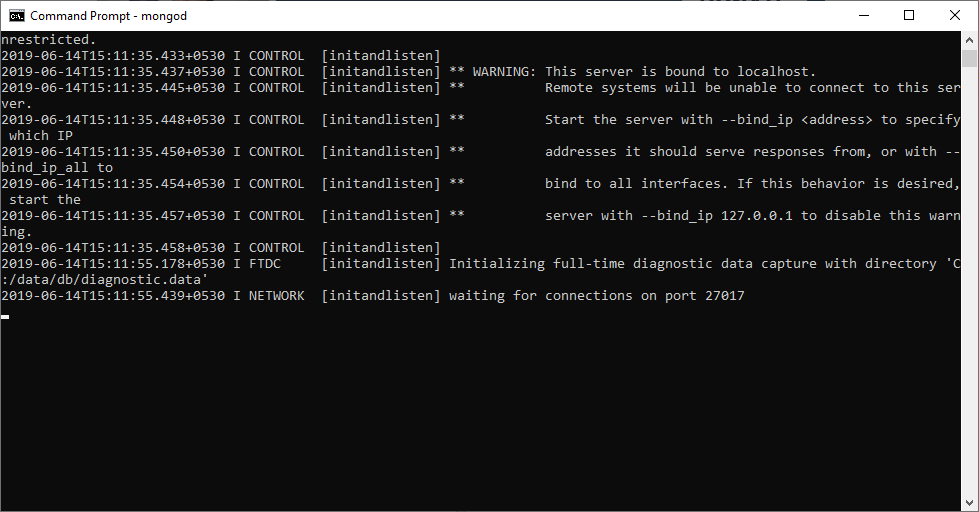
If you have not installed a MongoDB database, then install it and then start the mongodb server using the following command.
How to Install MongoDB Click Here…
Now, we have connected to the database.
Create one file called DB.js inside the api root project folder. Write the following code inside a DB.js file.
Import this DB.js file inside our server.js file and use the mongoose library to set up the database connection with MongoDB. Write a following code inside the server.js file to connect our MongoDB application to the Node.js server.
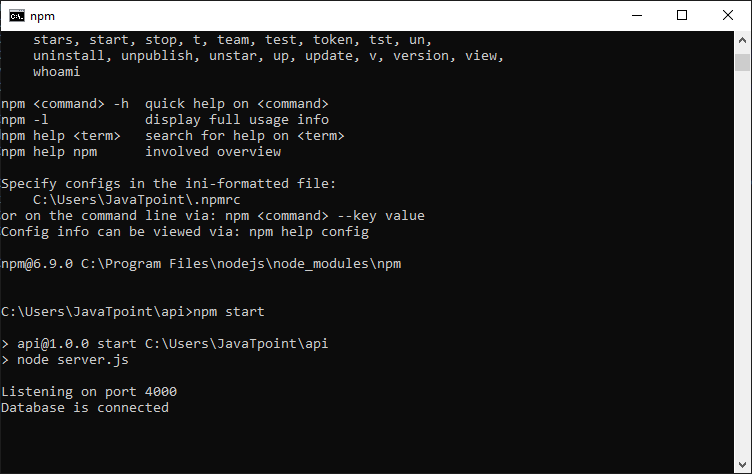
Save this server.js file and go to the terminal and start the node server using the following command.
So, right now, there are three servers running:
- Angular Development Server
- Node.js Server
- MongoDB server
Angular Server:
Node.js Server:
MongoDB server:
Create model and routes for your application
Now, we have to create two folders inside the api root folder called routes and models.
Let’s create one model called Product.js in models folder having the following code.
Here, we have defined our schema for the Product collection. We have three fields called ProductName, ProductDescription, ProductPrice.
In the routes folder, create one file called the product.route.js.
Write the following CRUD code inside the product.route.js file.
Now, we have all the CRUD operations set up on the route file; we need to import inside the server.js file.
So, update the server.js file with the following code:
Now, start the node.js server, if you yet not started. If it is already started then let’s check the data store functionality.
Test the data store functionality
Now, we will enter some data to test if it is storing or not.
First, open the mongo shell on the 4th tab because all the other three tabs are occupied at the moment.
Use the following command to open mongo shell:
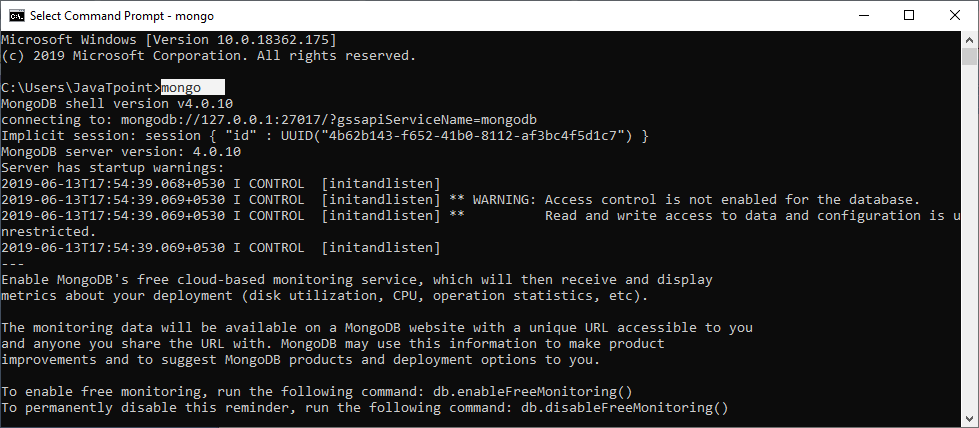
Here, you can use
- show dbs command to see the databases
- use database_name command to use the database and db.collection_name.find() to find the query.
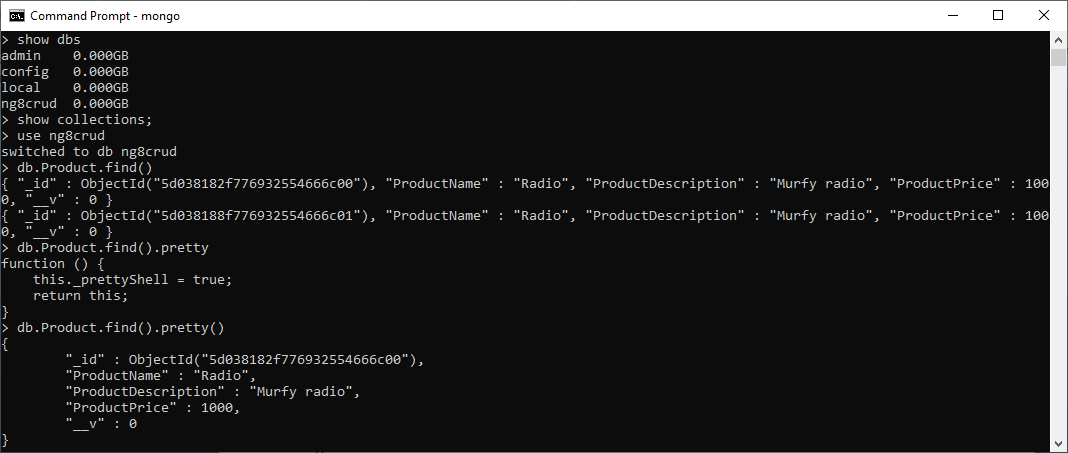
Note: Here, we have used db.collection_name.find().pretty() command to prettify the result only.
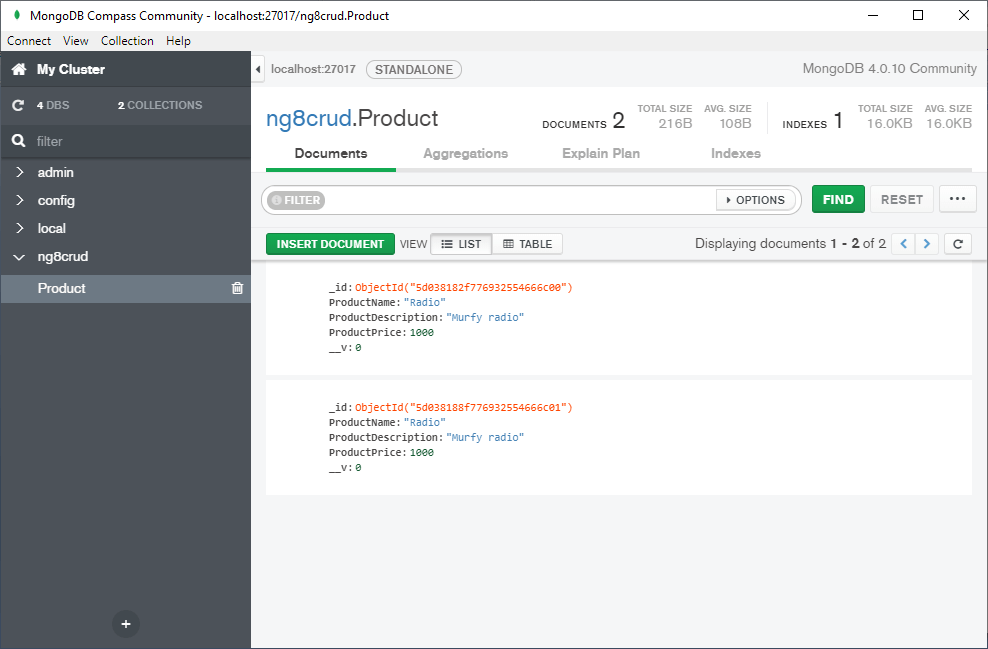
Alternative way to see the stored items in database
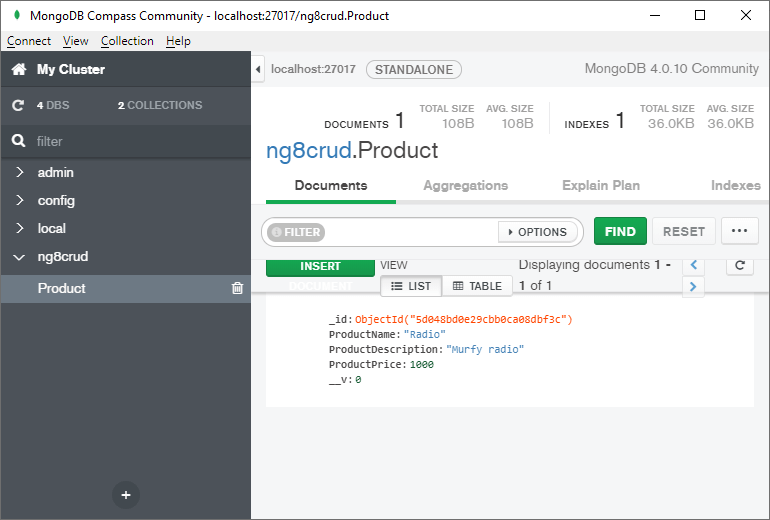
You can also use the MongoDB Compass Community to see the databases and entries if we prefer a GUI.
Display the data on the frontend browser
If you want to display the data on the frontend browser, use the following code inside the product-get.component.html file.
Now, we have to write the function inside the products.service.ts file that fetches the products data from the MongoDB database and display at the Angular application.
Include this products.service.ts file and Product.ts file inside the product-get.component.ts file.
Write the following code inside the product-get.component.ts file.
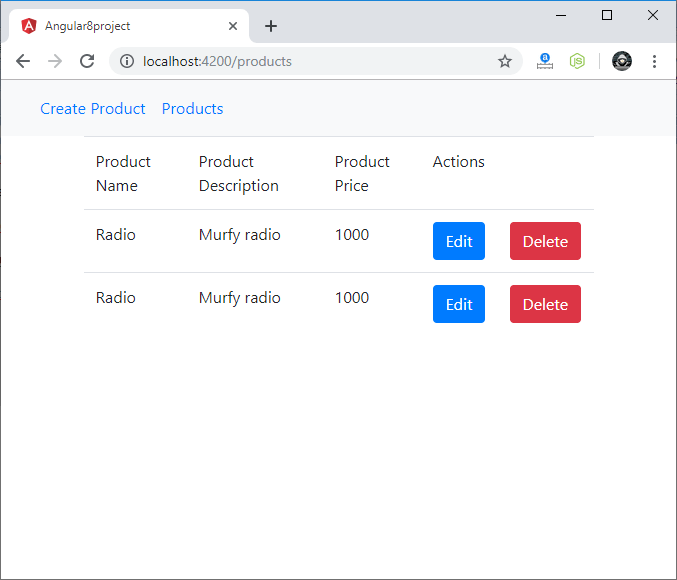
Now, save the file, go to the browser and switch to this URL: http://localhost:4200/products. You will see the following result.

Now, you have succeeded to fetch data from the database and show to the browser.
Edit and Update the Data
First, we need to fetch the _id wise data from the MongoDB database and then display that data in the product-edit.component.html file.
Write the following code inside the product-edit.component.ts file.
Here, when the product-edit component.ts render, it will call the ngOnInit method and send an HTTP request to the node server and fetch the data from an _id to display inside the product-edit component.html file.
Now, inside the products.service.ts file, we need to code the editProduct function to send an HTTP request.
At last, write the form inside the product-edit.component.html file.
Now, use the following code to update the data inside the products.service.ts file, we need to write the function that updates the data.
Now, write the updateProduct() function inside product-edit.component.ts file.
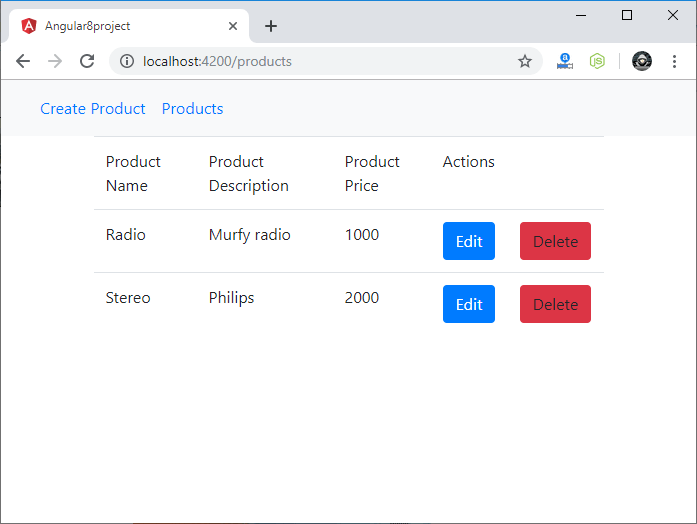
Let’s check the edit functionality. In the above read operation, we have seen that there are two duplicate entries of Radio like this:
Now, we will change the second entry of Radio with Stereo.
Delete the Data
This is the last step of CRUD operation. We have successfully deployed CREATE, READ, and UPDATE operation till now.
So, to make the DELETE operation possible, we have to define a click event on the delete button inside the product-get.component.html file.
Now, we have to write a deleteProduct() function inside the product-get.component.ts file.
At last, create deleteProduct() function inside the product.service.ts file.
DELETE operation is completed now. Let’s check how it is working. Here, we delete the second item Stereo which we have edited first.
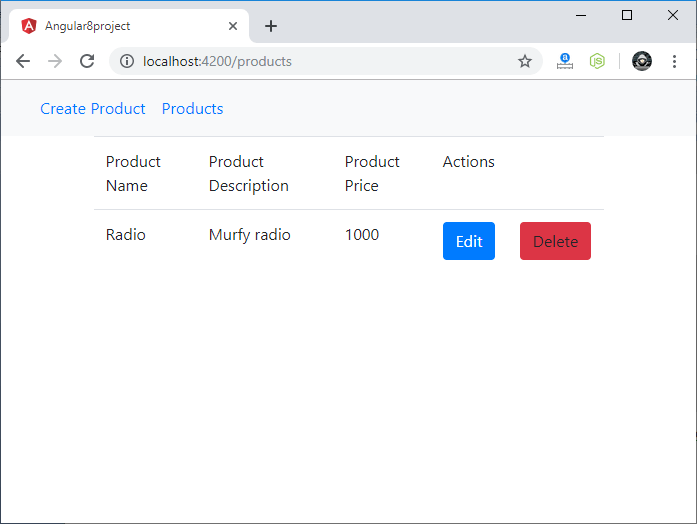
You can see that Stereo is deleted now. You can also verify it on MongoDB Compass Community GUI.
Angular 8 Tutorial Index
Angular 8 Tutorial
- Angular 8 Tutorial
- How to Upgrade Angular older versions to Angular 8
- Angular 8 Introduction
- Angular 8 Features
- Angular 8 Installation
- Angular 8 First App
- Angular Apps Loading
- Angular 8 Architecture
Angular 7 Directives
Angular 8 Data Binding
- Angular 8 Data Binding
- Property Binding
- String Interpolation
- Angular 8 Event Binding
- Two way Data Binding
Angular 8 Forms
Angular Misc
Angular + Spring
Interview Questions