Angular 9/8 Routing and Nested Routing
In this section, we are going to learn routing and nested routing. We will use Angular 8 or Angular 9 to do this. Firstly we will create a route in Angular 9/8, and after that, we will create a nested root.
This section will provide two examples to understand the routing and nested routing in Angular 8 easily. In the first example, we will create a simple Route. In the second example, we will create Nested Routes.
Our application requires the use of a routing system if we work on an extensive application or create a single page application. To create a simple route and sub route, the step by step process is described as follows:
Example 1:
In the 1st example, we are going to Create a Simple Route. For this, we will use simple components. To install the new Angular app, we will use the below command, which is described as follows:
When we successfully execute the above command, the command prompt will ask us to create the routing module. For the add Angular routing option, we have to write yes, which is described as follows:
When we successfully install the Angular app, we will install Bootstrap. If we don’t have Bootstrap in our system, we will use the following link to install Bootstrap for our Angular 8 application:
When we successfully download our Bootstrap application, we need to setup for container and header. For this, we will use the app.component.html file and update the file like this:
src/app/app.component.html
Now in our application, we require to create two components. The first component will be created for the home, and the second component will be created for the post. To create these components, we will use the following command:
When we successfully create both components, we will use these components to create the route. For this, we will use the route module file and make some changes, which are described as follows:
src/app/app-routing.module.ts
Now our above code is ready to run. To run the above code, we will use the following command:
When we run this command, the following output will be generated:

Example 2:
In the 2nd example, we will Create Nested Route. Here child route will be created for posts. Now in our application, we require to create two more components. We will create these for posts. The first component will be created for post create, and the second component will be created for post detail. To create these components, we will use the following command:
When we successfully create both components, we have three components for posts: first component for lists, second component for creating, and the third component for detail. Now, we will use the route module file and do the registration, which is described as follows:
src/app/app-routing.module.ts
Now we will use html component file. In order to see better view, we will update that file like this:
src/app/home/home.component.html
src/app/posts/posts.component.html
src/app/posts/post-create/post-create.component.html
src/app/posts/post-detail/post-detail.component.html
Now our above code is ready to run. In order to run the above code, we will use the following command:
When we run this command, the following output will be generated:
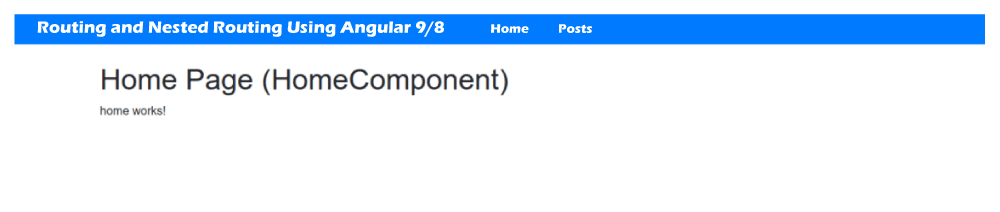
Home Page
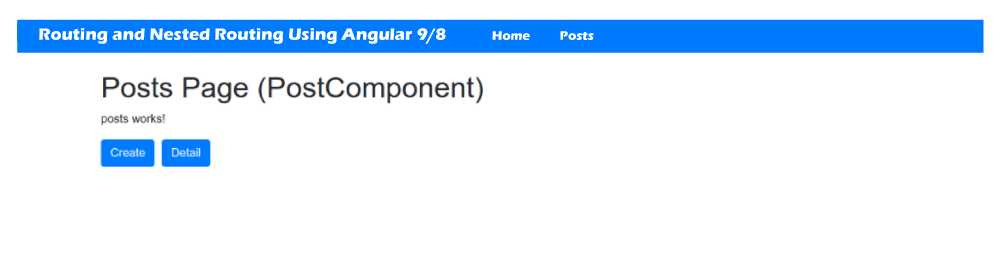
Post List Page
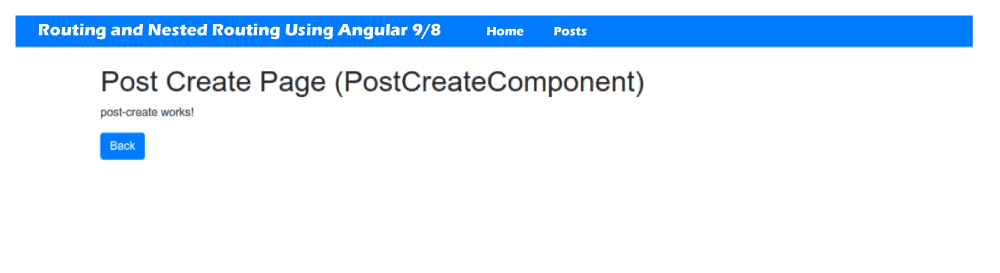
Post Create Page
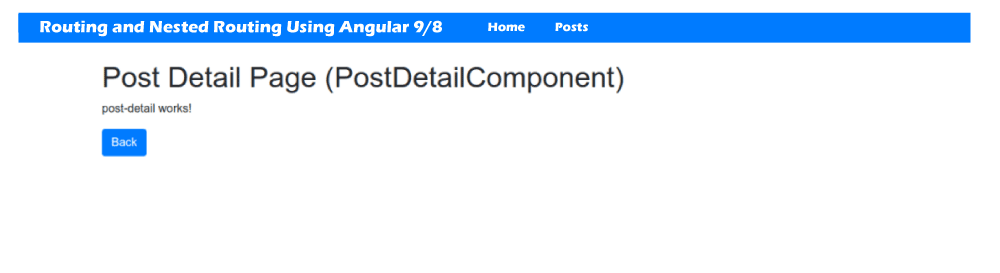
Post Detail Page