Color Management in CorelDraw
It supports us to ensure colors represent consistent if we work with various files from many outputs and sources these files over distinct devices.
This chapter includes the following essential topics:
- Learning color management
- How to start color management
- Embedding, loading, and installing color profiles
- Converting colors into another color profile
- Selecting settings of color-conversion
- Assigning different color profiles
- Soft proofing
Learning color management
It facilitates answers to some questions about color management. Some of them are as follows:
What is the role of color management?
It is a procedure that enables us to control and predict the reproduction of the color management, regardless of any document’s destination and source. It makes sure for an accurate color appearance if the documents are exported, shared, modified, and viewed to other formats.
The color management system is also called the color engine. It applies the color profiles for translating various color values through a single source to other sources.
Why do we require color management?
When our document needs appropriate color appearance, we may wish to understand about the color management. Our workflow’s complexity and our document’s ultimate destination are important considerations also. When our document is destined for online viewing only, the color management will not be more important. But if we plan for opening documents inside another application and if we are making documents to print or various output types, then appropriate color management will be essential.
Is our monitor showing the accurate colors?
Profiling and calibrating a monitor are important steps to ensure color accuracy. If we calibrate the monitor, we set it for displaying colors based on an established accuracy standard. After calibrating, we can create a monitor’s color profile, which specifies how a monitor understands the colors.
How to start color management
CorelDRAW contains two essential color management settings types: document color setting and default settings to color management. Default settings to color management can control any new document’s colors. Document color settings can affect an active document’s colors only.
To modify any default color profiles
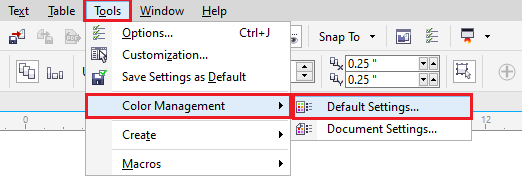
1. Press Tools > Color management > Default settings.
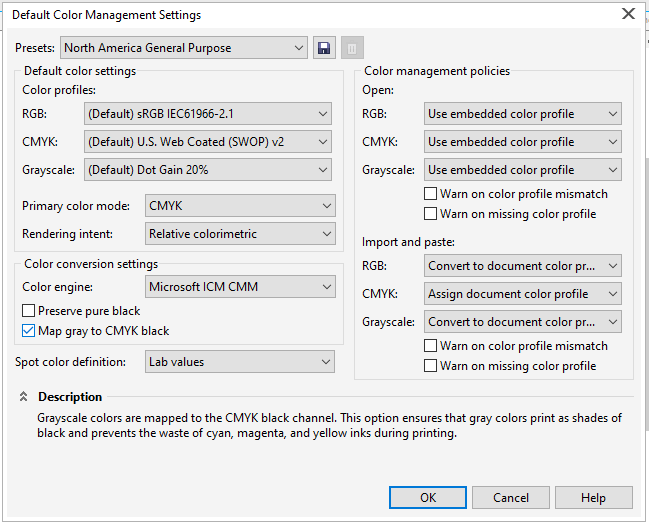
2. Within the Default color settings area, select any color profile through the below list boxes:
- RGB: It defines the RGB (Red Green Blue) colors within the untagged and new documents.
- CMYK: It defines the CMYK (Cyan Magenta Yellow Black) colors within the untagged and new documents.
- Grayscale: It defines the grayscale colors within the untagged and new documents.
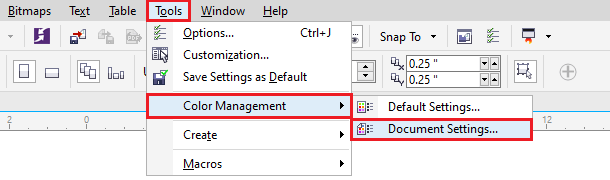
To view document color settings
- Press Tools > Color management > Document settings.

Embedding, loading, and installing color profiles
The color management requires ICC-compliant profiles to documents, output devices, external monitors, input devices, and monitors.
Detecting color profiles
Various color profiles can be installed with our application and can be produced with the profiling software. Manufactures of scanners, monitors, printers, and digital cameras also facilitate the color profiles. We can access the color profiles through some following websites:
http://www.color.org/findprofile.xalter
http://www.tftcentral.co.uk/articles/icc_profiles.htm
http://www.eci.org/doku.php?id=en:downloads
To install the color profile
- Within the Windows Explorer and right-click on the color profile, press on the Install profile.
To load the color profile
1. Press Tools > Color management > Default settings.

2. Within the Default color settings areas, select Load color profiles through the Grayscale, CMYK, or RGB list boxes.
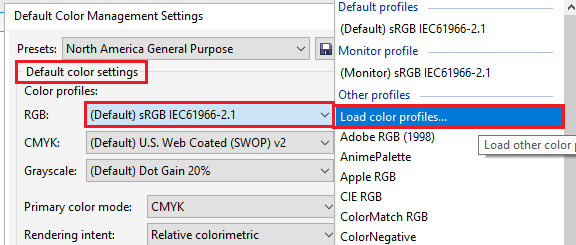
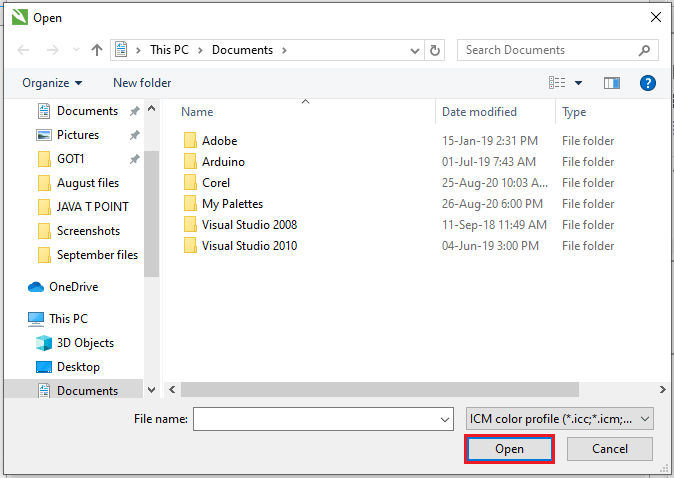
3. Within the Open dialog box, operate to a color profile.
To embed the color profile
1. Press File, click anyone from the below commands:
- Save as
- Export
- Export for > Web
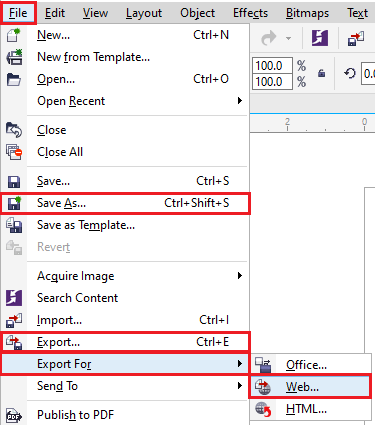
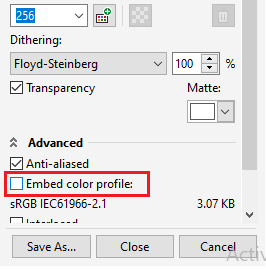
2. ithin a dialog box which appears, enable a checkbox, i.e., Embed color profiles.
Converting colors into another color profile
If we convert the document colors through a single color palette, various color values within a document can be modified based on rendering intent, however color appearance is preserved. Matching the color appearance (within a source color area) as closely as feasible to the colors within a destination color area is its primary objective. Also, we can select a color management engine that is applied to convert colors.
It is suggested to convert the colors only once because of various color conversion decline accuracy. Wait for a prepared document and we get a color profile that can be applied for final output.
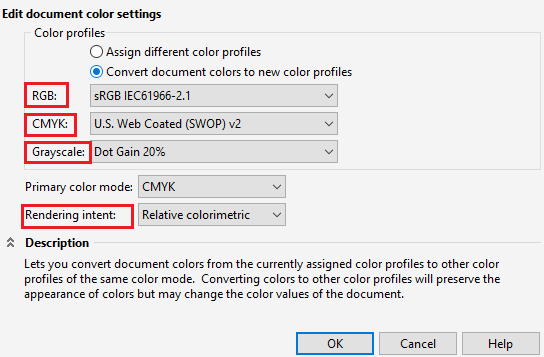
To convert into another color profile
1. Press Tools > Color management > Document settings.

2. Within the Edit document color settings space, enable the option Convert document colors to new color profiles.
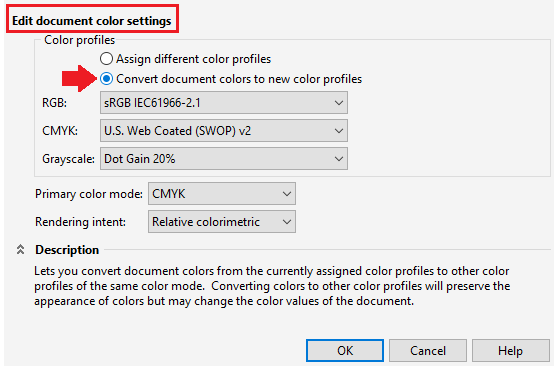
3. Select the color profile through the list boxes: Grayscale, RGB, or CMYK.
4. Select any convenient rendering intent through a Rendering intent list box.
Selecting settings of color-conversion
If we select color profiles, various colors can be matched among devices as closely as feasible the CMM (color management module) of the ICM (Microsoft Image Color Management), which is a default CMM. The CMM is also called the “color engines.” Also, we can apply an Adobe CMM when it will be installed on our computer.
Handling grayscale and pure black colors
We can defend black color within a destination color area at the time of the color conversion. Such as, when we are converting the RGB document into the CMYK color area, pure black RGB (R=0, G=0, B=0) could be mapped to CMYK pure black (K=100). This option can be suggested for documents and grayscale documents that include text mostly.
Note: Preserving pure black at the time of color conversion can make solid black edges in gradient fills and effects that include black.
The grayscale colors can be converted into CMYK black channel (K) by default. This procedure ensures that every grayscale color will print as black shades, and the yellow inks can be washed at the time of printing.
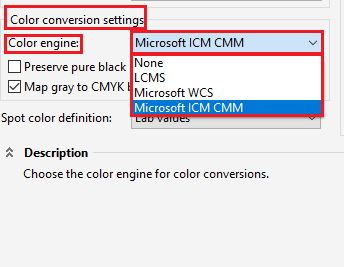
To select color-conversion settings
1. Press Tools > Color management > Default settings.

2. Within the Color conversion settings space, select the color engine through the list box of the Color engine.
Assigning different color profiles
If we import or open the documents that are missing the color profile, automatically the application assigns the color profile for that document by default. When the document contains any color profile and it isn’t suitable for a required destination, we can assign a distinct color profile for the document. Such as, when the documents are expected to be printed over the desktop printer or to be shown over the web, we must ensure that RGB is a document of the RGB profile. When the documents are destined to print production, an Adobe RGB profile (1998) will be a better selection, because it produces better outcomes if RGB color is converted into the CMYK color area.
If we assign a distinct color profile for any document, various colors may represent distinctly, however no color values will be changed.
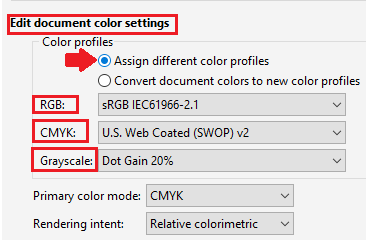
To assign the color profile
1. Click on Tools > Color management > Document settings.
3. Within the Edit document color settings space, enable the option, i.e., Assign different color profiles.
4. Select color profiles through the Grayscale, CMYK, and RGB list box.
Soft proofing
It facilitates a preview (online) of the document and it will represent if it is regenerate by any specific printer. Unlike a “hard proofing” method that is applied in the printing workflow (tradition), soft proofing enables us to see on final outcomes without violating ink on paper. We can verify the documents color profile is convenient for any specific monitor or printer and ignore unwanted outcomes. We can save the soft proofs through export them for the CPT, PDF, TIFF, JPEG file format. Also, we can print proofs.
To turn the soft-proofing off or on
- Press View > Proof colors.

If we turn on the soft-proofing, colors within the preview window, color palettes, and document window of the dialog box represent differently.
Simulating the printer result may cause an on-screen color for representing dull because every color is brought to the CMYK color area, which contains the gamut than the RGB color area.
Also, we can disable or enable soft proofing through click on the Proof colors button over the status bar.
To export the soft-proofing
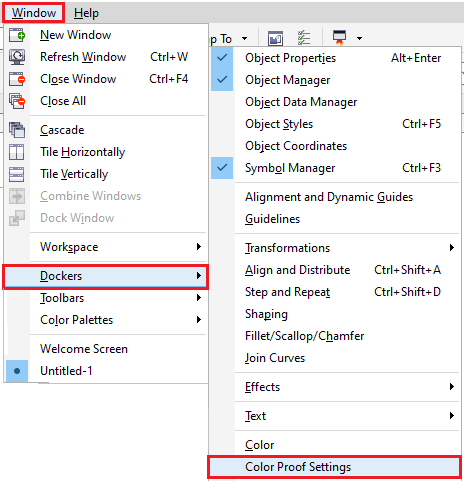
1. Press Window > Dockers > Color proof settings.

2. Within the Color proof settings docker, press on the Export soft proof
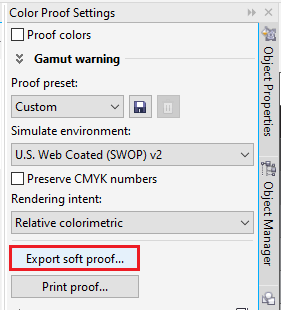
3. Fill the filename within the File name
4. Select anyone option through the list box, i.e., Save as type:
- JPG: It can be defined as JPEG Bitmaps.
- PDF: It can be defined as an Adobe Portable Document Format.
- TIF: It can be defined as TIFF Bitmaps.
- CPT: It can be defined as the Corel PHOTO-PAINT image.

5. Select a setting within a dialog box that appears.
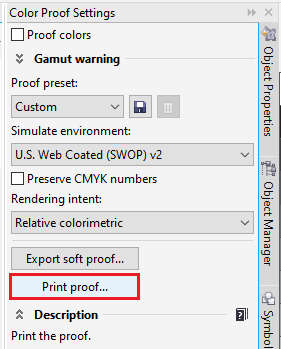
To print the proof
1. Press Window > Dockers > Color proof settings.
2. Within the Color proof settings docker, press the Print proof
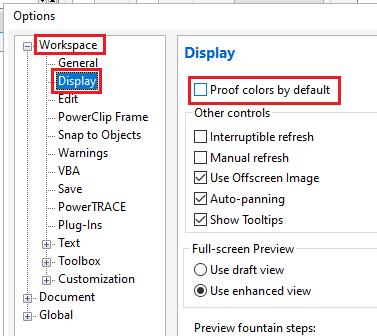
To turn on soft-proofing by default
1. Press Tools > Options.
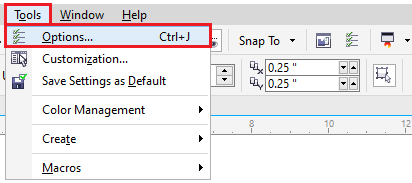
2. Within the Workspace categories list, press Display.
3. Enable the checkbox, i.e., Proof colors by default.