Configure JPA and Initialized Data
In the previous section, we have hardcoded the response for the exchange value. It comes from the database. In this section, we will create a connection to the in-memory database.
Let’s see how to connect microservice to the H2 database. Follow the following steps to connect microservice to JPA in-memory database.
Step 1: Open pom.xml of currency-exchange-service and add the following two dependencies.
Once we have added the dependencies, now we have to define entity.
Step 2: Open the ExchangeValue.java file and do the following:
- Add @Entity annotation at the class level.
- Define the table name by using the annotation @Table.
- Define an Id for the entity by adding the annotation @Id.
- Define columns by adding the annotation @Column above each field and also specify the column name.
ExchangeValue.java
We have created the entity, now we have to insert some data into the database.
Step 3: Create a data.sql file to insert data into database.
Right-click on the folder src/main/resources -> New -> File -> Provide the name data.sql -> Finish
Step 4: Insert the data into data.sql file. We have inserted the following data:
data.sql
Step 5: Open application.properties file and enable H2 console, configure URL and datasource. The default JDBC URL is testdb. We can specify our own JDBC URL.
We have specified JDBS URL: jdbc:h2:mem:tutoraspire
application.properties
Step 6: Restart the application.
Step 7: Open the browser and type the URI http://localhost:8000/currency-exchange/from/USD/to/INR. It returns the response, as shown below:

We can also see the data in the database which we have inserted in the data.sql file. To open the H2 Console, we have to do the following:
- In the browser type http://localhost:8000/h2-console. It displays the following page:
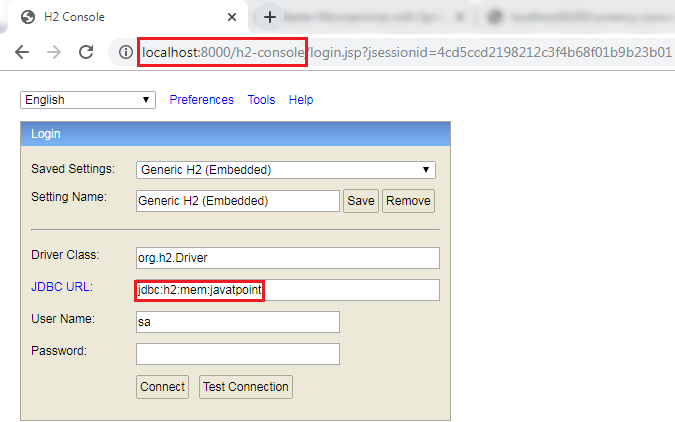
Remember: The JDBC URL must be the same as you have specified in the application.properties file. Do not write anything in the User Name and Password field. The default User Name is sa.
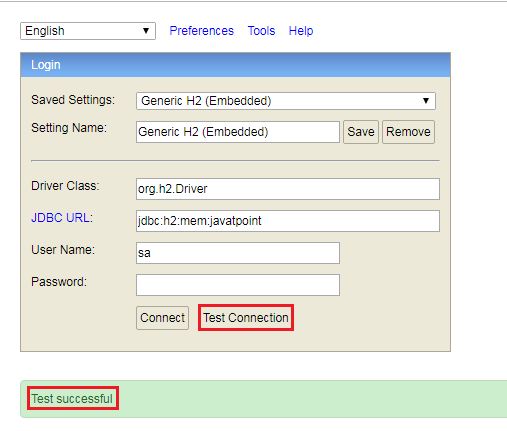
Now click on the Test Connection button; if the connection is successful, it shows the message Test Successful.
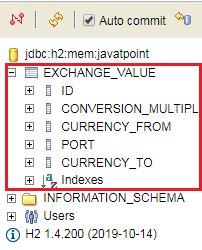
Step 8: Click on the Connect button. It shows the created table on the left-hand side of the page.
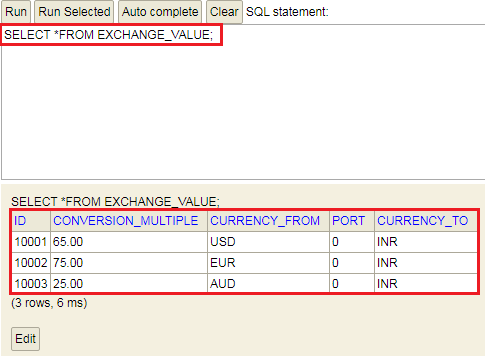
Step 9: Run the following query to view the data.
It shows the data which we have inserted in the data.sql file.
In this section, we have created the in-memory database and inserted some values in the database.