Create REST API using Django REST Framework | Django REST Framework Tutorial
In this tutorial, we will learn about one of the popular and widely used industry-standard data interchange formats, REST API. It is the most used technique for data exchange. We will explain how to create REST APIs in Python using Django. Before diving deep into this topic, let’s understand the concept of REST and how it is different from the conventional formats. Understanding REST will help to get into it in a better way. Let’s have a brief introduction to the REST API.
What is REST API?
REST is an acronym name of Representational State Transfer, a standardized way to provide data to other applications. In other words, it is used for building and communicating with web services. It is the best way to transfer data across the applications and can be used by the application. It mandates resources on the web are represented in JSON, HTML, or XML. Sometimes APIs are used in the other application to change the data.
An API is an acronym for Application Programming Interface, an interface that defines the interaction between different software components. Web APIs determine what exactly request is made to the component. For example We define an endpoint to get the list of the students of a particular branch. It is also used on how to make the request and their expected responses.
Following are the few important key REST API request methods.
- GET It is most common method for get some data from component. It returns some data from the API based on the endpoint we hit and any parameter we pass.
- POST It creates the new records and updates the new created record in the database.
- PUT It takes the new records at the given URI. If the record exists, update the record. If record is not available, create a new record.
- PATCH It takes one or more fields at the given URI. It is used to update one or more data fields. If the record exists, update the record. If the record is not available, create a new record.
- DELETE It deletes the records at the given URI.
Typically, API is a window into a database. The API is responsible for fetching or updating the records based on the database queries. We receive the static response in JSON format.
REST APIs are so commonly used in software development that it is a most demanded and essential skill for the developer. APIs are how applications communicate with one another or even within themselves.
Many applications rely on REST APIs. For example – the REST API allows the front end to communicate with the backend. For instance, if we deploy the application using the Django backend, we will need an API to allow react to consume information from the database.
We will learn more about REST API by doing practical. Now let’s have an introduction to the Django REST Framework.
What is Django Rest Framework?
Django Rest Framework (DRF) is a package built on the top of Django to create web APIs. It provides the most extensive features of Django, Object Relational Mapper (ORM), which allows the interaction of databases in a Pythonic way.
Hence the Python object can’t be sent over the network, so we need to translate Django models into the other formats like JSON, XML, and vice-versa. This process is known as serialization, which the Django REST framework made super easy.
DRF allows us to represent their functionality Django application in the form of REST APIs. It is quite easy to do.
If you like to get in-depth knowledge of DRF, you can read about how to create REST API with the core Django framework.
Getting Started with Django Rest Framework
As we know that Django is a web framework popular for rapid development of the secure and scalable web services. Our first step is to create virtual environment and install all the dependencies in it. Let’s create the virtual environment.
python3 n venv myenv
Now we need to activate by going into the scripts directory inside the environment and run the below command.
On Mac or Linux
On Window
Now, install django via the pip command
We are ready to create Django Project and app.
We have created a project and app; it must be registered in the settings.py file. Also, add rest_framework in the list of applications to let Django know we will be using Django REST Framework.
Once we register the application, we can migrate (initialize the database) and create a superuser to keep track the database.
Now, enter the required details and create the superuser. We are ready to start the server that can accept requests.
Creating a REST API in Django Using DRF
We are all set up with the Django project; now, we can start developing the domain model and business logic.
First, we create the model simple model of Students to represent the student details. In the sample_app/model.py file, we define our model.
sample_app/models.py
We created our model and we will register this model with Django. To visible this into the admin panel, we will add the following line in the sample_app/admin.py.
Our new model is registered. We will need to makemigration to reflect the Student table into the database. Run the following commands in the terminal.
Here we can use our model. Web apps frequently transfer model data from one end to another.
Now we implement one of most useful features of DRF, serializers. Let’s have a basic understanding of serializers.
What are serializers?
Serializers are used to represent the model data in JSON format and convert object instances to a more transferable format. It makes the process of parsing data from our API easy. On the other hand, Deserializers convert the JSON data into our model as an object instance.
We will create the serializers.py file in the sample_app, converting a model object into JSON format before sending the response.
serializers.py
The serializers.py is very similar as the Form class file in Django, and including validation flags on the various fields, such as required, max_length and default. In the above code, we specified all the fields required, if any of the field is not provided by the user, it will throw an error. To avoid the error, we can pass the default value.
We have used the Modelserializer class, the same as the ModelForm class in Django. The serializers can also be created using the Serializers class.
As we can see, there are two methods create() and update() methods to define how fully fledge instances are created or modified when calling the .save() method. We can use any one of the method to create serializers.
Create Views
DRF allows us to create both class-based and function-based views for the API. We will create the class-based view.
We will use the APIView class, a subclass of Django’s View class. We can define the get(), post(), patch(), and delete() methods so that we can perform the CRUD operations.
sample_app/views.py
As we can see, first, we have taken all the records from the database and serialized them using the StudentSerializers. In the post() method, we created the serialized object from the request.data using StudentSeriliazer. The post request sends data to the server enclosed in the request body. It is used to create a new record in the database. The is_valid() method returns True if the requested data is valid and call the save() method to create a new record. If it returns False, it throws an error.
The response must be initialized with the data to be returned. This data can be an instance of any type of Python object like bool, str, dict, etc.
Setup Endpoints for View
First, we need to initialize the app endpoints to the project urls.py using the following code.
config/urls.py
We can to register StudentView class as a view for the user. The purpose of adding this is not to implement but it’s the request handler.
Let’s create the endpoints for the get() and post() method. It requires to create urls.py file in the sample_app folder. We will add the following code in the sample_app/urls.py file.
sample_app/urls.py
In the above code, path()‘s first argument represents the subpath where our views should be accessible, and the second argument is class name that we created in the views.py file.
Now we are ready to play with our API.
Running the Runserver
Now, we run the server and use our created api/basic/ endpoint.
When we visit to the local server http://127.0.0.1:8000/ it will show our endpoints where we can check our defined endpoints.
http://127.0.0.1:8000/api/basic/ the actual path to test get() and post() method. First we verify the get() method.
The view processes the get() request and returns the available data to the client I the JSON format.
Let’s test POST endpoint. The post() will take data from the users and add it into the database as a new record. The DRF generates the auto-generated browsable API.
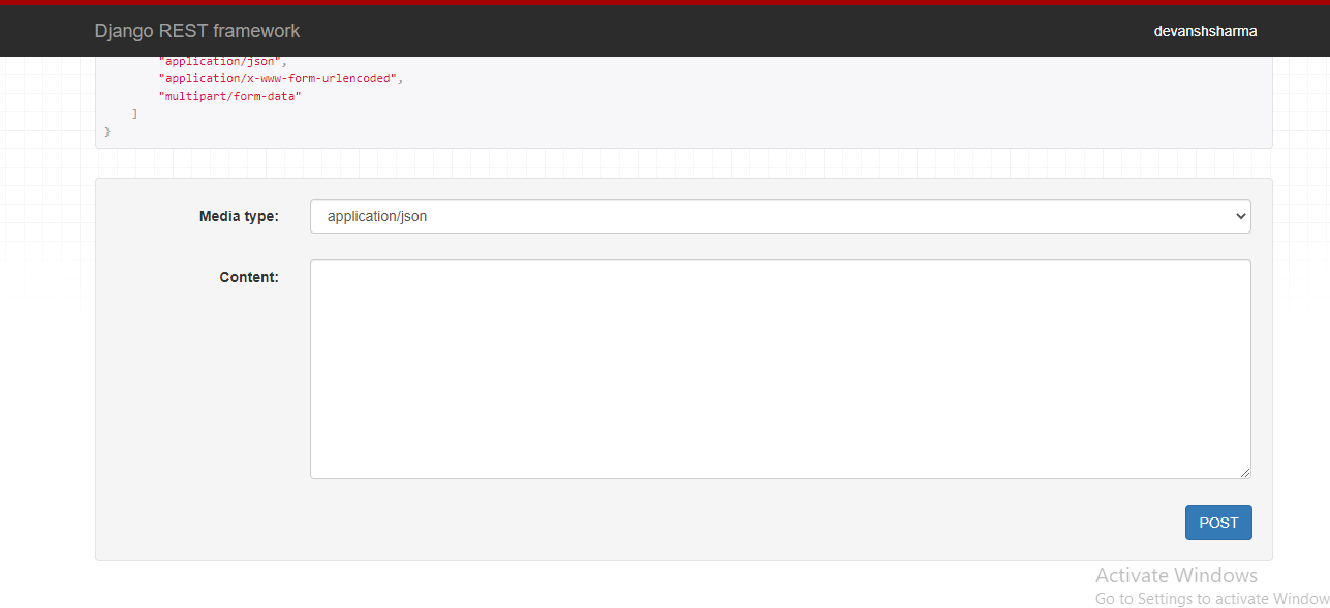
Here we will pass the input field that will allow us to send a POST request to the endpoint.
The new data is added to the database, which means our POST method is working fine.
Now we fetch the data; it will show the entire result in the browser.
Request Data Validation
What if we miss the any required data or enter the wrong entries? For example a str for the roll number, this has been defined as the integer. Let’s see the following example.
Input
Output:
{ "status": "error", "data": { "roll_number": [ "A valid integer is required" ] } } It throws an error, because we passed the wrong type of value for the roll_number. The automatic data validation is an excellent features of the DRF. It throws an error because we passed the wrong value type for the roll_number. If we miss out on any fields, it will show the following error.
However, we can also define the custom validation rule via custom validators.
Modifying Get Request Handler
In the previous get request example, we fetched all records that present in the table. We can also retrieve a particular entity from the table by passing its id as a parameter. We get the single record and pass to StudentSerializer() and this time we will not pass the many=True because we are passing single record. We will change the code as below.
sample_app/views.py
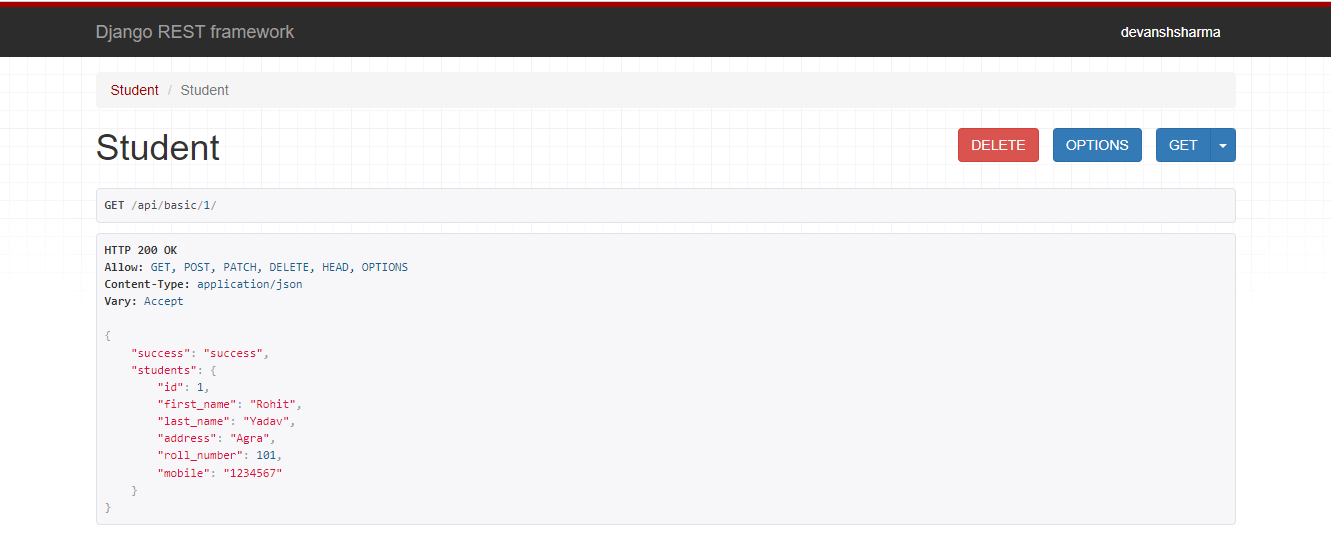
As we can observe, StudentSerializer(result, many=True) has returned serialized data in the JSON format a list of objects. Alternatively, we can pass the id argument through the URL – http://127.0.0.1:8000/api/basic/1/. Here we pass the 1 as id, to process the request we need to modify the urls.py. We add the path as below.
sample_app/urls.py
When we hit the http://127.0.0.1:8000/api/basic/1/, it will show the following result.
We get only one JSON response instead of a list of objects.
Updating Values The Patch Request Handler
So far, we have implemented the functionality of fetching and adding records. Now, we will create the endpoint for updating the records already present in the database. We can use the POST requests targeting a certain id to update the record. Then we retrieve the object, update its values and save it under the same id persisting the change.
The APIView class provides the patch() method which handles PATCH requests and updates the data.
Let’s update the views.py file as below.
The line we want to emphasize
serializer = StudentSerializer(result, data = request.data, partial=True)
Let’s understand the above line
- Fetch the given id record that is to be update.
- Pass to the StudentSerializer to convert into JSON.
- The data received from the request.
- The partial=True indicates that this may not contains all the fields of our Student model.
We need to pass the actual instance, we will have to use get() function to first retrieve a resources and then update it. Now, we will send the patch request at http://127.0.0.1:8000/api/basic/1/, and update our item.
We changed the last_name “Sharma” to “Yadav”.
The response shows updated last_name. We can verify by visiting to http://127.0.0.1:8000/api/basic/1/update endpoint.
Here, we can see that our data is successfully updated.
Deleting Entities The DELETE Request Handler
The user also wants to record some entries from the database. To do so, the APIView class provides the delete() method that remove the record as corresponding to given id. We won’t need to use the serializers for this purpose as there is no conversion between data and concrete objects. Here, instead of using Students.objects.get() we can use the get_object_or_404() function that will automatically return the 404 error if the given id is not present.
Let’s understand the following implementation of delete() method.
sample_app/views.py
When we restart the server, it will the show the DELETE button on API browser. When we click on the DELETE button, it will delete that particular id record from the database.
After deleting the record of http://127.0.0.1:8000/api/basic/1/ , the following response will be shown.
When we visit the http://127.0.0.1:8000/api/basic/ and this record is no longer present there.
We have implemented the CRUD API using the DRF.
CRUD API Complete Code
Following is the complete code of the CRUD operations that we have implement so far in this tutorial.
sample_app/urls.py
Conclusion
This tutorial described a detailed idea of DRF and how we can build a RESTful API in Django. In this tutorial, we created a project and added a sample_app application. We created the Student model and StudentSerializer to handle the serialization and deserialization of our model. It is a CRUD API where we have important request handlers get(), post(), patch(), and delete(). By taking an idea from this, you can create CRUD APIs for shopping site for practice purpose.