Installing Jenkins on Ubuntu
Before moving on to installing the packages on the server, our system package manager must be updated. Use the following command to ensure your system package manager is up to date:
Install Java
Since Jenkins is written in Java, the first step is to install Java. Install the Java 8 OpenJDK package with the following command:
The current version of Jenkins doesn’t support Java 10 or more yet. If you have multiple java versions installed on your system then make sure java 8 is the default java version.
To check the version of java on your system, use the following command:
Add the Jenkins Debian Repository
Import the GPG (GnuPG – GNU Privacy Guard) keys of the Jenkins repository using the following wget command:
The output of the above command should OK which means that the key has been successfully imported and packages from this repository will be considered trusted.
Now, add the Jenkins repository to the system with the following command:
Install Jenkins
Once the Jenkins repository is enabled and keys and sources are added, update the apt package list:
Now, install the latest version of Jenkins by using the following command:
Once the installation is completed, Jenkins service will start automatically.
We can verify it with the help of following command:
We should see something like this:
Adjusting Firewall
If you are installing Jenkins on a remote server of Ubuntu that is protected by a firewall, you will need to open port 8080. Consider that you are using UFW to manage your firewall; you can open the port with the following command:
Verify the change with the following command:
Output will look like this:
Status: active To Action From -- ------ ---- OpenSSH ALLOW Anywhere 8080 ALLOW Anywhere OpenSSH (v6) ALLOW Anywhere (v6) 8080 (v6) ALLOW Anywhere (v6)
Setting Up Jenkins
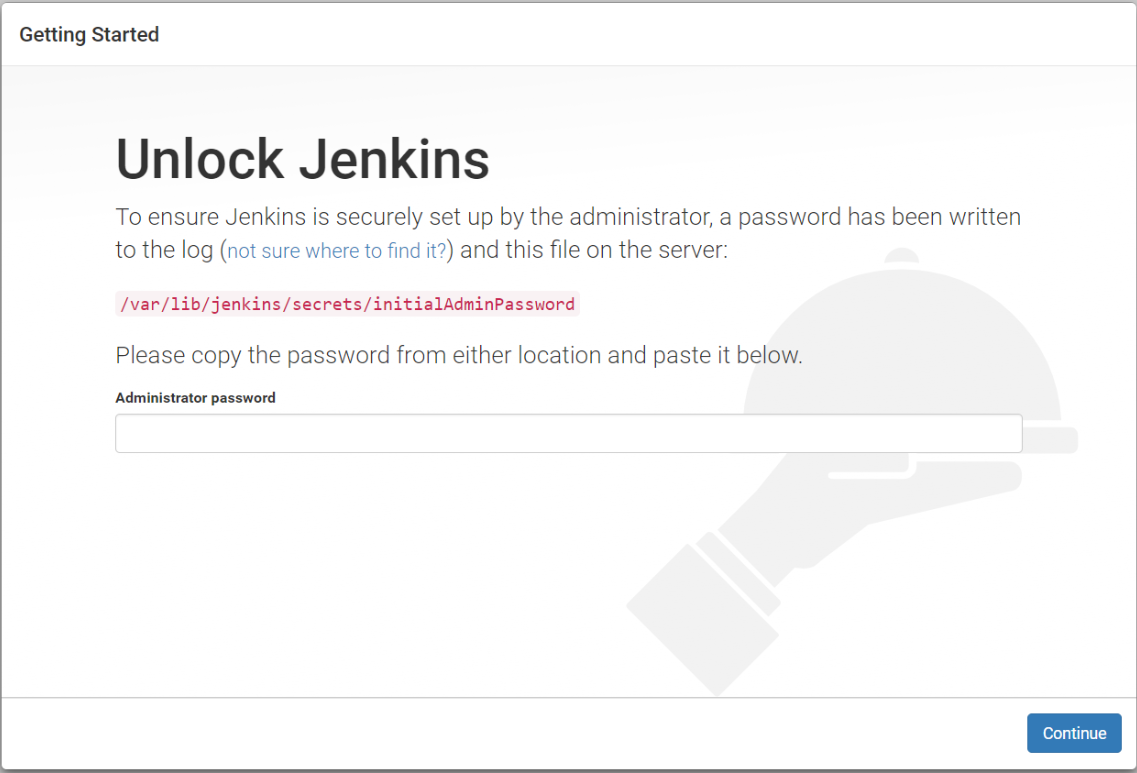
To set up the new Jenkins installation, open the browser, type the domain or IP address followed by port 8080, http://your_ip_or_domain:8080, and screen (unlock Jenkins screen) similar to the following will be displayed:

In the terminal, type the following cat command to see the password:
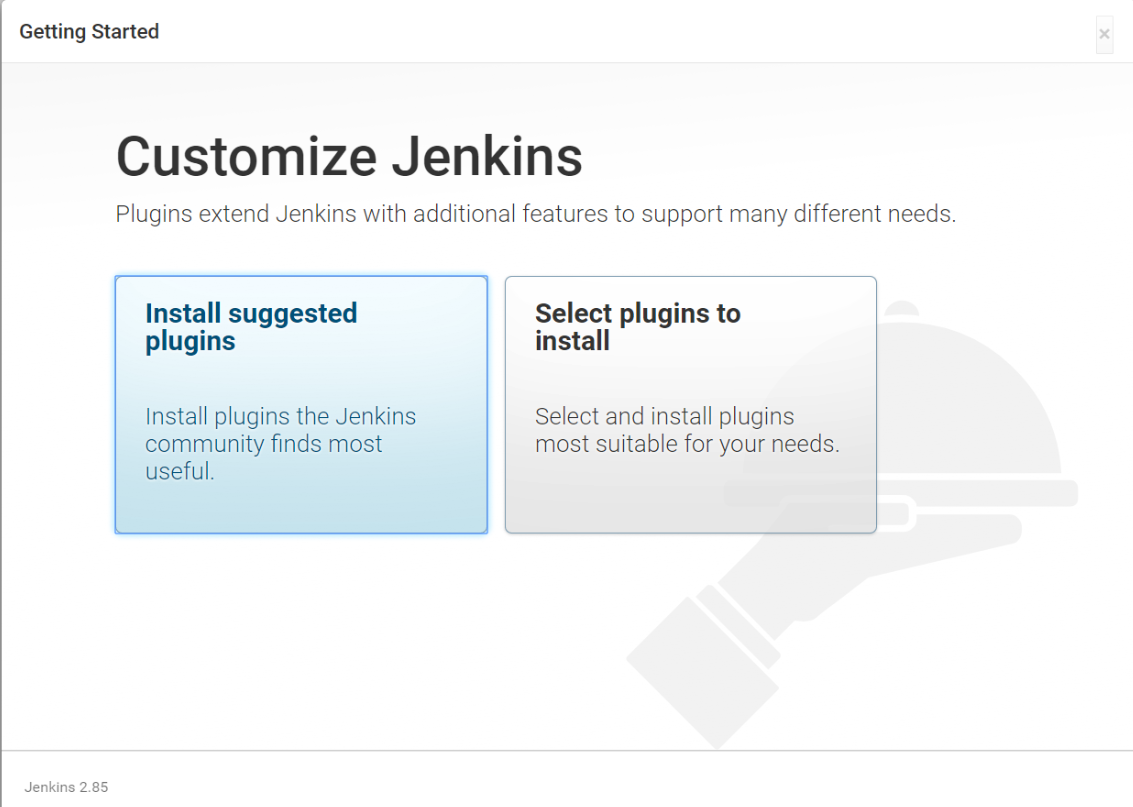
Copy the password from the terminal and paste it into the “Administrator password” field and then click continue. Now, the screen presents the option of installing suggested plugins or selecting specific plugins:

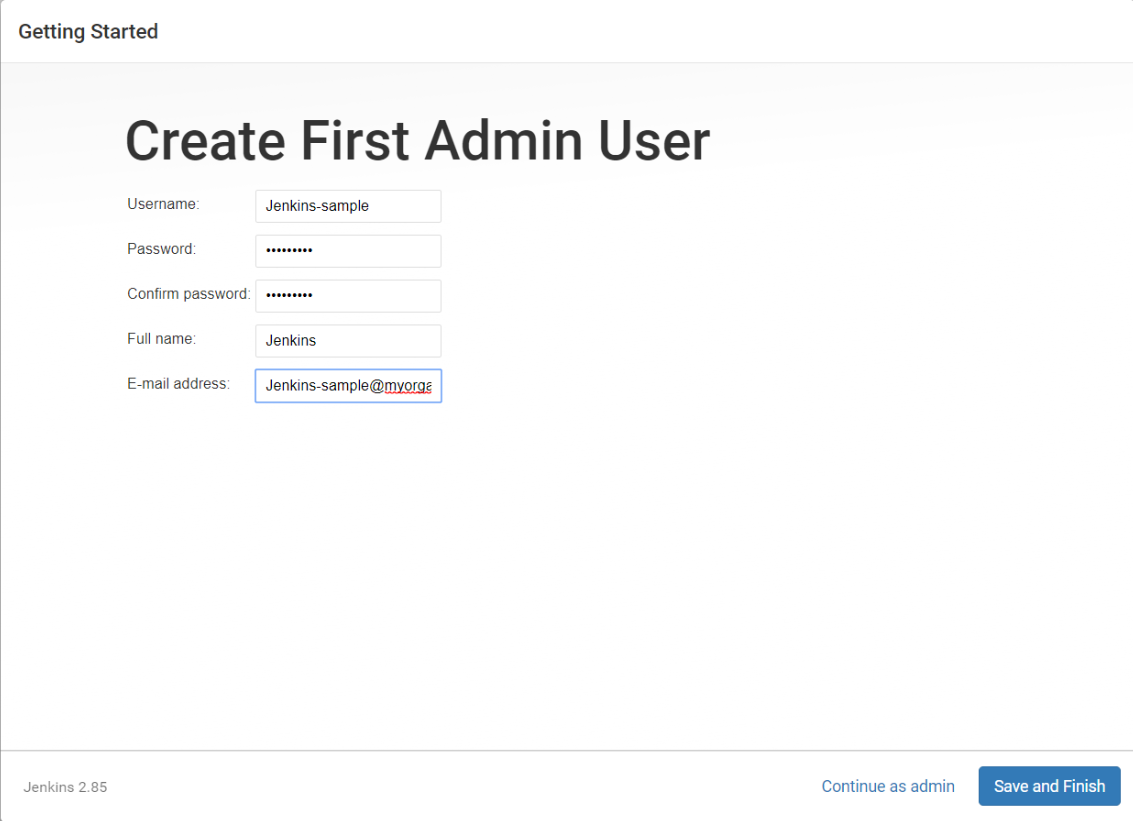
After the installation of plugins, it’s time to create an admin account to login to Jenkins:

Fill the required fields and click on save and finish button.

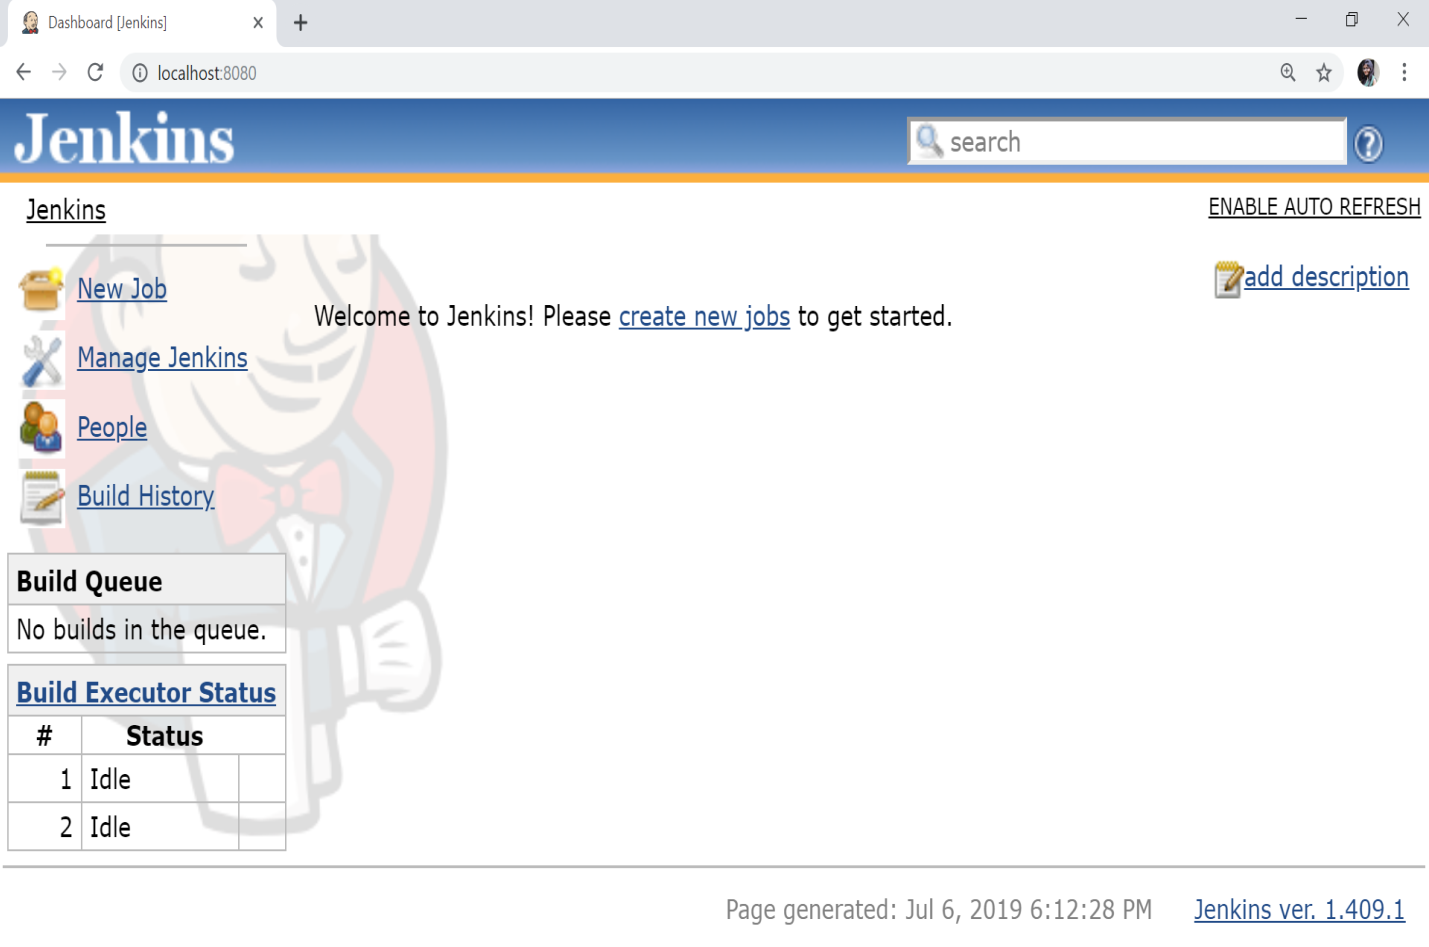
We have successfully setup Jenkins and now Jenkins server is ready for use.
