ListBox Control in C#
The ListBox Control provides us a user interface that will display the List of the items. From there, the users can select one or more items from the List. We can use the ListBox to show the multiple columns, and these columns can contain images and other controls.
ListBox Control Creation in C#
For creating the ListBox, we will follow the two approaches in Windows Form. To create the ListBox control, either we can use the Forms Designer at the time of the designing, or we can use the ListBox class for creating control at the run time.
ListBox Creation at the time of the designing
In our first approach, we will create the ListBox control at the time of the designing using the Windows Forms.
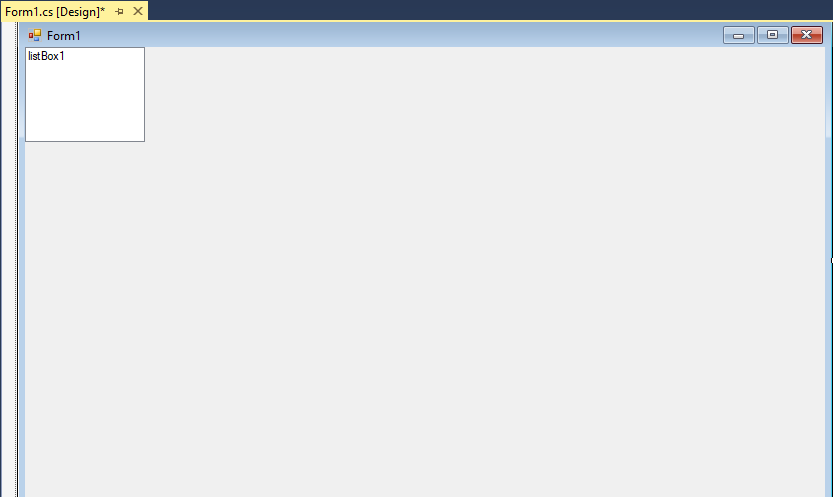
To create the ListBox control, we simply drag the ListBox control from the toolbox and will drop it to the Form. After the drag and drop of Listbox, the Form will look like as below figure. When the ListBox is shown on the Form, now we will resize its size by using the mouse and will set its property and events.
Dynamically approach to create the ListBox
ListBox class shows the ListBox control in Windows form. For the run time execution to create the ListBox, firstly, we will create the instance of the ListBox class and set its properties and will add the ListtBox object to the Form Control.
Step 1. To create the Dynamic ListBox in the first, we will create the instance of the ListBox class.
To create the object of the ListBox, we will write the below code:
Step 2. In the next step, we will set the properties of the ListBox control. For this we will write the following code. In the property we will set the Location, width, height, background color, foreground color, name and font properties of the ListBox, as shown below:
Step 3. When the properties are set with the ListBox control, in the next step we will add the ListBox to the Form. For this we will use the Form.Controls.Add method which will add the ListBox control to the Form control and will display it on the Form according to their location, and size.
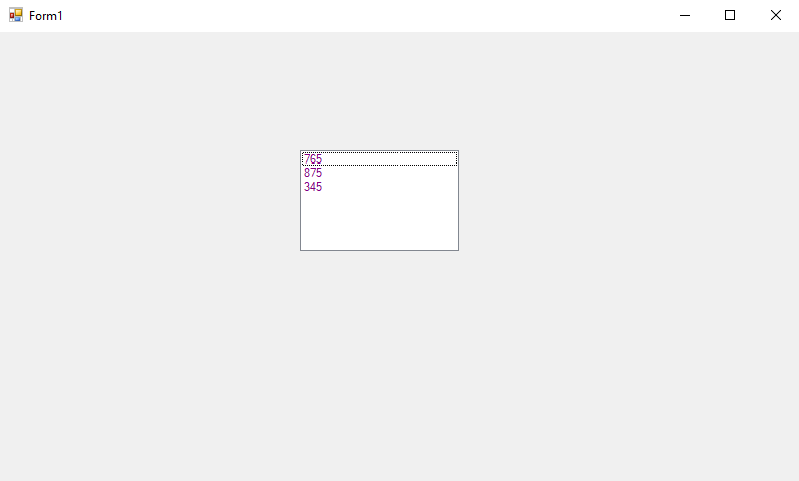
Now we will write a code to add the item in the ListBox control and to show them in the List.
Example:
Output:
Now we will take another example of the creation of the ListBox item at the run time.
For this, as will follow the same steps as per the above code.
Step 1. In the first, we will create an object of the ListBox. For this, we will write the below code:
Step 2. In the next step, we will set the properties of the ListBox control. We will write the code for the location, width, height, etc.
Step 3. Now we will add the item in the ListBox at the run-time by using the below code.
Step 4. In the next step, we will add the ListBox to the Form. For this we will use the Forms.Controls.Add method which helps us to add the ListBox controls to the Forms control and displays it on the Form which is based on the location and size of the control.
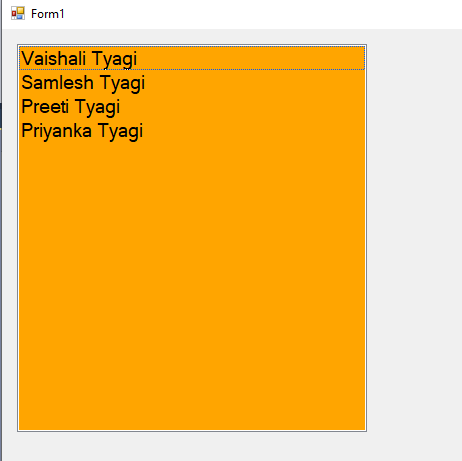
Now we will write a code in C# to create the ListBox control in Windows Form.
Example 2.
OutPut:
Explanation of the Above Code
Properties of ListBox in C#
ListBox Name Property
The name property represents the unique name of the ListBox controls. We used this name in the code to access the controls. The below code sets and gets the name of the text of the ListBox control.
Location, Height, Width and Size property of ListBox
Location: The Location property contains a point that shows the starting position of the ListBox on the Form. We can also use the Left and Top properties to show the location of the control from the top-left corner of the Form.
Size: The size property shows the size of the control. We can also use the width and height properties instead of the size property. For this, we will write the following code to set the location, height, and width properties of the ListBox control.
Font of ListBox
Font property shows the font of the text of ListBox control. When we click on the font property in the properties window there, we can see the name of the Font, Size, and other option of the font. For this, we will write the following code, which sets the Font property at the run time.
Background Color and Foreground Color of the ListBox
To set the background and foreground color of the ListBox, we used the BackColor and Forecolor properties. After clicking on these properties in the property window, there will appear a color-dialog.
For this, we will write the following code:
Creating an Application in C# using the ListBox
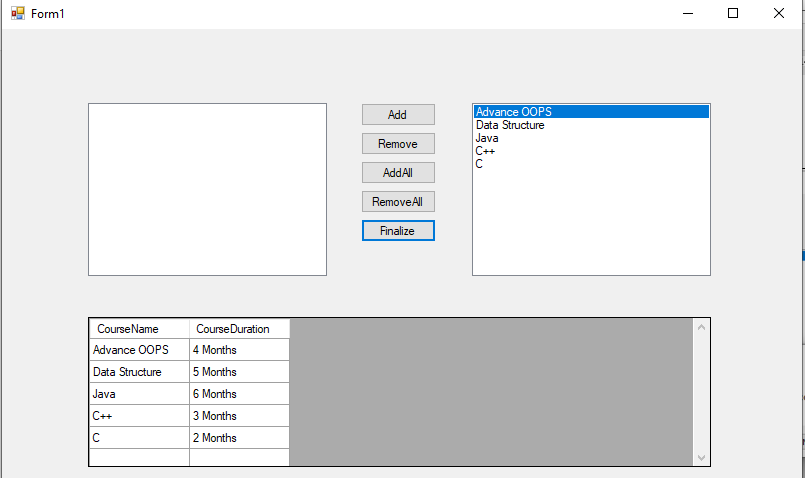
Here we are going to add the element in the ListBox, Remove the element and will show them in the GridView.
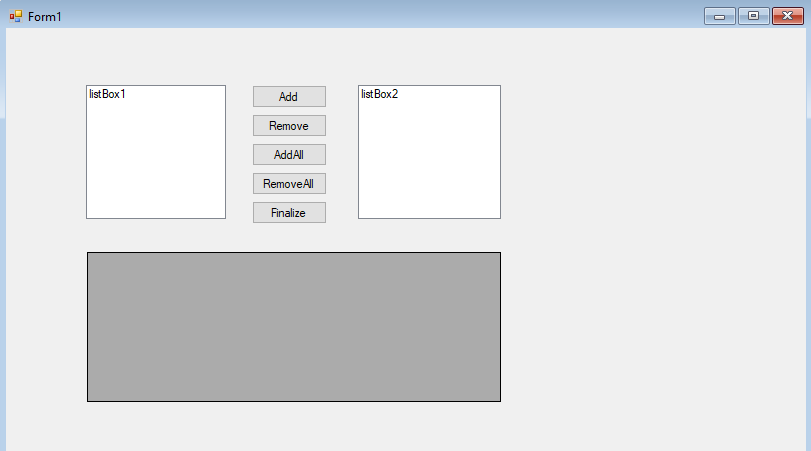
For the application creation, we will design a User Interface where the interface contains the two listboxes(listbox1 and listbox2), five buttons which includes the different functionality i.e., Add the data from the first Listbox to the second Listbox, Remove data, Add All, Remove All, Finalize and a GridView where we will show the Finalize data.
To design the Graphical User Interface, we will follow the following steps:
Step1. In the first, we will create a new project for the creation of the project; we will follow the next steps:
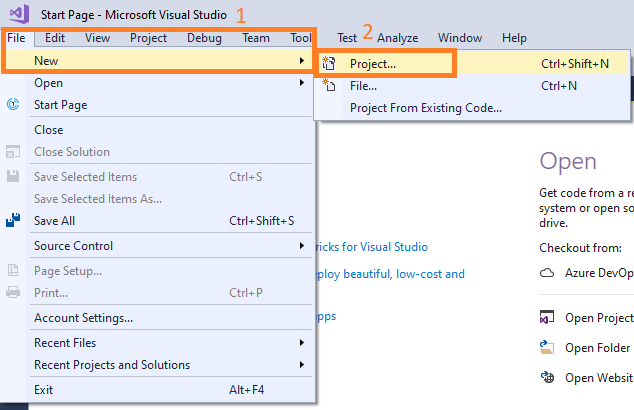
Click on New->Project, as shown in the below screenshot.
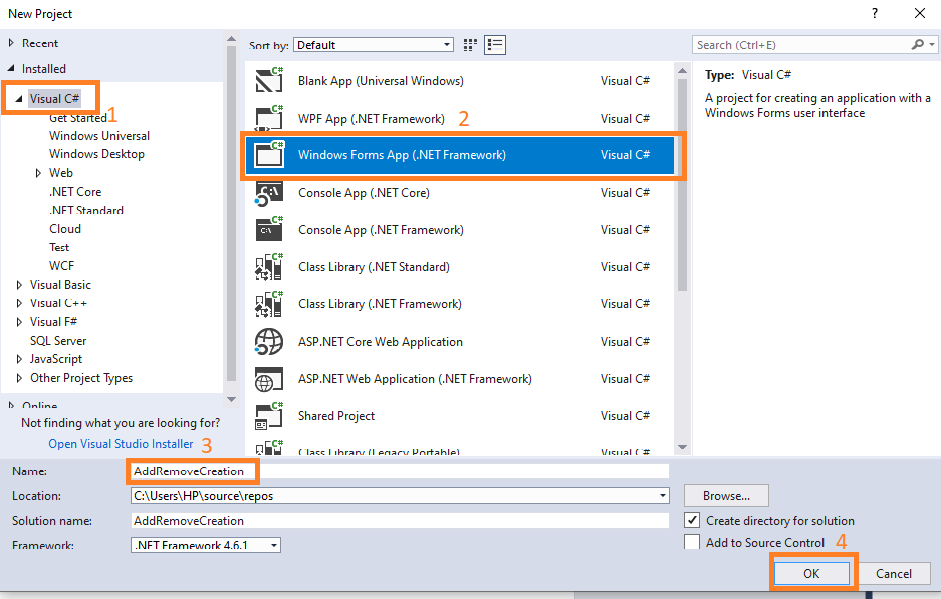
Step 2. After this, a new window will display, where we select the Visual C#->Windows Form Application->Name of the project(AddRemoveCreation) and click ok, as shown in the below screenshot.
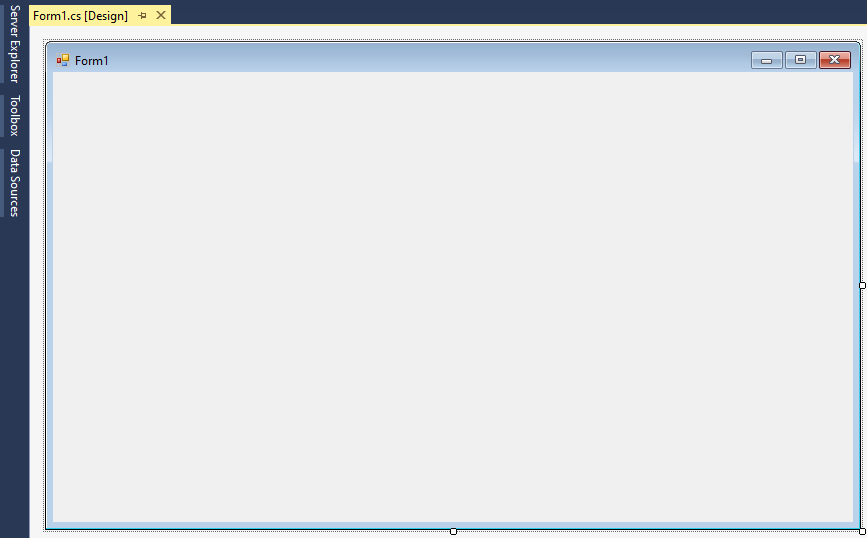
Step 3. After this, a Form will create as shown in the below screenshot:
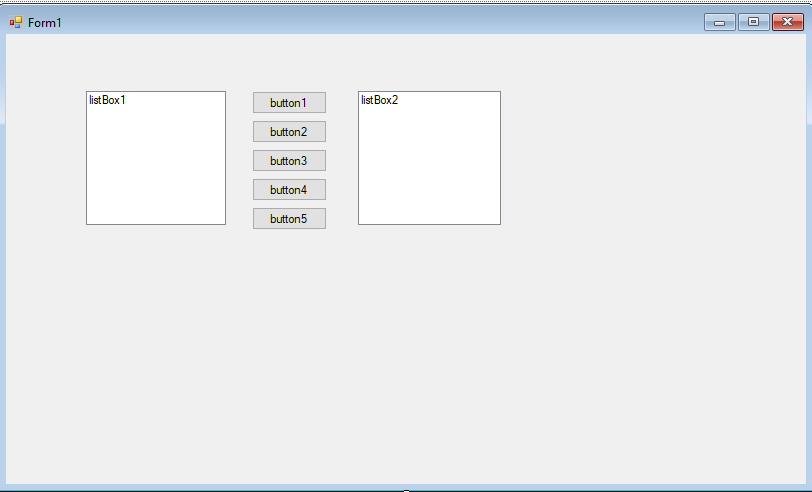
Step 4. In the next step, we will Drag and Drop the ListBox from the toolbox. Here we are going to take two ListBox(ListBox1 and ListBox2) and Five buttons(Add, Remove, Add All, Remove All and Finalize).
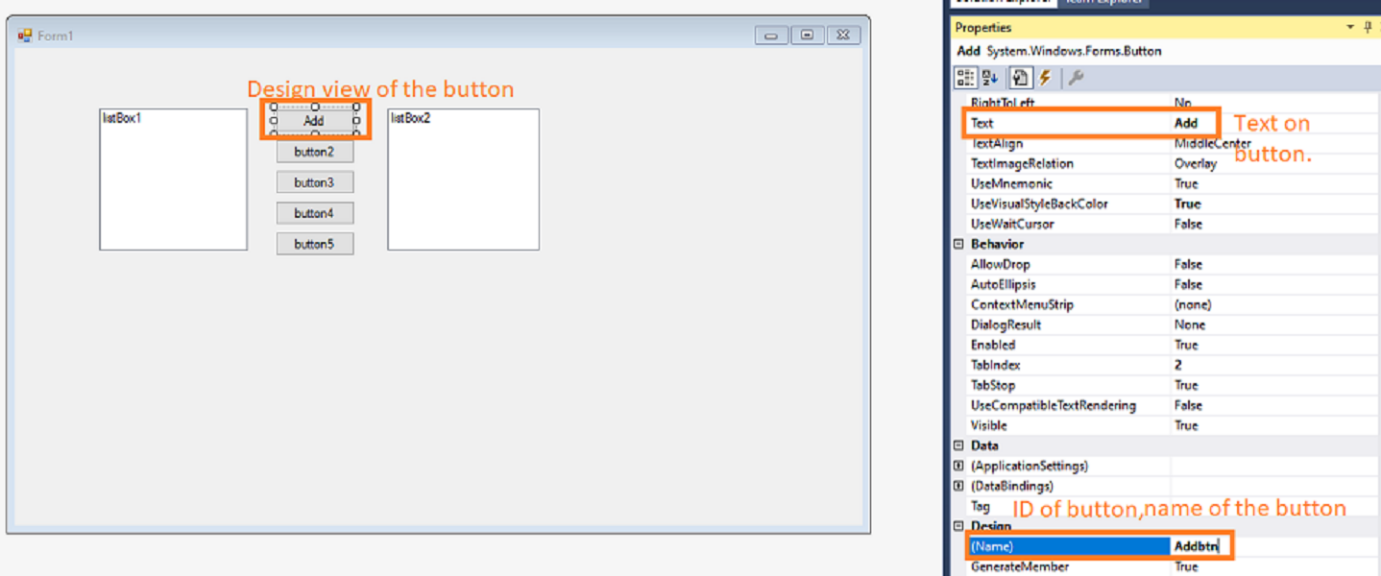
Step 5. In the next step, we will change the text and name of the button by right-clicking on the button->choose properties->change the text name as shown in the below screenshot:
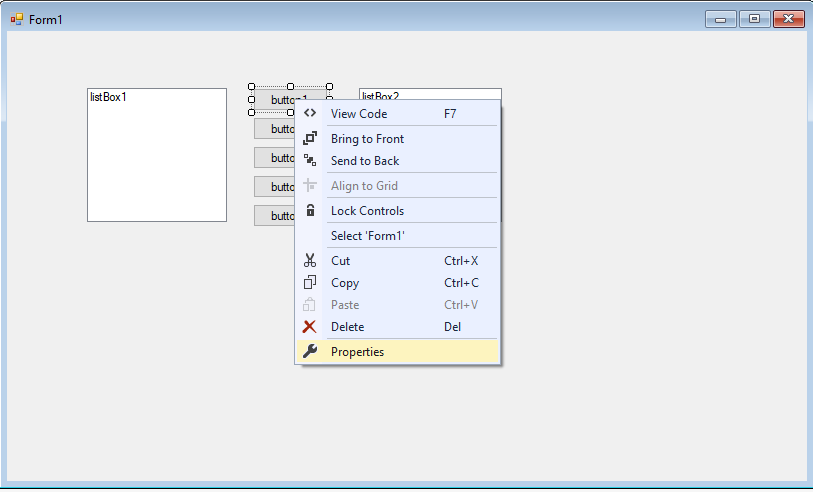
Step 6. After clicking on the properties, the property window will open where we will change the name of the button and the text on the button as shown in the below screenshot:
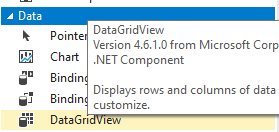
Step 7. After this, we are going to show the data after clicking on the finalize button in the GridView. For this, we will click on the Data->GridView.
After this, the page will look like, as shown below:
Now we will show how to add the data in the listbox1 and import the data in ListBox2.
For this, we will do the below code:
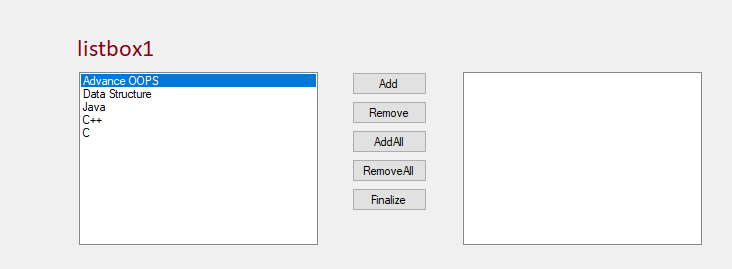
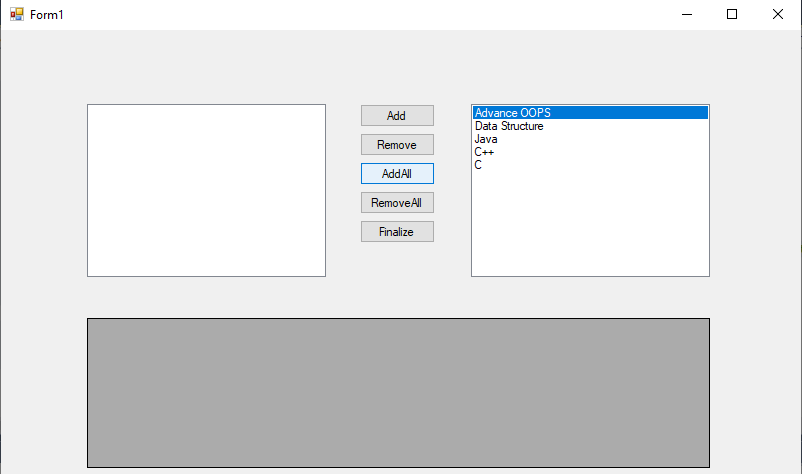
Here we are going to show that the listbox1 containing the data.
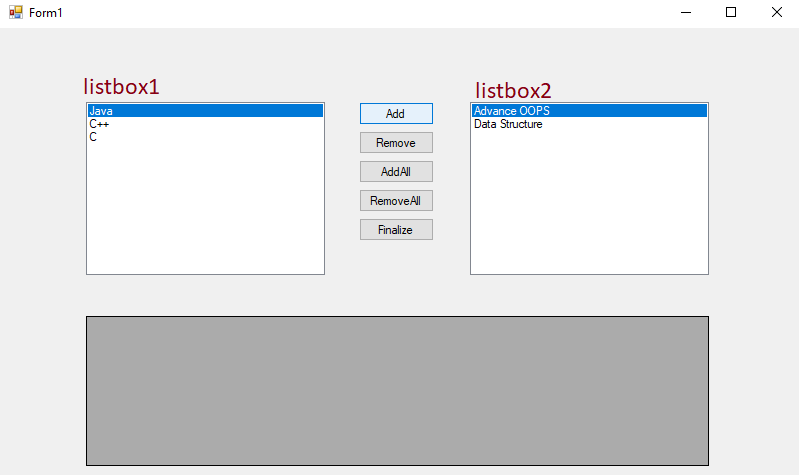
After clicking on the Add button, data will be added to the listbox2 and gets deleted from the listbox1.
Remove the data from the ListBox
Here we are going to show how to remove the data from the listbox2.
For this, we will write the below code:
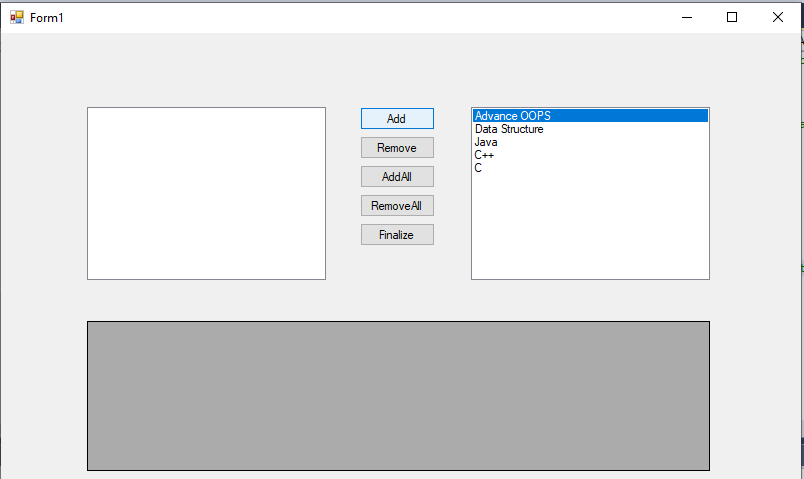
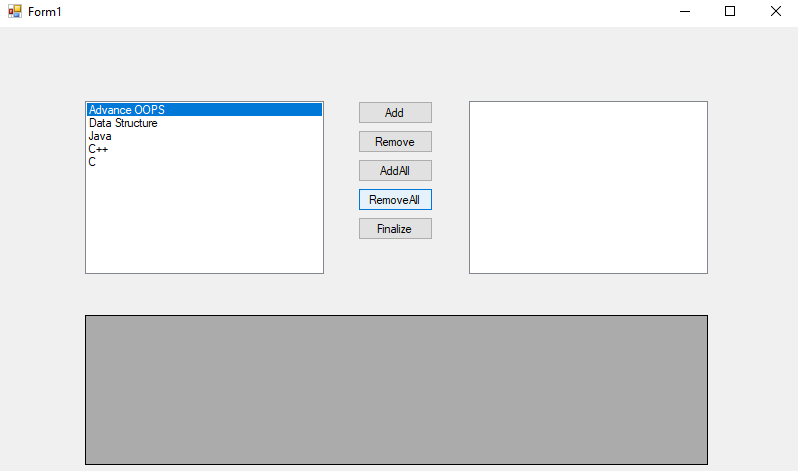
Before removing the data, the whole data is in the listbox2 and the listbox1 does not contain any value. The output will look like as shown below:
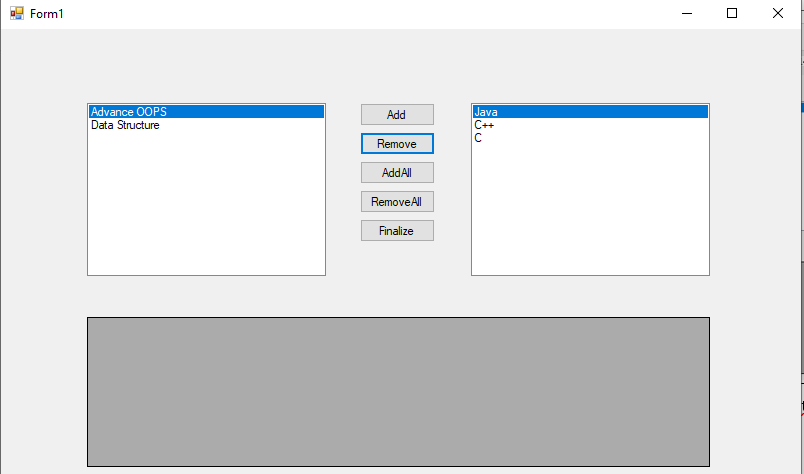
After clicking on the remove button, data is going to be deleted from the listbox 2 and added to the listbox1, as shown in the below screenshot:
Adding the whole data in one go in the ListBox
To add the complete data from listbox1 to listbox2, we will write the following code as shown below:
Data in the listbox1 is shown as below:

After writing this code, the AddAll button will work, as shown below:
Remove all the data from the ListBox
Here we will remove all the data from the listbox2 and add all the data in the listbox1.
To remove all the data from the Listbox, we will write the following code as shown below:
Showing the data of the ListBox in the GridView
Here we will use GridView to show all the data of the ListBox2 after clicking on the finalize button.
To show the data in the GridView, we will write the following code:
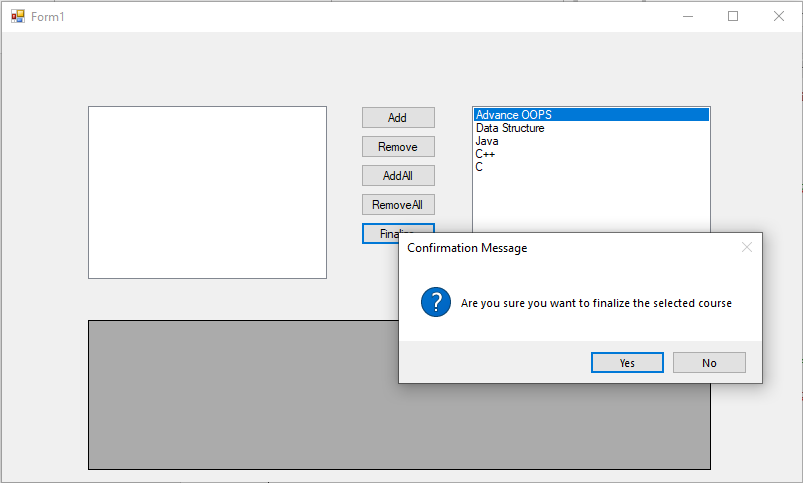
After clicking on the Finalize button, confirmation message will display.
After clicking on yes, the aggregate data is displayed in the GridView as shown in the below screenshot: