React-Native Localization
Localization is locating a character or restricting it to a particular place. In the case of application development, it is about developing the application according to the local language.
For Localization, we will use the LocalizedStrings component of the react-native-localization library.
It is a class to locate the ReactNative interface.
If you want to share code in a React project, use react-localize or local strings of a generic JavaScript.
Version 1. x. note
This library has been recompiled to use the newly created local strings package, which is now added as a dependency, to make the code more integrated and easier to maintain.
All native code is the localized strings project, and the react localization version supports embedding JSX code in formatted strings to override the formatString.
This release adds a custom version of getInterfaceLanguage to retrieve the native operating system interface language.
To simplify the configuration of Android versions, versions 2.0 and higher only support ReactNative >= 0.56.0
We just needed an easy way to internationalize our first React Native app.
Initially, we thought of exposing the native iOS internationalization API to React Native. Then, we opted for a solution to me that seems more in the spirit of React.
In this implementation, we can keep the local strings in the same React View file as the styles are applied (I do not deny that this approach may have some repetition in the translated strings.
But it makes it possible to make a CommonJS module a source common string needed in different views).
Before integrating native plugins like this, it is necessary to exclude the applications created by Expo. So if you used the Create React Native App shortcut, you should delete the app.
How does it work?
The JavaScript library uses the React Localization library mainly to get the current interface language. Loads and displays strings that match the current interface locale or default language (if no specific locale is found, then the first one)
It is possible to force a language other than the interface language.
Facility
The easiest way to install is to just type 2 commands inside the react-native project folder and you’re good to go:
Don’t forget to restart the node server when you see any error.
If installing for Android and still having problems, check if the linker automatically performs step 4 of “Android Manual Installation”.
The Windows platform does not support automatic installation by the linker. Only manual installation is supported.
Manual installation iOS
- npm install –save react-native-localization
- In XCode’s “Project Browser”, right-click on the Libraries folder in the project → and add the files to <…>.
- Go to node_modules → then react-native-localization, add the ReactNativeLocalization.xcodeproj.
- Add libReactNativeLocalization to Build Phases -> Link the libraries
- Lastly, Build and run the library
Manual installation Android
In android/setting.gradle
In android/app/build.gradle
Manual installation windows
- Run npm install –save react-native-localization
- Open Visual Studio solution.
- Right-click on the Solution Explorer
- Select Add -> Existing Project
- Select the.csproj dependency from the Explorer window. The dependency will be in node_modulesreact-native-localizationwindowsReactNativeLocalization
- Right-click the Universal Windows App project in Solution Explorer.
- Select Add -> Reference
- Select the ReactNativeLocalization project.
- Open homepage.cs
- Add the new ReactNativeLocalization.RNLocalizationPackage() to the list of packages in MainPage.cs
Usage:
In the React class you want to localize requires the library and the Strings object passed to the constructor is a simple object containing a language key (ie: N, It, Fr..) and then with the required key value Defines a list of pair of localized strings.
Then, use the strings object n the render method to accessing the localized string’s key.
The first language is the default, so the selected language is displayed and written to the log if any translation is missing.
Update/Overwrite locale
You have localized by default on the build but downloaded the localization strings from a server. Use content to override the whole object.
NOTE: It will remove all the locations if they are used it.
You can override specific language:
Typescript
Where “module”: “es2015” is essential to import the module easily.
The import is being done like below:
APIs
- set language(languageCode) -It is manually a particular language
- get language() – It is used to get the displayed language
- getInterfaceLanguage() – It is used to get the current device interface language
- formatString() – It is used to format the string replacing and its placeholders with the argument strings.
- getAvailableLanguages() – It is used to get an array of the languages passed in the constructor.
Examples
It is possible to set the language directly in the Xcode project by using the below code snippet:
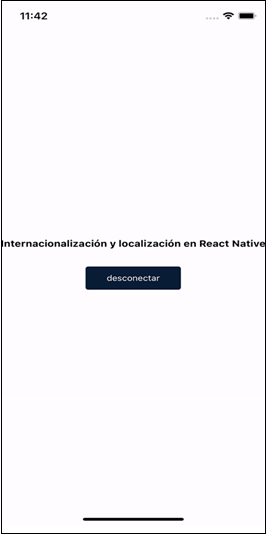
Internationalization and Localization in React Native

Internationalization, or i18n, is the process of creating applications that can be adapted to different cultures, regions, and languages.
However, Localization, or l10n, involves translation into a user-specified location or language and is made possible by internationalization.
Localizing any app is like creating to support multiple languages or regions, to make it accessible and usable for a range of users.
Localization gets the language and location of the user’s device in mobile app development, which is not the same as the user’s geographic location and writes software to adapt it.
Localizing an app will be challenging, but with the help of expo-localization and i18n-js, we will learn to implement Localization in Expo and React apps.
Before starting it, you should have the following installed in your system:
- Node.js is
- Watcher if you are using macOS
React native configuration
Also, in addition to the expose localization SDK, we can use a library like react-native-localize. But this toolbox only supports React Native, and it does not support Expo apps without kicking out Expo because it’s a native module.
Working with expo-location
The Exposure Localization SDK gives us access to local data on a user’s native device, including the isoCurrencyCodes constant, which returns an array of all supported currency codes on the user’s device, and the timezone constant, which returns the time zone of the device.
Now, let’s localize an Expo app and i18n-js.
Creating an Expo app
Let’s generate an Expo app using the Expo CLI to get started. Open the new terminal and run the command to generate an Expo app:
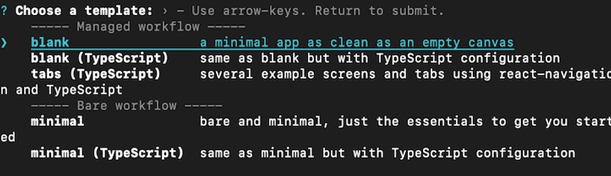
Select a blank template here. It gives us the minimum dependencies we need to get started.
To open the app, navigate root of the newly created app and run the command accordingly:
For iOS
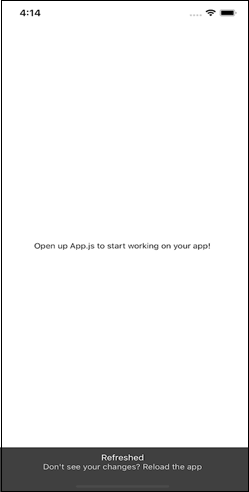
The command outputs the following screen:
Installing dependencies
Now that we’ve built an Expo app, we can install expo-localization and i18n-js as dependencies after navigating to the app directory.
Run either of the following commands to install both packages:
Extract and centralize the text of the application
An important step in localizing our application is extracting and centralizing the text users will interact with within a separate file. This allows us to conditionally display text to our users based on their device’s locale.
First, create a file at i18n/supportedLanguages.js; this is where we want to place all the text that the user interacts with that is not code.
The application will support three languages here: English, Chinese, and Spanish. By adding the lines of code below, we create a JavaScript object of key-value pairs. Every language has a key, but the values are different:
Later, we will import the different languages to replace the current string with the key-value representing the user’s locale text.
The expo-localization SDK provides us with the locale of the user’s device by calling the locale constant, which accesses the device’s language code.
Adding internationalization functionality
Let’s import two packages we recently installed our language configuration file to add the internationalization:
After the import statements, add the following line of code:
Specifying i18n. Backups = true. We are enabling the local backup feature. For example, if we do not specify the text for “Reset password” in Spanish, the text will return to the default language.
We were configuring i18n. Translations = { en, zh, es } specifies the key-value pairs of the languages we want to support in our application.
And, with i18n. Regional Settings = Localization. locale, we are setting the locale of our app based on user device settings.
Application text localization with i18n-js
To get the localized text in the application, we need to call the i18n.t() function and pass the key we want to translate as a string. Let’s say we want to localize the welcome text of our app. We can add the following:
It gives us the value of the welcome key in the configuration object we imported based on the locale of the user’s device.
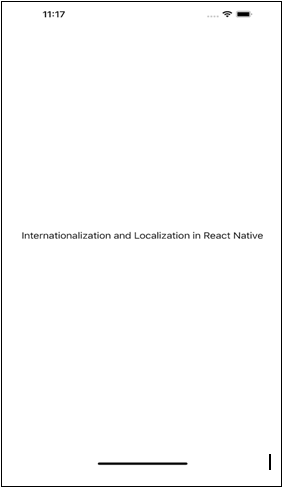
Welcome key of device set to English.
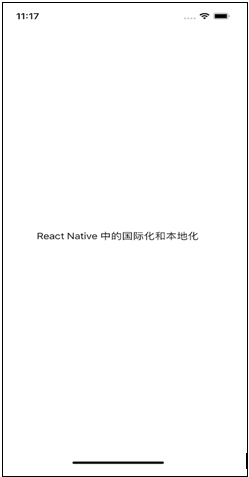
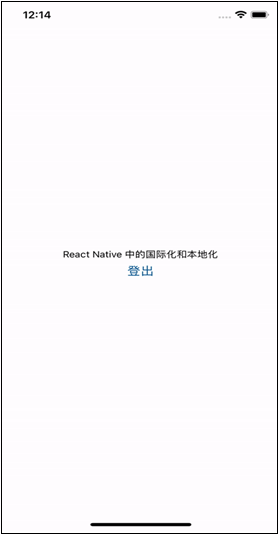
Welcome key of the device, which will be set to Chinese.
To demonstrate device localization in an iOS simulator, open the device settings and go to General > Language & Region > iPhone Language. Select Chinese or Spanish to see how the text will conditionally render based on the selected language.
On an Android iOS emulator, open Menu > Settings > Language & keyboard > Select locale.
With the locale selected, the final localized Expo app in an iOS simulator looks like this:
If we want to change the device’s locale without going into the device settings, we can change i18n.locale = Localization.locale to i18n.locale = ‘es’ to get the localized version of the app in Spanish or whatever language code supports the application…
Bare React Native App
Generating a new React Native project
To get started with the React Native app, let’s create React Native project by using the command below:
It generates an empty React Native project and installs necessary dependencies.
Navigate the root of our newly created app and run the command to open the app:
Let’s see how we use the Expose Localization SDK with 18n-js in the React Native app.
To get started, install and configure the react-native-unimodules package by the dependencies in the React Native project:
Follow the additional settings app for iOS and Android.
Now, we should install the necessary dependencies. Run either of the commands to install both of the packages:
After installation, follow the steps in our Expo app to localize the React Native app. Here is a working demo of a localized React Native app with expo-localization SDK and 18n-js.
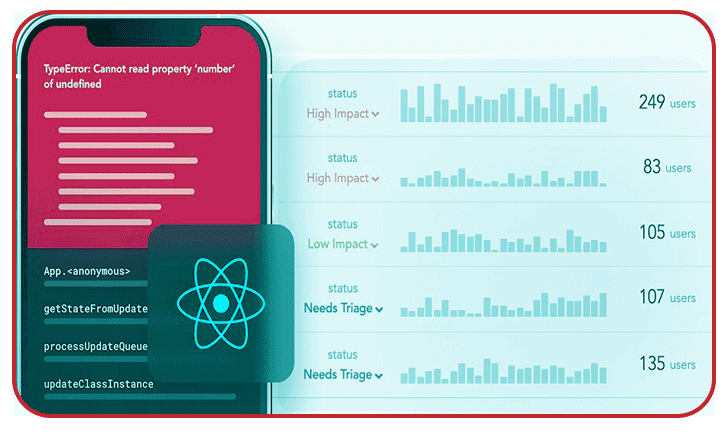
LogRocket is a React Native monitoring solution that helps instantly reproduce issues, prioritize bugs, and understand the performance in React Native apps.
LogRocket also helps us increase conversion rates and product usage by showing the users engaging with our application. LogRocket’s product analytics features reveal that users aren’t completing a flow or adopting a new feature.
Configuring native React localization for Multilanguage apps
React Native Localization (RNL) makes Localization much easier to implement, significantly reducing development time. It is a step-by-step guide to setting up RNL, plus some tips for deployment with multilanguage applications.
Configuring native React localization
Only two commands are needed to install the library:
- yarn add react-native-localization
- cd ios && pod install
Next, we’ll need to define our strings. It is a list of strings for locale or creates a structure to access them. Those structures look like below:
TYPESCRIPT
We prefer to keep the translation divided into files according to language. We have en.ts for English and es.ts for Spanish.
TYPESCRIPT
We can then import these files into our string file and use them similarly to the previous example.
TYPESCRIPT
To access the strings, we can simply ask the LocalizedStrings object for them. React’s native localization library will use the device’s locale to determine which language to use.
TYPESCRIPT
If our device language was set to English, this would display as “Hello!” If the language was set to Spanish, it would display as “¡Hola!”.
Tips and Tricks
Determine the device language
To retrieve the device location (or interface language) from the library, run:
TYPESCRIPT
With RNL, it is possible to set the language programmatically, even to a different language than the device language.
TYPESCRIPT
Once the language is set, we can get the application’s language from the library. This is different by the interface language.
TYPESCRIPT
Default language
There may not be a translation for a specific word in some cases. The library will choose a default language string when this happens. The default language is simply the first language in the list passed to the localized string constructor.
React Native Localization is a great tool. Please let me know if you have any tips to get more out of it.
React native Localization
Here is an example of Localization in the React Native Multi-Language app. Localization is making local or restricting it to the place. It is related to the development of the application according to the local language in the case of application development.
We use the LocalizedStrings component of the react-native-localization library for the Localization.
How to Use Localized Strings Component?
Here is the code snippet of LocalizedStrings we used in the Example.
In this example, we will create a splash screen to select the language and display the text content on the next screen accordingly from a common string repository where we have defined the same text for each language code.
To make a React Native app.
Getting started with React Native will help us learn how to make a React Native project. We are going to use react-native init to make React Native app. If you have a node installed, you use npm to install the react-native-CLI command.
Open the terminal and run.
Run the following commands to create a new React Native project
If you want to start a new project with a specific version of React Native, you can use the –version argument:
In the project directory, we have to create a project structure with an index file called App.js.
Installing Dependencies
To install the dependencies, open the terminal and start the project:
1. First, install the react-native-localization dependency to import LocalizedStrings
2. Install the dependencies for react-navigation:
The commands will copy all the dependencies to the node_module directory.
Installation of CocoaPods
Use the below-given command to install the CocoaPods:
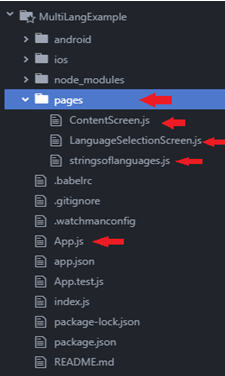
Project Structure
We are using the project structure, which is below.
Code to Make a Multilanguage App
If you are done with the project structure, replace the below code:
Application.js
LanguageSelectionScreen.js
ContentScreen.js
To run the React Native app
Open the terminal again and jump into your project using.
To run the project on a virtual Android device or a real debug device
or in iOS simulator running (macOS only)
Output Screenshots
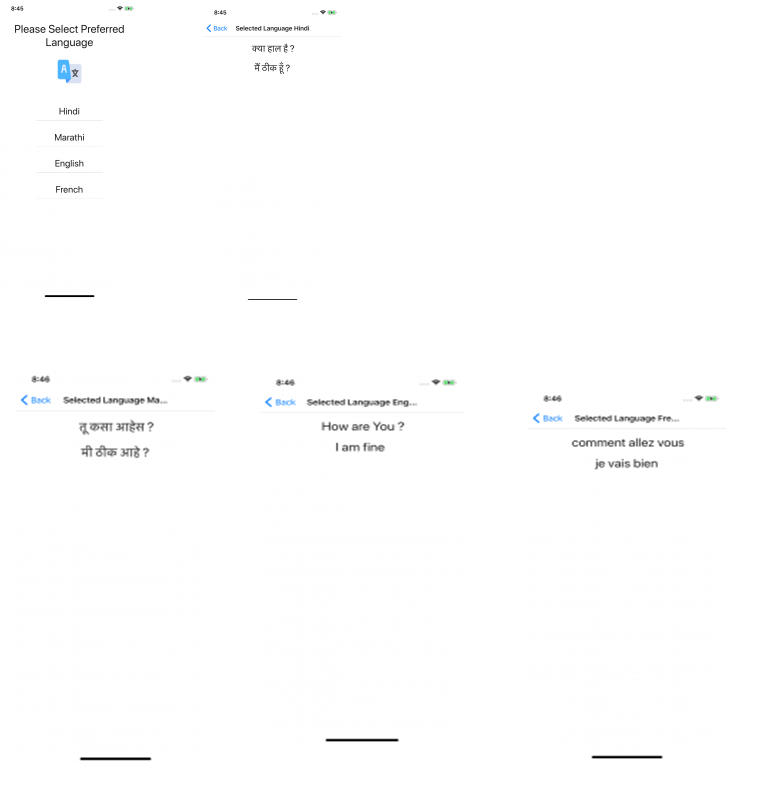
It’s how you can make a React Native app (Localization) in multiple languages.
CONCLUSION
We easily located an Expo with internationalization and discovered the React Native app. Using the localization expo and the i18n-js internationalization library, we render a localized version of the text of both applications using the i18n.t() function.