What is BlackArch?
The BlackArch is an Arch Linux based, open-source penetration testing distribution tool. It is used by the peoples and officials interested in cyber security and penetration testing that provides a large number of cyber security tools.
It is built specifically for security researchers and penetration testers. The distribution is very famous among these peoples. Because it consists of more than 2400 resources which is presented in the BlackArch repository. These can be installed individually or in groups as per the need of the user. BlackArch Linux distribution is compatible with current installs of Arch Linux and provides a very efficient and powerful environment one can possibly imagine off.
Overview
Once the BlackArch is installed, one can use both Parrot OS and Kali Linux as per needs. It makes this distribution a very powerful tool.
However, a crucial distinction between the other distributions and BlackArch is that BlackArch does not have a desktop setting, rather offers a preconfigured number of Window Managers.
BlackArch also has some of the same features that are offered by other operating systems of this category as it can be burned to an ISO image and run as a live machine, similar to Kali and Parrot. It can also be installed as an unofficial operating system and can be used as an individual system to work anonymously.
BlackArch Packages
At present, BlackArch contains 2597 packages and software, along with their dependencies. A small number of cyber security experts and researchers are improving BlackArch, adding the packages and dependencies required to run these tools.
In this tutorial we are going to use ISO and BlackArch-installer to install BlackArch Linux. We can also use VirtualBox for the installation of the BlackArch, only if preferred to virtualize, or user can also use other apps as well or if want to install as a full new operation system.
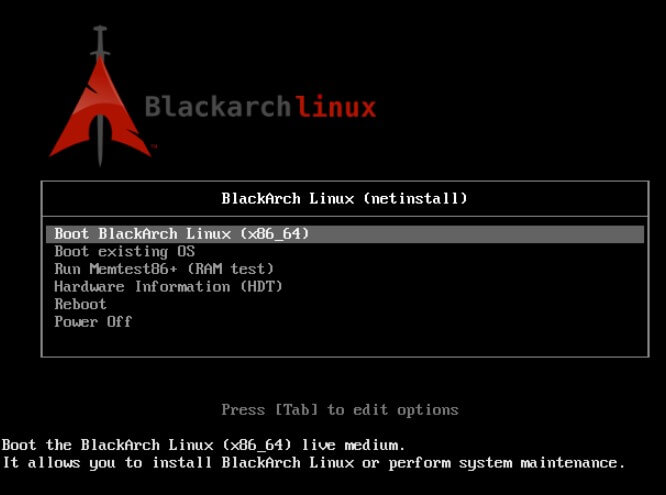
We believe that the ISO has already been burned to a USB or DVD and that you are ready for download. The screen must look something like the snapshot below, when we boot into the image. Pick the distribution accordingly and then press the Enter button. In our case, we have chosen the first option 64bit, BlackArch Linux (x86_64).
We must execute the BlackArch install script to start the installation. Be sure to have the internet enabled on the computer. It prevents issues that might force us to restart the installation. With the ip command, we can list the network interfaces.
To know how to set up a wireless link, you can read the arch wiki if you want or just have Wifi available as an option.
To start the BlackArch install script, execute the blackarch-install command. It shows the three options on the screen:
1. Install from repository using pacman
For the netinstall iso, it is the recommended choice to pick. It will also fetch the necessary packages from official arch repositories and BlackArch repositories.
2. Install from Live-ISO
It is only valid if one has downloaded the ISO of the BlackArch from the internet. In that case we do not require any kind of internet for the installation process to begin.
Once the installation has been done and after the system is connected to the internet, we can update our system from a general update using pacman -Syyu command.
3. Install from source using blackman
Using this option, we can install it directly instead of fetching the prebuilt package from a registry like pacman does.
In this process we will get the source into the destination system and it is compiled from the source. However, this type of installation is not preferred for the armatures as it may have some consciences and can even re-create the architecture of the OS if not used wisely.
We’ve got to pick the keymap we want now. Select the keymap as per your needs and the languages that we want to use in the BlackArch.
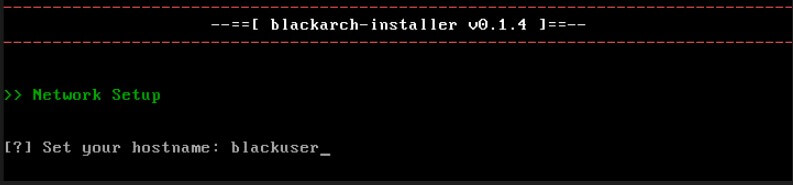
Now here we also need to create a hostname as it will be the name of the system and the local network.
After that, we will also need to setup the Network type that we want to use, and for that we have the following options open for us, from which we can choose accordingly. For the reference image has been attached below. As suggested, one must use its ethernet as it does not support the Wifi but one can add the Wifi also but have to do it manually. So best option is to choose the ethernet.
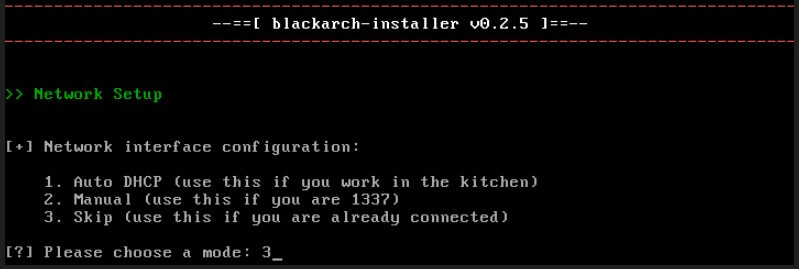
1. Auto DHCP (use this if you work in the kitchen)
The simple and suggested way for your network details to be set up automatically.
2. Manual (use this if you are 1337)
If you are sure about the details of the network, one can go for the option. Like it will ask the gateway type, LANIP, subnet mask etc. So, if the user has all the details of its network then he can setup it manually.
3. Skip (use this if you are already connected)
Each repo will now be updated by Pacman, downloading and installing some of the basic system packages required for the next BlackArch installation phase. It can take some time if you have a sluggish download speed. Go pick up a cup!
Once it is done then we will have to setup the partition of the hard disk space as per the need as we do it while the installation of any operating system.
Once the partition is done, boom it is done and the OS will be ready to use.