How to rotate a picture
The rotation of an image or picture is a common image processing routine that allows the user to correctly display an image taken from a different angle to a camera, mobile or scanned document/ pictures. Or we can also define that when we refer to an image or picture, rotation is a feature that allows the user to rotate the picture in a clockwise or anticlockwise direction depending on the need. For example, a user can rotate any picture in 90, 180, 270 degrees in clockwise as well as in the anticlockwise direction and completely inverted the pictures. In this topic, we will understand how we can rotate our pictures on different applications or electronic items such as mobile, computer, paint, Microsoft Window explorer, Photoshop, Microsoft Word, etc.
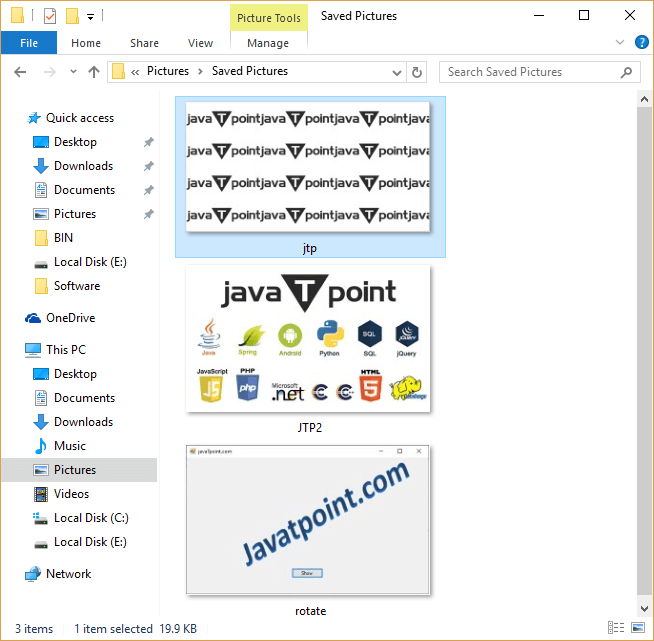
Rotate a picture in Microsoft Windows File Explorer
All the latest versions of the Windows operating system (Windows XP and later versions) can rotate pictures within Microsoft Window File Explorer. To rotate the picture in windows, we have to follow the following steps, as shown below:
1. Go to the Window Explorer using the Window key + E.
2. Browse the location of the image or picture.
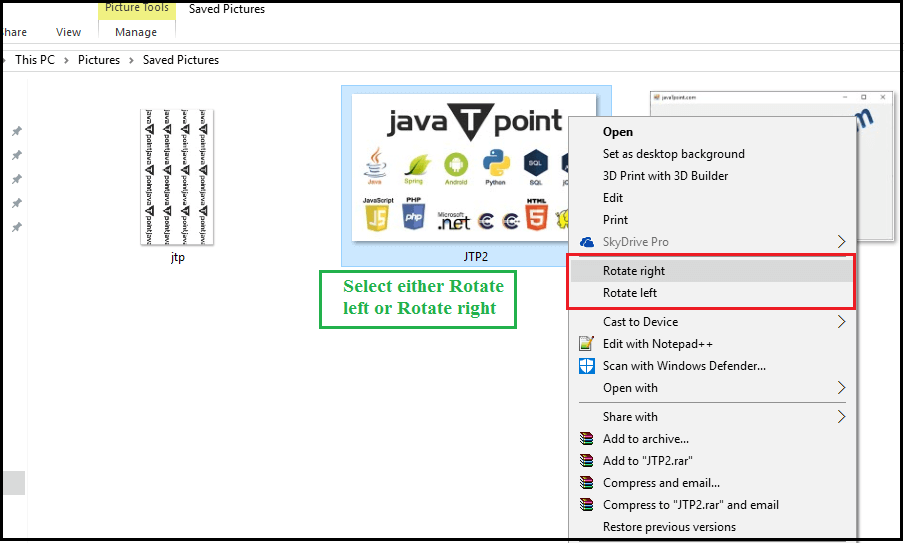
3. Select the picture that we want to rotate.
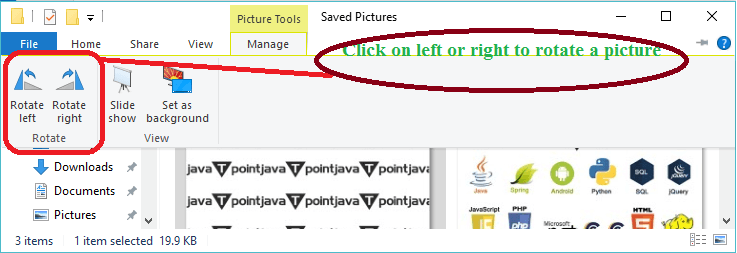
4. After that, click on the Manage tab to display the Rotate Left and Rotate right icon to rotate the selected picture.
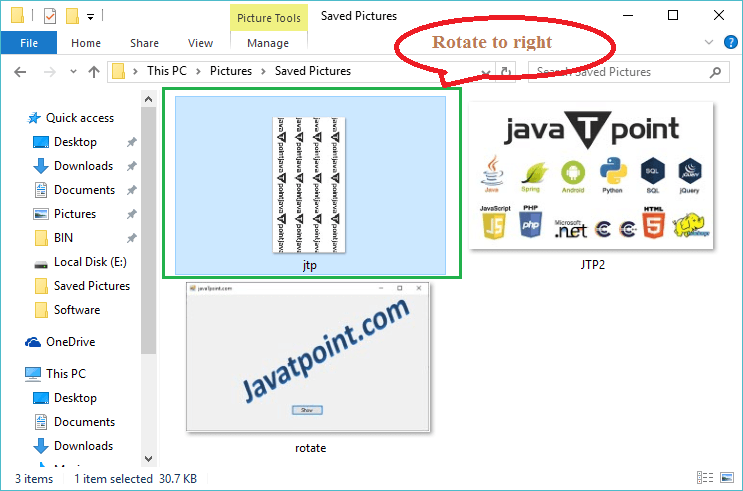
5. As we click on the Rotate right option, it rotates the selected picture.
6. We can also rotate any image by right-clicking on the selected picture and then select either Rotate left or rotate right, as shown below.
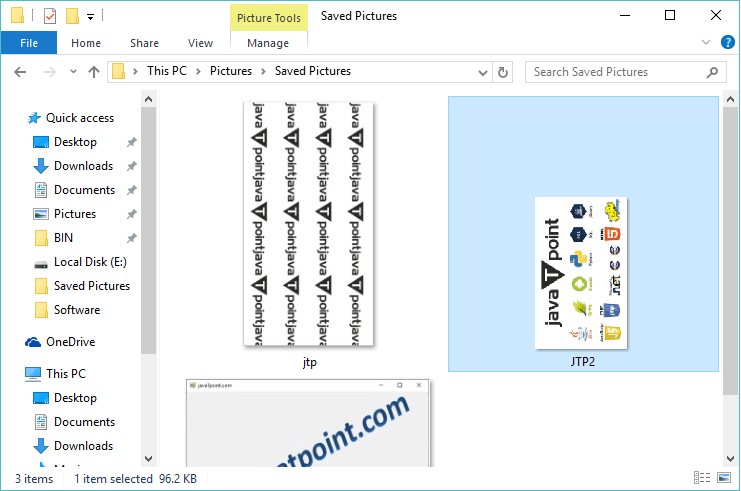
After that, it shows the rotated picture.
Rotate an Image/Picture in Microsoft Paint
Microsoft Paint is a classic window application tool used for painting, drawing and photo/image editing tools on a computer. It is a very simple tool that allows users to learn and use it very fluently with little effort. It has various features such as editing, drawing, resizing and many more. But picture rotation is the most basic feature to rotate a picture using the Microsoft Paint tool. Now we will learn how we can rotate an image through Microsoft paint by following the steps as shown below:
1. Select the photo and right-click on the one we want to rotate in Microsoft Paint, as shown below.
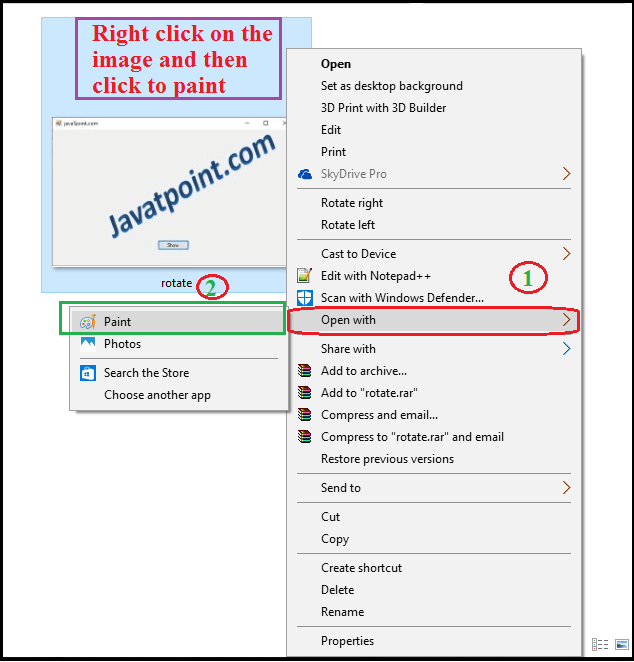
2. Click on the Paint option. It redirects the paint, as the below image shows.
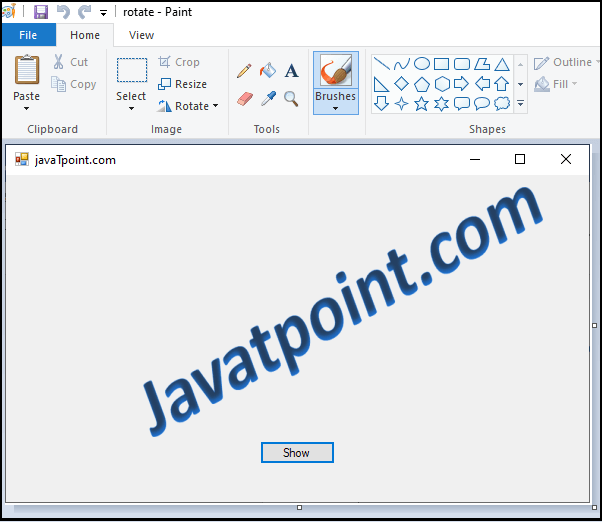
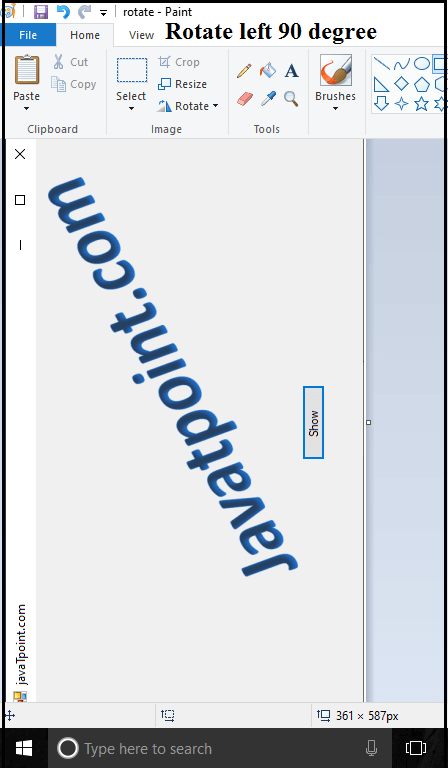
3. Now click on the Rotate It shows various options to rotate the image like Rotate right 90, Rotates left 90, Rotate 180 degrees, flips vertical and flip horizontal.

4. Click Rotate left at 90 degrees; it shows rotated pictures.
Similarly, we can rotate any pictures to the rotate right, Flip vertical and Flip horizontal. And if we want to bend or rotate pictures in 30, 40, 120 degrees, etc., we can click on the Resize option at the top of Rotate option. After that, it shows a pop-up window, as shown below.
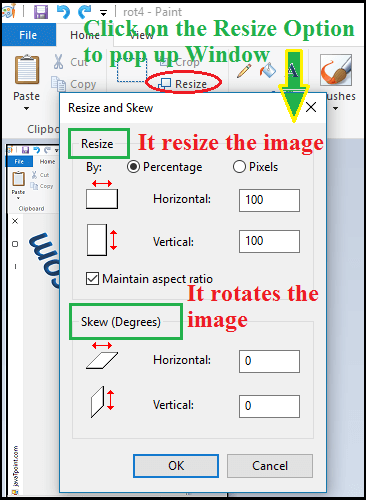
Skew Degrees
Now go to Skew (Degrees) options, and there are two options: the first one is Horizontal, and the other one is Vertical.
Method 1: Horizontal
Horizontal: As the name defines, it is used to rotate an image slantly (horizontal) by defining degrees.
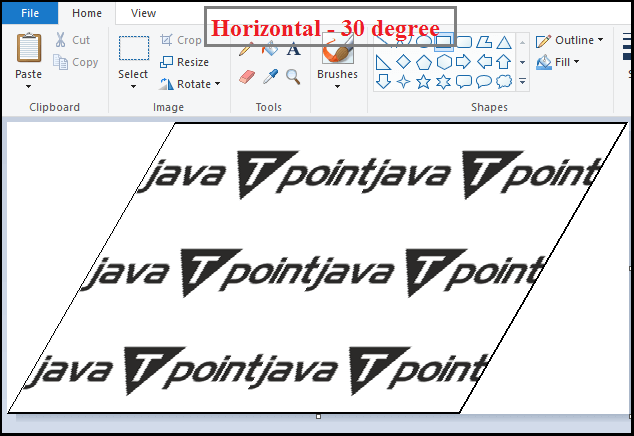
In the above picture, we set the horizontal rotation of an image by 30 degrees. Similarly, we can set different horizontal rotation of a picture by defining degrees.
Method 2: Vertically
Vertical: As the name defines, it is used to rotate an image slantly (vertically) by defining the degrees.
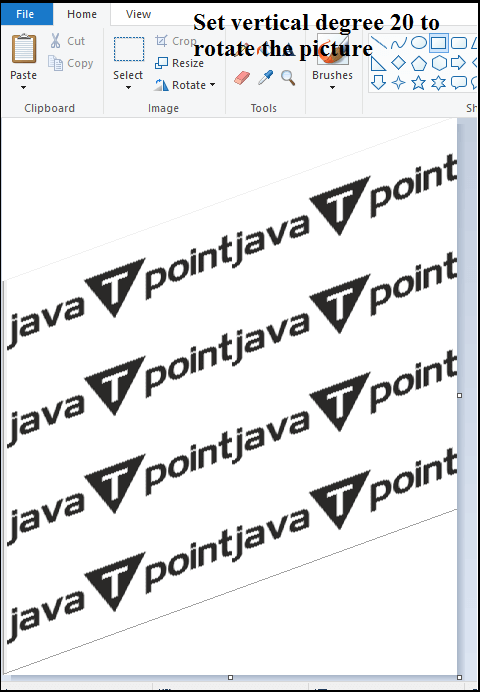
Here we set the vertical rotation of an image by 20 degrees. Similarly, we can set different vertical rotation of a picture by defining the degrees.
Rotate an Image/Picture in Microsoft Word
When we write any topic in Microsoft Word, the picture plays an important role in making the document more interactive and relevant so that the reader can see and understand things. Now we will learn how we can rotate an image through Microsoft Word. To rotate the picture in Word, we have to follow the following steps, as shown below:
Method 1: Manually Rotate a picture:
1. Go to Microsoft Word and select the picture to be rotated.
2. After that, manually rotate the picture by placing the mouse on a circle, as shown below.
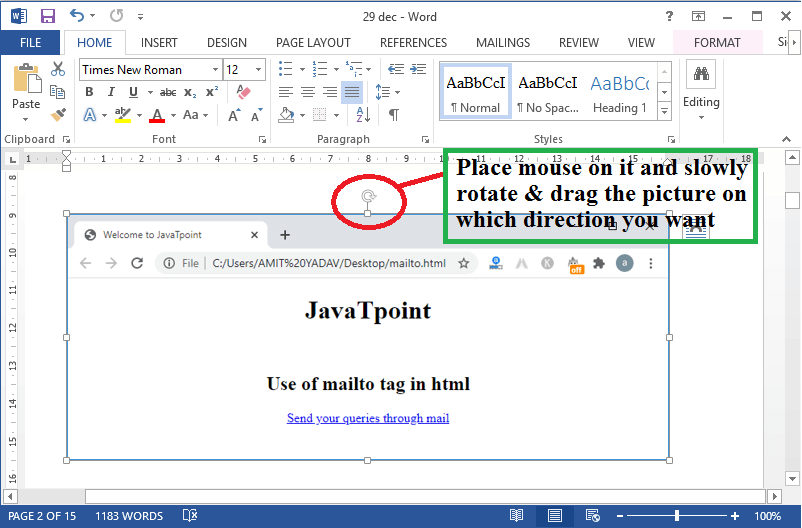
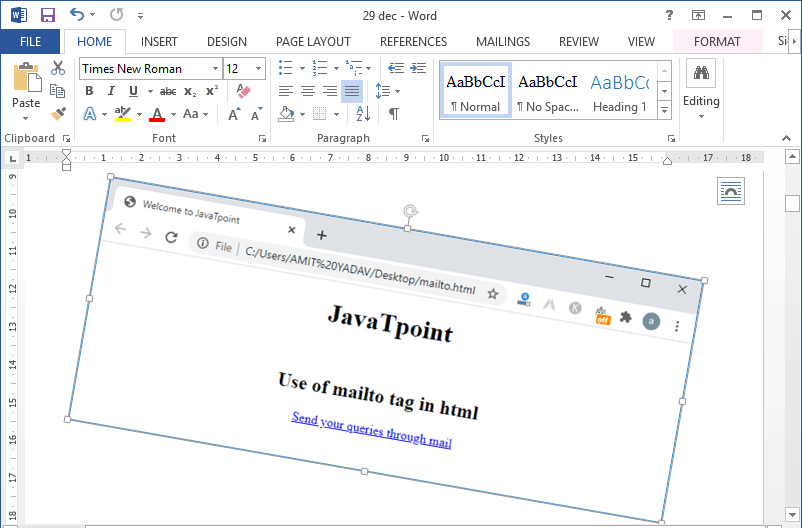
3. Here we rotated the selected image.
Method 2: Rotate a picture using predefined degrees
1. Select the image we want to rotate in MS Word.
2. In MS Word, click on the PAGE LAYOUT tab; it shows the Rotate icon on the right side.
3. Click on the Rotate button; it shows various options to rotate the picture, as shown below.
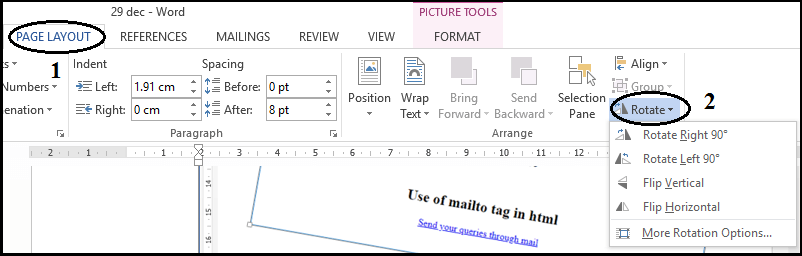
4. f we cannot find the Rotate option in the PAGE LAYOUT tab, click the FORMAT tab and look for the Rotate option on the right side, as shown below.
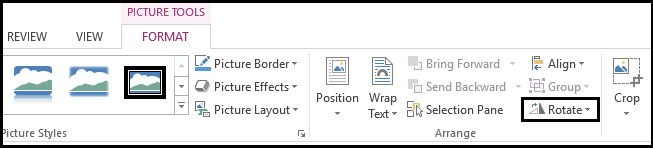
Note: If we want to rotate the picture more or less than the default options in the Rotate option. Click the More Rotation Option to define the degree of rotation to change the direction of the picture.
Rotate a picture on an iPhone and iPad
After taking an image or saving the picture on an iPhone or iPad, we can rotate any selected picture 90 degrees left or right and above it. Now we will learn and understand how we can rotate an image on the iPhone or iPad by following the steps.
- Go to the photos application and select any image that we want to rotate on the iPhone.
- After getting the picture, tap on the Edit button at the top right corner of the screen.
- Now we tap on the Crop and Rotate button just right to the Cancel
- After that, tap on the rotate button to rotate the picture counter by 90 degrees in the clockwise direction.
- When the picture’s rotation is complete, tap the Done button on the bottom right corner of the screen to save the changes according to our needs.
Rotate a picture using Window 10 default Photos Application
To rotate the image in the Window, we have to follow the followings steps:
1. Select any picture from the computer that we want to rotate using the default window 10 Photos
2. Right-click on the selected picture and then open with Photos, as shown below.
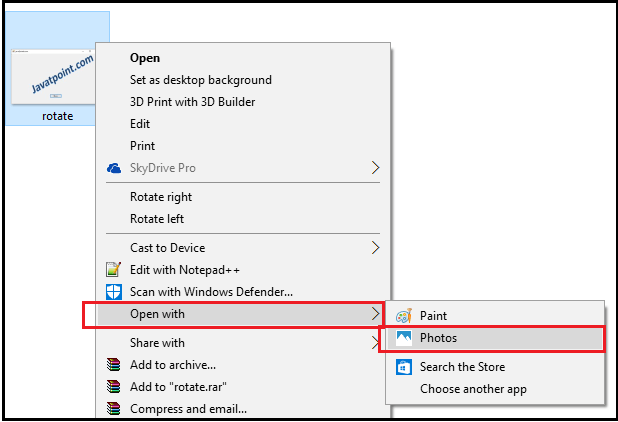
3. As we click on the Photos, it shows the below images.
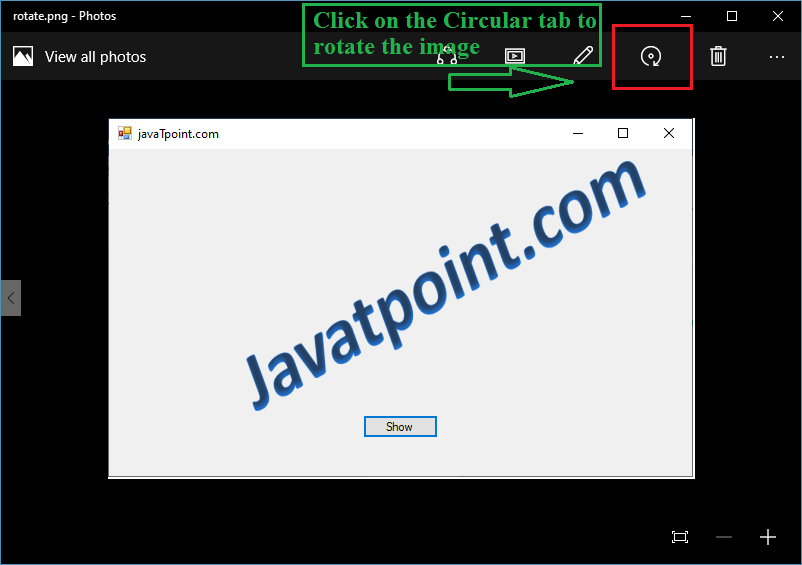
In the above image, click the circular tab to rotate the picture as needed.
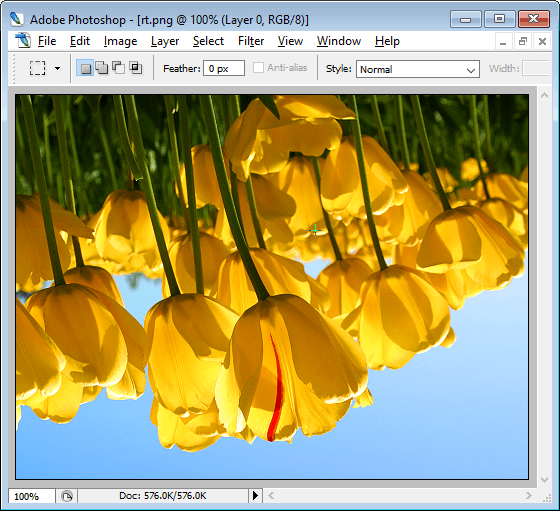
Rotate the picture using Adobe Photoshop
To rotate the image in the Adobe Photoshop, we have to follow the followings steps:
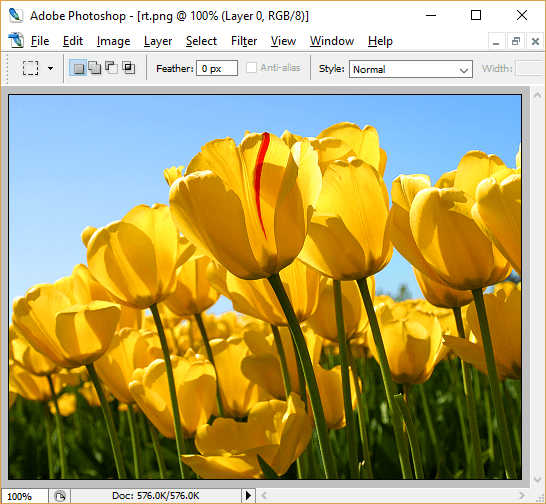
1. Go to Adobe Photoshop and then double click on the blank area that shows a pop-up dialog box to select an image from your Picture folder.
2. After selecting the image, click the Image button on the toolbar to display the various options to rotate the image, as shown below.
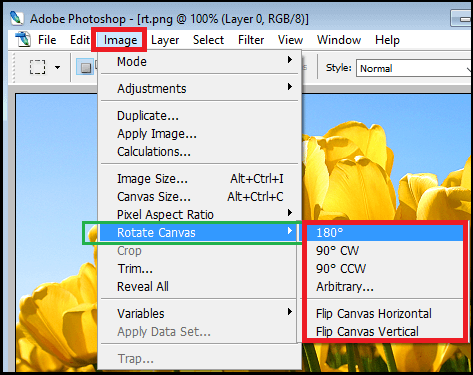
3. Then select the Rotate Canvas option and then follow the option to rotate the image, such as rotating the picture at 180
Rotate the picture in Google Docs
Google Docs is a free web-based application that allows a user to create, edit, share and use documents online from any computer. It is a free online alternative to Microsoft Word and Excel application with almost all the capabilities of traditional Microsoft Word and Excel. Google Docs also has an image editing feature. Therefore, instead of using any other image editor to rotate, crop, border, etc., an image, we can use Google Docs. Now we will learn and understand how we can rotate an image in Google Docs by following the steps.
1. Before editing the pictures or documents in Google Docs, we must to login with a Gmail account.
2. If we directly visit google.com in the browser before login in with a Gmail account, it asks for an email address and password.
3. After that, it redirects to the docs.google.com home page, as shown below.
4. If we have no recent document on Google Docs, click on Blank (+) to start a new document for writing and editing.
5. After that, click on the Insert button to insert or upload an image from the computer, drive, photo to the document, as shown below.

6. Here, we upload an image from the computer, as shown below.
After uploading, we can rotate any picture in two ways:
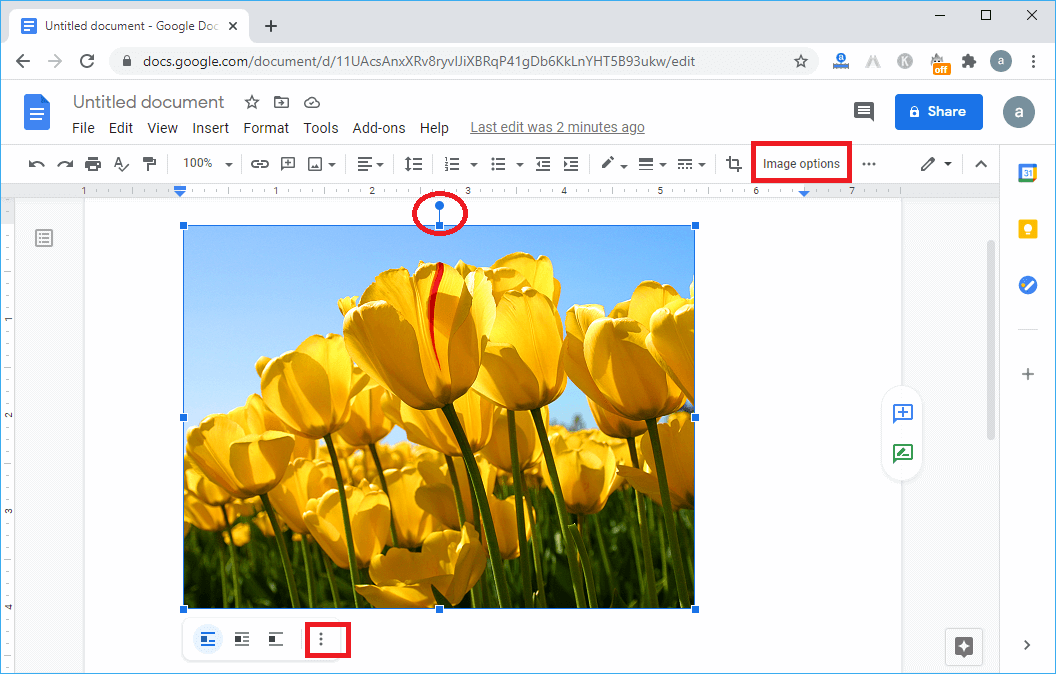
1. Manually: To rotate manually, click on the picture, and it shows a blue border with a circular tab at the top of the image, as shown in the above figure.
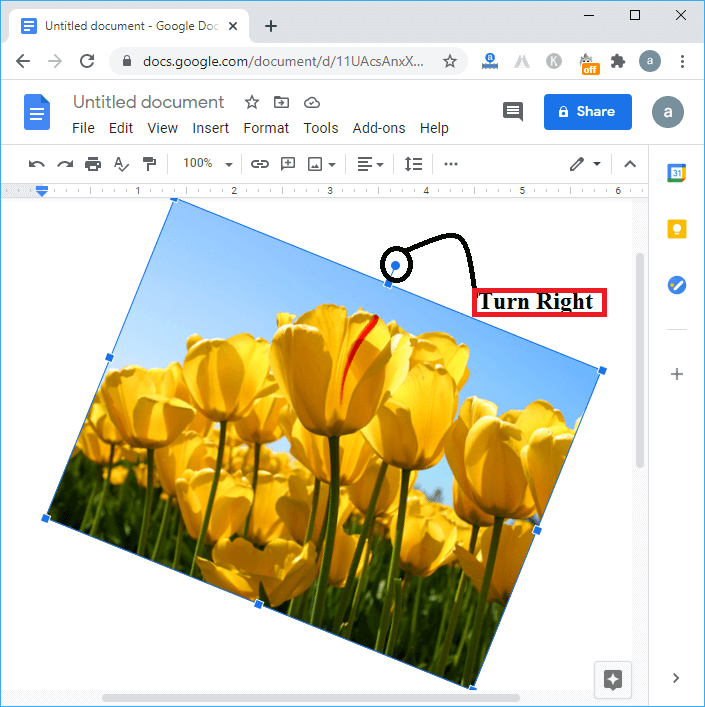
Now we turn the circular tab in the right direction, and it shows a rotated image in the docs file, as shown below.
2. Customized Rotation: In customized rotation, we can rotate any photo by defining the degree of rotation in the docs file.
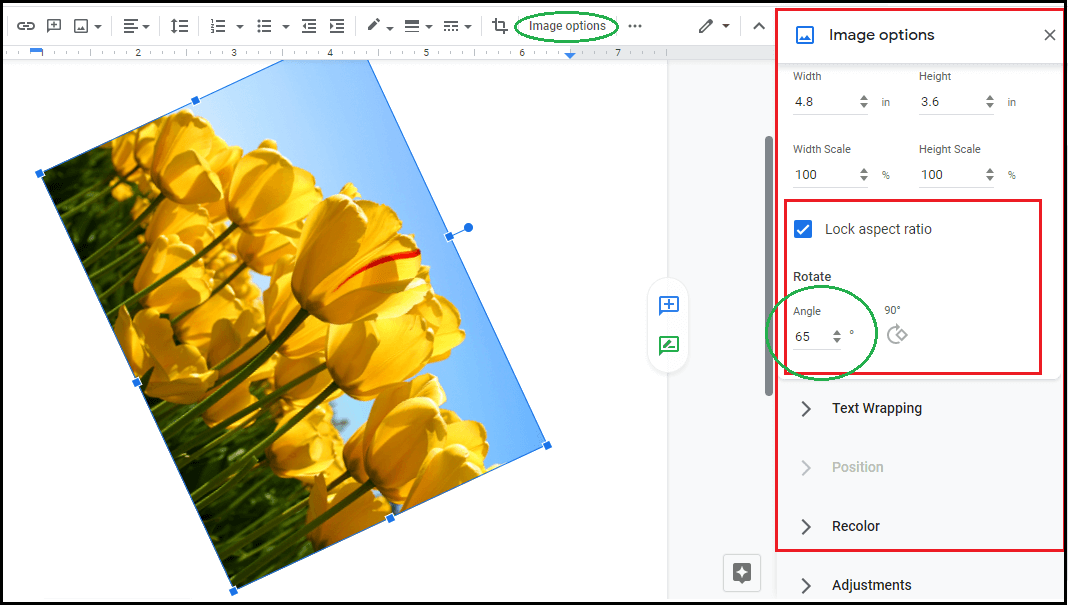
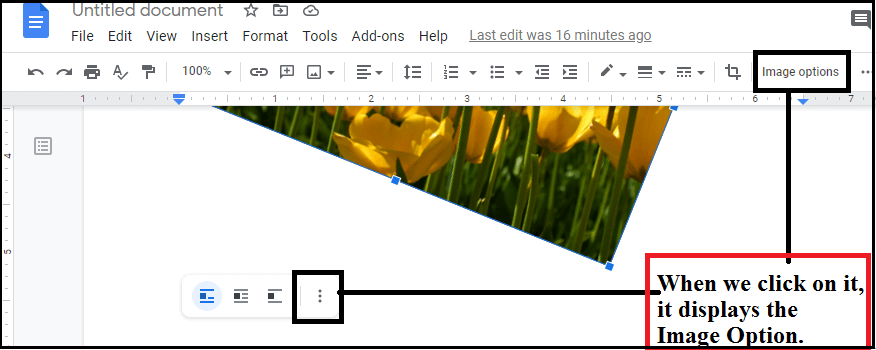
To customize a picture, we need to click on the selected picture, and it displays the Image options on the right side in a toolbar. And if we do not find the toolbar’s image option, we can see three dotted (…) below the selected image in the docs file, as shown below.
After clicking on the Image Options, it shows a prompt dialog box at the right side to define the rotation’s degree/ angle. Here, we have defined the Rotate Angle by 65 degrees, and we can also see that our picture is rotated to define an angle, as the given figure shows.