Dynamic Input
The Dynamic Input in AutoCAD includes a command interface, which is provided near the cursor. The command interface is placed near the cursor on the viewport of the drawing area.
The command that we type on the command line or command prompt is also reflected in the command interface near the cursor known as Dynamic Input. It is considered as an alternative way to enter the commands. The information on the tooltip is the updated information of a specified command.
We can also specify the values in that tooltip when the command is in progress.
To activate Dynamic Input,
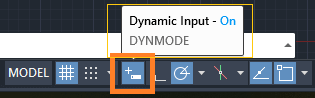
- Go to the status bar (on the bottom of the display), and click on the Dynamic Input option, as shown below:

Drag the cursor on the Dynamic Input, as shown below:
The ON status shows that the Dynamic Input is activated.

Let’s understand it by example, to draw a line.
The steps are listed below:
- Click on the Line icon on the ribbon panel.
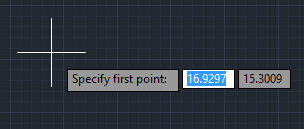
- As we move the cursor to specify the first point of a line on the drawing area, it will appear as:
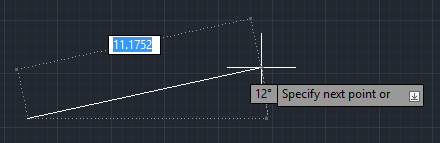
- As we move the cursor to specify the next point of a line, it will now look like the below image:
Dynamic Input Settings
We can also modify the settings of Dynamic Input accordingly.
To open the settings follow the below steps:
- Right-click on the Dynamic Input on the status bar, as shown below:
Click on the Dynamic Input Settings. A dialog box will appear, as shown below:

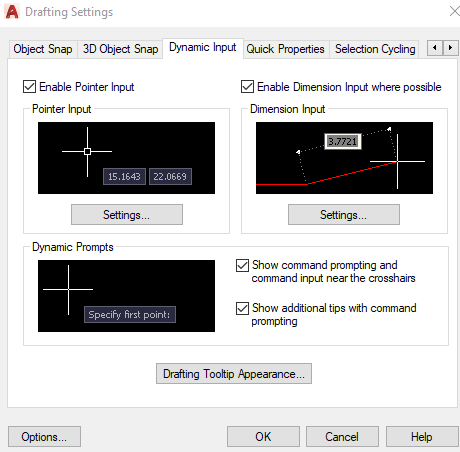
Here, we can enable or disable the settings by clicking on the box.
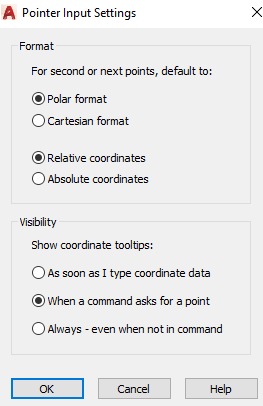
- To change the format of the Pointer Input,
Click on the Settings button present below the Pointer Input. A dialog box will appear, as shown below:
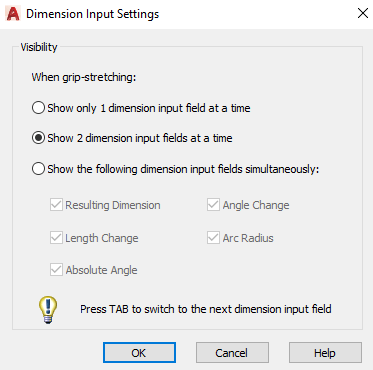
We can select the desired option, according to the requirements. - To change the format of the Dimension Input,
click on the Settings button present below the Dimension Input. A dialog box will appear, as shown below:
We can select the desired option, according to the requirements. - To modify the appearance of drafting tooltip (command interface near the cursor),
Click on the ‘Drafting Tooltip Appearance…‘ button present below the Dynamic Prompts.
A dialog box will appear, as shown below:

We can modify the settings accordingly. Click on the OK button after finishing.