How to Install Apache web server on MacOS
Introduction
Apache HTTP server is an open source cross platform web server which was released under the license of Apache 2.0. It is developed and maintained by an open community of developers under apache software foundation.
In this tutorial, we will learn the steps involved in the installation process of Apache on MacOS.
Prerequisites
- MacOS
- Login as an administrator on terminal.
- Homebrew must be installed on the system.
Installation
Installation of Apache web server on MacOS includes following steps.
1) Update the repository index of homebrew
To install Apache on our MacOS, we first need to update the index of homebrew package installer. This can be done as follows:
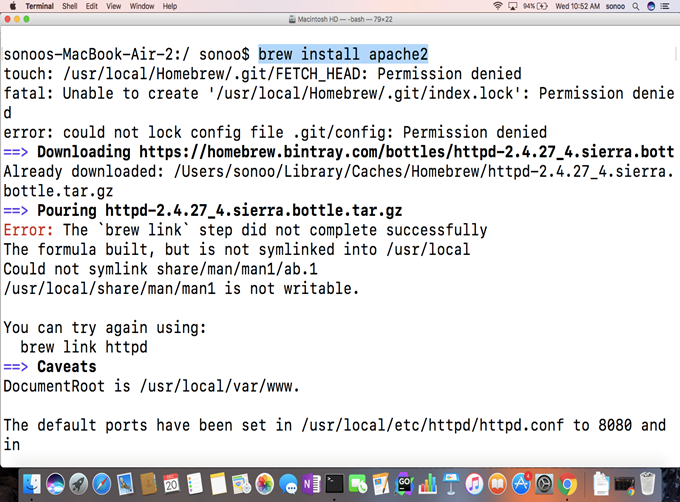
2) Install apache 2.0
The homebrew package installer can be used to install Apache 2.0 on MacOS. The installer installs the Apache HTTP server on the location /usr/local/Cellar/httpd .
3) Start apache
Apache provides a service named as apachectl which needs to be started in order to start Apache. The command needs super user privileges to be executed hence we have to use sudo to get the command executed.

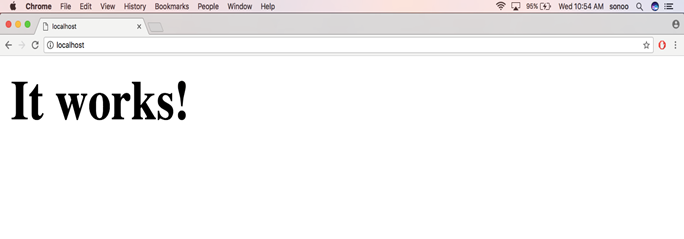
This will start Apache HTTP server which can be tested by visiting localhost on the browser. The localhost gives the response as shown below:
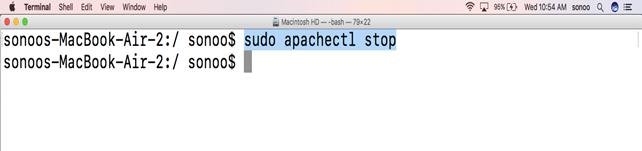
4) Stop Apache
To stop Apache, we need to stop apachectl service with super user privileges as shown below.
When you stop Apache, the localhost will stop listening on port 8080 and it doesn’t give any response.
Well we have successfully installed and test apache which is working fine on our MacOS.