Linux traceroute command
Linux traceroute command is a network troubleshooting utility that helps us determine the number of hops and packets traveling path required to reach a destination. It is used to display how the data transmitted from a local machine to a remote machine. Loading a web page is one of the common examples of the traceroute. A web page loading transfers data through a network and routers. The traceroute can display the routes, IP addresses, and hostnames of routers over a network. It can be useful for diagnosing network issues.
Syntax:
Options:
The following command-line options are supported by the traceroute command:
-f, –first-hop=NUM: It is used to set the initial hop distance.
-g, –gateways=GATES: It is used to display a list of gateways for loose source routing.
-I, –icmp: It is specified to use ICMP ECHO as a probe.
-m, –max-hop=NUM: It is used to set maximal hop count, the default is 64.
-M, –type=METHOD: It specifies the METHOD (icmp or udp) for traceroute operations, the default method is udp.
-p, –port=PORT: It is defined to use destination PORT port, the default PORT is 33434.
-q, –tries=NUM: It is used to forward NUM probe packets per hop, the default is 3.
–resolve-hostnames: It is used to resolve the hostnames.
-t, –tos=NUM: It is used to set the type of service (TOS) to NUM.
-w, –wait=NUM: It is used to wait in seconds for a response, the default is 3.
-?, –help: It is used to display the help manual that contains a brief description of supported command-line options and usage.
–usage: It displays a short usage message.
-V, –version: It is used to display the version information of the traceroute.
Let’s have a look at the quick index of the topic:
- Install the traceroute Command
- How does it work?
- Trace the route using Ipv6
- Trace the route using Ipv4
- Disable IP address and hostname mapping
- Set the number of queries per hop
- Set the response wait time
- Specify the interface to use
- Set the Initial TTL Value
- Set the Maximum number of hop
- Getting Help
Install the traceroute Command
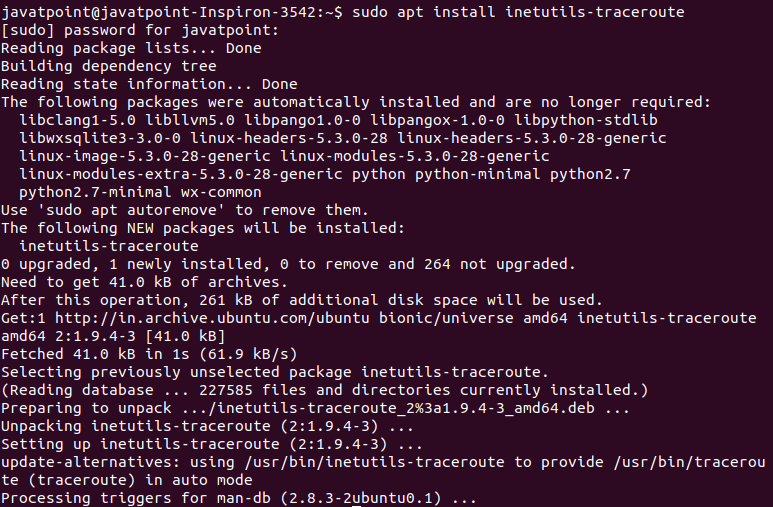
The traceroute is not a default utility of the Linux system. To use the traceroute, we need to install it manually. To install it, execute one of the following commands:
The above commands will install the traceroute utility on our system. After the successful installation, the output will look like as follows:
How does it work?
To trace the route of a connected network host, pass the name of the server or IP address you want to connect. For example, to trace the route of the server ‘tutoraspire.com,’ execute the below command:
The above command will display hops, packets, and much other information on the given route. Consider the below output:
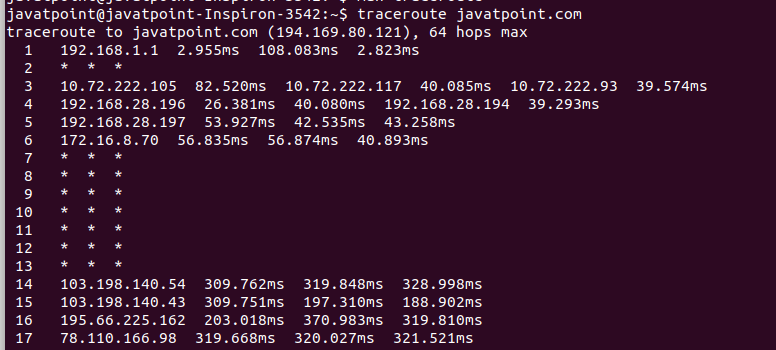
From the above output, we can see several things. let’s understand each part of the output:
- The first line is displaying the hostname and IP address that is to be reached, hops that are going to be attempted by the traceroute command, and the size of the packets to be sent.
- From the second line, each line is displaying a hop to the destination. And the hostname followed by the IP address of the host, roundtrip time. The roundtrip time is the sum of time that it takes for a signal to be sent and the time it takes to respond to the host.
- By default, it sends three packets for each host, so three response times are listed.
- The ‘*’ symbol represents the packet loss. The packet loss happens because of a network outage, high traffic to network congestion, or maybe the firewall is dropping traffic. In much loss of packet, the traceroute will display the error as “destination is not reached.”
Trace the Route Using IPv6
The ‘6’ option is used to trace the route to a host network using the Ipv6 protocol. Consider the below command:
The above command will trace the route to ‘google.com’ by using the Ipv6 protocol. Consider the below output:

Trace the Route Using Ipv4
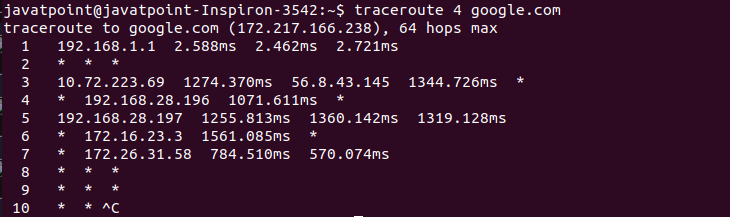
The ‘4’ option is used to trace the route to a host network using the Ipv6 protocol. Consider the below command:
The above command will trace the route to ‘google.com’ by using the Ipv6 protocol. Consider the below output:
Disable IP Address and Hostname Mapping
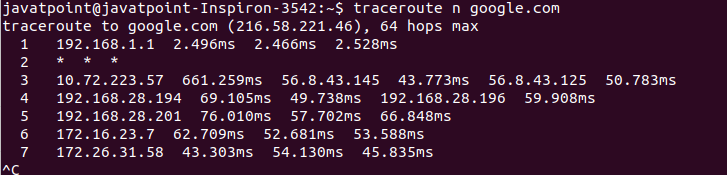
The ‘n’ option is used to disable the IP address and hostname mapping. Consider the below command:
The above command will produce the output as follows:
Set the Number of Queries per hop
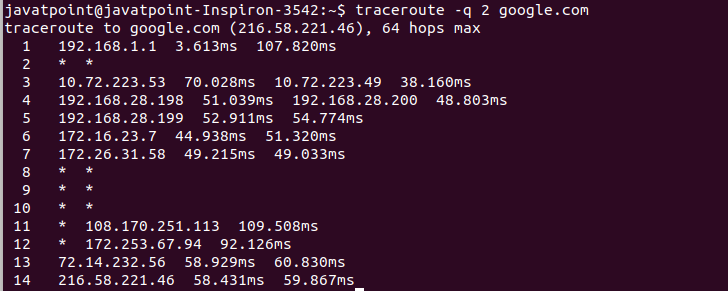
The ‘-q’ option is used to set the number of queries per hop. Consider the below command:
The above command will produce the output as follows:
Set the response wait time
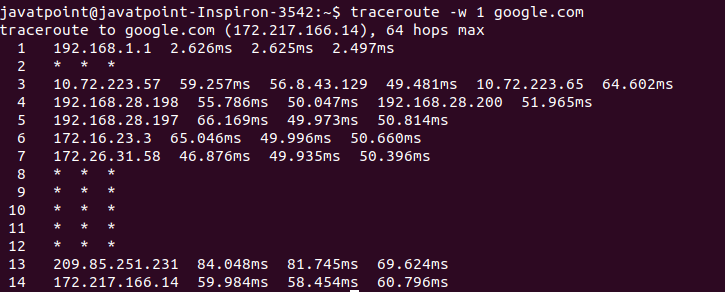
The ‘-w’ option is used to set the response wait time in traceroute. It will specify the wait time in seconds for responding to a probe. Consider the below command:
From the above command, the response wait time is 1 second. It will produce the output as follows:
Specify the interface to use
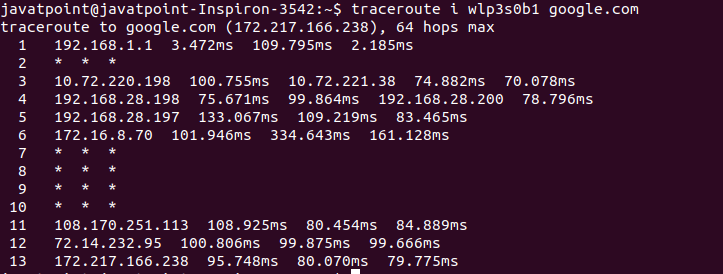
The ‘i’ option is used to set the network interface that traceroute should use. If it is not set, it will set the interface according to the routing table. Consider the below command:
The above command will produce the output as follows:
Set the Initial TTL Value
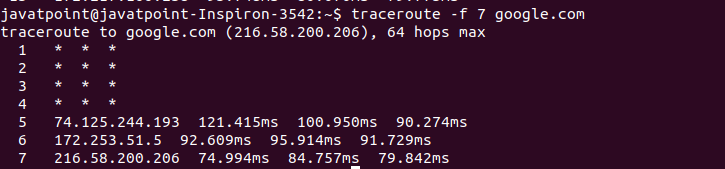
We can set the initial TTL ( time to live) value other than the default value. It will skip some hops. Usually, it is set to one, two, three, and so on for the respective set of tests. So, if we set it to seven, the first test will attempt the hop seven and skip the hops from one to six. Consider the below command:
The above command will go straight to hop seven. Consider the below output:
Set the Maximum Number of hop
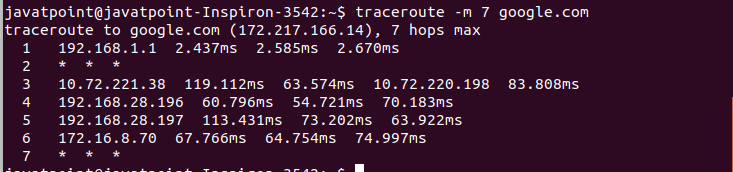
The ‘-m’ option is used to set the maximum number of hops for the packet to reach the destination. The default value for the maximum number of hops is 30. Consider the below command:
The above command will set 7 maximum hops for the packet to reach the destination. Consider the below output:
Getting Help
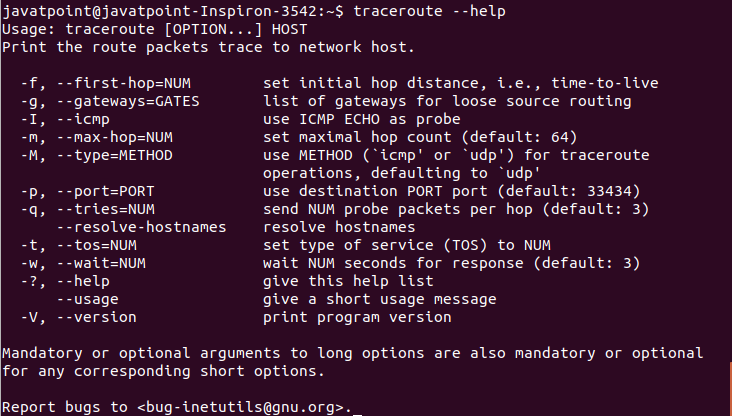
To display the help manual that contains a summary of usage and supported options, execute the below command:
The above command will display the help. It will produce the output as follows:
We can also access the manual pages by executing the man command as follows:
The above command will display the manual page of the traceroute command. It will look like as follows:
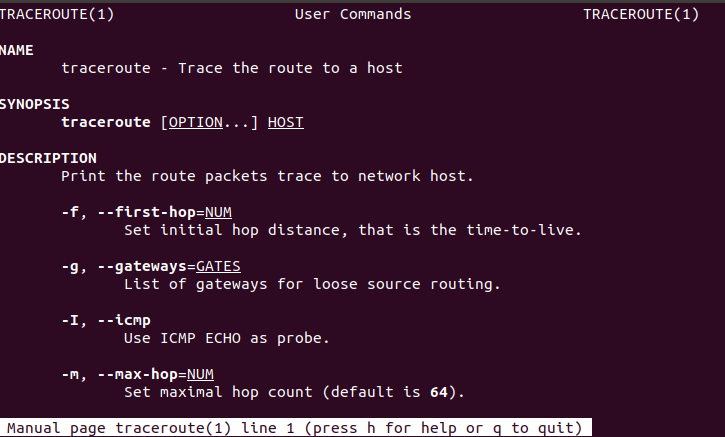
Scroll the page to read more and press the ‘q’ key to exit from the manual page.