92
Programming using AVR Studio
AVR studio is an Integrated Development Environment (IDE) developed by ATMEL for developing different embedded applications based on 8-bit AVR microcontroller. Before the installation of AVR Studio you have to install the compiler WinAVR. By installing WinAVR allow AVR Studio to detect the compiler.
Step 1:
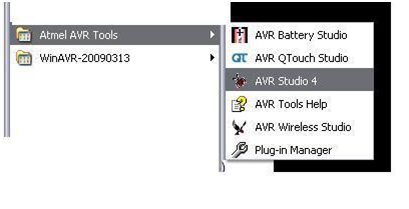
Step 2:
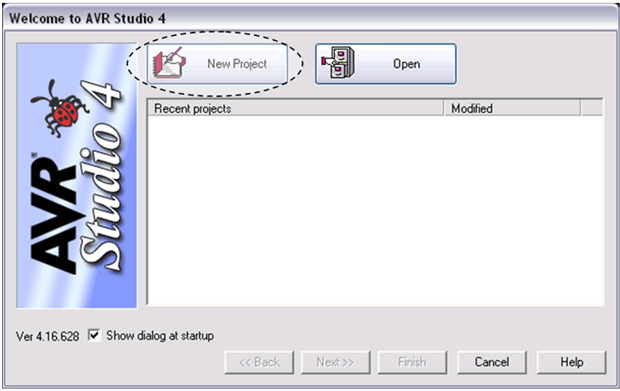
Click on new project.
Step 3:
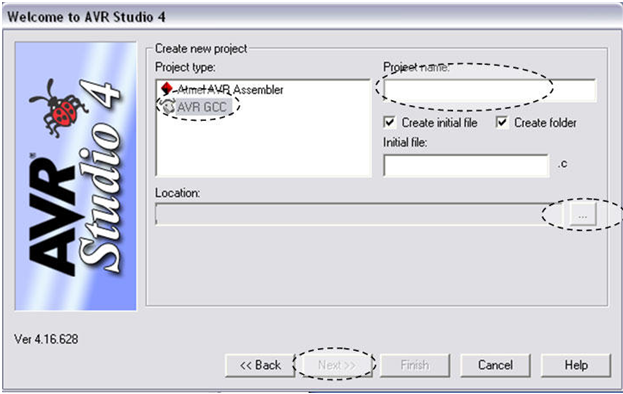
- First click on AVR GCC
- Configure the project name
- Select the project location
- Click on Next
Step 4:
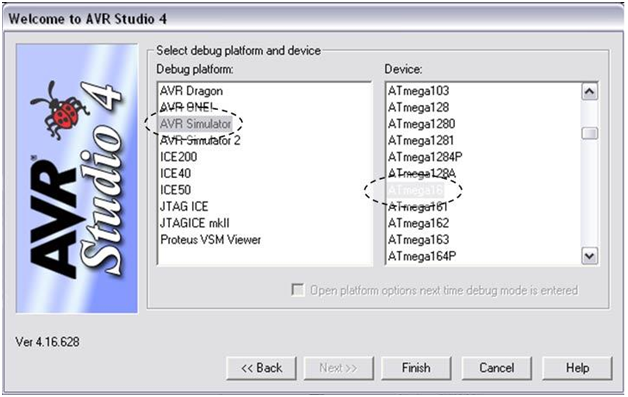
- Click on AVR Simulator in left side of block and then select your microcontroller (For e.g. – ATmega16).
- Then click on finish button
Step 5:
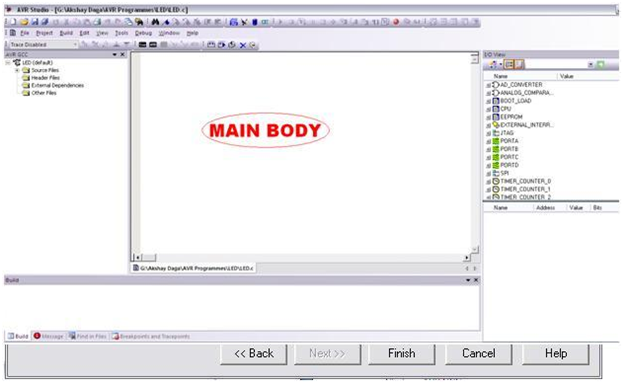
- Write the code in main body area mention in above snapshot.
- Then save the project file.
Step 6:
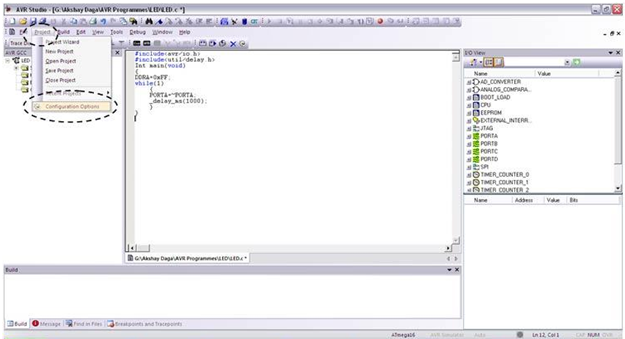
- Go to project option as shown in above snapshot.
- Then click on configuration option.
Step 7:
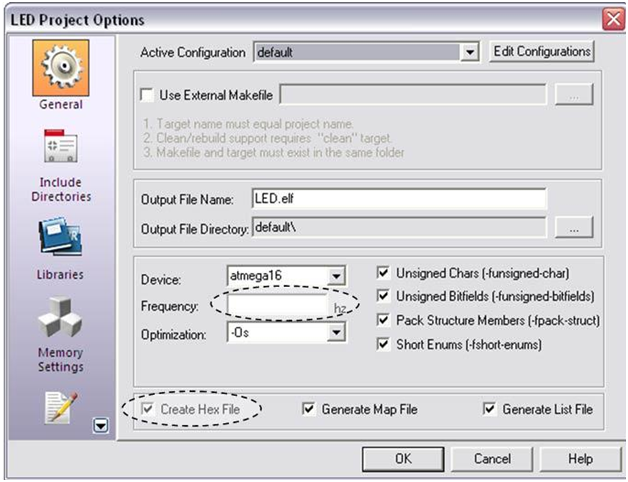
- If you are using external crystal then write the crystal frequency in highlighted box present in above snapshot.
- Then check the checkbox corresponding for creating Hex file and then click on OK.
- Now save the project again.
Step 8:
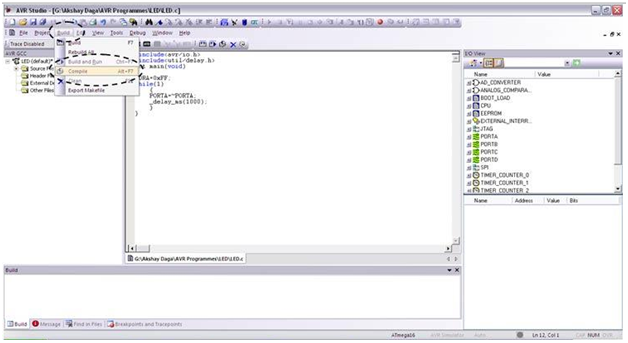
- Go to build option -> Then Compile
- This will compile the code and generate the error if any.
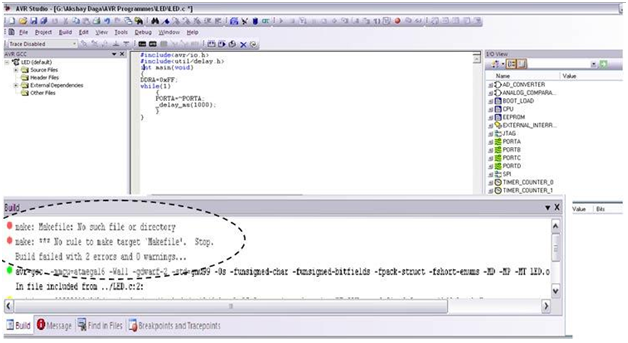
For the first time compilation it will generate two errors, ignore them.
Step 9:
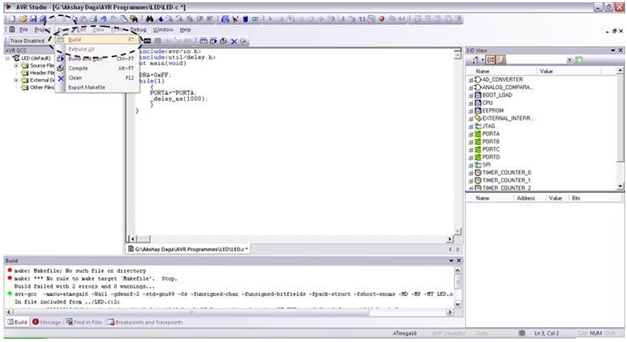
- Again go to build option and click on build.
- This operation will generate the hex file of a code
- Use this hex file for burning into your microcontroller using programmer.
Next TopicLCD Interfacing with AVR