SoapUI Load Testing
Load testing is a typical form of software performance testing and volume testing. It helps to determine the behaviour of a system under a specific load, identifying any bottlenecks or slowness of an operating component and the maximum operating capacity of a web service. Furthermore, load testing is used to perform all types of non-functional testing, where the system is loaded with multiple requests to check the performance of the web service.
Key points of Load Testing:
- Load testing can be used on the basis of existing functionality tests in a SoapUI.
- Using a load test in a SoapUI, a functional test allows us to quickly create and modify the performance tests for a web service.
- The Load test allows us to validate the web service performance using different load strategies, and the functionality of a test is not broken under load testing.
- Load testing is used to check the web service’s performance and examine how the system will behave when the number of requests increases in the load.
Create Load Testing
For creating Load testing in a SoapUI, we have to follow the steps given below:
Step 1: Right-click on the Calculate Sum TestCase and Select the New Load Test option, as shown below.
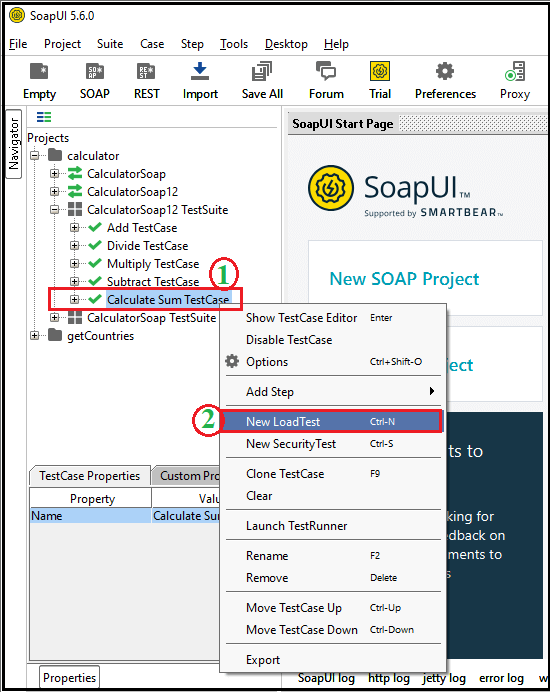
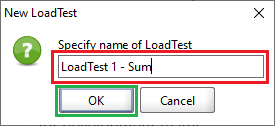
Step 2: After clicking on the New Load Test, it shows a pop dialog box to enter the Load Test name and click the OK button.
Step 3: On clicking the OK button, the ‘LoadTest 1 ? Sum’ is created inside the Load Test and the ‘LoadTest1 ? Sum’ window is also open, as we have shown in the following figure.
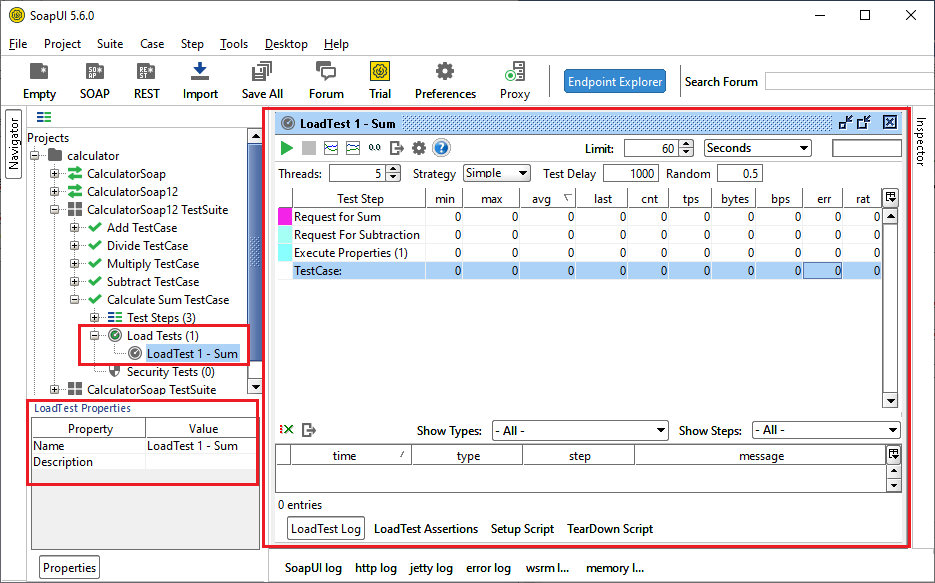
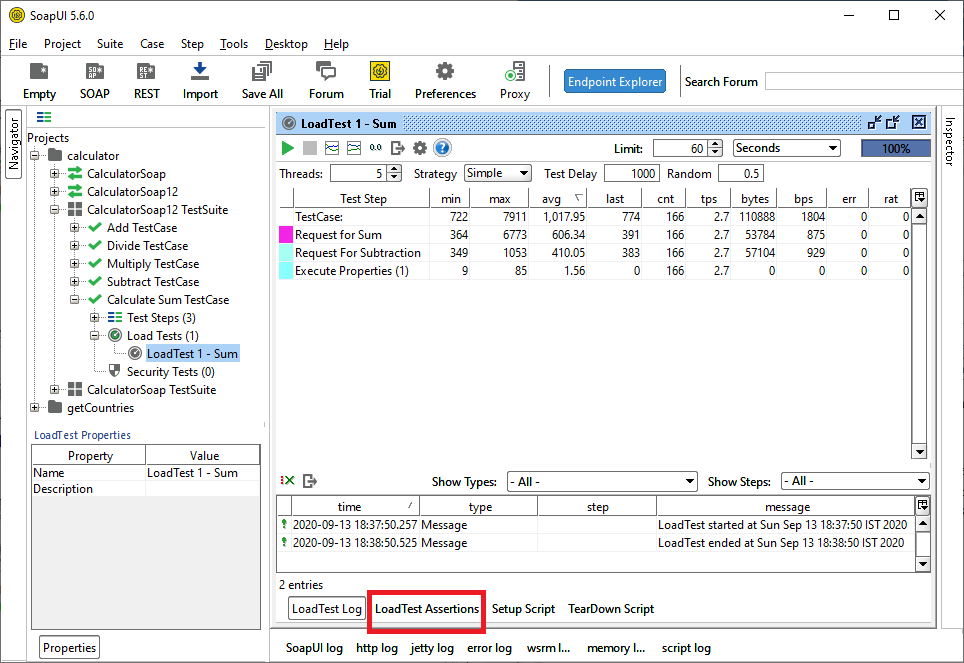
When the load testing is executed, the statistics data are collected and displayed under the following headers of the load test.
| Option | Description |
|---|---|
| Test Step | It is used to set the start-up delay for each thread (in milliseconds); setting to 0 will starts all threads simultaneously. |
| Min | It is used to represents the shortest time that has taken by the Load step in milliseconds. |
| Max | It is used to represents the longest time that has taken by the Load step in milliseconds. |
| Last | It represents the last time for the load test step in milliseconds. |
| Cnt | The Cnt header is used to count the number of executions in the load test step. |
| Tps | The Tps header is used to represents the number of transactions per second in a load test step. |
| Bytes | Bytes headers are used to process the number of bytes during the load test step. |
| Bps | Bps headers are used to process bytes per second in the load test step. |
| Err | It is used to represents the number of assertions that occurred for the test step. |
| Rat | It represents the failed request ration (the percentage of requests that failed). |
Execution of Load Testing
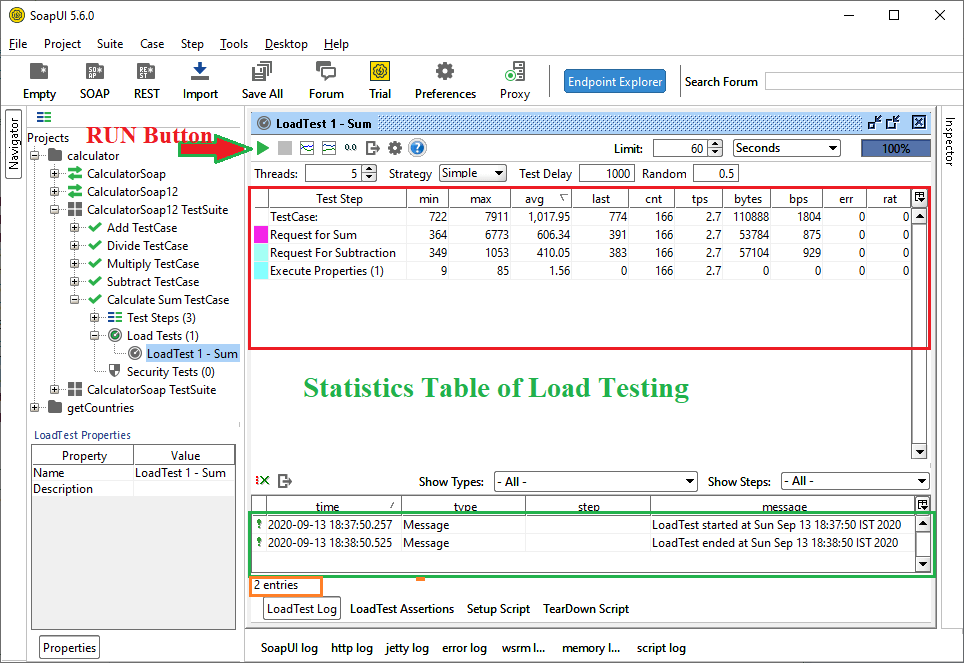
When a test is loaded in the SoapUI, by default, it is pre-configured to use a simple load strategy with 5 threads running for 60 seconds, and it can be customized as per the requirement of the Test properties in a load testing, as shown below.

Step 4: For running the test, click the run icon (green triangle above the thread) of the load test. After that, it starts the execution of a load test in which the user can view the statistics table with a collection of different header data. It requires 60 seconds to complete load test work in a SoapUI.
Use assertion in a Load Testing
Step 5: To validate load testing, click on the LoadTest Assertion tab at the bottom of the LoadTest Editor, as shown below.
Step 6: After clicking on the LoadTest Assertion Tab, it shows a workspace area to add an assertion to the Load Test, as shown below.

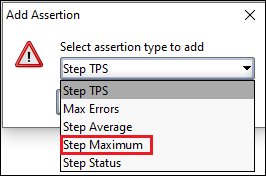
Step 7: Click the (+) icon to add an assertion to the Load Test Assertion menu bar, and then it shows a popup dialog box to add an assertion.
Step 8: Select the Step Maximum option from the assertion list to add an assertion and then click the OK button.
Step 9: Once the OK button is pressed, the ‘Step Maximum Assertion’ window will open.
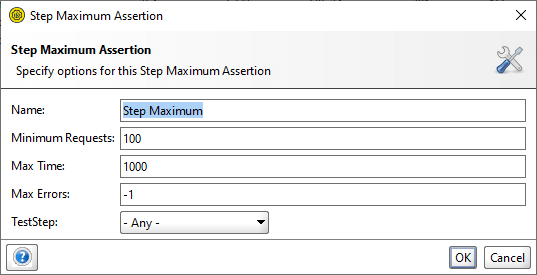
In the above image, we set the default max response time of one second is 1000 milliseconds and then click the OK button without any change.
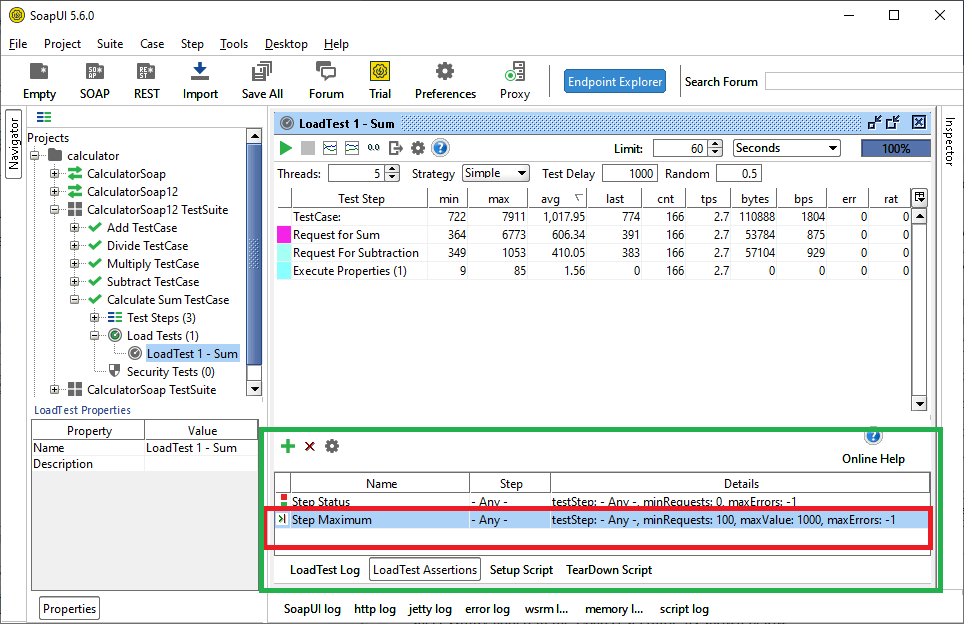
Step 10: After clicking the OK button, the Step Maximum Assertion will be successfully added to the LoadTest Editor, as shown below.
Step 11: Now, we have to run the test again by clicking on the Run Icon. If the Load test response takes too much time, it means the load test has many errors, and these errors are quickly adding to the err columns, as shown below.
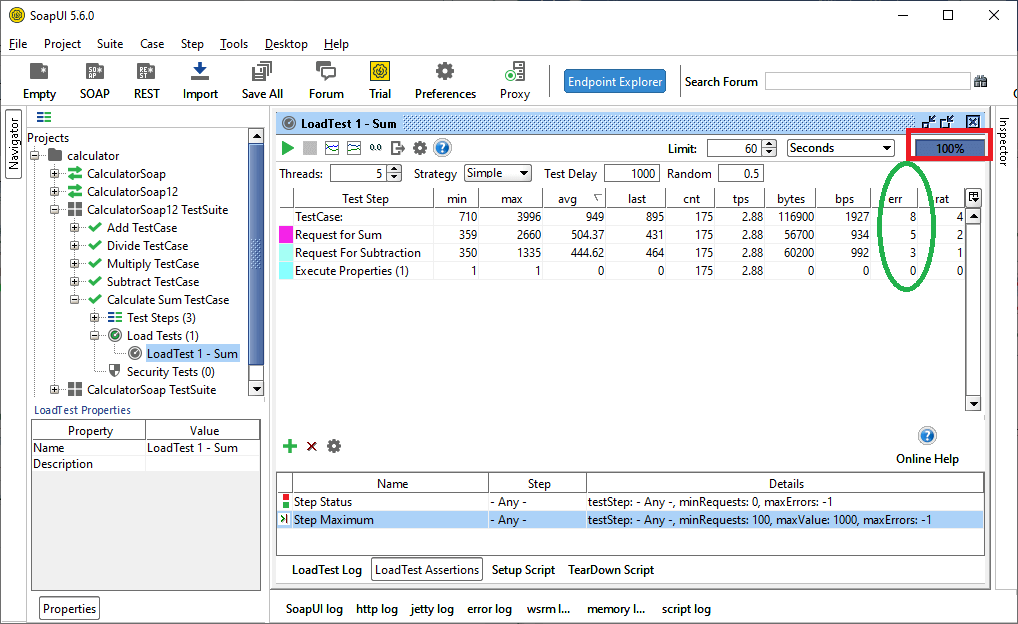
Therefore, we use load testing in a SoapUI project to handle the behaviour of a web service.